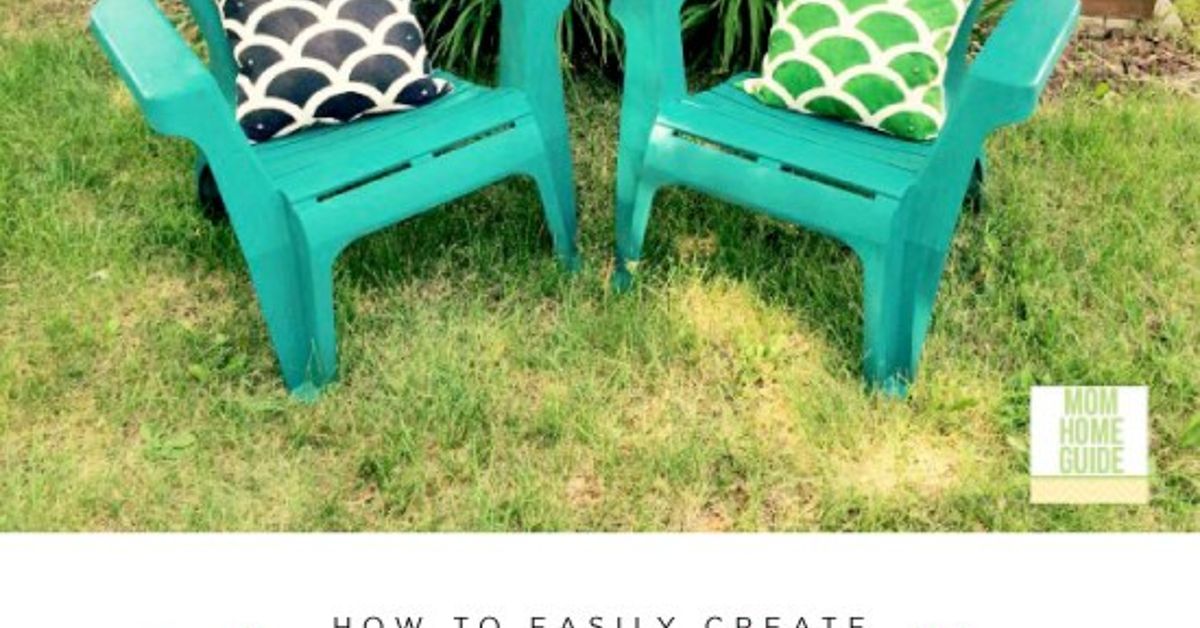
Outdoor spaces deserve more than a lonely plastic chair and a citronella candle working overtime. A few colorful outdoor accent pillows can turn a porch, balcony, deck, or patio into a comfortable extension of your homejust with better airflow and a greater chance of squirrels judging your decorating choices.
Fortunately, DIY outdoor pillows are among the easiest beginner sewing projects. The shape is simple, the supplies are widely available, and most minor imperfections disappear once the cover is stuffed. Making your own also gives you complete control over the colors, patterns, sizes, and details instead of forcing you to choose from whatever survived the seasonal clearance aisle.
This guide explains how to select outdoor-rated materials, calculate fabric measurements, sew a removable pillow cover, create a no-sew version, and care for the finished pillows. You will also find styling ideas, common mistakes to avoid, and experience-based lessons that can prevent your first project from becoming an oddly shaped fabric pancake.
Why Make Your Own Outdoor Accent Pillows?
Store-bought patio pillows are convenient, but custom covers allow you to coordinate every detail with your space. You can repeat the blue from an outdoor rug, match a striped umbrella, introduce a seasonal print, or create narrow lumbar pillows that fit chairs standard pillows overwhelm.
Removable covers are also practical. They can be cleaned, repaired, or replaced separately from the insert. One pillow form can wear tropical leaves in summer, warm plaid in fall, and something cheerfully dramatic during the holidays.
The important difference between an indoor pillow and an outdoor pillow is not its shape. It is the complete material system. The fabric, thread, closure, trim, and filling must all cope with sunlight, moisture, dirt, spills, and repeated cleaning.
Choose Materials That Can Handle Outdoor Conditions
Select Outdoor-Rated Fabric
Look for fabric labeled for outdoor upholstery, patio use, marine use, or indoor-outdoor applications. Common choices include solution-dyed acrylic, olefin, and treated polyester. These materials generally resist fading, stains, moisture, mold, and mildew better than ordinary indoor cotton.
Remember that water-resistant and waterproof are not interchangeable. Water-resistant fabric helps light rain and spills bead on the surface, but water may eventually enter through seams or openings. Waterproof material blocks moisture more aggressively, although it can feel stiffer and may trap condensation inside the pillow.
For most decorative patio pillows, comfortable outdoor upholstery fabric combined with sensible storage is more practical than attempting to turn every pillow into a tiny life raft.
Before buying fabric, check its cleaning instructions and pattern repeat. A large floral or geometric design may require extra yardage so the main motif can be centered instead of disappearing awkwardly into a seam.
Choose the Right Pillow Insert
Use an outdoor pillow form or make an insert with polyester fiberfill and a suitable liner. Polyester filling is usually preferable to down or feathers outdoors because it dries faster and is less likely to hold moisture for extended periods.
For a full, designer-style appearance, use an insert one or two inches larger than the finished cover. For example, a 20-inch insert can create a plump look inside an 18-inch cover. However, heavy or stiff outdoor fabric may need a smaller difference to avoid excessive stress on the seams.
Use Durable Thread and Closures
Choose polyester or outdoor-rated thread rather than standard cotton thread. Polyester handles moisture and sunlight more effectively and is less likely to weaken quickly outside.
A polyester coil zipper creates a tailored, removable cover. An envelope back is even easier and does not require zipper installation, making it ideal for beginners. Hook-and-loop tape is another option, although it can collect dust, hair, and outdoor debris.
Tools and Supplies
- Outdoor upholstery or indoor-outdoor fabric
- Outdoor pillow insert or polyester fiberfill
- Durable polyester thread
- Sewing machine and suitable needle
- Fabric scissors or rotary cutter
- Measuring tape and ruler
- Fabric marker or tailor’s chalk
- Sewing clips or pins
- Zipper and zipper foot, if needed
- Optional outdoor piping, trim, ties, or fabric paint
Outdoor fabric can be thick, tightly woven, or slippery. Test your needle, thread tension, and stitch length on a scrap before working on the actual panels.
Plan the Pillow Size and Style
Measure your furniture before cutting. A deep outdoor sectional can support 20- to 24-inch square pillows, while a compact bistro chair may look better with a 16-inch pillow or a narrow lumbar cushion.
For an 18-by-18-inch finished cover with a 1/2-inch seam allowance, cut two 19-inch squares. The additional inch accounts for a 1/2-inch seam on both sides of each dimension.
When working with stripes, checks, or directional prints, mark the top of every piece and align the pattern before sewing. A few extra minutes of matching prevents one side from looking polished while the other appears to be sliding downhill.
How to Sew an Easy Outdoor Accent Pillow Cover
Step 1: Prepare the Fabric
Read the manufacturer’s care instructions before washing, pressing, or applying any treatment. Some performance fabrics have factory finishes that should not be exposed to high heat or aggressive laundering.
If pressing is permitted, test the iron on a scrap and use a pressing cloth. When ironing is not recommended, smooth the fabric flat and use sewing clips to hold the layers in position.
Step 2: Measure and Cut the Panels
Mark two equal squares or rectangles on the wrong side of the fabric. Measure twice before cutting with sharp scissors or a rotary cutter.
For a large patterned fabric, make a paper template the size of the panel. Move it across the fabric until the design is attractively centered, then trace and cut. This prevents your finished pillow from displaying one flamingo leg and an alarming amount of empty sky.
Step 3: Decorate the Front Panel
Add any decorative elements before assembling the cover. Suitable options include outdoor piping, color-blocked fabric, a contrasting center band, exterior-rated fabric paint, or appliqué cut from another outdoor textile.
Avoid untreated cotton tassels, delicate lace, and absorbent pom-poms on exposed patios. These details can retain water, fade rapidly, or become mildew magnets. Flat outdoor trim and painted designs generally age more gracefully.
Step 4: Add a Zipper or Envelope Back
For a zippered cover, place the front and back panels right sides together. Position the zipper along the bottom edge and mark its beginning and end. Sew the seam normally outside those marks and use a long basting stitch across the zipper opening.
Press the seam open, center the zipper underneath it, and sew around the zipper using a zipper foot. Remove the basting stitches to expose the zipper teeth.
For an envelope closure, divide the back into two overlapping panels. Hem the exposed edges and overlap them by several inches. The overlap should be generous enough to hide the insert when someone leans against the pillow.
Step 5: Sew the Outer Seams
Open the zipper partway before sewing the remaining sides. Forgetting this step creates a beautifully constructed fabric vault with no entrance.
Place the panels right sides together and sew around the perimeter with a 1/2-inch seam allowance. Backstitch at the beginning and end, and reinforce the areas beside the zipper or envelope overlap.
If the fabric frays, finish the raw edges with a zigzag stitch, overlock stitch, or serger.
Step 6: Shape the Corners
Trim each corner diagonally without cutting through the stitching. Turn the cover right side out and use a blunt point turner to shape the corners.
To reduce empty “dog-ear” corners, taper the final inch or two of each corner slightly while sewing. This subtle adjustment helps the insert fill the cover more evenly.
Step 7: Insert and Fluff the Pillow
Fold the pillow form gently and slide it through the opening. Work each corner into position without pulling aggressively on the zipper or seams.
If the pillow looks flat, consider using a slightly larger insert. If the seams bow outward or the zipper barely closes, use a smaller insert or remove some fiberfill.
Step 8: Add Wind Control
For a breezy patio, sew fabric ties into a side seam or attach outdoor-rated hook-and-loop strips to the back. Ties are especially useful on chairs with open frames.
Loose sofa pillows should be moved into a weather-resistant deck box when strong winds or storms are expected. Even the most stylish pillow loses some dignity when recovered from a neighbor’s shrub.
Easy No-Sew Outdoor Pillow Method
A no-sew cover works best on a covered porch, for a temporary seasonal display, or when your sewing machine currently serves as an expensive shelf.
- Cut two pieces of outdoor fabric with extra material for folded edges.
- Place the wrong sides together and bond three edges with permanent fabric adhesive rated for outdoor textiles.
- Allow the adhesive to cure for the full time stated on its label.
- Insert an outdoor pillow form.
- Fold the final edges inward and close them with adhesive hook-and-loop tape or a bonded flap.
Follow all ventilation, curing, and washing directions for the adhesive. No-sew covers are convenient, but stitched seams are usually more durable for pillows that will be handled, washed, or exposed to heat frequently.
Outdoor Pillow Design Ideas
Follow a Three-Color Formula
Choose one dominant color already present in the space, one supporting color, and one smaller accent. Navy furniture, for example, could be paired with cream stripes and a coral lumbar pillow.
Mix Pattern Sizes
Combine one large botanical or geometric print with a narrow stripe and a small-scale texture. Patterns compete when they are all the same size. Varying the scale gives each design a clear role.
Combine Different Shapes
Square pillows provide comfort, lumbar pillows support the lower back, and round pillows soften furniture with strong straight lines. On a small loveseat, two squares and one lumbar pillow are often enough. Leave room for guests to sit without excavating a cushion quarry.
Make Reversible Covers
Use different fabrics on the front and back. Display the bold pattern during gatherings and turn the solid side forward for a calmer everyday look. Reversing pillows can also help distribute sunlight and wear.
Add Outdoor Piping
Piping outlines the pillow and produces a tailored finish. Use premade outdoor piping or make your own by wrapping bias-cut outdoor fabric around compatible cord.
Common DIY Outdoor Pillow Mistakes
Using indoor fabric: Ordinary cotton may absorb water, fade quickly, and remain damp. Reserve it for a protected sunroom unless the cover is intentionally temporary.
Ignoring drying time: Water can enter through seams even when fabric is water-resistant. Never place damp pillows in a closed storage container.
Choosing weak components: Durable fabric cannot compensate for cotton thread, a fragile zipper, or absorbent trim.
Skipping the test swatch: Test the needle, tension, stitch length, adhesive, paint, cleaner, and protectant on leftover fabric before treating the finished cover.
Overstuffing: A full pillow looks inviting. A pillow stretched like a drum looks anxious and places unnecessary pressure on the seams.
How to Clean and Store Outdoor Accent Pillows
Brush or vacuum away loose dirt before it becomes embedded. Treat spills promptly by blotting instead of rubbing them deeper into the fibers.
Many outdoor fabrics can be cleaned with mild soap, lukewarm water, and a sponge or soft-bristle brush. Rinse thoroughly because leftover soap can attract dirt and encourage mildew-related problems.
Always follow the manufacturer’s care label. A removable cover is not automatically machine-washable. Hand-washing may be necessary to protect coatings, prevent shrinkage, or avoid damaging zippers and trim.
Allow both the cover and insert to air-dry completely. Stand wet pillows on an edge so air can circulate around them. During prolonged rain, severe weather, or winter, store clean and completely dry pillows indoors or in a suitable weather-resistant container.
Rotate and flip the pillows during the season to spread sun exposure and wear. Before applying a water-repellent or UV-protective spray, verify that it is compatible with the fabric, test an inconspicuous area, and follow the product’s ventilation and curing instructions.
Experience-Based Lessons From a Typical First Project
A first outdoor pillow project often begins with too much confidence and not enough measuring. The fabric looks perfect on the bolt, the insert appears approximately square, and the maker assumes optimism will handle the details. Then the cutting starts, and “approximately” reveals itself as a dangerous unit of measurement.
The most useful habit is measuring the actual insert rather than trusting its package. Forms can vary slightly, and older inserts may have flattened or shifted. A paper template is especially valuable when working with a large print. Moving a paper square around the fabric is much less painful than discovering that the finished pillow features half a flower, one bird wing, and an unexplained patch of beige.
Outdoor upholstery fabric also behaves differently from lightweight quilting cotton. It may be thicker, stiffer, or more slippery. Sewing clips often hold heavy layers more effectively than pins, while a slightly longer stitch can help the fabric feed smoothly. Every adjustment should be tested on scrap material first.
The scrap is where skipped stitches, poor tension, incompatible paint, and questionable creative decisions should happen. Think of it as the rehearsal room rather than opening night.
Installing a first zipper sounds intimidating, but the biggest challenge is often remembering to open it before closing the remaining seams. An envelope back eliminates that worry and may be the better choice for a beginner. However, the overlapping panels need enough depth. A shallow overlap can look fine while the pillow is flat and then gape dramatically when someone leans against it.
Another lesson involves scale. A small 14-inch pillow can disappear on a deep sectional, while several oversized pillows can consume a balcony chair. Making one prototype before cutting an entire matching collection allows you to check its proportions, comfort, and color in the actual setting.
Outdoor light can also change the appearance of fabric. Colors may look brighter in direct sunlight, and undertones that were invisible inside a store can suddenly become obvious. Set the uncut fabric on the furniture at different times of day before committing to several covers.
Weather provides the final education. A pillow left flat after rain dries much more slowly than one stood upright. A pillow placed in storage while slightly damp can emerge smelling like a forgotten gym bag. The dependable routine is simple: shake off excess water, separate the pillows, stand them on edge, and store them only after they have dried completely.
Wind is another brutally honest design critic. Lightweight accent pillows can travel surprisingly far. Ties work well when there is a chair frame to hold them, while a nearby deck box is the easiest solution for loose sofa pillows. Neither decorative weights nor hopeful thinking should replace secure storage during a storm.
Most people find that the second pillow is dramatically easier than the first. Measurements become faster, corners improve, and the zipper stops feeling like a mechanical riddle. Buying a little extra fabric provides insurance against cutting mistakes and leaves material for a matching lumbar pillow, table runner, or future repairs.
The larger lesson is that DIY outdoor accent pillows do not need to be technically perfect to transform a space. Straight seams, durable materials, thoughtful colors, and proper drying matter more than showroom-level precision. Once the pillows are arranged and cold drinks arrive, guests will not inspect the interior seam allowance. They will simply notice that the patio feels more comfortable, colorful, and complete.
Conclusion
Learning how to easily create outdoor accent pillows is primarily a matter of choosing suitable materials and following a straightforward construction plan. Use outdoor-rated fabric, durable polyester thread, a weather-tolerant insert, and either a zipper or envelope closure. Measure carefully, test the fabric before sewing, reinforce stress points, and keep every layer completely dry between uses.
Begin with one square pillow in a forgiving pattern. Once you understand the process, expand the collection with lumbar shapes, reversible panels, piping, color blocking, or coordinating prints. A small amount of fabric can refresh an entire patio, while removable covers make future updates affordable.
The finished pillows may not stop the mosquitoes, but they will make your outdoor seating look far more intentional while everyone complains about them.
Note: Fabric finishes, inserts, adhesives, cleaners, and protectant sprays vary. Follow the manufacturer’s safety and care instructions for every product, and test treatments on scrap fabric before applying them to a finished pillow.