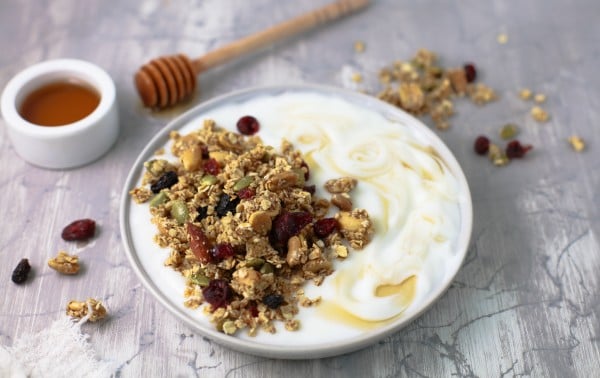
There are two kinds of people in autumn: those who light a cinnamon candle and those who bake something that makes the whole house smell like a cinnamon candle with better benefits. This Fall Harvest Chunky Granola belongs proudly in the second group. It is crisp, golden, maple-kissed, packed with oats, nuts, seeds, dried apples, cranberries, and enough cozy spice to make your kitchen feel like it is wearing a flannel shirt.
Learning how to make granola at home is one of those kitchen skills that feels suspiciously easy once you do it. You mix pantry staples, bake them low and slow, let everything cool, and suddenly you have crunchy homemade granola clusters that taste fresher than most store-bought bags. Better yet, you control the sweetness, the oil, the salt, the fruit, the nuts, and the level of chunkiness. Want big clusters? Press the mixture down and leave it alone. Want loose cereal-style granola? Stir more often. Want your breakfast to taste like an apple orchard wearing a sweater? You are in the right place.
Why Homemade Granola Is Worth the Tiny Bit of Effort
Granola has a reputation for being health food, snack food, hiking food, and “I forgot to make breakfast” food all at once. That flexibility is exactly why homemade granola deserves a permanent spot in your fall meal prep routine. A good batch can become cereal with milk, a yogurt parfait topper, a crunchy layer over roasted pears, or an emergency handful eaten directly from the jar while standing in the pantry pretending you are “checking inventory.”
The best part is customization. Store-bought granola can be delicious, but it often leans too sweet, too oily, too dusty, or too expensive for something made mostly from oats. When you make granola from scratch, you can choose old-fashioned rolled oats, real maple syrup, pumpkin seeds, pecans, walnuts, dried apples, and warming spices like cinnamon, ginger, nutmeg, and clove. You can keep it nut-free, vegan, gluten-free with certified gluten-free oats, extra seedy, extra chunky, or lightly sweetened.
The Secret to Big, Crunchy Granola Clusters
If chunky granola is the goal, the method matters as much as the ingredients. Big clusters happen when the dry ingredients are evenly coated with a sticky binder, pressed firmly onto the baking sheet, baked at a moderate temperature, and cooled completely before being broken apart. In other words, do not poke it every five minutes like a nervous squirrel. Granola needs space, patience, and a little trust.
For this fall harvest granola recipe, maple syrup and brown sugar help create crisp edges, while oil helps the oats toast evenly. A small amount of applesauce adds fall flavor and helps the mixture clump without making the recipe overly heavy. The real cluster trick is pressing the granola into a compact slab before baking, then stirring only once halfway through. After baking, leave it on the pan until completely cool. Warm granola is soft; cooled granola is crunchy. This is not magic, but it does feel like it when the slab snaps into golden chunks.
Fall Harvest Chunky Granola Recipe
This recipe makes a generous batch, about 8 to 10 cups, depending on how many handfuls mysteriously disappear during cooling. It is designed for fall flavors, but the base recipe works year-round.
Ingredients
- 4 cups old-fashioned rolled oats
- 1 cup chopped pecans
- 1 cup chopped walnuts or sliced almonds
- 3/4 cup raw pumpkin seeds
- 1/2 cup unsweetened coconut flakes
- 1/4 cup ground flaxseed or wheat germ
- 1 1/2 teaspoons ground cinnamon
- 1/2 teaspoon ground ginger
- 1/4 teaspoon ground nutmeg
- 1/8 teaspoon ground cloves
- 3/4 teaspoon fine sea salt
- 1/2 cup pure maple syrup
- 1/3 cup neutral oil, melted coconut oil, or light olive oil
- 1/4 cup unsweetened applesauce
- 2 tablespoons packed brown sugar
- 2 teaspoons vanilla extract
- 3/4 cup chopped dried apples
- 1/2 cup dried cranberries
- Optional: 1/3 cup chopped crystallized ginger or dried cherries
Instructions
- Prepare the pan. Preheat the oven to 300°F. Line a large rimmed baking sheet with parchment paper. If you only have small baking sheets, use two. Crowded granola steams before it crisps, and nobody invited soggy oats to breakfast.
- Mix the dry ingredients. In a large bowl, combine the rolled oats, pecans, walnuts or almonds, pumpkin seeds, coconut flakes, flaxseed, cinnamon, ginger, nutmeg, cloves, and salt. Stir well so the spices do not gather in one dramatic little mountain.
- Warm the wet ingredients. In a small saucepan over low heat, combine maple syrup, oil, applesauce, and brown sugar. Stir just until smooth and slightly warm. Remove from heat and stir in vanilla extract.
- Coat the oats. Pour the maple mixture over the oat mixture. Use a sturdy spatula to fold everything together until every oat looks glossy and lightly coated. Take your time here; uneven coating leads to uneven clusters.
- Press for chunks. Spread the mixture onto the prepared baking sheet. Press it into a firm, even layer with the back of a spatula. The more firmly you press, the bigger the clusters will be.
- Bake low and slow. Bake for 20 minutes. Remove the pan, gently turn sections of granola with a spatula, then press it down again. Bake for another 18 to 25 minutes, until the granola is fragrant and golden around the edges.
- Cool completely. Place the baking sheet on a cooling rack and do not stir. Let the granola cool for at least 45 minutes. This is the hardest step, spiritually speaking.
- Add dried fruit. Once cool, break the granola into chunks. Stir in dried apples, cranberries, and any optional dried fruit or crystallized ginger. Store in an airtight container.
Why Dried Fruit Goes in After Baking
One of the easiest ways to ruin homemade granola is to bake the dried fruit from the beginning. Dried cranberries, raisins, chopped dates, and dried apples can harden, burn, or turn oddly chewy when roasted too long. Add them after the granola cools. They will stay pleasantly tender and give the finished batch bright pops of flavor.
The same rule applies to chocolate chips if you decide to make a dessert-style version. Let the granola cool first, then stir them in. Unless, of course, your goal is chocolate lava granola, which sounds poetic but stores like a tragedy.
Best Oats for Homemade Granola
Old-fashioned rolled oats are the best choice for chunky homemade granola. They hold their shape, toast beautifully, and create a hearty texture. Quick oats are thinner and can make the mixture dusty. Steel-cut oats are too hard for this style of recipe and should stay in their lane as porridge. If you need gluten-free granola, choose oats labeled certified gluten-free, because oats can be cross-contacted with gluten-containing grains during processing.
How to Make Granola Healthier Without Making It Sad
Healthy homemade granola does not have to taste like birdseed in a cardigan. The trick is balance. Use whole rolled oats as the base, add nuts and seeds for texture and satisfying fats, sweeten with maple syrup or honey in moderation, and use enough salt to make the flavors pop. Salt is the tiny cymbal crash that keeps sweet recipes from tasting flat.
You can reduce the brown sugar or omit it if you prefer a less sweet granola. You can also replace some of the oil with applesauce, as this recipe does, though a little oil is helpful for crispness. Add fiber-rich extras like ground flaxseed, chia seeds, wheat germ, pumpkin seeds, or sunflower seeds. For protein, serve the granola over Greek yogurt, cottage cheese, or a smoothie bowl.
Portion size matters, too. Granola is nutrient-dense, which is a polite way of saying it is easy to eat three servings while discussing how wholesome it is. A small bowl or a generous sprinkle over yogurt is usually enough to bring crunch, flavor, and staying power.
Flavor Variations for Every Fall Mood
Apple Pie Granola
Use dried apples, golden raisins, pecans, cinnamon, nutmeg, and a pinch of allspice. Serve it over vanilla yogurt with diced fresh apples for a breakfast that tastes suspiciously like dessert but behaves much better before 9 a.m.
Pumpkin Spice Granola
Replace the applesauce with pumpkin puree and use pumpkin pie spice instead of the individual spices. Add pepitas and dried cranberries after baking. This version is ideal for anyone who believes pumpkin spice season should be recognized as a federal holiday.
Maple Pecan Granola
Use all pecans, skip the cranberries, and add a splash of maple extract with the vanilla. This creates a rich, buttery flavor without needing actual butter.
Cranberry Orange Granola
Add the zest of one orange to the wet ingredients and use dried cranberries and almonds. The citrus brightens the cozy spices and keeps the granola from tasting too heavy.
Nut-Free School-Safe Granola
Replace the nuts with extra pumpkin seeds, sunflower seeds, coconut flakes, and crispy rice cereal. Use maple syrup instead of honey for a vegan-friendly option, and check labels if allergies are a concern.
Common Granola Mistakes and How to Avoid Them
Baking at Too High a Temperature
Granola should toast slowly. A hot oven can burn coconut, nuts, and sweeteners before the oats have a chance to crisp. Stick around 300°F to 325°F for better control.
Not Using Enough Binder
If your granola never forms clusters, the mixture may be too dry. Maple syrup, honey, brown sugar, oil, applesauce, and even egg white can help bind ingredients. For this recipe, maple syrup, applesauce, and brown sugar work together to encourage chunks.
Stirring Too Much
Stirring creates loose granola. Pressing creates clusters. For chunky granola, stir once halfway through baking, press the mixture back down, and leave it alone while it cools.
Adding Dried Fruit Too Early
Dried fruit belongs at the end. Bake the oats, nuts, seeds, and coconut; stir in dried fruit after cooling.
Storing Before It Cools
Warm granola releases steam. Steam creates softness. Let the granola cool fully before sealing it in a jar, unless your dream breakfast is autumn-flavored packing material.
How to Store Fall Harvest Chunky Granola
Store cooled granola in an airtight container at room temperature for up to 2 to 4 weeks, depending on humidity and ingredients. A glass jar, cereal container, or zip-top bag works well. For longer storage, freeze granola in a sealed freezer-safe bag for up to 3 months. Let it come to room temperature before serving, or sprinkle it directly from the freezer over yogurt. It thaws quickly because the pieces are small and dry.
Keep granola away from heat, moisture, and direct sunlight. If your kitchen is very humid, add a small food-safe desiccant packet to the container or store the granola in the freezer. The goal is crunch, not granola with the emotional texture of a wet leaf.
How to Serve Homemade Granola
Fall harvest granola is more than cereal. Try it layered with Greek yogurt and roasted apples, sprinkled over pumpkin smoothies, scattered on baked pears, or used as a topping for pancakes and waffles. It also makes a fantastic crunchy finish for vanilla ice cream, especially with warm caramelized apples. For a quick snack, mix it with extra dried fruit and dark chocolate chips for a homemade trail mix.
For gifting, spoon the granola into clean jars, tie with twine, and add a handwritten label. It is practical, pretty, and much less risky than giving someone a mystery fruitcake with the density of a doorstop.
Experience Notes: What Making Fall Harvest Granola Teaches You
The first time you make chunky granola at home, you may wonder why you ever paid premium prices for a tiny bag of crumbs wearing a rustic label. Homemade granola feels almost too simple: oats, nuts, seeds, syrup, oil, spice, heat. But the experience is oddly satisfying because it uses all your senses. You hear the dry scrape of oats in the bowl, smell cinnamon blooming in warm maple syrup, feel the sticky mixture press into the pan, and watch the edges turn golden like fallen leaves after a sunny afternoon.
One practical lesson is that patience matters. Granola is not a stir-fry. It does not want constant attention. It wants even heat and a little peace. The most tempting moment is right after baking, when the kitchen smells like a country store that sells handmade candles and suspiciously expensive jam. But if you break the granola while it is warm, the clusters collapse. Letting it cool completely is the difference between chunky granola and oat confetti.
Another lesson is that homemade granola rewards small adjustments. If you like a toastier flavor, bake it a few minutes longer. If your family loves big clusters, press the mixture harder and stir less. If you prefer a lighter breakfast, reduce the sweetener slightly and add more seeds. If your fall personality is “apple orchard main character,” double the dried apples and add orange zest. Granola is forgiving as long as you keep the basic ratio of dry ingredients to wet binder in balance.
This recipe is also a useful way to clean out the pantry. The last handful of pecans, the lonely scoop of pumpkin seeds, the dried cranberries left from a salad phase, the coconut flakes hiding behind the flourall of them can find purpose in one golden batch. That makes homemade granola feel thrifty without feeling boring. It is the culinary equivalent of turning scattered sweaters into a cozy quilt.
Finally, making granola at home changes how you eat breakfast during busy weeks. A jar on the counter becomes an invitation to assemble something good in under two minutes. Yogurt, granola, apple slices, done. Milk, granola, banana, done. Smoothie bowl, granola, cinnamon, done. It is meal prep without the stack of identical containers glaring at you from the fridge. And when afternoon hunger arrives, a small handful offers crunch, sweetness, and enough autumn flavor to keep you away from the office vending machine, which has never once cared about your well-being.
Conclusion
Fall Harvest Chunky Granola is the kind of homemade recipe that proves cozy food can be practical, flexible, and deeply delicious. With rolled oats, maple syrup, nuts, pumpkin seeds, dried apples, cranberries, and warm spices, this granola brings together everything people love about fall in one crunchy jar. The key is simple: coat the ingredients well, bake low and slow, press the mixture for clusters, add dried fruit after baking, and let the granola cool completely before breaking it apart.
Once you learn how to make granola at home, you can adjust the recipe endlessly. Make it sweeter, spicier, nuttier, fruitier, gluten-free, nut-free, or extra chunky. Serve it for breakfast, snacks, desserts, or edible gifts. Just be warned: the first batch may disappear faster than expected. Apparently, “I’ll just have a taste” is not a reliable storage strategy.