Note: This article is written in standard American English for web publication and has been cleaned of placeholder citation artifacts.
Some gifts are nice. Some gifts are memorable. And then there are the gifts that make Mom pause, smile, and say, “Wait… you made this?” A DIY flower frame for Mom lands squarely in that sweet spot. It is thoughtful without being overly fussy, beautiful without requiring a fine arts degree, and sentimental without screaming, “I panicked and bought this at the last minute in the store checkout line.” In other words, it is the unicorn of handmade gifts.
A flower frame combines two things people love: blooms and memories. You can use pressed flowers, dried petals, a favorite family photo, a handwritten note, or even a tiny quote that sounds like Mom. The result feels personal in a way store-bought decor rarely does. Better yet, this project can be tailored to almost any skill level. If you can arrange pretty things and avoid gluing your sleeve to the table, you are already halfway there.
In this guide, you will learn how to make a DIY flower frame that looks polished, lasts longer, and feels genuinely special. We will cover flower choices, preservation methods, layout ideas, common mistakes, display tips, and creative ways to personalize the gift so it feels less like “craft project” and more like “future family keepsake.”
Why a DIY Flower Frame Makes Such a Great Gift for Mom
Fresh flowers are lovely, but they also have a tragic habit of becoming compost with excellent manners. A flower frame lets you hold onto the beauty a little longer. That is part of the charm. It turns a temporary bouquet into something lasting and display-worthy.
It also checks every gift-giving box. It is budget-friendly, customizable, and emotionally rich. You can make it rustic, modern, vintage, minimalist, colorful, botanical, or delightfully over-the-top. If your mom loves gardening, use blooms from the yard. If she loves soft neutrals, go with pressed ivory petals and muted greenery. If she loves family memories, tuck in a photo, a recipe card, or a tiny message in your handwriting. Suddenly the gift is not just pretty. It tells a story.
And unlike many trendy DIY projects, this one is actually practical. A flower frame can hang on a wall, sit on a shelf, brighten a desk, or become part of a gallery wall. It is decor with a heartbeat.
Choosing the Right Style of Flower Frame
Before gathering supplies, decide what kind of frame you want to make. This choice affects everything from the flowers you use to the adhesive you need.
1. Pressed Flower Frame
This is the flattest and most classic option. Pressed flowers are arranged on cardstock, handmade paper, or a photo mat, then placed behind glass. The look is elegant, light, and botanical. It works especially well for pansies, daisies, violets, baby’s breath, fern fronds, and delicate leaves.
2. Flower Shadow Box
If you want more dimension, use a shadow box. This style is perfect for small dried blooms, thicker petals, ribbon, a short note, or a photo layered with preserved flowers. It feels a bit more substantial and can look wonderfully high-end when arranged carefully.
3. Photo-and-Bloom Frame
This version combines preserved flowers with a printed family photo. It is ideal if you want the gift to feel even more personal. Think of it as a floral love letter with a picture in the middle.
4. Quote Frame for Mom
Instead of a photo, place a favorite quote, a short poem, a “Love you, Mom” note, or a phrase she always says. You know, something better than “Clean your room,” though that is undeniably iconic.
What You Will Need
- A frame or shadow box
- Pressed or dried flowers and foliage
- Acid-free cardstock, watercolor paper, or archival backing paper
- Craft tweezers
- Small scissors
- Clear-drying glue or a delicate craft adhesive
- Parchment paper or absorbent paper for pressing
- Heavy books or a flower press
- Optional: silica gel for drying dimensional flowers
- Optional: printed photo, handwritten note, labels, ribbon, or decorative paper
If you are aiming for a longer-lasting piece, choose materials that are sturdy and clean-looking. Acid-free paper is especially useful because it helps the project age more gracefully. It is one of those tiny upgrades that makes the finished piece look more intentional and less like a school assignment from 2009.
The Best Flowers and Foliage for a DIY Flower Frame
Not every bloom behaves nicely in a frame. Some flowers press beautifully. Others become a soggy little mystery. As a rule, flatter flowers or flowers with fewer petals tend to work best for pressed designs. Thick, layered flowers are often better dried with silica gel or used in a shadow box.
Great Choices for Pressed Flower Art
- Pansies and violas
- Daisies
- Baby’s breath
- Lavender sprigs
- Fern fronds
- Single-petal roses
- Small leaves and herb sprigs
Great Choices for a Shadow Box
- Mini roses
- Hydrangea florets
- Statice
- Strawflower
- Baby’s breath clusters
- Eucalyptus
If you are collecting your own flowers, pick them when they look fresh and dry, not after rain and not while dew is still hanging around like an uninvited guest. Cleaner, drier blooms generally preserve better. If you are using a bouquet from a florist or grocery store, choose blooms that still look crisp and colorful rather than overly open or wilted.
How to Preserve Flowers for the Frame
The secret to a beautiful flower frame is simple: never put fresh flowers straight into it and hope for the best. That path leads to trapped moisture, browning petals, and sadness. Preserve first. Frame second.
Method 1: Press Flowers in a Book
This is the easiest and most beginner-friendly option. Place flowers between sheets of absorbent paper or parchment, tuck them inside a heavy book, and stack more books on top. Leave them alone until fully dry. This method works well for flat flowers and foliage. It is slow, but effective, and it costs almost nothing.
Method 2: Use an Iron for Faster Pressing
If you are short on time, the iron method can help. Put the flower between absorbent sheets, flatten it gently, and press with a warm, dry iron in short intervals. The key word there is dry. Steam is the enemy here. You are preserving flowers, not trying to give them a facial.
Method 3: Dry Flowers with Silica Gel
If you want to preserve shape instead of flattening everything, silica gel is your best friend. It surrounds the flowers and pulls out moisture while helping them hold their form. This method is especially useful for fuller blooms you want to use in a shadow box. It requires a bit more setup, but the results can be gorgeous.
Method 4: Air-Dry for a Rustic Look
Some flowers can simply be tied and hung upside down in a cool, dark, dry place. This method is less polished than pressing, but it works beautifully for farmhouse, cottage, or vintage-inspired designs.
No matter which method you choose, let the flowers dry completely before arranging them in the frame. Half-dry flowers are like half-baked cookies: disappointing and structurally suspicious.
Step-by-Step: How to Make a DIY Flower Frame for Mom
- Pick your design direction. Decide whether the frame will feature only flowers, a photo, a quote, or a combination.
- Prepare the backing. Cut your cardstock, watercolor paper, or photo mat to fit the frame. Neutral colors usually let the flowers shine.
- Lay everything out before gluing. This is non-negotiable. Arrange the flowers first and take a quick phone photo so you can remember the layout.
- Create visual balance. Place larger flowers first, then fill gaps with smaller blooms, leaves, or tiny sprigs. Try not to crowd every inch.
- Add personal elements. Include a tiny note, a label with the date, “For Mom,” or a favorite quote in a beautiful font or your own handwriting.
- Glue with a light hand. Use a clear-drying adhesive sparingly. Too much glue can show through delicate petals or make paper warp.
- Let it dry fully. Give the arrangement time to set before closing the frame.
- Assemble the frame. Carefully place the finished backing into the frame or shadow box. Check that no petals are getting crushed where they should not be.
- Inspect the final piece. Wipe the glass, straighten the layout if needed, and make sure the back is sealed well.
Design Tips That Make the Frame Look Expensive
The difference between “sweet handmade gift” and “wait, where did you buy that?” usually comes down to design restraint. Good news: restraint is cheaper than over-decorating.
Use Negative Space
Do not feel obligated to cover every corner with petals. Leaving some open space helps the arrangement breathe and makes the flowers feel more intentional.
Stick to a Color Story
Choose two or three main tones. Blush and green looks soft and classic. White and sage feels calm and elegant. Bold pinks and yellows bring a cheerful, springy mood.
Mix Textures
Pair soft petals with airy greenery or tiny filler blooms. The contrast adds visual interest without requiring circus-level crafting skills.
Choose the Right Frame Finish
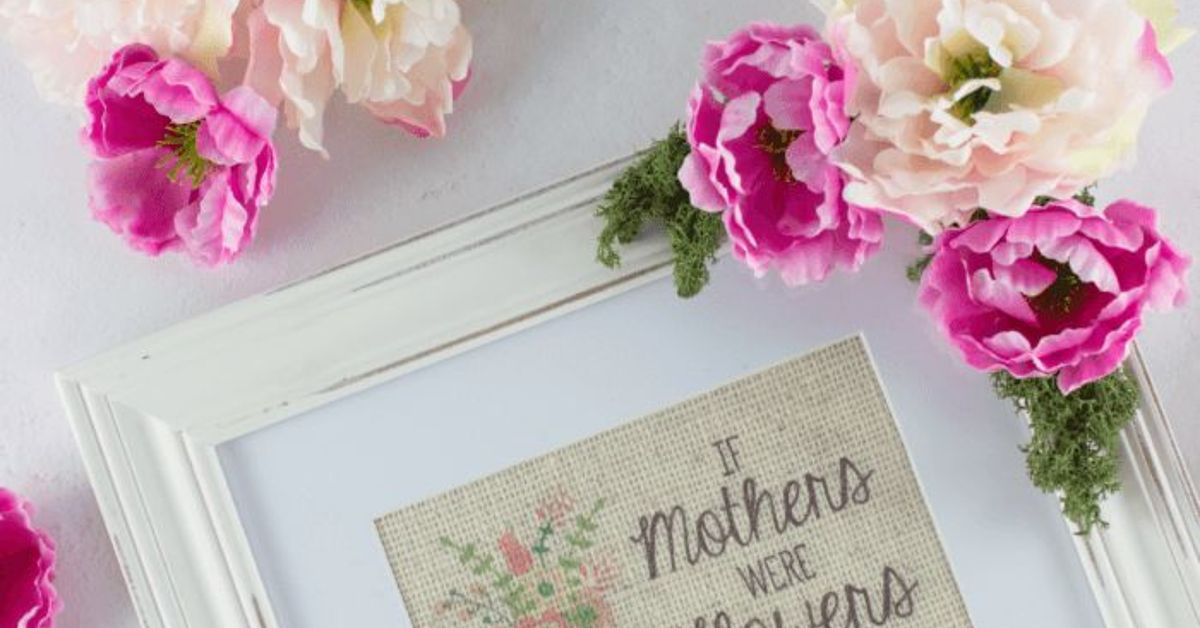
Natural wood feels warm and organic. White frames feel bright and clean. Gold frames add a vintage or elevated touch. Black frames can look modern and dramatic.
Use a Mat If the Design Feels Busy
A mat can visually separate the arrangement from the frame edge, giving the piece a more polished look.
Common Mistakes to Avoid
- Using flowers that are still damp
- Choosing blooms that are too bulky for a standard frame
- Overloading the design with too many elements
- Using too much glue
- Skipping a test arrangement before attaching anything
- Displaying the finished piece in strong direct sunlight
- Using flimsy paper that bends or wrinkles easily
Another common mistake is trying to force every meaningful item into one frame. Yes, Mom may love flowers, your kindergarten drawing, the family dog, an old recipe card, and a beach shell from 2016. That does not mean they all need to live together in a single eight-by-ten rectangle.
Creative Ways to Personalize the Flower Frame for Mom
This is where the project really comes alive. A flower frame becomes unforgettable when it reflects your relationship with her.
- Use flowers from her garden
- Include blooms in her favorite colors
- Add a family photo from a favorite vacation or holiday
- Frame a handwritten message like “Love you always, Mom”
- Include the date and occasion, such as Mother’s Day or her birthday
- Use petals from a bouquet tied to a meaningful event
- Add a short quote about mothers, love, or home
You can even make a theme-based version. For a gardening mom, use herbs, lavender, and tiny botanical labels. For a sentimental mom, use flowers around a baby photo or family snapshot. For a minimalist mom, keep the design spare and elegant with one flower stem and a simple note. For the mom who loves maximum color and joy, go full bloom and let it sing.
How to Display and Care for the Finished Frame
Once the frame is complete, help it last by treating it more like art than like a coaster. Keep it away from direct sunlight, excess humidity, and strong heat. A hallway, bedroom shelf, home office, or living room wall that does not get harsh afternoon sun is usually a safer choice than a steamy bathroom or blazing windowsill.
If you want extra protection, choose a frame with higher-quality glass or place the piece in a spot with gentle, indirect light. Dust the outside lightly and avoid opening the frame more than necessary. Preserved flowers are delicate. They are beautiful, but they are not built for drama.
Budget, Timing, and Gift Presentation
One of the best things about a DIY flower frame is that it can be as affordable or as elevated as you want. A simple version made with a thrifted frame, backyard blooms, and cardstock can look fantastic on a small budget. A more luxe version with a shadow box, archival paper, and carefully preserved flowers can still cost far less than many custom gifts online.
Timing matters, though. If you are pressing flowers the traditional way, start early. This is not the craft for the night before unless your plan includes stress, bargaining, and muttering at petals. If you need a faster turnaround, use the iron method for pressed flowers or silica gel for dimensional blooms.
For presentation, wrap the frame in tissue paper, add a handwritten card, and explain why you chose those flowers or that photo. That short explanation often becomes the emotional center of the gift. The frame is beautiful, but the meaning is what makes it unforgettable.
Experience and Inspiration: Why This Gift Feels So Personal
What makes a DIY flower frame for Mom stand out is not just the finished object. It is the experience attached to it. Handmade floral gifts carry a different kind of energy. They slow you down. You start noticing shape, color, memory, and detail. Suddenly you are not just making decor. You are editing a tiny visual story.
Maybe you pick a few flowers from the yard where she taught you how to water plants without drowning them. Maybe you use lavender because it reminds you of her linen closet, which somehow always smelled like calm and competence. Maybe you choose a photo from a road trip, a birthday dinner, or one of those gloriously unplanned family moments where everyone looks happy instead of confused. All of those small decisions add emotional texture.
There is also something deeply satisfying about the process itself. Pressing flowers, arranging petals, and building the composition can feel relaxing in a way many modern activities are not. No notifications. No endless scrolling. Just you, a table, some flowers, and the noble mission of making your mom cry in the best possible way.
Many people who make a flower frame for the first time are surprised by how meaningful it becomes. What starts as “I need a cute gift idea” often turns into “Wow, this actually feels important.” That is because flowers already carry symbolism. They mark celebrations, milestones, apologies, thank-yous, and love. Framing them gives those moments a little more staying power.
It is also one of the rare crafts that works beautifully across generations. A child can help pick flowers. A teen can design a modern layout. An adult can add archival details and polished finishing touches. Siblings can make one together. Grandchildren can contribute notes or doodles. The project can be simple or elaborate, but it almost always feels warm.
And let us be honest, moms tend to appreciate effort. A handmade flower frame says, “I thought about you enough to make something with my actual hands.” That message lands. It lands even if one petal is slightly crooked. In fact, sometimes the slight imperfections are part of the charm. They prove the gift was made, not manufactured.
If you are looking for inspiration, imagine a few different scenes. A white frame with pressed violets and a handwritten “Home is wherever Mom is.” A shadow box with dried hydrangea petals surrounding a black-and-white family photo. A natural wood frame featuring tiny sprigs from her own garden with the date underneath. A gold frame with pale blush blooms and a short note tucked into the corner. Each version tells a different story, but all of them feel intimate.
That is why this project has such staying power. It is not trendy in a disposable way. It is classic, sentimental, and adaptable. Years from now, the frame can still hang in a hallway or rest on a shelf, quietly doing its job: reminding her that she is loved.
And really, that is the whole point. Not perfection. Not flashy technique. Not winning some imaginary craft championship. Just making something beautiful, meaningful, and a little bit joyful for the woman who has probably done about a million things for everyone else. A DIY flower frame gives some of that care back to her, one petal at a time.
Conclusion
A DIY flower frame for Mom is one of those rare projects that manages to be affordable, creative, personal, and genuinely beautiful all at once. Whether you choose a pressed-flower design, a dimensional shadow box, or a photo-and-bloom combination, the magic is in the meaning behind it. Start with well-preserved flowers, keep the layout balanced, personalize it thoughtfully, and you will have a gift that feels heartfelt instead of generic. In a world full of quick purchases and forgettable presents, that kind of handmade care stands out. And yes, it looks pretty great on a shelf too.