Empty wine bottles have a secret holiday talent: they can go from “Tuesday night recycling bin” to “festive mantelpiece with main-character energy” in less than an afternoon. Wine bottle Christmas decor is one of the easiest and most inexpensive ways to create custom holiday decorations without buying another plastic reindeer, glittery sign, or mystery item from the seasonal aisle that somehow costs $29.99.
The beauty of this project is its flexibility. A clear bottle can become a glowing snowflake lantern. A green bottle can turn into a rustic Christmas tree vase. A dark bottle can look elegant with gold paint, velvet ribbon, and a single taper candle. Even the oddly shaped bottle you were about to toss can be reborn as a charming snowman, Santa, centerpiece, porch accent, or handmade gift. Basically, if the bottle stands upright and doesn’t leak, it has potential.
This guide covers practical, budget-friendly ideas for turning empty bottles into Christmas decorations that look polished, personal, and warm. You’ll find supply lists, step-by-step ideas, safety tips, styling suggestions, and real-life experience notes to help you avoid common craft disastersbecause nobody wants “festive” to mean “hot glue strings attached to everything you own.”
Why Wine Bottle Christmas Decor Is Worth Trying
Christmas decorating can get expensive quickly. Between wreaths, lights, table settings, gift wrap, candles, ornaments, and that one impulse-buy nutcracker who looks like he judges your snack choices, the holiday budget can vanish fast. Wine bottle Christmas decor solves three problems at once: it saves money, reduces waste, and gives your home handmade charm.
Repurposing glass bottles also fits beautifully with the “use what you already have” style of decorating. Many holiday design ideas from home and craft experts rely on simple materials like ribbon, greenery, candles, twinkle lights, paint, pinecones, jars, and recycled containers. Wine bottles fit right into that world. They are tall, sturdy, elegant, and easy to customize for rustic farmhouse, modern minimalist, vintage Christmas, woodland cabin, glam gold, or playful snowman decor.
The Best Bottles to Use
Almost any empty glass bottle can work, but some are easier than others. Clear bottles are perfect for fairy lights because they let the glow shine through. Green bottles already feel Christmassy and look beautiful with white paint, red ribbon, cranberries, pine sprigs, or gold accents. Dark brown or black bottles create a moody, elegant look when paired with metallic paint, velvet bows, or candlelight.
Choose bottles that are not cracked, chipped, or unstable. A slightly wider bottle is better for centerpieces, while tall narrow bottles are ideal for taper candles or slim greenery stems. If you plan to use the decor on a dining table, avoid oversized bottles that block conversation unless your goal is to hide from Uncle Dave’s annual “back in my day” speech.
Basic Supplies for Easy Wine Bottle Christmas Decorations
You do not need a professional craft room, a laser cutter, or a suspiciously perfect Pinterest pantry. Most projects can be made with affordable supplies from a dollar store, craft store, hardware store, or your own holiday storage box.
Simple Supply List
- Empty wine bottles, cleaned and dried
- Warm soapy water or adhesive remover for labels
- Acrylic paint, chalk paint, spray paint, or glass paint
- Battery-powered LED fairy lights or cork-style bottle lights
- Ribbon, twine, burlap, lace, or fabric scraps
- Mini ornaments, bells, faux snow, pinecones, or faux berries
- Mod Podge, craft glue, or hot glue
- Wrapping paper, tissue paper, napkins, or scrapbook paper
- Paint pens, stencils, adhesive vinyl, or letter stickers
- Faux greenery, cedar sprigs, eucalyptus, or small branches
For the safest and easiest lighting projects, use battery-powered LED lights made for decorative use. Cork-style bottle lights are especially convenient because the battery pack sits at the top like a cork, so you do not have to drill into glass. That means less mess, less risk, and fewer “why did I think this was a good idea?” moments.
How to Prepare Wine Bottles for Christmas Crafts
Preparation is the unglamorous but important part. A clean bottle helps paint stick better, glue hold longer, and the final decor look intentional instead of “I found this near the sink and panicked.”
Step 1: Remove the Labels
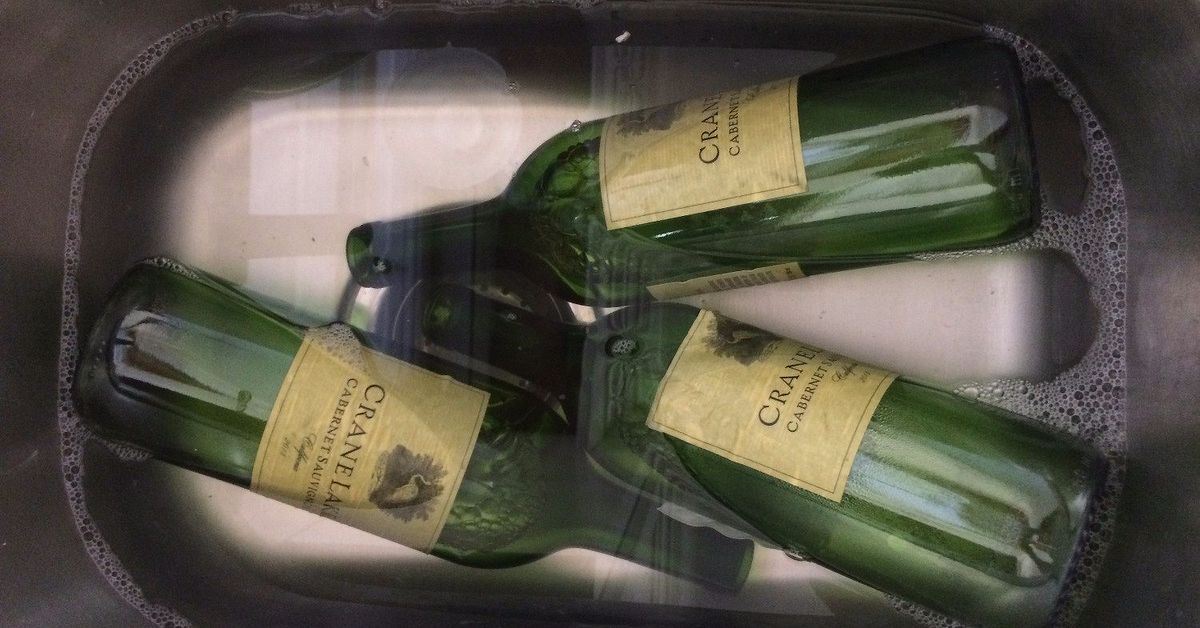
Soak the bottle in warm soapy water for 20 to 30 minutes. Many paper labels will peel away after soaking. If the label is stubborn, use a plastic scraper, sponge, or adhesive remover. Avoid using a sharp knife directly against the glass, especially if the bottle is wet and slippery.
Step 2: Clean and Dry Thoroughly
Wash the inside of the bottle with warm water and dish soap. Let it dry completely upside down. Moisture trapped inside can make lights look foggy and can interfere with paint or paper designs.
Step 3: Wipe the Outside
Before painting or gluing, wipe the bottle with rubbing alcohol or a clean dry cloth to remove fingerprints and residue. This small step helps prevent streaky paint and peeling decorations.
Easy Wine Bottle Christmas Decor Ideas
These ideas are simple, inexpensive, and flexible. You can make one bottle as a small accent or create a set of three for a mantel, buffet table, window ledge, entryway, or holiday bar cart.
1. Lighted Snowflake Wine Bottle
A lighted snowflake bottle is one of the most popular wine bottle Christmas decor ideas because it looks magical but requires very little effort. Start with a clear or frosted bottle. Add white snowflake stickers, paint snowflakes with a white paint pen, or use adhesive vinyl decals. Then insert battery-powered fairy lights inside the bottle.
For a softer winter look, spray the bottle lightly with frosted glass spray before decorating. Add a silver ribbon or small ornament around the neck. Place it on a mantel, shelf, or nightstand for a cozy glow. This also makes a lovely homemade Christmas gift because it looks thoughtful without requiring a crafting degree from the North Pole.
2. Rustic Twine and Greenery Bottle
For farmhouse Christmas decor, wrap the lower third or neck of a bottle with jute twine. Secure it with hot glue, then add a small sprig of faux cedar, a berry pick, and a tiny bell. Leave the glass exposed or paint it white, cream, sage green, or matte black first.
This style works beautifully in groups. Try three bottles of different heights with different greenery stems. Add pinecones around the base and you have an inexpensive Christmas centerpiece that feels warm, natural, and not at all like you assembled it while watching holiday movies in pajamaseven if you absolutely did.
3. Painted Snowman Wine Bottle
Painted snowman bottles are cheerful, family-friendly, and easy to personalize. Paint the bottle white with acrylic paint, chalk paint, or spray paint. Once dry, add black dots for eyes and buttons, an orange carrot nose, and a happy smile. Tie a strip of fabric or ribbon around the neck as a scarf.
For the hat, use a baby sock, felt, or a small piece of black cardstock. A sock hat is especially forgiving because it hides the bottle top and instantly makes the snowman look adorable. Add LED lights inside if the bottle is clear enough, or simply display it as part of a winter village scene.
4. Santa Bottle Decor
A Santa wine bottle is a fun choice for kitchen counters, gift tables, and kids’ craft nights. Paint the bottle red, add a black belt around the middle with ribbon or paint, and use gold paint or a small square of glitter paper for the buckle. Add white faux fur, cotton trim, or pom-poms around the neck and bottom.
If you want a cleaner look, skip the face and make it a stylized Santa suit bottle. It will look festive without veering into “craft fair chaos,” which is a very real design category.
5. Decoupage Christmas Bottle
Decoupage is perfect if you have pretty holiday napkins, leftover wrapping paper, tissue paper, or scrapbook paper. Brush a thin layer of Mod Podge or decoupage glue onto the bottle, smooth the paper over it, and seal with another light coat. Work slowly and use small sections to reduce wrinkles.
Holiday napkins with snowflakes, cardinals, pine branches, plaid, holly, or vintage Santa prints work especially well. Once dry, finish the bottle with ribbon, twine, or a cluster of small ornaments. Decoupage bottles can be used as vases, shelf accents, or glowing lanterns if you add LED lights.
6. Glitter Wine Bottle Centerpiece
Glitter bottles bring sparkle to holiday tables, party bars, and New Year’s Eve displays. Paint the bottle first in a base color such as white, red, green, gold, or silver. Once dry, brush on craft glue or spray adhesive, then roll the bottle in fine glitter. Seal it with a clear spray sealer to reduce glitter shedding.
Fine glitter looks more elegant than chunky glitter, though chunky glitter has its own loud holiday confidence. Use glitter bottles in odd-numbered groups and pair them with candles, ornaments, or fresh greenery.
7. Wine Bottle Candle Holders
Wine bottles make excellent taper candle holders because the narrow opening naturally supports many standard taper candles. For a Christmas version, place evergreen stems and cranberries inside a clear bottle with water, then insert a taper candle into the opening. You can also paint the outside of the bottle and use it as a simple candle base.
Use caution with real candles. Keep flames away from greenery, paper, fabric, curtains, and anything that can burn. Never leave lit candles unattended. For safer everyday decorating, flameless taper candles create a similar look without the open flame.
8. Mini Christmas Tree Bottle
A green wine bottle can become a mini Christmas tree with very little effort. Wrap it with thin garland, ribbon, pearl strands, or battery-powered micro lights. Add tiny ornaments with hot glue or mini adhesive dots. A small star ornament or gold bow on top completes the look.
This is a great project for using leftover ornament hooks, broken garland pieces, or extra gift-wrap ribbon. The result is cute, compact, and ideal for apartments, office desks, dorm rooms, or small kitchens where a full-size tree would be a logistical comedy.
9. Chalk Paint Message Bottle
Chalk paint gives wine bottles a soft matte finish and works well for modern holiday decor. Paint the bottle black, white, forest green, or deep red. After it dries, write a holiday message with a paint pen or chalk marker. Try phrases like “Joy,” “Noel,” “Merry,” “Peace,” “Let It Snow,” or “Meet Me Under the Mistletoe.”
For a polished set, make three bottles with one word each: “Merry,” “Bright,” and “Joy.” Display them together with greenery and lights.
10. Elegant Gold and Green Bottle Arrangement
If your Christmas style leans sophisticated, choose metallic paint and simple greenery. Spray paint bottles in matte gold, champagne, bronze, or brushed silver. Add eucalyptus, cedar, pine, or berry stems. Tie a narrow velvet ribbon around the neck.
This look is especially beautiful on a dining table or console. It feels festive but not overly themed, which means you can leave it up through New Year’s without feeling like Santa is overstaying his welcome.
Where to Use Wine Bottle Christmas Decorations
Wine bottle decor is compact, so it works in places that are easy to overlook during holiday decorating.
On the Mantel
Group lighted bottles with garland, stockings, small houses, and candles. Use bottles of different heights for dimension. If your mantel is narrow, choose slim bottles and battery lights instead of bulky accessories.
On the Dining Table
Use three to five decorated bottles as a centerpiece. Keep the designs low-profile enough that guests can see across the table. Bottles with greenery stems, ribbon, or soft lights work better than tall branches that poke people during dinner.
On a Bar Cart
A wine-themed decoration naturally belongs on a bar cart. Add a snowman bottle, a gold bottle with lights, or a bottle wrapped with ribbon and bells. Pair it with holiday napkins, copper mugs, candy canes, or a small bowl of ornaments.
In the Entryway
Place a glowing bottle on an entry table to welcome guests. Add a tray, pinecones, and a small sign for a cozy first impression. It says, “Welcome, I decorated,” but not “I have been panic-cleaning since 6 a.m.”
Budget Tips for Inexpensive Christmas Bottle Crafts
The goal is easy and inexpensive, so do not overbuy supplies. Start with what you already own. Leftover ribbon, old ornaments, wrapping paper scraps, gift tags, pinecones, buttons, yarn, fabric remnants, and broken garland pieces can all become useful embellishments.
Dollar stores are excellent for fairy lights, faux greenery, small ornaments, bells, craft paint, glitter, and ribbon. Thrift stores often have inexpensive candleholders, fabric, lace, and holiday picks. Hardware stores carry spray paint, painter’s tape, and adhesive remover. Craft stores are best for specialty items like glass paint, stencils, Mod Podge, and vinyl decals.
Make projects in batches to save time and money. Paint several bottles at once, then decorate them in different styles after they dry. A single can of spray paint can usually cover multiple bottles, depending on bottle size and paint coverage.
Safety Tips for Wine Bottle Christmas Decor
Handmade decorations are wonderful, but safety still matters. Glass, lights, paint, and candles all need common sense.
Use LED Lights
Battery-powered LED lights are the best option for bottle projects. They produce less heat than many older lighting options and are easy to place inside bottles. Always inspect light strands for damage before using them. Turn off decorative lights when leaving the house or going to bed.
Avoid Drilling Unless You Know What You’re Doing
Some tutorials show drilled glass bottles for corded lights. While this can look nice, drilling glass requires the correct bit, eye protection, gloves, water cooling, and patience. For beginners, cork-style LED bottle lights are a much easier and safer choice.
Be Careful With Candles
If using real candles, keep them away from paper, ribbon, dried greenery, curtains, and other flammable materials. Place bottles on a stable, heat-safe surface. Flameless candles are the safer option for homes with pets, children, or anyone who forgets things after eating two plates of cookies.
Ventilate When Painting
Use spray paint outdoors or in a well-ventilated area. Follow product instructions for drying times. Do not place lights inside a freshly painted bottle until the paint and any sealant are fully dry.
Common Mistakes to Avoid
The first mistake is rushing the drying process. Paint may feel dry to the touch but still smudge when handled. Give each coat time to cure before adding ribbon, glue, or decals.
The second mistake is using too much glue. A small amount of hot glue is usually enough for ribbon, bows, bells, and greenery. Too much glue creates bumps and strings that show up under lights.
The third mistake is overcrowding the design. A bottle does not need paint, glitter, ribbon, stickers, lights, ornaments, bells, faux snow, and a tiny woodland creature all at once. Choose one main feature and let it shine.
The fourth mistake is ignoring balance. A tall bottle with heavy decorations near the top may tip easily. Keep heavier items low or use a tray to stabilize the arrangement.
Experience Notes: What Actually Works Best
After making wine bottle Christmas decor, the biggest lesson is that simple designs often look the most expensive. The bottle that gets the most compliments is usually not the one with fifteen supplies attached to it. It is the frosted bottle with warm fairy lights, a velvet ribbon, and one small snowflake charm. The bottle did not work harder; it worked smarter.
Label removal is the part people underestimate. Some labels slide off politely after soaking, as if they were raised with manners. Others cling to the bottle like they signed a long-term lease. The best approach is to soak first, scrape gently, then use adhesive remover only where needed. Starting with a clean surface makes every later step easier.
Paint choice also matters. Chalk paint gives a soft, cozy finish and hides imperfections well. Glossy acrylic paint can look festive but may need multiple coats. Spray paint gives the smoothest finish, but it requires ventilation and patience. For beginners, white chalk paint is forgiving and works for snowmen, winter scenes, farmhouse bottles, and Scandinavian-style Christmas decor.
Fairy lights are the fastest way to make a bottle look finished. Even a plain clear bottle becomes charming once warm LED lights are added. Cork-style lights are especially useful because they avoid the need for drilling. The battery pack sits neatly at the top, and the bottle can be moved anywhere without worrying about outlets.
One useful trick is to decorate in sets of three. A single bottle can look lonely unless it has strong details. Three bottles, however, instantly look intentional. Try one painted bottle, one lighted bottle, and one greenery-filled bottle. Place them on a tray with pinecones or ornaments, and suddenly you have a centerpiece that looks like it came from a boutique shop instead of your recycling pile.
Ribbon can rescue almost any design. If the paint line looks uneven, add ribbon. If the neck looks bare, add ribbon. If the bottle feels too plain, add ribbon. Wired ribbon holds shape best, but velvet ribbon feels rich and classic. Twine creates a rustic look, while satin ribbon feels more formal. Keep a few styles nearby and test them before gluing.
Another lesson: do not use real greenery inside a sealed bottle unless you are prepared to refresh it. Fresh pine, cedar, or cranberries look beautiful in water-filled bottles, but they will not stay perfect forever. For long-term decor, faux greenery is more practical. For a dinner party or Christmas Eve table, fresh greenery is gorgeous and worth the extra care.
Glitter is beautiful, but it has a personality. It travels. It appears later on your sweater, your floor, your dog, and possibly your taxes. If using glitter, choose fine glitter and seal it well. For a less messy sparkle, metallic paint, shimmer ribbon, or glittered ornaments are easier to control.
The most satisfying part of wine bottle Christmas decorating is that each piece feels personal. You can match your home’s colors, use meaningful charms, add family names, create handmade gifts, or design a centerpiece that fits your table perfectly. It is affordable, creative, and low-pressure. If one bottle turns out odd, call it “whimsical” and place it near the back. Christmas is forgiving like that.
Conclusion
Wine bottle Christmas decor is proof that beautiful holiday decorating does not have to be expensive, complicated, or store-bought. With empty bottles, a little paint, LED lights, ribbon, greenery, and imagination, you can create glowing centerpieces, rustic mantel accents, handmade gifts, festive candle holders, and charming winter decorations. These projects are easy enough for beginners, flexible enough for any decor style, and affordable enough to make in batches.
Whether you prefer snowflake lanterns, painted snowmen, elegant gold vases, Santa bottles, decoupage designs, or simple twine-wrapped greenery, wine bottles offer a sturdy and stylish base for holiday creativity. Best of all, each project gives something ordinary a second life. That is the kind of Christmas magic even your recycling bin can appreciate.
Note: This article is written in original American English for web publication and is based on practical DIY decorating methods, common craft materials, holiday safety guidance, and real home decor inspiration.