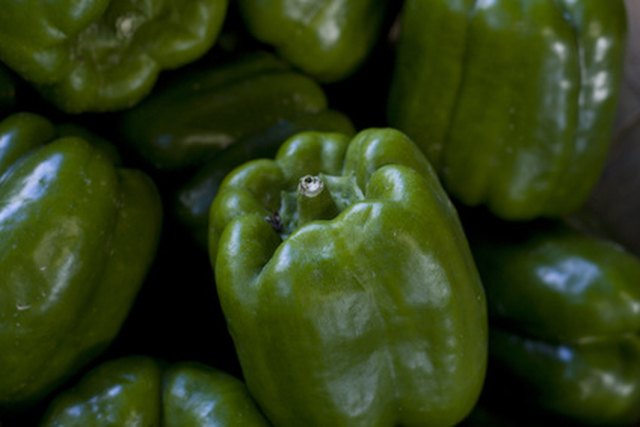
Green peppers are the dependable jeans of the vegetable garden: not flashy, not fussy once established, and somehow useful in almost every meal. Toss them into fajitas, dice them into omelets, stuff them with rice and sausage, or slice them for a snack that makes you feel responsible even if dinner later involves pizza. But before a green pepper plant can become a kitchen hero, it has to survive its tiny, dramatic baby stage: germination.
Learning how to germinate green pepper seeds is not difficult, but peppers do have opinions. Strong opinions. They like warmth, steady moisture, clean seed-starting mix, and a gardener who does not hover over them every twelve minutes asking, “Are you alive?” Unlike some quick-sprouting vegetables, pepper seeds often take their sweet time. A radish may pop up as if it has somewhere important to be, but a pepper seed may sit quietly for a week or two before making its entrance.
The good news is that once you understand the right temperature, planting depth, watering method, lighting setup, and transplant timing, germinating green pepper seeds becomes far more predictable. This guide walks through the complete process, from choosing seeds to troubleshooting stubborn trays, with practical examples and a few garden-tested tips that can save you from staring sadly at an empty seed tray.
What Are Green Pepper Seeds?
First, let’s clear up a common point of confusion. When gardeners say “green pepper seeds,” they may mean one of two things: seeds from a green bell pepper fruit, or seeds sold for growing green bell pepper plants. These are not always the same in terms of reliability.
Most green bell peppers are harvested at the mature green stage, before they fully ripen into red, yellow, orange, or another final color depending on the variety. That green pepper in the grocery store may be delicious, crunchy, and perfect for stir-fry, but the seeds inside may not be fully mature. Immature seeds often germinate poorly or not at all. Some may sprout, because gardening loves exceptions, but relying on grocery-store green pepper seeds is a bit like asking a cat to follow a five-step productivity plan: possible, but do not build your calendar around it.
For the best results, use fresh, high-quality seed from a reputable seed packet. If you want to save seeds from your own peppers, let the fruit ripen fully on the plant until it reaches its final mature color. Then remove the seeds, dry them thoroughly, and store them in a cool, dark, dry place. Properly stored pepper seeds can remain useful for several years, but germination rates usually decline with age.
Best Time to Start Green Pepper Seeds Indoors
Green peppers are warm-season crops with a long growing period, so most gardeners should start seeds indoors rather than sow them directly outside. A practical rule is to start green pepper seeds about 8 to 10 weeks before your expected outdoor transplant date. In cooler climates, this gives seedlings enough time to grow strong roots before the garden soil warms. In warmer regions, the window may be slightly shorter, but peppers still benefit from a controlled indoor start.
The outdoor transplant date is not simply the last frost date. Peppers dislike cold soil and chilly nights. If planted outside too early, they may survive but sulk for weeks. A young pepper plant sitting in cold spring soil is not “building character”; it is losing momentum. Wait until the danger of frost has passed, soil has warmed, and nighttime temperatures are consistently mild before moving seedlings outdoors.
Supplies You Need to Germinate Green Pepper Seeds
You do not need a greenhouse or laboratory coat to germinate green pepper seeds. However, the right basic supplies make the process easier and more consistent.
Recommended Materials
- Fresh green bell pepper seed packet or fully mature saved pepper seeds
- Seed-starting trays, cell packs, or small containers with drainage holes
- Sterile seed-starting mix
- Spray bottle or gentle watering can
- Humidity dome or clear plastic cover
- Plant labels and waterproof marker
- Seedling heat mat, if indoor temperatures are cool
- Grow light or bright indoor seed-starting light setup
A sterile seed-starting mix is important because it drains well, holds moisture evenly, and reduces disease risk. Avoid using heavy garden soil in seed trays. Garden soil can compact, hold too much water, and bring along fungi, pests, or weed seeds. Pepper seedlings are tiny. They do not need to begin life wrestling mystery organisms from the backyard.
Ideal Temperature for Green Pepper Seed Germination
Temperature is the big secret behind pepper seed germination. Green pepper seeds germinate best when the growing medium is warm, usually around 75°F to 85°F. They may sprout at lower temperatures, but the process will be slower and less reliable. At cool temperatures, seeds can sit in damp mix too long, increasing the risk of rot.
Notice the phrase “growing medium.” The temperature of the seed-starting mix matters more than the air temperature in the room. A sunny windowsill may feel warm during the day but become cold at night. That temperature swing can delay germination. A seedling heat mat can help keep the mix consistently warm, especially in early spring or in homes where the thermostat has a strict personality.
If you use a heat mat, check moisture often. Warm seed-starting mix dries faster, and a seed that begins absorbing water can be damaged if it dries out completely. The goal is evenly moist, not swampy and not dusty.
Step-by-Step: How to Germinate Green Pepper Seeds
Step 1: Moisten the Seed-Starting Mix
Before filling your tray, lightly moisten the seed-starting mix. It should feel like a wrung-out sponge: damp but not dripping. Pre-moistening helps the mix settle evenly and prevents dry pockets around the seeds.
If the mix is peat-based or very dry, it may resist water at first. Add water slowly and stir until the texture is even. This small step saves frustration later, because pouring water aggressively over freshly planted seeds can move them around like passengers on a tiny, chaotic water slide.
Step 2: Fill Containers and Level the Surface
Fill each cell or container with moistened seed-starting mix. Gently firm the surface with your fingers, but do not pack it tightly. Pepper roots need air as well as moisture. A lightly firmed surface gives seeds good contact with the mix while still allowing drainage.
Step 3: Plant Seeds at the Right Depth
Plant green pepper seeds about 1/4 inch deep. This depth keeps them covered enough to stay moist while allowing the sprout to reach the surface without exhausting itself. Place one or two seeds per cell. If both sprout, you can snip the weaker seedling at soil level later, leaving the strongest one to grow.
Do not bury pepper seeds too deeply. A seed planted too far down may germinate but fail to emerge. It is the gardening version of starting a race from the parking lot.
Step 4: Cover and Keep Warm
After planting, mist the surface gently and cover the tray with a humidity dome or clear plastic wrap. This keeps moisture around the seeds while they begin the germination process. Place the tray in a warm location or on a seedling heat mat.
Check the tray daily. You are looking for moisture, not puddles. If condensation is heavy and the mix looks soaked, vent the cover briefly. If the surface begins to dry, mist it lightly. Balance is the name of the game.
Step 5: Watch for Sprouts
Green pepper seeds usually germinate in about 7 to 21 days, though some varieties may take longer. Older seeds, cooler temperatures, and uneven moisture can slow the process. Resist the urge to dig up seeds to “check.” That rarely helps and often damages a seed just as it is trying to sprout.
Once seedlings appear, remove the humidity dome. Leaving the cover on too long can encourage fungal problems and weak growth. The moment green loops break the surface, the seedling’s needs begin to change.
Light Requirements After Germination
Pepper seeds do not need strong light to germinate, but seedlings need bright light as soon as they emerge. Without enough light, they become tall, thin, and floppy. Leggy seedlings are not ruined, but they are less sturdy and harder to manage.
A sunny window is often not enough, especially in late winter or early spring. A basic grow light placed a few inches above the seedlings gives more consistent results. Keep the light on for about 14 to 16 hours per day and raise it as plants grow. The goal is compact, sturdy seedlings with rich green leaves, not pale stems leaning dramatically toward the nearest window like they are auditioning for a soap opera.
Watering Green Pepper Seedlings
Watering is where many seed-starting adventures go sideways. Pepper seedlings need consistent moisture, but soggy conditions can cause disease and root problems. Let the surface of the mix begin to dry slightly between waterings, but do not let the entire cell dry out.
Bottom watering is a helpful method. Place the tray in a shallow container of water and let the mix absorb moisture from below. After 15 to 30 minutes, remove the tray and let excess water drain. This encourages roots to grow downward and keeps the seedling stems drier.
If watering from above, use a gentle stream. Young pepper seedlings are not ready for a high-pressure rainstorm created by an enthusiastic gardener with a full watering can.
When to Fertilize Pepper Seedlings
Seed-starting mix often contains little or no fertilizer. That is fine at first because seeds carry enough stored energy to germinate. Once seedlings develop their first true leaves, they can benefit from light feeding.
Use a diluted, balanced liquid fertilizer at about half strength or weaker. Fertilize too strongly and you may burn tender roots. Think of it as feeding a toddler, not fueling a marathon runner. Little and steady wins.
Thinning and Potting Up
If you planted two seeds per cell and both sprouted, choose the stronger seedling. Instead of pulling the weaker one, snip it at the soil line with clean scissors. Pulling can disturb the roots of the seedling you want to keep.
As seedlings grow, they may need more space. If roots fill the cell or plants begin to crowd each other, transplant them into slightly larger pots. Bury them at the same depth they were growing before. Unlike tomatoes, peppers do not need deep stem burial as a standard practice. Keep them warm, well-lit, and evenly watered after potting up.
Hardening Off Green Pepper Seedlings
Hardening off is the process of gradually introducing indoor-grown seedlings to outdoor conditions. Do not skip it. Indoor seedlings have lived a sheltered life: steady temperatures, gentle light, no wind, no direct midday sun, and absolutely no surprise thunderstorms. Moving them straight outdoors can cause sunscald, wilting, or transplant shock.
Start hardening off about 7 to 10 days before transplanting. Place seedlings outside in a protected, shaded spot for a couple of hours, then bring them back in. Each day, increase their time outdoors and gradually introduce more sunlight. Avoid cold nights, strong wind, and harsh weather during this transition.
When to Transplant Green Pepper Seedlings Outdoors
Transplant green pepper seedlings after frost danger has passed, the soil has warmed, and nighttime temperatures are reliably mild. Seedlings should be sturdy, healthy, and usually 6 to 8 inches tall with several sets of true leaves.
Choose a site with full sun and well-drained soil. Green pepper plants generally need at least 6 hours of direct sun daily, though 8 or more hours is better for strong growth and fruit production. Space plants according to the seed packet or variety instructions, commonly about 18 to 24 inches apart.
After transplanting, water well and consider using mulch once the soil is warm. Mulch helps conserve moisture and reduce weeds. If spring nights are still borderline cool, row cover can provide protection, but remove or vent covers when temperatures rise too much.
Common Problems When Germinating Green Pepper Seeds
Seeds Do Not Sprout
The most common causes are old seed, cool soil, planting too deeply, or mix that dried out after the seed began absorbing water. Use fresh seed, keep the growing medium warm, and maintain even moisture.
Seeds Rot Before Sprouting
Rot usually points to excess moisture, poor drainage, or cold conditions. Use sterile seed-starting mix, containers with drainage holes, and warmth. The mix should be damp, not soup.
Seedlings Are Tall and Weak
Leggy seedlings usually need more light. Move grow lights closer, keep them on longer, or improve your lighting setup. Warmth helps germination, but after sprouting, seedlings also need strong light and slightly cooler growing conditions.
Seedlings Suddenly Collapse
This may be damping-off, a fungal disease that attacks young seedlings. Prevent it by using clean containers, sterile mix, good air circulation, and careful watering. Avoid overcrowding and remove humidity covers after germination.
Can You Germinate Seeds From a Store-Bought Green Pepper?
Yes, sometimes. Should you rely on it? Not if you want dependable results. Seeds from a store-bought green bell pepper may be immature because the fruit was harvested before full ripeness. Even if the seeds sprout, the plant may not grow true to the pepper you bought, especially if the original pepper came from a hybrid variety.
If you enjoy experiments, try it. Remove the seeds, rinse off any pulp, dry them for several days, and test a few on a damp paper towel. If they sprout, you have a fun project. If they do not, you have learned something and still had a pepper for dinner. That is not a bad bargain.
For serious gardening, use packet seed or saved seed from fully ripe peppers grown in your own garden. It is the difference between planning dinner and spinning the vegetable roulette wheel.
Paper Towel Method vs. Seed Tray Method
The paper towel method can be useful for testing seed viability. Place pepper seeds on a damp paper towel, fold it, put it in a partially sealed plastic bag or container, and keep it warm. Check regularly for roots. Once seeds sprout, gently move them into seed-starting mix.
This method lets you see which seeds are alive, but it has drawbacks. Pepper roots are delicate, and sprouted seeds can be damaged during transfer. The seed tray method is usually better for beginners because seeds germinate directly where they will grow for the first few weeks.
If you have old seeds or saved seeds of uncertain quality, test a small batch with the paper towel method first. If most sprout, plant the rest with confidence. If very few sprout, buy fresh seed and save yourself several weeks of suspense.
Quick Green Pepper Seed Germination Checklist
- Start seeds indoors 8 to 10 weeks before transplanting.
- Use fresh seed for best germination.
- Plant seeds about 1/4 inch deep.
- Keep the seed-starting mix warm, ideally around 75°F to 85°F.
- Maintain even moisture without waterlogging.
- Remove humidity covers after seedlings emerge.
- Provide bright grow light for 14 to 16 hours daily.
- Harden off seedlings for 7 to 10 days before transplanting.
- Transplant only after soil and weather are truly warm.
Final Thoughts: Patience Is Part of the Pepper Plan
Germinating green pepper seeds is a simple process, but it rewards gardeners who pay attention to details. Warm soil, fresh seeds, clean containers, steady moisture, and bright post-germination light make the difference between a tray of sturdy seedlings and a tray of “maybe next year.”
The most important lesson is not to rush peppers. Start them early indoors, give them the warmth they crave, and wait until outdoor conditions are friendly before transplanting. A pepper plant that begins life strong is more likely to handle summer heat, produce healthy foliage, and reward you with crisp green peppers for the kitchen.
In gardening, some crops are sprinters. Peppers are more like thoughtful planners. They take their time at first, but once they get going, they can become some of the most satisfying plants in the garden. Give them the right beginning, and those tiny seeds can become months of harvests, recipes, and the quiet joy of saying, “I grew that.”
Experience Notes: What Germinating Green Pepper Seeds Teaches You
One of the most useful experiences with green pepper seed germination is learning that “warm enough” indoors is not always warm enough for seeds. A room may feel comfortable to a person wearing socks and holding coffee, but the seed-starting mix sitting near a window can be much cooler than expected. The first time many gardeners start peppers, they place the tray on a windowsill, water it faithfully, and wait. A week passes. Then another. Nothing happens. The seeds are not necessarily bad; they may simply be cold.
A seedling heat mat often changes the entire experience. With bottom warmth, pepper seeds tend to sprout more evenly and more quickly. It is not magic, although it feels suspiciously close when a tray that did nothing for ten days suddenly begins showing green hooks. The lesson is clear: peppers are heat lovers from the very beginning. Treat them like tomatoes if you must, but remember they are often slower and more stubborn.
Another experience worth mentioning is the danger of overwatering out of love. New gardeners often see a covered tray and think it needs more water every day. In reality, a humidity dome can hold plenty of moisture. Too much water creates heavy, airless conditions that pepper seeds dislike. The best habit is to touch or check the mix before watering. If it is still moist, leave it alone. Gardening sometimes requires doing less, which is both wonderful and emotionally difficult.
Labeling is another small practice that prevents big confusion. Pepper seedlings look nearly identical when young. If you start green bell peppers beside jalapeños, banana peppers, or sweet Italian peppers, you may not know who is who until fruit appears. That can be exciting, but it is less exciting when you promised mild stuffed peppers and accidentally grew a surprise spicy situation. A simple plant label saves everyone at dinner.
Light also teaches a memorable lesson. Pepper seedlings raised too far from a window or light source stretch quickly. They become tall, pale, and wobbly, and while they may survive, they start at a disadvantage. Moving a grow light closer usually improves new growth, but prevention is better. Once seedlings emerge, bright light should be ready immediately. Do not wait until they look like tiny green spaghetti.
Finally, hardening off can feel unnecessary until the year you skip it. Indoor seedlings may look sturdy, but direct sun and wind can stress them fast. A gradual outdoor introduction makes transplanting smoother and helps plants resume growth quickly. The best pepper seedlings are not just germinated; they are prepared. From seed tray to garden bed, each step builds resilience. That is the quiet reward of starting green peppers from seed: you do not just grow a plant, you learn its rhythm.