Note: This article is written in publish-ready HTML and synthesizes practical orchid-care guidance from reputable horticultural, university extension, and orchid society resources.
Orchid leaves are not just decorative green paddles attached to a fancy flower spike. They are the plant’s solar panels, moisture managers, and early warning system. When they are clean, firm, and naturally glossy, your orchid can absorb light more efficiently and look like it belongs in a boutique plant shop instead of beside a dusty window blind. When they are coated with dust, hard water spots, fertilizer residue, sticky honeydew, or tiny pests, your orchid may start looking tired, dull, or downright offended.
The good news is that cleaning orchid leaves is simple when you use a gentle method. The bad news is that orchids do not appreciate aggressive scrubbing, mystery oils, mayonnaise spa treatments, or being sprayed like a patio chair at a car wash. A Phalaenopsis orchid, one of the most common indoor orchids in American homes, has broad, smooth leaves that can be cleaned with a soft cloth, clean water, and a little patience. Other orchids may have thinner or more delicate foliage, but the same rule applies: clean carefully, keep water out of the crown, and never leave the plant wet and chilly.
This guide explains how to clean orchid leaves to remove dust, mineral deposits, and common pests such as mealybugs, scale, aphids, and spider mites. You will also learn what not to use, how often to clean, and how to prevent the same problems from returning. Think of it as leaf hygiene without the drama.
Why Cleaning Orchid Leaves Matters
Dust may look harmless, but on orchid leaves it can reduce light exposure and make photosynthesis less efficient. Since indoor orchids already live with less intense light than they would receive in a bright greenhouse, a dusty leaf is basically a solar panel wearing a sweater. Clean leaves help the plant use available light, support stronger growth, and make it easier for you to spot early signs of trouble.
Cleaning also helps you inspect the plant closely. Many orchid pests hide where casual glances do not go: under leaves, along the midrib, near the crown, inside leaf joints, around old flower spikes, and under dry papery sheaths. Mealybugs look like tiny cotton clumps. Scale can appear as brown, tan, or whitish bumps stuck to leaves and stems. Spider mites may cause fine stippling, pale speckling, or faint webbing. Aphids often cluster around tender growth and flower spikes. The sooner you notice them, the easier they are to remove.
Mineral deposits are another common issue. If you water or mist with hard tap water, calcium and magnesium can leave cloudy white spots on orchid leaves. Fertilizer spray or splashed potting medium can also leave residue. These marks are mostly cosmetic when they sit on the leaf surface, but heavy buildup can make the leaves look dull and may hide pests or damage.
Before You Start: Know Your Orchid’s Weak Spots
Most indoor orchid leaf cleaning problems come from using too much force or too much liquid. Orchids like humidity, but they do not like water sitting in the crown, which is the central growing point where leaves meet. In Phalaenopsis orchids, trapped water in the crown can encourage rot, especially when the plant sits in cool conditions or poor airflow.
Another weak spot is the leaf surface itself. Orchid leaves have a protective outer layer, and while they can handle gentle wiping, they do not need polishing products. Commercial leaf shine sprays, cooking oils, coconut oil, mayonnaise, and thick homemade “shine” mixtures can clog or coat the leaf surface, attract dust, and create a sticky buffet for pests. Your goal is a naturally clean leaf, not a glazed donut.
If your orchid has soft, yellowing, mushy, black, or sunken spots, do not treat the issue as simple dirt. Those symptoms may point to disease, rot, cold damage, sunburn, or bacterial problems. Clean around healthy tissue, isolate the plant if needed, and avoid spreading moisture from suspicious areas to healthy leaves.
Supplies You Need to Clean Orchid Leaves
You do not need a laboratory, a magic potion, or a cart full of plant influencer products. For routine orchid leaf cleaning, gather a few simple supplies:
- Distilled, rain, reverse-osmosis, or filtered water
- A soft microfiber cloth, cotton pad, or clean sponge
- Cotton swabs for leaf joints and pest removal
- A small bowl of lukewarm water
- 70% isopropyl alcohol for small mealybug or scale outbreaks
- Mild liquid soap or insecticidal soap for pest cleaning
- Diluted white vinegar or lemon juice for stubborn mineral spots
- Paper towels to dry the crown and leaf bases
- Clean scissors or pruners if damaged leaves must be trimmed
Use lukewarm water rather than cold water. Orchids are tropical plants, and they react to icy water about as well as you react to stepping barefoot on a Lego. Avoid scented soaps, degreasers, disinfecting wipes, bleach solutions, furniture polish, and anything designed for countertops instead of living leaves.
How to Clean Orchid Leaves Step by Step
Step 1: Inspect the Orchid First
Before wiping anything, look closely at the entire plant. Check the top and underside of every leaf. Look along the leaf midrib, around the crown, at the base of the plant, around aerial roots, and on the flower spike. If you see white cottony patches, sticky residue, tiny crawling insects, webbing, raised bumps, or yellow speckling, you are not just cleaning dust; you are dealing with pests.
If pests are present, move the orchid away from your other houseplants. Isolation keeps mealybugs, mites, and scale from turning your plant shelf into a tiny insect convention. Put the orchid in a bright, indirect-light area where you can treat it easily and watch it for a few weeks.
Step 2: Remove Loose Dust With a Dry Cloth
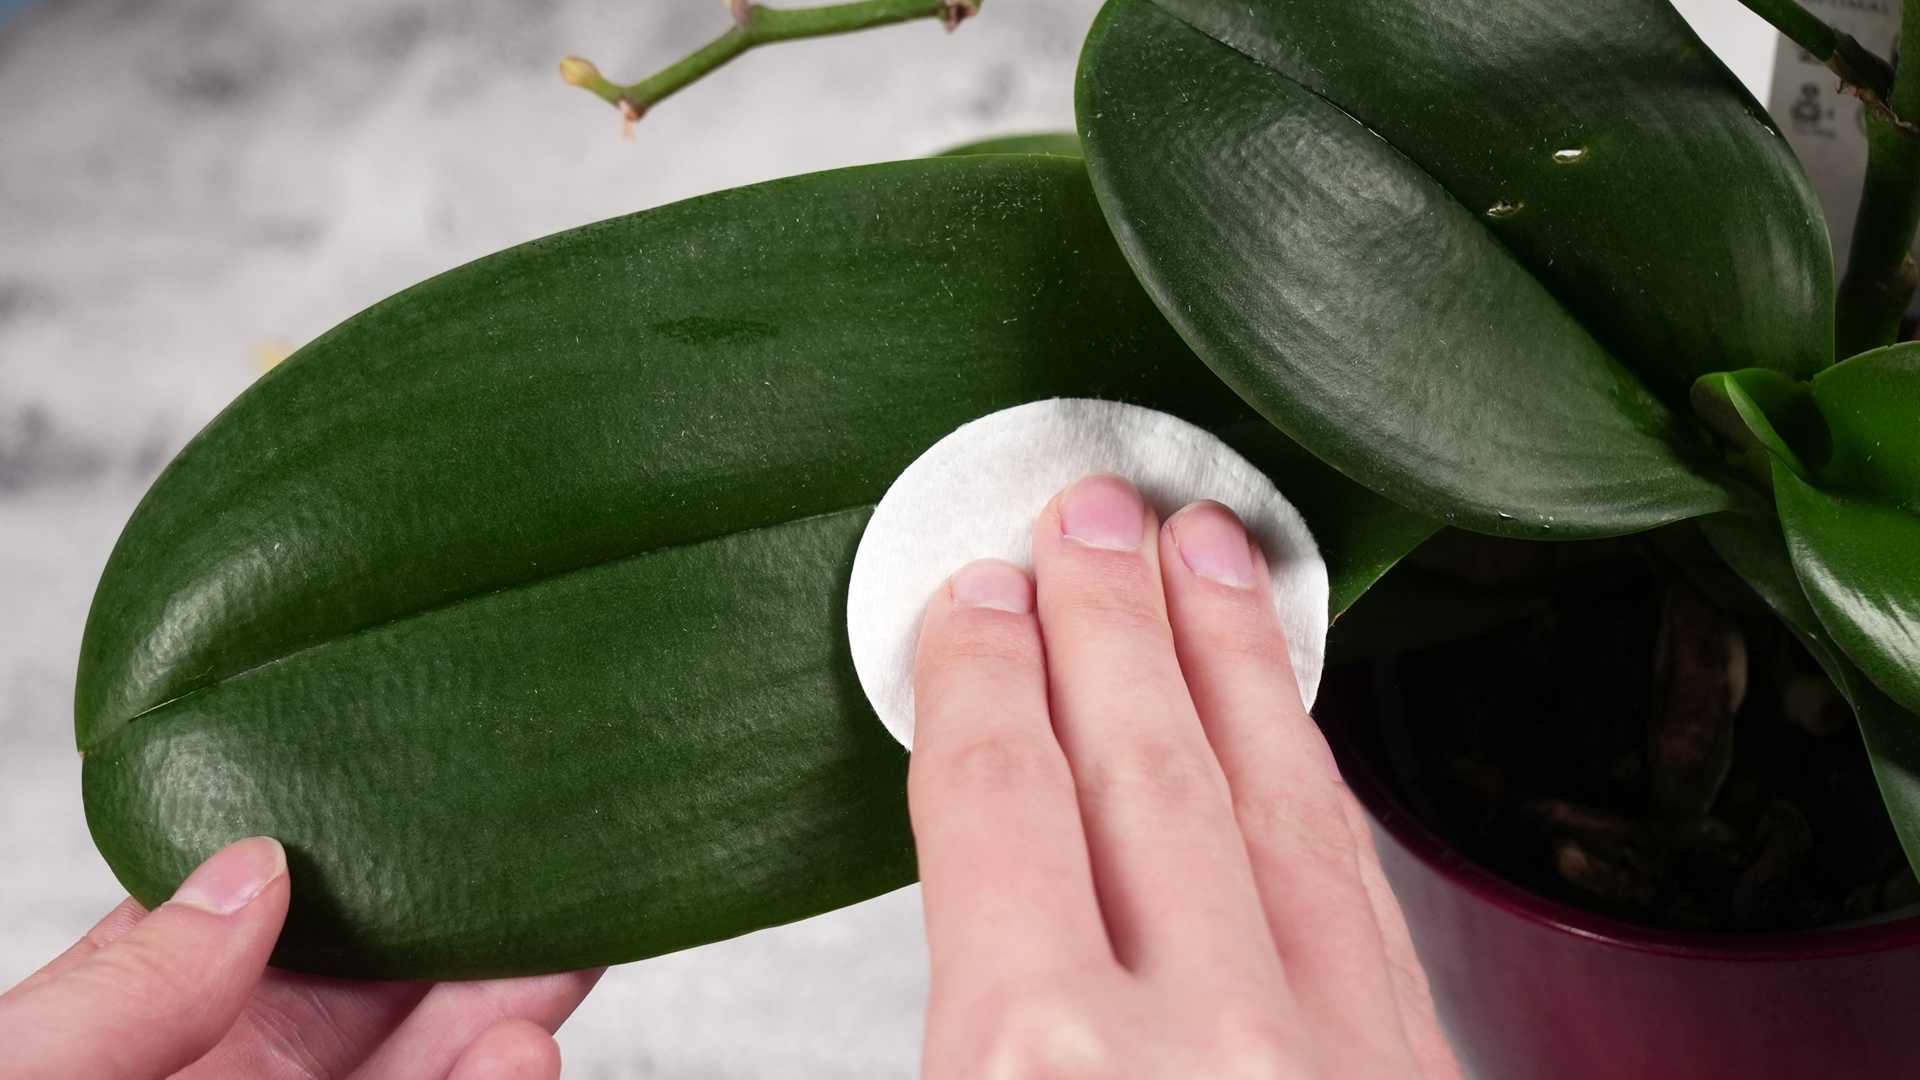
For light dust, start dry. Support the leaf from underneath with one hand and gently wipe from the base of the leaf toward the tip with a soft microfiber cloth. Do not bend the leaf backward or scrub in circles. Orchid leaves are sturdy, but they are not cutting boards.
Dry dusting is useful because it removes loose particles without adding moisture to leaf joints. It also helps you see what is actually stuck to the leaf. If the leaf looks clean after dry wiping, you may not need anything else.
Step 3: Wipe With Lukewarm Clean Water
For ordinary grime, dip a microfiber cloth or cotton pad in lukewarm distilled or filtered water. Wring it out until damp, not dripping. Wipe the top of each leaf from base to tip, then clean the underside the same way. Rinse the cloth often so you do not move dust, pest eggs, or residue from one leaf to another.
Pay special attention to the undersides of leaves because pests love hidden real estate. However, avoid flooding the crown. If water collects where leaves meet, blot it with a dry paper towel or cotton swab. This tiny step can prevent big problems.
Step 4: Use Mild Soap for Sticky Residue
Sticky leaves often mean honeydew, a sugary waste produced by sap-sucking insects such as aphids, mealybugs, and soft scale. If the leaves feel tacky, mix a very mild cleaning solution: a few drops of gentle liquid soap in a quart of lukewarm water. Dip a cloth into the solution, wring it out well, and wipe the leaves carefully.
After cleaning with soap, wipe again with plain water to remove any residue. Soap left on leaves can cause spotting or irritation, especially if the plant is placed in bright light before the leaves are fully dry. Keep the orchid out of direct sun while cleaning and until the foliage has dried.
Step 5: Remove Mineral Deposits From Hard Water Spots
White, chalky spots on orchid leaves usually come from hard water or fertilizer residue. These deposits can be stubborn, but they should still be treated gently. First, try wiping with distilled water. If the spots remain, use a weak acidic solution: mix one teaspoon of white vinegar or lemon juice into one cup of distilled water.
Dampen a cloth with the solution and test it on one small section of one leaf. Wait a day if you are cautious, especially with a valuable orchid. If the leaf shows no damage, wipe the mineral marks gently. Do not pour the solution into the potting mix, and do not let it run into the crown. After treating the spots, wipe the leaf again with plain distilled water and dry any crevices.
Avoid strong vinegar mixtures. More acid does not mean more plant love. It means you are getting closer to salad dressing, and your orchid did not ask to be marinated.
Step 6: Treat Mealybugs and Scale With a Cotton Swab
For small infestations, manual removal is often the best first move. Dip a cotton swab in 70% isopropyl alcohol and touch it directly to mealybugs or scale insects. The alcohol helps break down protective coatings and makes the pests easier to remove. Wipe them away with a clean cotton pad or cloth.
Use alcohol carefully. Do not soak the entire orchid, do not pour alcohol into the crown, and do not treat in hot direct sunlight. After spot-treating pests, wipe the area with clean water. Repeat inspections every few days because eggs and hidden juveniles may remain. Scale and mealybugs are persistent. They are the glitter of the pest world: you think they are gone, and then one shows up three days later.
Step 7: Rinse or Wipe Away Spider Mites
Spider mites prefer warm, dry indoor conditions and usually hide under leaves. If you see fine webbing, pale speckling, or a dusty-looking underside that moves when touched, isolate the plant. Wipe both sides of the leaves with lukewarm water, paying close attention to the undersides.
For a small orchid, you may rinse the leaves gently in a sink using low-pressure lukewarm water. Tilt the plant so water runs away from the crown and potting medium. After rinsing, dry the crown and leaf bases. Repeat cleaning every few days for a couple of weeks, and consider using insecticidal soap or horticultural oil labeled for houseplants and orchids if mites continue.
Step 8: Use Insecticidal Soap, Horticultural Oil, or Neem Carefully
If pests keep returning, a labeled pest-control product may be needed. Insecticidal soap can help with soft-bodied pests when it contacts them directly. Horticultural oil can smother scale and other insects. Neem-based products are also used by many indoor gardeners, though results vary and coverage matters.
Always read and follow the product label. Test on a small area first, especially if your orchid is stressed, blooming, recently repotted, or sitting in warm bright conditions. Spray in the evening or away from direct sunlight, coat the pests directly, and avoid soaking flowers. Many treatments require repeat applications because they do not kill every life stage at once.
What Not to Use on Orchid Leaves
The internet is full of shiny-leaf hacks. Some are harmless once, some are messy, and some are a fast way to annoy a perfectly decent orchid. Avoid commercial leaf shine sprays unless a product is specifically labeled safe for orchids and you know exactly what it contains. Avoid mayonnaise, cooking oil, coconut oil, butter, milk, beer, banana peel residue, and heavy homemade shine recipes. These can attract dust, encourage microbial growth, or leave a film that interferes with normal leaf function.
Also skip harsh household cleaners. Disinfecting wipes, window cleaner, bleach, hydrogen peroxide sprays used casually on healthy leaves, and strong dish soap mixtures can damage leaf tissue. If a product belongs under the kitchen sink with a warning label, it probably does not belong on your orchid leaves.
How Often Should You Clean Orchid Leaves?
Most indoor orchids benefit from leaf cleaning every two to four weeks, depending on your home. If you live near a busy road, keep windows open often, run fans, burn candles, use a fireplace, or have renovation dust floating around, leaves may need cleaning more often. If your home is relatively dust-free, once a month may be enough.
Do not clean on a rigid schedule if the plant does not need it. Look at the leaves. Touch them gently. If you can see dust, feel grit, notice water spots, or spot sticky residue, it is time. If the leaves are already clean and firm, leave them alone. Overcleaning can cause tiny abrasions, spread disease if tools are dirty, or keep the plant too wet.
How to Prevent Dust, Minerals, and Pests From Coming Back
Use Better Water When Possible
Hard tap water is a major cause of white spots on orchid leaves and mineral crust in potting media. If your water leaves spots on glassware, it will probably leave spots on leaves. Use distilled, rain, reverse-osmosis, or filtered water when you can, especially for misting or wiping foliage. If you use tap water, avoid frequent overhead misting, and wipe leaves before deposits become heavy.
Keep Leaves Dry Overnight
Clean orchids earlier in the day so leaves dry before evening. Good timing reduces the risk of fungal or bacterial problems. If water gets into the crown, blot it out. A dry crown is a happy crown, and a happy crown does not send you into a late-night search for “why is my orchid turning black in the middle.”
Improve Airflow Without Creating a Wind Tunnel
Orchids appreciate gentle air movement. A small fan in the room can reduce stagnant moisture and make pests less comfortable. Do not aim a strong fan directly at the plant for hours. The goal is fresh air, not a leaf-flapping weather event.
Quarantine New Plants
Many pest problems arrive on new plants. Keep new orchids away from your existing collection for two to four weeks. Inspect them closely, clean the leaves, and watch for pests before introducing them to the main plant area. This is not rude; it is responsible plant parenting.
Flush the Potting Medium Occasionally
Mineral and fertilizer salts can build up in orchid bark or moss. Flush the potting medium with clean water periodically, allowing water to run freely through the drainage holes. Never let the pot sit in salty runoff. A cleaner root zone supports healthier leaves, and healthy leaves are easier to keep clean.
Common Mistakes When Cleaning Orchid Leaves
One common mistake is spraying the entire plant and walking away. Water left in the crown or leaf joints can create problems, especially in cool rooms. Another mistake is scrubbing hard water spots so aggressively that the leaf surface becomes scratched. Mineral stains are annoying, but damaged tissue is worse.
Some growers also forget to clean the undersides of leaves. This is where pests often begin. If you only clean the top surface, your orchid may look great from above while hosting a secret bug apartment downstairs. Finally, many people treat pests once and assume the problem is solved. Most pest control requires repeated inspection and treatment because eggs, crawlers, or hidden adults may survive the first round.
Experience-Based Tips for Cleaning Orchid Leaves
After caring for indoor orchids through dusty windowsills, hard-water apartments, and the occasional mealybug ambush, one lesson stands out: gentle consistency beats dramatic rescue missions. The healthiest-looking orchids are not usually the ones treated with the fanciest sprays. They are the ones checked regularly, wiped before dust becomes a blanket, and kept dry in the crown after cleaning.
A practical habit is to pair leaf cleaning with watering day. After watering and letting the pot drain, take two minutes to inspect the leaves. Use a damp microfiber cloth on the top and underside of each leaf, then dry the crown with a corner of a paper towel. This routine is quick, and it helps you notice subtle changes. A slightly sticky patch, a tiny cottony dot, or a new yellow speck is much easier to handle early than after it becomes a full pest parade.
For mineral spots, patience matters. In homes with hard water, white marks often return if the same water is used for misting or overhead watering. Switching to distilled or filtered water for leaf cleaning makes a visible difference. The leaves may not become mirror-shiny overnight, but new residue forms more slowly. When spots are stubborn, a very diluted vinegar solution can help, but it should be used like a detail tool, not a shower. Wipe, rinse with plain water, and dry. That simple sequence prevents most cleaning regrets.
With pests, the best experience-based advice is to look where you do not want to look. Check under leaves, behind clips, around old flower spikes, and in the tight spaces between leaves. Mealybugs love those hidden corners. Scale can look like part of the plant until you realize those little bumps were not there last month. A cotton swab with alcohol works well for small problems, but the real secret is repetition. Check again in three days, then again a week later. If you wait a month, the pests will have held a family reunion.
Another helpful trick is to use separate cloths for suspicious plants. Do not wipe a pest-infested orchid and then use the same cloth on a clean one. That is less “plant care” and more “pest relocation service.” Wash cloths in hot water after use, or use disposable cotton pads when dealing with insects.
Finally, accept that orchid leaves do not need to look artificially glossy. A healthy orchid leaf has a natural sheen, but it may also have old scars, faint water marks, or cosmetic blemishes. Cleaning improves plant health and appearance, but it does not erase history. The goal is not perfection. The goal is a plant that can breathe, photosynthesize, resist pests, and keep enough dignity to bloom again when it feels like being admired.
Conclusion
Cleaning orchid leaves is one of the easiest ways to support a healthier, better-looking plant. Dust blocks light, mineral deposits make leaves look cloudy, and pests often hide in places you only notice during a careful wipe-down. With a soft cloth, lukewarm clean water, gentle pest removal, and smart prevention, you can keep orchid foliage fresh without stressing the plant.
The best method is simple: inspect first, wipe gently, remove mineral spots with a mild diluted solution only when needed, treat pests early, and keep water out of the crown. Avoid heavy oils, commercial shine sprays, harsh cleaners, and internet hacks that make your orchid look polished for five minutes but unhappy for weeks. Clean leaves are not just prettier; they are a sign that you are paying attention. And with orchids, attention is half the battle. The other half is resisting the urge to overwater.