Some baby cribs retire quietly. Others become laundry racks, garden trellises, porch swings, or mysterious garage objects that everyone promises to “do something with someday.” Today, that someday has arrived. If you have an old crib rail, a doorway that needs blocking, and a dog who believes “off-limits” means “try harder,” this fur baby gate DIY project may be your new favorite weekend win.
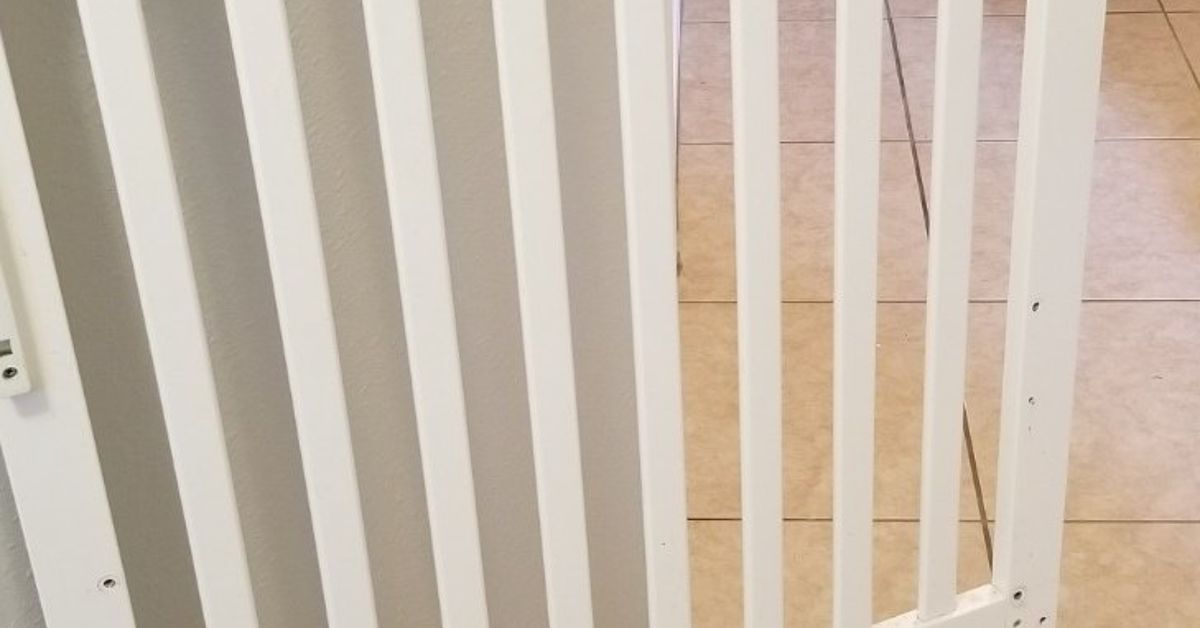
Turning a baby crib into a pet gate is a smart upcycling idea because crib rails are already shaped like a gate: sturdy frame, evenly spaced slats, and enough charm to avoid the “temporary plastic barrier in the hallway forever” look. With the right measurements, hardware, sanding, finish, and safety checks, you can transform unused crib pieces into a custom DIY pet gate for dogs, cats, puppies, or small indoor areas.
Before we pick up the drill like confident home-improvement heroes, one important note: an old crib should not be reused as a sleeping space for a baby unless it meets current safety standards. This project is about repurposing crib parts for pets, not restoring a crib for infant sleep. Safety first, cuteness second, chaos prevention third.
Why Turn a Baby Crib Into a Fur Baby Gate?
A store-bought pet gate works fine, but it rarely fits every home perfectly. Doorways are weird. Hallways are not always square. Stair landings are dramatic. And pets, bless their fluffy little brains, can turn a two-inch gap into a full escape plan.
A crib rail gives you a head start. It already has vertical spindles, a finished frame, and enough height to discourage many small and medium dogs from casually strolling into the kitchen during taco night. It can also look warmer and more intentional than a metal pressure gate, especially in farmhouse, cottage, craftsman, vintage, or family-style interiors.
Best Uses for a Repurposed Crib Pet Gate
This project works especially well for blocking a laundry room, kitchen doorway, mudroom, home office, playroom, or feeding area. It can also help separate pets during meals, keep a puppy away from shoes, or stop a curious dog from greeting guests with full-body enthusiasm.
For stairways, be more cautious. A gate used at the top of stairs should be hardware-mounted into solid structure, not simply pressure-fit or wedged in place. If your dog is large, strong, anxious, or a determined jumper, consider a commercial safety-rated gate or consult a professional before installing a homemade version.
Safety First: What to Check Before You Start
Repurposing is wonderful. Repurposing recklessly is how a cute Pinterest idea becomes a dramatic family story. Before using an old crib rail, inspect every part carefully.
Check the Crib Material
Use solid wood or sturdy composite pieces that are not cracked, warped, splintering, or water-damaged. Avoid rails with peeling paint, unknown antique finishes, soft spots, chew marks, or loose spindles. If the crib is very old, assume the finish may not be pet-safe until proven otherwise.
Inspect the Slat Spacing
Crib slats are usually narrow enough for babies, but pets vary wildly. A tiny kitten, toy-breed puppy, or escape-artist Chihuahua may squeeze through spaces that look impossible to human eyes. Measure the gap between slats and compare it with your pet’s head, shoulders, and determination level. Determination is not an official unit of measurement, but pet owners know it counts.
Remove Unsafe Hardware
Take off any old crib hardware that is no longer needed, especially protruding bolts, sharp brackets, loose screws, decorative caps, or moving parts from drop-side mechanisms. Sand rough areas and fill old holes if needed. Your finished gate should have no sharp points, pinch spots, exposed nails, or chewable loose pieces.
Do Not Use This as a Child Safety Gate Unless Professionally Built
This DIY guide is for a pet barrier. Child safety gates have strict design and installation requirements. A homemade crib-rail gate may not meet those requirements, especially around stairs. If human toddlers are part of the household, choose a certified child safety gate for their protection.
Tools and Materials You’ll Need
The exact materials depend on your doorway width, crib rail size, and whether you want a swinging, folding, or removable gate. Here is a practical starter list for a basic hinged pet gate.
- One sturdy crib side or crib end panel
- Tape measure and pencil
- Drill and drill bits
- Saw, if trimming is needed
- Sandpaper or sanding block
- Wood filler for old holes
- Two or three heavy-duty hinges
- Latch, slide bolt, hook-and-eye latch, or magnetic gate latch
- Wood screws suitable for your wall framing or mounting board
- Mounting board, if attaching to drywall, trim, or uneven surfaces
- Non-toxic paint, stain, or clear sealer
- Felt pads or rubber bumpers to protect walls
For renters or anyone who cannot drill into walls, a freestanding folding pet gate may be a better option. Two crib rails can be connected with hinges to create an accordion-style barrier. Just remember that freestanding gates are easier for large dogs to push, so they are best for calm pets and low-risk areas.
Step-by-Step: How to Transform a Baby Crib Into a Fur Baby Gate DIY
Step 1: Measure the Opening
Measure the width of the doorway or hallway at the top, middle, and bottom. Use the smallest measurement because walls and trim often have a charming habit of being slightly crooked. Also measure the height you want. Most crib rails are already tall enough for small and medium pets, but jumpers may need extra height.
Leave a small clearance gap at the bottom so the gate does not scrape the floor. A half-inch to one inch often works, depending on your flooring and whether rugs are nearby. Do not leave a gap large enough for your pet to squeeze under like a furry pancake.
Step 2: Decide on the Gate Style
There are three popular options. A swinging crib rail pet gate works like a small door and is ideal for daily use. A removable crib rail gate can be lifted out when not needed. A folding crib rail dog gate can stand in wider openings and store flat.
For most homes, the hinged swinging style is the most convenient. You can open it with one hand, install a secure latch, and make it look like a permanent part of the house instead of a temporary solution that somehow stayed for six years.
Step 3: Cut the Crib Rail to Size
If your crib rail is wider than the opening, mark your cut line carefully. Cut from the side that best preserves the frame strength and keeps the slats balanced visually. After cutting, reinforce the cut end with a vertical board if the original side frame was removed.
If the crib rail is narrower than the doorway, add a mounting post or side filler board. This can actually make the project look more custom. Paint or stain the added wood to match the crib rail, and suddenly the “oops, it was too short” moment becomes a design choice. Very fancy.
Step 4: Sand Everything Smooth
Sand the entire gate, focusing on corners, old screw holes, cut edges, and any place your pet might rub against. Rounded edges are better than sharp ones. If the crib rail has glossy finish, scuff-sand it lightly so primer or paint can grip properly.
Run your hand over the wood after sanding. If it feels rough to you, it may feel worse to a pet’s nose, paws, or tail. Wipe away dust with a damp cloth before finishing.
Step 5: Fill Old Holes and Repair Weak Spots
Use wood filler to patch unused screw holes, dents, or small gaps. If any spindle is loose, glue and clamp it securely or replace it. Do not rely on paint to “hold things together.” Paint is makeup, not structural engineering.
If the crib rail flexes too much, add a horizontal support board along the top or bottom. A stable gate should not wobble dramatically when your pet leans on it.
Step 6: Prime, Paint, Stain, or Seal
Choose a durable, pet-safe finish. Water-based enamel, low-VOC paint, or a clear water-based polyurethane can work well once fully cured. Let the finish dry completely according to the manufacturer’s instructions before letting your pet near it.
White paint gives the gate a clean farmhouse look. Natural stain feels warm and rustic. Black or deep gray can look modern and hide paw smudges better than bright white. If your dog drools like a leaky faucet, choose a wipeable finish and thank yourself later.
Step 7: Install the Mounting Board
If you are attaching the gate to a doorway, wall, or stair post, a mounting board can make installation stronger and cleaner. Secure the board into a wall stud or solid trim. Avoid attaching a heavy gate only to drywall. Drywall is not a personality type; it will not “try its best” under pressure.
Use a level to keep the board straight. If your house is old and nothing is square, choose “visually straight” and “mechanically secure” over perfection. The goal is a gate that works, not a museum exhibit.
Step 8: Attach the Hinges
Lay the crib rail on a flat surface and mark hinge placement. Two hinges may be enough for a small lightweight gate, but three hinges offer better support for taller or heavier panels. Pre-drill holes to prevent splitting.
Attach the hinges to the gate first, then hold the gate in position and mark the hinge holes on the mounting board. Use shims or scrap wood underneath to maintain the bottom clearance while installing.
Step 9: Add the Latch
The latch should be simple for humans and confusing for pets. A slide bolt, gate latch, magnetic latch, or hook-and-eye latch can work depending on your pet’s size and cleverness. For dogs who have watched you open doors one too many times, choose a latch with a little extra security.
Install the latch high enough that pets cannot paw it open. Test it several times. Open, close, wiggle, repeat. You are not being dramatic; you are doing quality control with the seriousness of someone who knows what happens when a dog gets into a trash can.
Step 10: Add Wall Protection
Stick felt pads or rubber bumpers where the gate touches the wall or trim. This prevents banging, paint chips, and that tiny but irritating thud that somehow becomes louder every day.
Step 11: Pet-Test the Gate
Introduce the gate while supervising your pet. Let them sniff it. Reward calm behavior. Do not immediately leave them alone with it, especially if they are anxious, energetic, or personally offended by boundaries.
Watch for pushing, chewing, climbing, squeezing, or latch pawing. If your pet tries to climb, add height or use a different barrier. If your dog chews wood, this may not be the best design unless you add a chew-resistant edge or choose a metal gate instead.
Design Ideas to Make It Look Custom
Farmhouse Style
Paint the crib rail white, add matte black hinges, and use a simple black latch. This style works beautifully with shiplap, natural wood floors, and homes where baskets somehow multiply in every corner.
Modern Minimalist
Sand the rail smooth, paint it satin black, and choose hidden or low-profile hardware. Keep the lines clean and avoid extra trim. The result feels less “old crib” and more “custom architectural pet boundary.”
Cottage or Vintage Look
Use a soft cream, sage green, or muted blue finish. Add a small decorative top rail or antique-style latch. Just avoid ornate details that create chew points or trap fur.
Pet Feeding Station Divider
If one pet eats slowly and another inhales food like a vacuum with paws, use the gate to separate feeding zones. A crib rail gate can create a calm dining area and reduce mealtime competition.
Common Mistakes to Avoid
Using Weak Hinges
Small craft hinges are not enough for a gate that gets daily use. Choose sturdy hinges rated for the weight of the panel. A gate that sags after one week is not charming; it is a future repair appointment.
Skipping the Studs
Hardware-mounted gates need solid support. If you cannot hit a stud, install a properly anchored mounting board or use another safe mounting method. The gate should not pull away when pushed.
Leaving Gaps Too Wide
Pets are surprisingly compressible when snacks, visitors, or forbidden rooms are involved. Check side gaps, bottom gaps, and latch-side openings carefully.
Ignoring Your Pet’s Personality
A calm senior dog and a teenage husky have very different opinions about barriers. Build for the pet you have, not the imaginary pet who respects your craftsmanship.
Maintenance Tips for a Long-Lasting DIY Pet Gate
Check screws, hinges, and latch alignment every few weeks, especially during the first month. Wood expands and contracts with humidity, and daily use can loosen hardware. Tighten screws as needed and touch up paint if scratches appear.
Clean the gate with a damp cloth and mild soap. Avoid harsh cleaners that may damage the finish or leave residue pets can lick. If your dog chews the gate, stop using it until you can modify the design safely.
Extra Experience Section: Real-Life Lessons From a Crib-to-Fur-Baby-Gate Project
The best part of transforming a baby crib into a fur baby gate is that the project feels personal. It is not just another rectangle from a store aisle. It has history. Maybe it came from your child’s nursery. Maybe you found it in the garage behind holiday decorations and one lonely tennis racket. Maybe a neighbor gave it away because they were tired of moving it from one corner to another. Whatever its origin, the crib rail already carries a homey feeling that makes the finished gate look less like a barrier and more like furniture.
One practical lesson: measure more than you think you need to. Doorways can be sneaky. A top measurement may be different from the bottom measurement, especially in older homes. If you build the gate based on one quick measurement, you may discover it swings perfectly until it reaches the baseboard, where it suddenly becomes a wooden traffic jam. Measuring at several points saves time, frustration, and the deeply humbling experience of re-cutting something you already painted.
Another lesson is to think about daily life, not just the finished photo. A gate may look adorable closed, but can you carry laundry through it? Can you open it while holding a leash, a grocery bag, or a suspiciously wet dog towel? A swing gate with a comfortable latch is usually better for high-traffic areas. A removable panel may work for occasional use, but if you move it ten times a day, you will eventually start stepping over it. That is when the gate becomes less “DIY genius” and more “household obstacle course.”
Pet behavior matters as much as carpentry. Some dogs respect a barrier immediately. Others take it as a personal challenge. If your dog is a jumper, build higher. If your dog is a chewer, protect edges or choose a different material. If your cat is involved, accept that the cat may treat your gate as either a mild inconvenience or a new climbing gym. Cats do not read project goals.
Finishing also makes a huge difference. A freshly painted crib rail can completely change the look of a hallway. White feels bright and classic, natural wood feels cozy, and black hardware can make the whole piece look intentional. Let the paint cure fully before use. A finish may feel dry to the touch before it is truly hardened, and impatient pets have a gift for discovering tacky paint faster than any human.
Finally, expect small adjustments. You may need to tighten a hinge, move a latch, add a bumper, or sand one spot that rubs. That does not mean the project failed. It means you made a custom piece for a real home with real pets, real walls, and real-life movement. The finished gate should be sturdy, safe, easy to use, and good-looking enough that guests say, “Where did you buy that?” At that point, you may proudly answer, “I made it from a crib,” and enjoy the brief silence while they decide whether you are a DIY wizard or simply very committed to keeping the dog out of the pantry.
Conclusion
Learning how to transform a baby crib into fur baby gate DIY style is a creative way to save money, reduce waste, and build something useful for your home. A crib rail already has the bones of a great indoor pet gate: structure, height, slats, and character. With careful inspection, solid mounting, smooth sanding, safe finishing, and the right latch, it can become a charming custom barrier for your dog, cat, or puppy zone.
The secret is to treat the project like a real piece of home safety equipment, not just a cute upcycle. Build it strong. Install it securely. Test it with your pet. Then enjoy the satisfaction of turning old nursery furniture into a stylish pet solution that says, “I love my fur baby, but no, you may not reorganize the trash.”