There is a special kind of optimism involved in bringing home a thrift-store dresser with one missing knob, three mystery stains, and a drawer that sounds like a haunted accordion. Most people see a problem. A DIYer sees potential, a weekend project, and an excuse to buy another paintbrush.
DIY furniture makeovers are one of the easiest ways to refresh a home without replacing every table, chair, cabinet, and nightstand you own. With a little planning, some basic repair work, and a finish that fits the piece, an outdated item can become useful, beautiful, and surprisingly personal. A scratched coffee table can become a modern centerpiece. A bland laminate dresser can turn into a colorful storage hero. Even an old dining chair can get a second act that is less “garage sale sadness” and more “I found this at a charming boutique.”
The best furniture upcycling projects are not about covering everything in paint and hoping for the best. They are about understanding what you have, choosing the right makeover method, and giving the piece enough preparation to survive real life. That means hands, pets, backpacks, coffee mugs, snack crumbs, and that one family member who puts a sweating glass directly on every wooden surface despite repeated warnings.
Why DIY Furniture Makeovers Are Worth the Effort
A furniture makeover can save money, reduce waste, and give your home a look that does not resemble every other room on the internet. New furniture is convenient, but older furniture often has stronger construction, solid wood parts, interesting details, and character that cannot be ordered in a cardboard box.
Refinishing furniture also gives you more creative control. You can choose a paint color that matches your walls, replace tired hardware with modern pulls, add wallpaper inside cabinet backs, stain a tabletop while painting the base, or turn an ordinary dresser into a statement piece. The result does not need to look expensive. It needs to look intentional.
That word matters: intentional. A successful DIY furniture makeover should look like a design choice, not like a chair lost a fight with a can of spray paint.
Start With the Right Piece
Before you buy paint, inspect the furniture carefully. A makeover is much easier when the piece is sturdy, functional, and worth the effort. Cosmetic flaws are usually fixable. Structural problems require more patience, tools, and occasionally the emotional strength of a medieval bridge builder.
Look for Good Bones
Check whether the piece feels solid when you press on it or sit on it. Open every drawer. Test doors, hinges, shelves, and legs. A little wobble can often be repaired by tightening screws or regluing joints, but major movement may mean the frame needs more serious work.
Solid wood furniture is often an excellent makeover candidate because it can be sanded, painted, stained, repaired, and refinished several times. Veneer furniture can also be beautiful, but it needs a lighter touch because the decorative wood layer may be very thin. Laminate, MDF, metal, wicker, and particleboard can all be updated too, but each material requires a different preparation strategy.
Know When to Leave a Piece Alone
Not every old piece needs a dramatic makeover. Consider preserving furniture with historical value, a valuable maker’s mark, rare craftsmanship, or meaningful family history. A genuine antique may be worth cleaning, repairing, and lightly restoring rather than covering with bright blue paint and decorative transfer decals.
That does not mean every old brown dresser is a museum treasure. It simply means you should pause before sanding through a century of character. Search for labels, stamps, original hardware, and construction clues before starting. When in doubt, photograph the piece and research it first.
Safety First: The Unsexy Step That Saves the Project
DIY furniture makeovers are fun, but dust, old finishes, chemical strippers, and paint fumes deserve respect. Work in a ventilated area, protect floors with drop cloths, wear eye protection when sanding, and use gloves when handling cleaners, stains, or stripping products.
If you are disturbing old painted surfaces in a home built before 1978, take lead safety seriously. Sanding or scraping older paint can create hazardous dust. Consider testing before beginning, keep children and pets away from the work zone, and use lead-safe practices if there is any concern. A colorful makeover is not worth turning your living room into a dust laboratory.
Also, handle oily rags carefully. Some oil-based finishing products can generate heat as they cure, especially when rags are crumpled together. Spread used rags flat outdoors or follow the manufacturer’s disposal instructions. Your furniture makeover should end with a beautiful table, not a surprise visit from the fire department.
Choose the Right Makeover Method
The finish you choose should match the furniture material, the condition of the piece, and how much wear it will receive. A decorative side table can handle a more experimental finish than a dining table used three times a day by a family that believes placemats are optional.
Painted Furniture
Painting is ideal when wood is badly stained, the existing finish is uneven, or you want a dramatic style change. It works especially well for dressers, nightstands, side tables, chairs, bookcases, and cabinet-style storage pieces.
For a durable painted finish, clean first, lightly sand glossy areas, repair dents or holes, apply primer when needed, and use thin coats. Furniture paint, cabinet paint, acrylic enamel, and other durable interior paints are usually better choices than ordinary wall paint for high-touch surfaces.
A satin or semi-gloss finish is practical for many projects because it is easier to wipe clean. Matte and chalk-style finishes can create a softer, more relaxed look, but they may need a protective topcoat depending on the product and how heavily the furniture will be used.
Wood Stain and Natural Finishes
Staining is a great choice when the wood grain is attractive and you want the piece to feel warm, classic, or more expensive than it was when you found it under a pile of lawn decorations at a yard sale.
Refinishing wood furniture usually involves removing or dulling the old finish, sanding gradually, cleaning away dust, applying stain if desired, and sealing the surface. Always test stain on a hidden spot or scrap wood first. Stain can look dramatically different depending on the wood species, old finish residue, sanding level, and your ability to resist applying “just one more coat.”
Two-Tone Furniture
Two-tone furniture makeovers are popular because they create contrast without making the piece feel overdesigned. A common approach is to stain the top of a table while painting the base. Another option is to paint the exterior of a dresser and leave the drawer interiors natural.
This works especially well when you want a modern farmhouse, coastal, transitional, or casual vintage look. Use a restrained color palette so the piece feels balanced. One bold color can look stylish. Six competing colors can look like a craft store got into an argument.
Hardware, Legs, and Small Details
Sometimes the fastest furniture makeover is not paint. New drawer pulls, knobs, feet, casters, hinges, or decorative trim can completely change a piece. Replacing dated brass knobs with matte black pulls can make a dresser look cleaner and more modern. Adding tapered legs can give a boxy cabinet a mid-century feel. Decorative molding, wood appliques, cane panels, and peel-and-stick wallpaper can add personality without requiring a full refinish.
How to Make Over Furniture Step by Step
1. Clean the Surface Thoroughly
Furniture collects more grime than it appears to. Dust, cooking grease, furniture polish, wax, and hand oils can interfere with paint adhesion. Clean the piece with a gentle degreasing cleaner or mild soap solution, then allow it to dry fully.
Do not rush this part. Sanding a dirty surface can push grime deeper into scratches and pores. It is like washing a car after waxing it: technically possible, emotionally regrettable.
2. Remove Hardware and Label Everything
Take off handles, pulls, hinges, knobs, shelves, and removable drawers when possible. Put screws and small parts in labeled bags. This simple step prevents the classic DIY moment when you finish a beautiful dresser and discover you have four screws left over with no idea whether they are important.
3. Make Repairs Before Painting
Fill small dents, scratches, nail holes, and unwanted hardware holes with wood filler. Let it dry fully, then sand it smooth. Tighten loose screws, reglue wobbly joints, and repair loose veneer before adding a finish.
If drawers stick, inspect the runners and edges. Sometimes a light sanding, wax, or minor adjustment is enough to improve movement. Do not paint the drawers shut unless you are intentionally creating a sculpture called “The Cabinet of Regret.”
4. Sand Only as Much as Necessary
Sanding helps create a surface that paint or stain can grip. For many painted furniture projects, you only need to dull the glossy finish rather than remove every layer down to bare wood. Use medium or fine sandpaper and move with the grain on wood surfaces.
For stained or natural wood finishes, sanding may need to go deeper. Start more aggressively only when you need to remove old finish, scratches, or discoloration. Then move to finer grits for a smoother result. Be careful around edges and corners, especially on veneer, where sanding too hard can expose the layer underneath.
5. Prime When the Surface Calls for It
Primer is especially useful on bare wood, laminate, slick surfaces, stained wood that may bleed through paint, metal, MDF edges, and furniture changing from dark to light. A bonding primer helps paint adhere to difficult surfaces such as laminate and melamine.
Some specialty paints advertise that they do not require primer. They may work well in the right conditions, but cleaning and light scuff sanding are still smart insurance. Skipping preparation can save thirty minutes today and create peeling paint next month. That is not efficiency. That is merely postponing your disappointment.
6. Apply Thin, Even Coats
Use a quality brush for detailed areas, a small foam roller for smooth flat surfaces, or a sprayer for larger projects if you have a controlled workspace. Apply several thin coats instead of one heavy coat. Thin layers dry more evenly and reduce drips, brush marks, and the dreaded “why is this paint still tacky after three days?” situation.
Allow each coat to dry according to the product label. Lightly sanding between coats can improve smoothness, especially on tabletops, cabinets, and furniture that will receive frequent handling.
7. Protect the Finish and Let It Cure
Paint may feel dry long before it is fully cured. Give the furniture time before placing heavy objects on it, closing drawers tightly, or hosting a full dinner party on your newly painted table.
Use a suitable protective topcoat when needed, especially for tabletops, desks, bathroom storage, kitchen furniture, and high-traffic pieces. Choose the sheen carefully: matte looks relaxed, satin is versatile, and semi-gloss is durable and easier to wipe clean.
Furniture Makeover Ideas for Every Room
Turn a Thrifted Dresser Into a Statement Piece
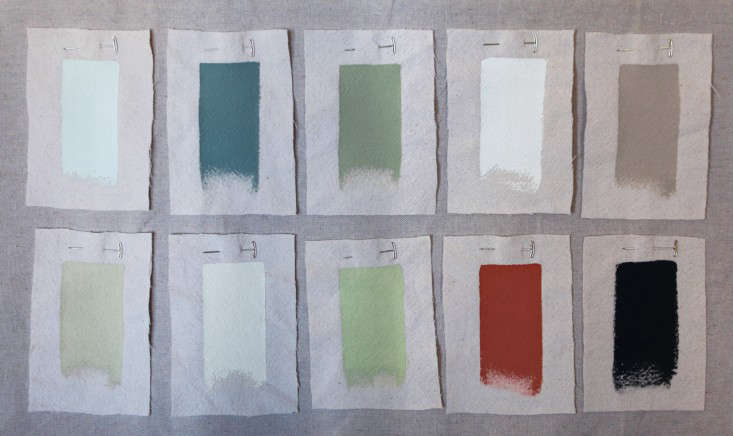
Paint the dresser frame in a deep navy, forest green, warm white, or soft clay color. Replace the hardware with knobs or pulls that match your room’s style. For extra personality, line drawer interiors with removable wallpaper or paint the drawer sides in a contrasting color.
Refresh a Coffee Table Without Hiding the Wood
Sand the top lightly, stain it in a richer tone, and seal it with a durable clear finish. Paint the base black, cream, charcoal, or muted green. This combination gives the table a custom look while keeping some natural wood warmth.
Make a Basic Nightstand Feel Custom
Add decorative trim to drawer fronts, swap the knobs, paint the body, and use a contrasting color inside the drawer or shelf area. A simple nightstand can become a polished bedroom accent with a few small changes.
Update Dining Chairs One Element at a Time
For wooden chairs, paint the frame and reupholster the seat cushion with durable fabric. For metal chairs, remove rust, clean thoroughly, use a metal-friendly primer if needed, and apply a suitable paint. Keep the makeover practical: dining chairs get dragged, bumped, sat on, and occasionally used as ladders by people who should know better.
Common DIY Furniture Makeover Mistakes
The most common mistake is rushing. Furniture projects reward patience more than enthusiasm. Cleaning, sanding, drying, curing, and repairing may not be glamorous, but they are the reason a makeover lasts.
Another mistake is choosing the wrong finish for the surface. Laminate needs strong adhesion. Bare wood may need primer or conditioning depending on the look you want. Tabletops need more durability than decorative shelves. Outdoor furniture needs weather-appropriate products. One paint cannot solve every furniture problem, no matter how confident the label looks.
Finally, avoid overdecorating. A piece does not need new legs, gold wax, stencils, wallpaper, distressing, transfers, tassels, and a dramatic ombré finish all at once. Pick one or two strong ideas and let them do the work.
DIY Furniture Makeovers: The Big Picture
The most rewarding furniture makeovers do more than improve an object. They change how you see your home. You start noticing shape, texture, color, storage potential, and materials. You stop seeing old furniture as automatically disposable. You begin seeing possibility in the odd little cabinet on the curb, the wobbly chair at a flea market, and the dresser your aunt has been trying to give away since 2014.
That is the real magic of furniture upcycling. It teaches you that a home can evolve without being replaced from top to bottom. A little repair, a better finish, and one brave color choice can make a forgotten piece feel useful again.
Experience: What DIY Furniture Makeovers Teach You Over Time
After a few DIY furniture makeovers, most people develop a healthy respect for preparation. The first project often begins with wild confidence. You find an old table, choose a paint color, buy a roller, and assume the transformation will be finished before lunch. Then you discover that the table has sticky residue, uneven varnish, loose legs, old hardware, and one inexplicable crater that appears to have been created by a tiny meteor.
That first experience teaches an important lesson: the makeover starts long before the paint goes on. Cleaning is not optional. Sanding is not punishment. Primer is not a corporate conspiracy invented to sell more cans. Each step makes the final result smoother, stronger, and far less likely to peel when someone places a mug on it.
Another lesson is that furniture has personalities. Some pieces cooperate. A solid wood nightstand may sand beautifully, accept paint evenly, and make you feel like a home-improvement genius. Other pieces fight back. Laminate furniture can be slippery. Veneer can be delicate. Old drawers can become stubborn little filing cabinets with emotional boundaries. The trick is not to force every project into the same process. Learn the material first, then choose the approach.
DIY furniture makeovers also improve your design instincts. At first, you may want to use every idea at once: bright paint, new hardware, stencils, wallpaper, metallic wax, decorative trim, and maybe a dramatic stripe because the internet made it look easy. Over time, you learn that restraint is often more powerful. A rich color, clean hardware, and a smooth finish can say more than a dozen decorative techniques competing for attention.
There is also a satisfying shift in how you shop. You start looking past surface flaws. A scratched desk becomes a potential workspace. A dated cabinet becomes entryway storage. A small table becomes a plant stand, bar cart, bathroom vanity, or bedside table. You begin evaluating furniture by shape, structure, size, and usefulness instead of whether it already matches your home.
Perhaps the best part is the story each project carries. A handmade makeover feels different from something purchased new because you remember the work behind it. You remember choosing the color, fixing the drawer, sanding the top, waiting impatiently for paint to dry, and realizing halfway through that you should have bought more drop cloths. The finished furniture becomes part of the room, but it also becomes proof that you can take something overlooked and make it useful again.
That is why DIY furniture makeovers remain so popular. They are practical, creative, budget-friendly, and occasionally humbling. They let you experiment without rebuilding an entire room. They turn imperfections into design opportunities. And when the project goes well, you get more than a refreshed piece of furniture. You get the deeply satisfying feeling of saying, “I made that,” while casually pretending the process did not involve six trips to the hardware store.