Witch broom party favors are the rare craft that hits the sweet spot: cute, inexpensive, theme-perfect, and weirdly satisfying to make. Also, they’re basically tiny trophies that say, “Thanks for comingnow please leave before I start cackling in the pantry.” Whether you’re throwing a Halloween bash, a spooky-season birthday, a classroom party, or a “let’s pretend it’s fall even though it’s 82°” get-together, these little brooms deliver maximum charm with minimum drama.
This guide walks you through several DIY optionsfrom rustic cinnamon-stick brooms to colorful paper-straw versions to edible broomsticksplus packaging ideas, personalization tips, and an assembly-line strategy so you can make a bunch without losing your sanity (or your hot glue gun).
Why Witch Broom Party Favors Work So Well
Great party favors do three jobs at once: they fit the theme, they feel intentional, and they’re easy to take home without requiring a second backpack. Mini witch brooms check all three boxes. They can be tucked into treat bags, used as place cards, tied onto gift boxes, or displayed in a jar like a tiny broom parking lot.
Even better, they’re flexible. Want “witchy-cute”? Add satin ribbon and glittery tags. Want “cottagecore haunted woods”? Use twigs, jute, and dried herbs. Want “my party budget is a whisper”? Go for paper straws and raffia. Want “I’m feeding a small army”? Make edible broomsticks and call it a day.
Pick Your Broom Style (and Gather Supplies)
Before you start, decide what kind of broom favor fits your party: decorative, functional (place cards, drink markers), or edible. Then choose a handle and bristles combo that matches your vibe.
Common Handle Options
- Cinnamon sticks (classic, smells amazing, naturally “witchy”)
- Small twigs (free, rustic, perfect for woodland themes)
- Paper straws (bright, kid-friendly, easy to cut)
- Wooden skewers/dowels (clean, uniform, great for big batches)
- Pretzel rods or pretzel sticks (for edible versions)
Common Bristle Options
- Raffia (the MVP: lightweight, broom-like, easy to fluff)
- Jute twine (more rustic; looks great with natural tags)
- Brown paper (fast and accessible; great for “broom treat bags”)
- Cheese strings (edible “bristles” for snack broomsticks)
Tools You’ll Actually Use
- Scissors (sharp enough to cut raffia cleanly)
- Hot glue gun + glue sticks (or craft glue for slower, kid-safe sessions)
- String, embroidery floss, jute, or thin ribbon (for tying)
- Optional: double-sided tape, washi tape, small rubber bands, mini clothespins
- Optional: tags, cardstock, metallic marker, wax seal stickers (extra flair)
Quick safety note: If kids are helping, consider low-temp glue guns, pre-cutting materials, or swapping hot glue for strong double-sided tape. Tiny brooms are adorable, but “tiny finger glued to cinnamon stick” is not the kind of memorable party detail you want.
DIY Method #1: Classic Cinnamon Stick Mini Broom Favors (Most Charming, Least Fussy)
This is the “signature look” mini witch broom: cinnamon stick handle + raffia bristles + a tidy tie. It smells like fall, looks handmade in the best way, and scales easily for batches.
What You’ll Need
- 1 cinnamon stick per broom (or small dowel/twig)
- Raffia (natural or colored)
- Embroidery floss, thin twine, or narrow ribbon
- Hot glue (optional but helpful)
- Scissors
Step-by-Step
- Cut your raffia. Aim for strands about 7–8 inches long. You want enough length to fold in half and still look broom-y, not like a stressed-out paintbrush.
- Make a small bundle. Gather 20–35 strands (depending on how full you want the broom head). Keep ends aligned.
- Tie the bundle near one end. Wrap embroidery floss/twine around the bundle about 1 inch from one end, then knot tightly. This creates a “bristle base.”
- Fold the bundle in half. Fold so the tied section sits at the bend, creating bristles on one side and a neat “top” on the other.
- Secure the fold. Wrap twine around the folded top (right at the bend) and knot firmly. You’re basically creating a little raffia “skirt.”
- Insert the cinnamon stick. Slide the cinnamon stick into the folded top. Add a small dab of hot glue inside the fold first if you want extra security.
- Bind it like a pro. Wrap twine around the top of the bristles (where bristles meet handle) several times. Knot and trim ends neatly.
- Trim the bristles. Snip the raffia ends straight across for a clean finish, or cut at a slight angle for a more rustic look.
Make It Look Extra Polished
- Hide knots: Tie your final knot on the “back” side, then cover it with a tiny bow or tag.
- Fluff, then trim: Fan the bristles with your fingers first, then trim. Cutting too early can make the broom look sparse.
- Add a charm: A mini star, tiny bell, or small wooden bead instantly upgrades the vibe.
DIY Method #2: Paper Straw Witch Brooms (Bright, Modern, Kid-Friendly)
If you want color, consistency, and speed, paper-straw brooms are your best friend. They’re also great when you need a uniform look for a classroom party or a big group where “every favor should look the same” is the unspoken law.
What You’ll Need
- Paper straws (patterned or solid)
- Raffia (natural or dyed)
- Hot glue or strong craft glue
- Washi tape or decorative tape (optional)
- Scissors
Step-by-Step
- Cut the straws. For mini favors, cut each straw in half (or to about 4 inches). For place-card brooms, keep them longer.
- Glue the raffia around one end. Add a thin ring of glue near one end of the straw and press raffia strands onto it, wrapping all the way around.
- Wrap and secure. Add a second thin ring of glue slightly above the first and wrap the raffia upward to lock it in.
- Cover the join. Wrap washi tape around the raffia “collar” to hide glue and give it a clean finished line.
- Trim bristles. Snip ends straight, then fluff slightly.
Design tip: Black-and-white striped straws scream “classic witch,” while orange polka dots lean playful. Gold foil straws? That’s a glam coven and nobody can tell you otherwise.
DIY Method #3: Rustic Foraged Twig Mini “Besom” Brooms (Woodland Witch Energy)
Want favors that look like they were handcrafted in a mossy cottage, seconds before a crow delivered your invitations? Use twigs. This method feels authentically handmade and costs almost nothing if you can collect materials responsibly.
What You’ll Need
- Small straight twigs for handles (4–6 inches)
- Short, thin twigs or dried grasses for bristles
- Jute twine or thin string
- Optional: a small zip tie or rubber band (hidden under twine)
- Pruners/scissors
Step-by-Step
- Prep your twigs. Choose handles that are fairly straight. Snip off side nubs so they don’t poke guests (or the party cake).
- Create a bristle bundle. Gather thin twigs or dried stems into a small bunch, like a tiny bouquet.
- Attach to the handle. Place the bundle against the end of the handle twig. Hold it tightly.
- Secure with a starter tie. Wrap twine around the bundle and handle several times, pulling snug. Knot firmly.
- Reinforce. For extra strength, slip a tiny rubber band or zip tie around the bundle first, then cover it fully with twine.
- Trim and shape. Snip bristles to an even length. Leave it slightly uneven if you want that “forest-made” look.
Clean-ish note: If you’re using foraged materials for party favors, brush off dirt, let them dry completely, and avoid anything sappy, moldy, or freshly green (it can rot or stain). “Authentic” is great“composting in real time” is less great.
DIY Method #4: Edible Witch Broomstick Party Favors (Fast, Funny, and Actually Useful)
Edible broomstick favors are perfect when you want something cute that won’t become “mysterious drawer object” by next week. They’re also a lifesaver for parties with lots of kidsbecause snacks disappear, and clutter doesn’t.
Option A: Cheese + Pretzel Mini Broomsticks
- String cheese sticks
- Pretzel sticks
- Chives or thin spinach strips (to “tie” the broom)
- Knife + cutting board
- Cut cheese into short sections. One cheese stick can make multiple mini brooms.
- Fray the bristles. On one end, slice thin strips downward, stopping before you cut all the way through.
- Insert pretzel handle. Push a pretzel stick into the uncut end of the cheese.
- Tie it off. Wrap a chive or spinach strip around the top of the bristles and knot gently.
Food-safety tip: Keep refrigerated until serving, and if you’re sending them home, pack them in an insulated bag or use shelf-stable versions (see Option B).
Option B: Pretzel Rod + Licorice “Broom” Favors (Shelf-Stable)
For a no-fridge favor, use pretzel rods and licorice laces. Cut licorice into short strands for bristles, bundle them at one end of the pretzel rod, then tie tightly with a matching licorice lace or food-safe string. Wrap each broom in a clear treat bag and tie with ribbon for a store-bought look that’s secretly DIY.
Packaging Ideas That Make Your Favors Look Like You Tried (Even If You Made Them During a TV Episode)
Packaging is where “cute craft” becomes “party favor.” Luckily, broom favors are lightweight and easy to dress up.
Easy Packaging Wins
- Clear treat bags + ribbon: Slide one mini broom in, add candy confetti or a small cookie, and tie with orange/black ribbon.
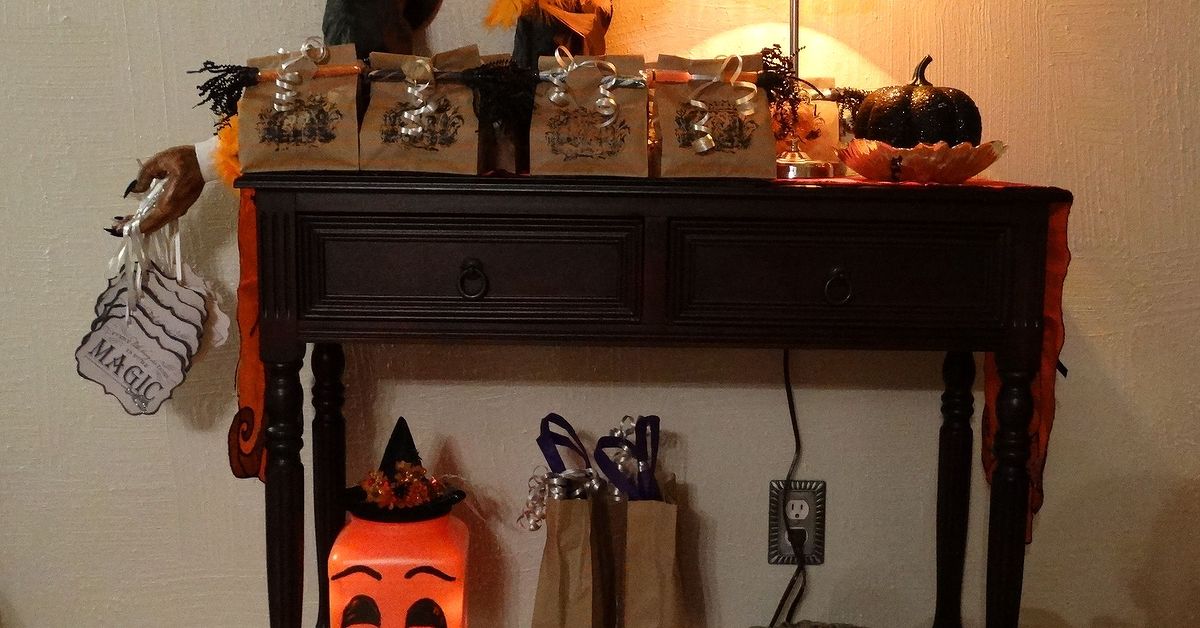
- Mini kraft bags: Staple or clip a broom to the outside like it’s “parked” there.
- Place card favors: Add a small name tag to the broom handle and place it on each plate.
- Jar display station: Stand brooms upright in jars, mugs, or a small cauldron bowl and let guests grab one on the way out.
Tag Ideas (Copy-Friendly Wording)
- “Thanks for sweeping by!”
- “A little magic to take home.”
- “Official Junior Witch Toolkit (Broom Included).”
- “Take a broomleave a doom.” (Okay, maybe only for the dramatic crowd.)
Style tip: Match your tie material to your party theme. Satin ribbon feels polished. Jute twine feels rustic. Embroidery floss looks crafty-cute. A tiny strip of black tulle is peak spooky glam.
Batch-Making Strategy: How to Make 24–100 Broom Favors Without Melting Into a Pile of Raffia
If you’re making more than a dozen, the secret is an assembly line. Do one step for all brooms before moving to the next step. It’s faster, cleaner, and you’re less likely to end up with 17 finished brooms and 9 “unfinished broom mysteries.”
Assembly Line Plan
- Cut everything first: Pre-cut raffia lengths, tags, and handles.
- Bundle bristles: Make all raffia bundles and tie them.
- Attach handles: Insert handles and secure with glue if needed.
- Wrap collars: Do all binding wraps and final knots.
- Trim and fluff: Final shaping so they look consistent.
- Tag and package: Add labels last to avoid tangles and crumpled paper.
Quantity Cheat Sheet
- 24 favors: Great for cinnamon sticks + raffia. Plan 60–90 minutes with a cozy playlist.
- 48 favors: Paper straws save time; prep tags in advance.
- 100 favors: Consider a simpler build (paper-straw brooms or shelf-stable edible brooms) and recruit a helper.
Troubleshooting (Because Hot Glue Has a Personality)
My broom bristles look limp.
Use more raffia, or switch to shorter bristle length. Fluff with fingers before trimming, and bind the collar tighter so the bristles fan outward instead of sliding down.
The handle keeps slipping out.
Add a dab of hot glue inside the folded raffia before inserting the handle. For twigs, roughing up the surface slightly helps the twine grip.
My brooms look inconsistent.
Measure raffia length and use the same number of strands per bundle. Consistency is less about perfection and more about repeating the same tiny choices.
The raffia is fraying everywhere.
Trim with sharp scissors. Dull scissors chew raffia like it owes them money. Also, store raffia bundles flat so they don’t kink.
Conclusion: A Little Handmade Magic Goes a Long Way
Charming witch broom party favors are proof that you don’t need expensive supplies to create something memorable. With a handful of raffia, a simple handle, and a few clever finishing touches, you can make favors that double as decor, conversation starters, and tiny take-home smiles. Pick the style that fits your party (rustic, colorful, edible, or glam), set up a quick assembly line, and let your inner craft-witch do her thingresponsibly, with snacks nearby.
Experiences and Real-World Notes From Making Witch Broom Party Favors (The Extra Stuff That Helps)
In real party prep, the “how” is only half the storythe other half is everything that happens around the craft. People who make witch broom party favors for classrooms, Halloween gatherings, or spooky birthdays tend to run into the same little surprises, so here are the most useful patterns and lessons that come up again and again.
First: these favors feel more special when they match the party’s personality, not just the theme. If the event is playful (lots of kids, bright décor, silly games), paper-straw brooms win because they look cheerful and intentionalespecially if the straw color repeats something already on the table (napkins, plates, balloons). If the party is more “cozy fall night” (mums, pumpkins, warm lighting), cinnamon-stick brooms instantly blend in. People often underestimate how much the handle affects the overall look; swapping a cinnamon stick for a twig can change the whole vibe from “cute craft” to “forest witch artifact.”
Second: batch-making is where most stress disappearsor shows up. When crafters try to complete one broom at a time, the early brooms look amazing and the last five look like they were made during a thunderstorm. An assembly line keeps quality consistent, and it prevents the “why is my glue stringing across everything like spiderwebs?” problem from escalating. A simple trick that helps in big batches: set out a small “sizing sample” broom you love and keep it nearby as a visual reference. It’s surprisingly easy to drift into longer bristles, looser knots, or uneven trims as you get tired.
Third: packaging can do more heavy lifting than people expect. The same mini broom can look rustic, elegant, or goofy depending on the tag, ribbon, and bag. Crafters often find that a plain broom becomes “party favor worthy” the second it’s paired with a clean tag and a tidy bow. If your brooms are slightly imperfect (which is normalhandmade things have opinions), packaging creates a unified look. Clear treat bags also help keep raffia from frizzing in transit, especially if you’re transporting favors in a box or giving them out at a busy event where they’ll get handled a lot.
Fourth: edible broom favors are a crowd-pleaser, but they come with reality checks. Cheese-and-pretzel brooms look adorable on a tray, yet they’re best served close to party time so the cheese stays safe and appetizing. For sending favors home, many hosts prefer the shelf-stable pretzel-rod-and-licorice version because it travels well and doesn’t need refrigeration. People also notice that edible brooms get giggles from kids and adults alikesomething about a snack that looks like witch gear makes everyone feel like they’re in on the joke.
Fifth: the “helpful hands” situation matters. If kids are participating, the craft goes more smoothly when the adult handles the hot glue and the kids do the fun parts: picking ribbon colors, tying bows, choosing tags, or fluffing and trimming bristles (with supervision). In group settings, giving everyone the same limited set of choiceslike three ribbon colors and two tag designsreduces decision chaos while still feeling personalized. People regularly report that the craft station becomes an activity guests remember, especially when the end result is something they can take home.
Finally: the best compliments usually come from tiny details. A subtle cinnamon scent, a mini charm, a name tag that doubles as a place card, or a punny message (“Thanks for sweeping by!”) makes the favor feel thought-through. Even if the brooms are simple, adding one “finishing touch” creates that boutique, custom-party feelwithout turning your kitchen into a craft tornado for three straight days.