Wood pallets are the garden world’s version of a plain white T-shirt: cheap, flexible, and surprisingly stylish when handled by someone with a plan. One minute they are carrying boxes behind a warehouse; the next, they are holding strawberries, herbs, compost, garden tools, or a tiny jungle of petunias. That is the magic of pallet gardening.
Better yet, using pallets in the garden is budget-friendly, sustainable, and beginner-friendly. You do not need a professional workshop or a garage full of expensive tools. In many cases, a drill, screws, landscape fabric, sandpaper, and a little optimism will get you started. The optimism is important. Pallets have nails, splinters, and the personality of a stubborn goat.
Still, before you drag home every wooden pallet you see behind a grocery store, there is one serious rule: choose safe pallets. For garden projects, especially edible gardens, look for pallets stamped HT, which means heat-treated. Avoid pallets marked MB, which indicates methyl bromide fumigation. Also skip pallets with chemical spills, oily stains, strange odors, or mystery goo. Mystery goo has never improved a tomato.
Once you have a clean, sturdy pallet, the possibilities open up fast. From vertical herb gardens to compost bins, raised beds, privacy screens, and rustic potting benches, pallets can turn a simple yard into a practical, charming outdoor space. Below are some of the best DIY pallet garden ideas, plus practical tips to help your projects last longer and look less like “free wood panic” and more like “intentional rustic design.”
Why Pallets Work So Well in the Garden
Pallets are popular in garden DIY projects for three big reasons: structure, cost, and character. A pallet already has a frame, slats, and spacing, so it can be transformed into something useful without starting from raw lumber. That is a huge win for beginners.
They are also inexpensive. Many pallets can be found for free or at low cost from local businesses, warehouses, garden centers, or contractors. Always ask before taking one. “Free-looking” is not the same as free, and forklifts do not enjoy surprises.
Finally, pallet wood has a naturally rustic look. It fits cottage gardens, farmhouse yards, urban patios, and relaxed backyard spaces. With sanding, stain, outdoor paint, or a clear sealant, it can become neat and polished. Left unfinished, it weathers into a casual gray tone that looks like it has been telling stories since 1893.
Safety First: How to Choose Garden-Safe Pallets
Look for the HT Stamp
The safest pallets for garden use are usually heat-treated pallets marked with HT. Heat treatment uses high temperature to control pests in the wood instead of chemical fumigation. This is especially important if you plan to grow vegetables, herbs, strawberries, or anything else you may eventually put in your mouth with great confidence.
Avoid MB Pallets
Pallets stamped MB were treated with methyl bromide, a fumigant used for pest control in shipping. Do not use MB pallets for vegetable beds, compost bins, herb planters, or anything that touches food crops. Honestly, do not use them for cozy garden projects at all. Your basil deserves better.
Skip Stained or Smelly Wood
Even if a pallet is heat-treated, inspect it carefully. Avoid pallets with oil stains, chemical smells, mold, excessive rot, broken boards, or heavy contamination. Pallets live hard lives. Some carried clean boxes. Others carried industrial liquids and bad decisions. Choose wisely.
Sand and Seal
Pallet wood can be rough, so sand exposed surfaces before using it around hands, kids, pets, or knees. For outdoor longevity, apply an exterior-grade, low-VOC sealant, stain, or paint. For edible garden projects, avoid finishes that are not labeled safe for garden or exterior use around plants.
1. Build a Vertical Pallet Herb Garden
A vertical pallet herb garden is one of the easiest and most useful pallet projects. It is perfect for small patios, balconies, side yards, and anyone who wants fresh basil without walking seventeen feet in slippers.
To make one, stand a pallet upright and staple landscape fabric or heavy-duty garden fabric along the back and bottom of each planting pocket. Fill the pockets with quality potting mix, then plant herbs such as basil, parsley, thyme, oregano, mint, chives, or cilantro.
Place the pallet where it receives the right light for your herbs. Most Mediterranean herbs, such as rosemary, thyme, and oregano, love sun and excellent drainage. Softer herbs like parsley and cilantro appreciate a little afternoon shade in hot climates.
Water slowly from the top and let moisture move downward. Vertical pallet gardens dry out faster than in-ground beds, so check them often during summer. If the top plants look cheerful and the bottom plants look like they are writing a sad country song, adjust your watering routine.
2. Create a Pallet Strawberry Planter
Strawberries and pallets are a natural match. The gaps between pallet slats make tidy planting rows, while the vertical design keeps fruit off the ground. That means fewer muddy berries, fewer pests, and fewer moments where you wonder whether you are eating strawberry or garden soil.
Use a clean HT pallet, line the planting areas with landscape fabric, and fill with a light potting mix enriched with compost. Plant strawberry crowns so the crown sits just above the soil line. Too deep, and the plant may rot; too shallow, and the roots may dry out.
Strawberries need consistent moisture and plenty of sun. A drip line or simple watering wand helps keep the soil evenly moist without blasting plants out of their pockets. For extra charm, paint the pallet white, sage green, or barn red before planting. It will look like something from a gardening magazine, minus the photographer hiding behind the hydrangeas.
3. Make Raised Garden Beds from Pallet Wood
Pallet boards can be dismantled and rebuilt into raised garden beds. Raised beds are useful because they help improve drainage, reduce soil compaction, define planting space, and make gardening easier on the back. They also let you control the soil mix instead of negotiating with clay, rocks, or whatever your builder buried in 1998.
To build a basic pallet raised bed, remove the boards with a pry bar or reciprocating saw, then use the best pieces to create a rectangular frame. Reinforce the corners with stakes or scrap wood. Line the bottom with hardware cloth if burrowing pests are a problem, then fill the bed with a mix of topsoil, compost, and organic matter.
For vegetables, aim for enough soil depth to support root growth. Leafy greens and herbs can grow in shallower beds, while carrots, tomatoes, peppers, and larger crops need more depth. If your pallet wood is thin, keep the bed modest in size so the sides do not bow outward after watering.
4. Turn Pallets into a Compost Bin
A pallet compost bin is a classic garden project because pallets already look like walls waiting for a purpose. Three or four pallets can be wired or screwed together to create a simple compost enclosure. Add hinges to the front pallet if you want easy access for turning and harvesting compost.
A good compost bin needs airflow, and pallet slats provide that naturally. Add layers of “greens” such as vegetable scraps, coffee grounds, and fresh grass clippings, along with “browns” such as dry leaves, straw, shredded cardboard, and small twigs. Keep the pile about as damp as a wrung-out sponge.
Turn the pile occasionally to speed decomposition. If it smells bad, add more browns. If nothing is happening, add greens and moisture. Composting is basically cooking for microbes, and microbes are picky little chefs.
5. Build a Pallet Garden Tool Organizer
Garden tools multiply when no one is watching. One day you own a trowel and a rake; the next, your shed looks like a medieval armory for people who fight weeds. A pallet tool organizer can bring order to the chaos.
Mount a pallet vertically on a shed wall, fence, or garage wall. Use hooks, screws, or pipe clamps to hold rakes, shovels, hoes, gloves, hand tools, twine, and watering wands. You can also attach small baskets or cans for plant labels, seed packets, and pruners.
Paint the pallet a bright color if your shed needs personality. Label sections for pruning, digging, planting, and watering. It may not make weeding fun, but at least you will know where the weeder is hiding.
6. Design a Pallet Potting Bench
A potting bench gives you a dedicated workspace for transplanting seedlings, mixing soil, filling containers, and pretending you are the host of a very wholesome gardening show. Pallets can form the back, shelves, and lower storage area of a rustic potting bench.
Use sturdy pallet frames for the bench base, then add a smooth work surface made from reclaimed boards, plywood rated for exterior use, or leftover decking. Add hooks for tools, a shelf for pots, and a bin underneath for soil bags.
For comfort, build the bench at a height that does not make your back file a complaint. Seal the wood well because potting benches get wet, dirty, and occasionally attacked by spilled compost.
7. Make a Pallet Garden Fence
Pallets can become a low-cost garden fence, especially for vegetable patches, cottage gardens, and informal backyard zones. A pallet fence can mark boundaries, discourage pets, support climbing plants, and add rustic style.
For a simple fence, set pallets vertically between posts and secure them firmly with screws or brackets. For a more finished look, remove some slats and rearrange them into a picket pattern. Sand sharp edges and cap exposed posts if children or pets use the area.
You can also add planter pockets to the fence by stapling landscape fabric behind selected slats. Fill them with trailing flowers, herbs, or succulents. Suddenly, your fence is not just a fence. It is a fence with hobbies.
8. Use Pallets as a Garden Walkway
Pallet boards can be repurposed into a simple garden walkway. This works especially well in muddy areas, between raised beds, or along a casual flower border. A pallet walkway keeps shoes cleaner and makes the garden feel more organized.
Remove the pallet boards, sand rough spots, and lay them over a leveled base of compacted soil, gravel, or landscape fabric. Leave small gaps between boards for drainage. Secure boards if the walkway will get frequent use.
Use rot-resistant sealant to extend the life of the wood. Pallet walkways will not last forever, but they are affordable, charming, and much nicer than hopping over mud like a caffeinated frog.
9. Build a Pallet Planter Box
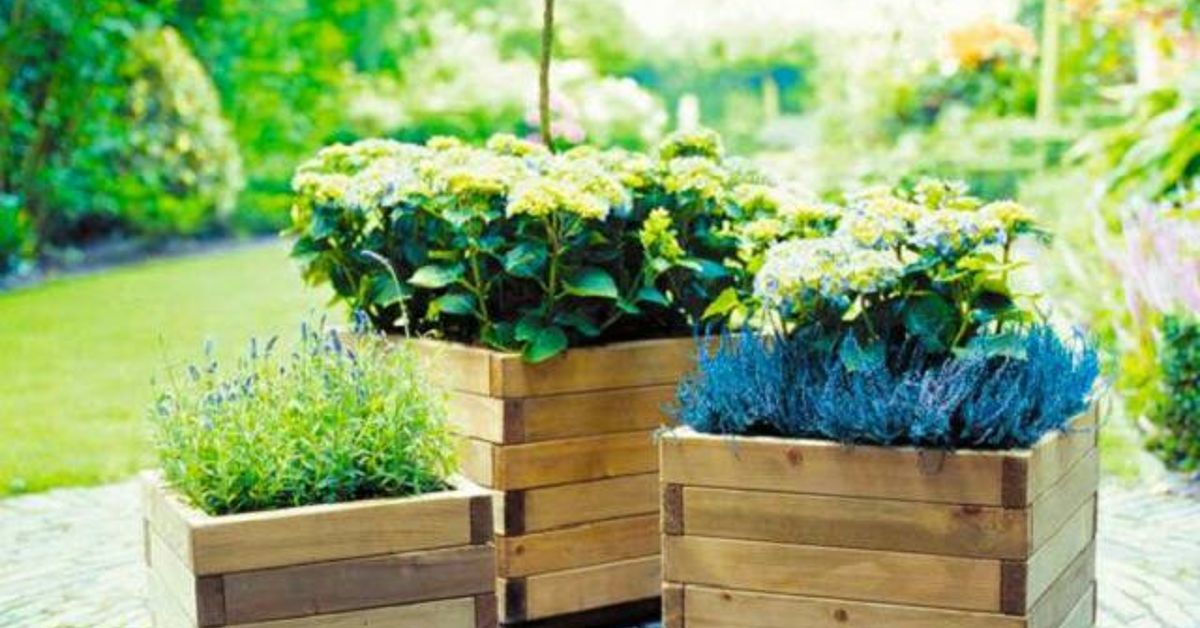
Pallet boards can be cut and assembled into planter boxes for flowers, herbs, lettuce, or compact vegetables. This is a great project if you want the pallet look without using the whole pallet structure.
Build a basic rectangular box with drainage holes, then line the inside with landscape fabric to keep soil from escaping. Add potting mix, not heavy garden soil, because containers need good drainage and aeration.
Pallet planter boxes look beautiful on patios, decks, porch steps, and along fences. For a polished look, paint several boxes in the same color family. For a playful look, paint each one a different color and tell visitors it is “eclectic,” which is design language for “I had leftover paint.”
10. Create a Pallet Privacy Screen
A pallet privacy screen can soften an exposed patio, hide trash bins, block an unattractive view, or create a cozy garden corner. Stand pallets vertically, connect them securely, and anchor them so wind does not turn your project into a wooden sail.
Decorate the screen with hanging pots, solar lights, small shelves, or climbing vines. Annual vines such as morning glory, black-eyed Susan vine, or sweet pea can add quick coverage. For edible gardens, try lightweight climbers like peas or nasturtiums.
A privacy screen is also a good place to test outdoor color. Deep green, charcoal, whitewash, or natural stain can make pallet wood look intentional and stylish rather than recently rescued from a loading dock.
11. Make a Pallet Trellis for Climbing Plants
Pallets can support climbing vegetables and flowers when used as trellises. Lean a pallet securely against a fence or mount it between posts. Grow peas, beans, cucumbers, small melons with slings, nasturtiums, or flowering vines.
Vertical supports help improve airflow, keep fruit cleaner, and make harvesting easier. They also save ground space, which is valuable in small gardens. Just remember that heavy crops need stronger support than delicate vines. A cucumber will politely climb. A full-size watermelon will attempt structural sabotage.
12. Build a Mini Pallet Greenhouse Shelf
If you start seeds in spring, a pallet shelf can hold seed trays, small pots, watering cans, and plant markers. Add clear plastic sheeting over a simple pallet frame to create a temporary mini greenhouse or cold-frame-style shelter.
Ventilation is essential. On sunny days, small covered structures can heat up quickly. Open the plastic or prop the cover to prevent seedlings from overheating. Young plants are dramatic. One hot afternoon and they collapse like they have received tragic news.
13. Create a Pallet Succulent Wall
Succulents are excellent candidates for pallet walls because many have shallow roots and tolerate drier conditions. Use landscape fabric to create planting pockets, then fill with a gritty, well-draining succulent mix.
Choose varieties with contrasting shapes, colors, and textures. Sedum, echeveria, sempervivum, and trailing succulents can create a living mosaic. Keep the wall in bright light and avoid overwatering. Succulents like attention, but not the clingy kind.
14. Use Pallets for Garden Storage Shelves
Pallets can become simple outdoor shelves for pots, seed trays, watering cans, soil amendments, and decorative containers. Cut a pallet in half, mount it to a wall, or add legs for a freestanding unit.
Storage shelves are especially helpful near a potting area or vegetable garden. Keep frequently used items visible and dry. Add hooks for gloves and small tools. A well-organized garden shelf can save time, prevent clutter, and reduce the number of times you say, “Where did I put the pruners?” in a tone that frightens birds.
Tips to Make Pallet Garden Projects Last Longer
Keep Wood Off Constantly Wet Ground
Moisture is the enemy of pallet wood. Raise pallet projects slightly with bricks, pavers, or gravel so the wood does not sit directly in wet soil. This simple step can add months or even years to a project’s life.
Use Exterior Screws
Outdoor screws resist rust better than standard indoor fasteners. If you are building raised beds, fences, benches, or shelves, use screws rated for exterior use. Your future self will appreciate not having to rebuild the whole thing after one rainy season.
Seal or Paint Exposed Wood
Exterior sealant, stain, or paint helps protect pallet wood from moisture and sun damage. Reapply as needed, especially on horizontal surfaces where water sits longer.
Choose the Right Plants
Match plants to the depth and moisture level of your pallet project. Shallow pockets are best for herbs, lettuce, annual flowers, strawberries, and succulents. Larger planter boxes and raised beds can handle tomatoes, peppers, kale, beans, and compact root crops.
Common Mistakes to Avoid
The first mistake is using unsafe pallets. Always inspect the stamp and condition. The second mistake is forgetting drainage. Plants in pallet containers need water to escape, or roots may rot. The third mistake is overloading weak wood. Pallets vary in quality, and not every board is strong enough for heavy soil.
Another common problem is placing vertical pallet gardens where they are hard to water. If watering requires gymnastics, you will eventually stop doing it. Put your pallet planters where you can reach them easily with a hose or watering can.
Finally, do not skip sanding. Rustic is charming. Splintery is a lawsuit with leaves.
Real-Life Experience: What Pallet Gardening Teaches You
The first thing you learn from using pallets in the garden is that “free wood” is never completely free. It costs time, patience, sandpaper, and at least one moment where you stare at a bent nail and question your life choices. But that is also part of the fun. Pallet projects feel rewarding because they start as rough, overlooked materials and end as something useful, personal, and surprisingly attractive.
One of the best beginner projects is a vertical herb planter. It teaches almost everything you need to know about pallet gardening in one small build: safety, cleaning, sanding, lining, drainage, soil depth, watering, and plant selection. Herbs are forgiving, but they also give quick feedback. If basil wilts, it wants water. If thyme sulks, it may want better drainage. If mint takes over, congratulations, you have met mint.
A pallet compost bin is another project that proves practical beats perfect. It does not need to look fancy to work well. Four pallets, some strong wire, and a simple gate can create a functional compost area in an afternoon. Over time, you begin to see how garden waste becomes soil amendment. Leaves, kitchen scraps, weeds without seeds, and plant trimmings slowly turn into dark compost. It feels a bit like garden alchemy, except instead of gold, you get crumbly organic matter and bragging rights.
Raised beds made from pallet wood teach a different lesson: measure twice, reinforce more than you think, and never underestimate the weight of wet soil. Soil is heavy. Wet soil is extremely heavy. If your boards are thin, build smaller beds or add support stakes along the sides. A compact raised bed that lasts is better than a giant one that bows like a tired bookshelf.
You also learn that pallet projects look better when they are repeated intentionally. One pallet planter can look random. Three matching pallet planters along a fence look designed. A pallet tool rack beside a pallet potting bench looks like a garden workstation. A pallet privacy screen with matching planter boxes can make a patio feel like an outdoor room. The trick is consistency: repeat a color, shape, finish, or planting style.
Maintenance matters, too. Pallet wood is not luxury hardwood. It cracks, fades, and eventually softens outdoors. That does not make it bad; it simply means pallet projects are best treated as evolving garden features. Check screws each season. Replace weak boards. Refresh paint or sealant. Move planters out of standing water. If a project finally gives up after several years, compost what is safe, discard what is not, and build version two with all the wisdom version one hammered into you.
The biggest experience-based tip is to start small. Do not begin with a full pallet pergola, outdoor kitchen, and chicken palace unless you already know your way around tools. Start with a planter, shelf, trellis, or compost bin. Once you understand how pallet wood behaves, you can tackle larger projects with fewer surprises and fewer dramatic conversations with your drill.
In the end, pallet gardening is not just about saving money. It is about creativity, resourcefulness, and seeing potential in ordinary materials. A pallet garden has personality. It says, “I grow things, I reuse things, and yes, I own a staple gun.” That is a pretty good garden philosophy.
Conclusion
DIY pallet garden projects are affordable, creative, and practical. With the right pallet, a few basic tools, and smart safety checks, you can build vertical herb gardens, strawberry planters, raised beds, compost bins, potting benches, privacy screens, fences, trellises, and more. The key is to use clean, heat-treated pallets, avoid chemically treated or contaminated wood, and design each project around the plants you want to grow.
Pallets may not be glamorous at first glance, but in the garden, they are full of possibility. They help save space, reduce waste, organize tools, support plants, and add rustic charm. Whether you have a large backyard, a tiny patio, or a balcony that barely fits a chair and your ambitions, pallet gardening gives you a way to grow more with less.
Note: This article is based on synthesized guidance from reputable U.S. gardening, home improvement, environmental, and extension resources. Source links are intentionally omitted from the publishable HTML as requested.