There are DIY projects that begin with a sensible list: paint, screws, maybe a weekend and a pizza. Then there are projects that begin with a pile of lumber, an unreasonable amount of optimism, and the sentence, “How hard can 2,500 little wood blocks be?”
That sentence, for the record, should be printed on a warning label.
I wanted a floor that did not look like it had rolled out of a warehouse in a cardboard box. I wanted something warm, imperfect, textured, and slightly dramaticthe kind of floor that makes guests stop mid-conversation and ask, “Wait… is that made of tiny pieces of wood?”
Yes. Yes, it is. Thousands of them.
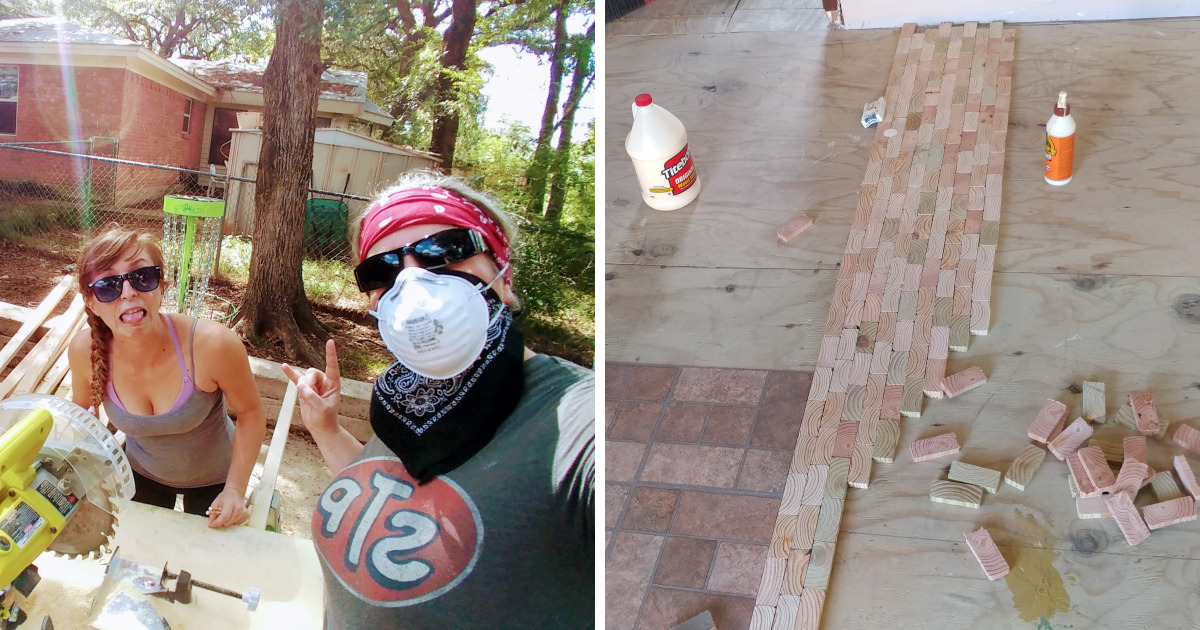
What began as a simple idea turned into a full-on end-grain wood block floor: 2,500 small pieces of wood arranged like a giant wooden mosaic. It was part flooring project, part woodworking experiment, part endurance sport, and part lesson in why people pay professionals to install hardwood floors.
Still, when the final coat dried and sunlight hit the grain, I knew the tiny wood pieces had been worth every measurement, every splinter, and every moment spent wondering whether I had accidentally invented an expensive puzzle.
Why I Wanted an End-Grain Wood Floor
Most hardwood flooring shows the face or edge of a board. An end-grain wood floor does the opposite: the cut ends of the wood face upward. Instead of long grain lines running across the room, you see little circles, arcs, rays, and growth-ring patterns. Each block becomes its own tiny topographic map.
The effect is somewhere between a butcher-block countertop, a vintage factory floor, and a very organized forest. It feels handmade because it is handmade. No two pieces look exactly alike, especially when different boards, tones, knots, and grain directions are mixed together.
Historically, wood block flooring appeared in workshops, industrial buildings, stables, and commercial spaces because end grain can handle repeated impact surprisingly well. It also has a little natural give underfoot, which is a pleasant surprise after years of standing on concrete, tile, or the emotional equivalent of tile.
For a home, an end-grain floor is not the easiest choice. It is not the fastest. It is not the cheapest. But it has something many mass-produced floors struggle to offer: personality that cannot be duplicated by clicking “Add to Cart.”
The Big Idea: Tiny Wood Pieces, One Giant Pattern
Before cutting anything, I had to decide what the floor should actually look like. This was more important than it sounds. A box of random blocks is not automatically charming. Sometimes it is just a box of random blocks that looks like a lumberyard lost a fight with a blender.
I settled on a loose mosaic pattern using mostly square and rectangular blocks. The pieces were intentionally similar in thickness but varied slightly in grain, color, and visual character. I did not want a perfectly uniform grid. I wanted something that looked collected over time, even though it was created through several weeks of sawdust, sorting, and muttering.
Choosing the Wood Species
Hardwood was the practical choice because dense species hold up better in a busy space. Oak, maple, ash, hickory, and walnut all bring different personalities to the party. Oak offers strong grain and classic warmth. Maple looks cleaner and lighter. Hickory brings dramatic contrast. Walnut adds rich dark accents, although using it everywhere can turn the room into a very expensive chocolate bar.
For this project, a mix of light and medium-toned hardwoods gave the floor movement without making it look chaotic. Reclaimed lumber and clean offcuts also helped create variety. The trick was avoiding pieces with serious damage, hidden fasteners, unstable cracks, or enough mystery residue to qualify as a historical artifact.
Why Consistent Thickness Matters More Than Perfect Beauty
Every block did not need to be identical in color. It did need to be close in thickness. That was the rule that saved the project from becoming a wooden ankle-testing obstacle course.
Wood flooring depends on a stable, flat surface. A block that sits too high becomes a proud little mountain. A block that sits too low turns into a dirt-catching valley. Multiply that by 2,500 pieces and suddenly your floor has its own weather system.
Sorting the pieces before installation took patience, but it prevented a much bigger headache later. The nicer-looking blocks were saved for visible areas. Less attractive pieces were placed near edges, under furniture, or anywhere a future rug might heroically cover my questionable decisions.
The Part Nobody Sees: Preparing the Subfloor
Every beautiful floor has an unglamorous foundation story. Mine involved cleaning, checking, leveling, checking again, and developing a personal relationship with a straightedge.
A wood block floor cannot magically correct a bad subfloor. If the surface underneath is uneven, damp, loose, or squeaky, those problems eventually introduce themselves upstairs. The blocks may look wonderful for a while, but movement, moisture, and weak adhesion can turn a handmade floor into a repair project with excellent lighting.
The subfloor needed to be clean, dry, stable, and as flat as practical. Any loose fasteners, uneven seams, old adhesive residue, or damaged spots had to be addressed before the decorative part began. It was not exciting work, but neither is brushing your teeth, and both are things you regret skipping.
Moisture Is the Villain in a Very Boring Cape
Wood responds to its environment. Changes in humidity can make it expand or contract, and that movement is one of the biggest reasons wood flooring deserves more planning than a casual craft project.
That is why wood should be conditioned to the room where it will live, rather than installed immediately after being stored in a garage, warehouse, damp basement, or trunk of a car that has seen some things. The room should be operating under normal living conditions before flooring goes down, especially in spaces with heating, air conditioning, or seasonal humidity swings.
It is tempting to rush this stage because waiting for wood to acclimate feels like being told to watch paint dry. But watching paint dry is more fun than watching an expensive floor cup, gap, crack, or buckle later.
Cutting 2,500 Pieces: The Moment the Project Got Real
The first fifty blocks were exciting. The first few hundred were satisfying. Somewhere around block number 800, I began to understand why monks illuminate manuscripts instead of building end-grain floors.
The important lesson was not speed. It was consistency.
I organized the wood into batches, then grouped the blocks by tone, grain, and size. Rather than trusting my brain to remember every stack, I labeled bins and trays. This was not overkill. This was self-defense.
The project also benefited from outsourcing the repetitive cutting phase to a qualified shop instead of treating thousands of small cuts as a heroic solo challenge. A professional setup can produce consistent blocks more safely and accurately than improvising in a crowded garage with a coffee in one hand and unrealistic confidence in the other.
Once the pieces were ready, the room looked like a giant board game waiting for someone to roll the dice.
How the Floor Came Together
The actual layout began dry. Before committing blocks to adhesive, I spread sections across the floor and studied the overall rhythm. This made it easier to avoid accidental clusters of dark wood, repeated grain patterns, or a strange visual line that looked suspiciously like a wooden lightning bolt.
Dry-laying also revealed an important truth: a random floor is not truly random. Good randomness is edited. You move pieces, balance light and dark tones, and create enough variation to feel natural without creating visual confusion.
Creating a Pattern That Felt Handmade, Not Messy
I worked in manageable zones instead of trying to solve the entire room at once. Each area got a balanced mix of colors and grain directions. A few darker blocks were placed deliberately to create depth. Lighter blocks helped prevent the floor from becoming too heavy.
The result was a parquet-inspired floor without strict geometric perfection. It had structure, but it did not feel stiff. It looked like something a patient craftsperson might have built decades ago, assuming that craftsperson had access to modern adhesives and a strong dislike of free time.
Leaving Room for Wood to Be Wood
Wood is not ceramic tile. It is not concrete. It is not a synthetic material that promises to remain emotionally unaffected by the weather. It moves.
That means perimeter space, transitions, and expansion planning matter. A floor should be installed with the room’s natural movement in mind, not squeezed tightly against every wall like it is trying to win a space-saving contest. Baseboards and trim can hide the expansion allowance while keeping the finished room looking clean.
Using flooring-rated materials and following the adhesive manufacturer’s system requirements was essential. The adhesive was not just there to make blocks stick. It needed to support a long-term flooring assembly while accounting for the realities of indoor temperature and humidity.
Sanding, Sealing, and Making End Grain Behave
End grain is thirsty. It absorbs stain, sealer, and finish differently from face grain because it exposes the open ends of the wood fibers. That is part of why the finished pattern looks so dramaticbut it is also why the finishing process requires patience.
The floor needed careful sanding to level the surface and soften minor differences between blocks. This was not a moment for aggressive shortcuts. End grain can show scratches and absorb color unevenly, so the preparation work mattered just as much as the final finish.
I skipped an overly dark stain because the natural variation was the whole point. Instead, a clear protective finish brought out the grain patterns, deepened the colors slightly, and made the floor look like a polished collection of miniature tree rings.
Several thin protective coats created a more durable surface than one dramatic, heavy application. Between coats, the floor was inspected under different lighting conditions. Morning light found spots that evening light hid. Side lighting found flaws I had confidently declared invisible. Floors, it turns out, are excellent at keeping you humble.
What I Would Do Differently Next Time
I would still make the floor again. I would just approach a few parts with less chaos and more snacks.
- I would sort lumber earlier. Separating usable wood from questionable pieces before cutting saves time later.
- I would make more test boards. A small sample section reveals how color, adhesive, sanding, and finish will behave together.
- I would buy more material than I thought I needed. Waste, defects, odd cuts, and last-minute design changes are not fictional characters. They will appear.
- I would protect the finished floor sooner. After the final coating stage, a newly completed floor becomes the most fragile-looking masterpiece in the house.
- I would stop counting at 2,000. At some point, exact numbers become emotionally unhelpful.
Is a Tiny Wood Block Floor Worth It?
For someone who wants instant results, probably not. Standard engineered hardwood, traditional plank flooring, or prefinished parquet offers a much easier path to a beautiful room.
But for someone who loves handmade design, reclaimed wood, unusual flooring ideas, and the satisfaction of building something that cannot be found in every other house on the block, an end-grain wood floor can be unforgettable.
This kind of floor carries visible evidence of effort. Every block is a little decision. Every pattern shift reflects a choice. Every knot, ring, and color variation reminds you that wood came from a living tree before it became part of a home.
And yes, I cut 2,500 tiny pieces of wood up and made a floor. It was loud, dusty, time-consuming, slightly ridiculous, and completely worth it.
My Experience With 2,500 Tiny Pieces of Wood
The funny thing about a project this large is that it changes shape in your head as you go. At the beginning, 2,500 blocks sounded like a number. It was just a number on a notepad, sitting beside measurements, material estimates, and a wildly optimistic timeline.
Then the blocks arrived.
Suddenly, 2,500 was no longer a number. It was a landscape. It was stacks of wood filling boxes, trays, corners, and any flat surface that had not been claimed by laundry. It was a tiny wooden population that required sorting, organizing, and, occasionally, a firm speech about cooperation.
The first lesson was that each piece looked different once it was turned upright. A plain-looking block could reveal beautiful grain rings on the end. Another piece that seemed perfect in the stack might have a knot, a crack, or a color streak that made it better suited for a less visible location. I started looking at every block like it had a personality. Some were dependable. Some were dramatic. Some clearly wanted to be placed under a bookshelf and left alone.
I also learned that progress on a floor is not always visible at the speed you expect. You can spend an entire afternoon placing, checking, adjusting, and bonding blocks, then step back and realize you have completed what looks like one respectable postage stamp. That can be discouraging until you remember that tiny details are the point. A floor made from little pieces is built in little victories.
There were moments when I wondered whether anyone would even notice the work. Would guests see the pattern? Would they recognize the end grain? Would they understand that the floor was handmade rather than simply “kind of brown”?
Then the first person walked into the room, stopped, and looked down.
That pause was the payoff.
People did not just notice the floor. They leaned closer. They traced the blocks with their eyes. They found different shades, tiny rings, and changes in grain direction. One person thought it looked like a map. Another said it reminded them of a giant cutting board. Someone else asked whether it was difficult to clean, which is a fair question and also a fast way to turn a design conversation into a household-maintenance meeting.
Living with the floor has been even more satisfying than building it. It has warmth that photographs do not fully capture. Bare feet notice the texture. Sunlight changes the colors throughout the day. A rainy afternoon makes the wood look deeper and richer, while bright morning light brings out the lighter blocks and subtle grain patterns.
Most importantly, it does not feel factory-perfect. It feels personal. There are tiny imperfections that I can spot because I built it: a darker cluster near the corner, a block with extra character by the doorway, a grain pattern that looks vaguely like a tiny eye staring at the ceiling. Nobody else notices these things, but I do.
That is what makes a handmade floor special. It is not only a surface you walk on. It becomes a record of patience, mistakes, problem-solving, and persistence. It proves that thousands of tiny pieces can become something much bigger than the pile they started as.
Would I recommend cutting 2,500 tiny pieces of wood to everyone? Absolutely not. Some people deserve peace. But for the right project, the right room, and the right kind of wonderfully stubborn person, it can create a floor with more character than anything sold in a box.