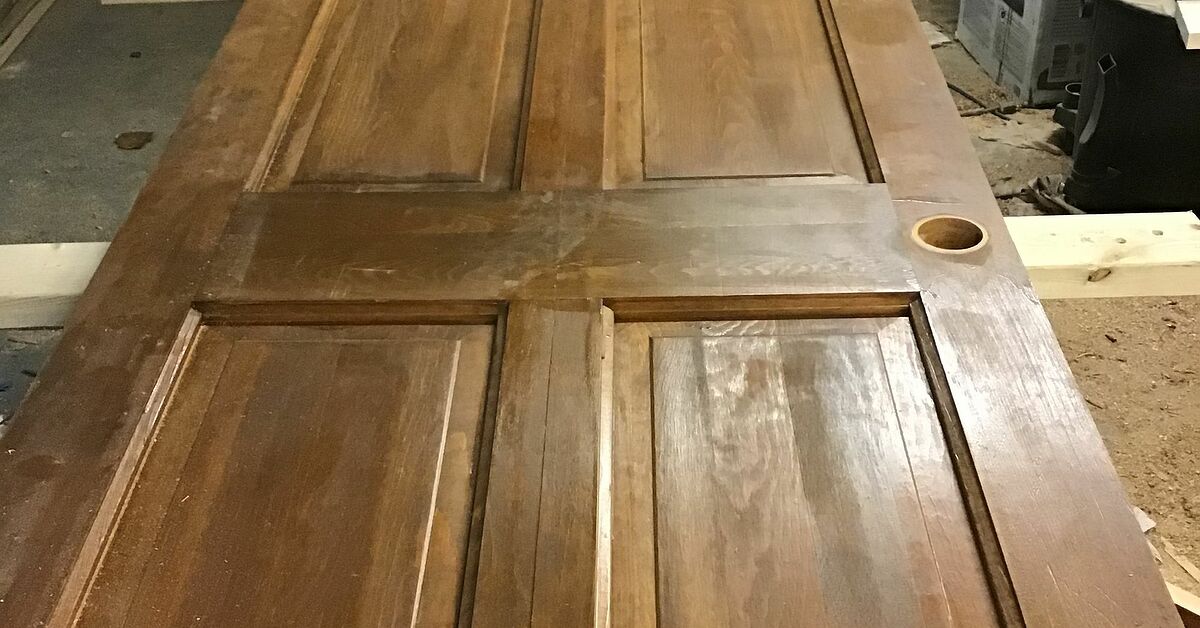
An old door does not have to spend retirement leaning behind the garage freezer, collecting dust and judging your storage habits. With proper hardware, accurate measurements, and a little sliding door DIY is ideal for pantries, closets, laundry rooms, offices, and narrow passages where a swinging door collides with furniture or blocks traffic. The project is manageable for a confident beginner,e door must clear trim, flooring, switches, and everything along its travel path.
Why Repurpose an Old Door?
A wall-mounted sliding door moves parallel to the wall, eliminating the arc required by a hinged door. Unlike a pocket door, it usually does not require opening the wall and rebuilding the framing. Reusing a sound door also keeps a building component in service and gives you design choices that factory-made doors cannot always match.
A weathered five-panel door can add vintage texture. A plain flush door can be upgraded with molding. Two narrow doors can become a double-slider system. Architectural salvage stores, reuse centers, garage sales, and Habitat for Humanity ReStores are good places to look for affordable candidates.
Plan Before Buying Sliding-Door Hardware
Measure the Opening and Wall Space
Measure the finished opening at the top, middle, and bottom, then check the height on both sides. A sliding door should overlap the opening to reduce sightlines. For many interior projects, about 1 to 2 inches of overlap on each side and roughly 1 inch above the opening works well, although trim and privacy needs may require more.
Confirm that the wall beside the opening has enough clear space for the entire door. A 36-inch door needs about 36 inches of open wall to park, plus room for the track stop. Check for switches, outlets, thermostats, vents, shelves, windows, and thick baseboards. A sliding door cannot pass through a light switch, no matter how motivational your attitude is.
Choose the Correct Track
A single door generally needs a track at least twice the door width, so a 36-inch door commonly uses a 72-inch rail. Weigh the door and choose hardware rated above that load. Confirm the allowed door thickness, hanger style, required clearance above the opening, and whether the rail can be shortened.
Consider Privacy and Sound
Surface-mounted sliders usually leave small gaps around the edges. They work beautifully for closets, offices, and pantries, but provide less sound control than a well-fitted hinged door. For bedrooms or bathrooms, use generous overlap, suitable edge seals, and a latch designed for sliding doors.
Select a Door Worth Repurposing
Choose a straight, structurally sound interior door with enough solid material at the top for hanger fasteners. Solid-wood and solid-core doors are usually easiest. Hollow-core doors may work only if the bolts enter reinforced blocking or the hardware manufacturer approves another mounting method.
Inspect for rot, loose joints, deep cracks, insect damage, delaminated veneer, broken glass, and severe warping. Sight down the edges or lay the door on a flat surface. A slight bow may be manageable; a twisted slab can rub the wall, wobble in the guide, and refuse to close neatly.
Vintage Paint Safety
Before sanding, scraping, drilling, or cutting a painted vintage door, consider its age. Coatings on pre-1978 residential components may contain lead, and disturbing them can create hazardous dust. Use an EPA-recognized test method or consult a qualified professional when the finish is uncertain. If lead is present, follow lead-safe work practices rather than dry sanding or grinding. Keep children and pets away, contain dust, use suitable protection, and clean thoroughly.
Tools and Materials
- Sound repurposed door
- Weight-rated sliding-door hardware kit
- Backer board, if required
- Track stops, anti-jump devices, and bottom guide
- Door pull and recessed finger pull
- Stud finder, long level, tape measure, and pencil
- Drill/driver, bits, sockets, and wrenches
- Wood filler, glue, clamps, and repair materials
- Primer, paint, stain, or clear finish
- Eye, hearing, and dust protection
Use the structural fasteners specified by the kit. Mystery screws from the bottom of a coffee can are not a certified support system.
How to Repurpose Doors Into a Sliding Door DIY
1. Remove Old Hardware
Take off hinges, knobs, latch parts, hooks, and other protruding hardware. Save valuable vintage pieces. Pull stray nails and screws without damaging decorative details.
2. Clean and Repair the Slab
Remove grime with a cleaner compatible with the existing finish and let the wood dry. Tighten loose joints, glue small splits, and patch unwanted hinge mortises or lockset holes. You may leave selected marks visible for character, but the finished result should look intentionally reclaimed, not recently rescued from a ditch.
3. Adjust the Size
Trim only after confirming overlap, floor clearance, and hanger position. Use a straightedge or saw guide, score painted edges to reduce chipping, and seal fresh cuts. Be cautious with hollow-core doors because excessive trimming can remove their internal wood blocking.
4. Prepare and Finish Both Sides
For paint, dull glossy surfaces, feather repairs, remove dust, apply a compatible primer, and add durable topcoats. For stain, remove failed finish as needed, sand with the grain, and test the color first. Finish both faces and accessible edges so the door responds more evenly to humidity. Let the coating cure before installation.
5. Drill for the Hangers
Place the door flat on padded supports and follow the kit template exactly. Make sure bolts will not enter glass, a weak repair, or an old mortise. Clamp scrap wood beneath the drilling point to reduce breakout and drill straight pilot holes of the specified size.
6. Find Structural Support
Map the studs above and beside the opening. Many systems use a backer board fastened into several studs, with the rail attached to that board. The backer can also move the track outward so the door clears casing and baseboards. Do not rely on drywall anchors alone for a heavy moving door. Add blocking or call a carpenter if suitable framing is missing.
7. Install a Level Track
Calculate the rail height using the door height, hanger geometry, desired floor gap, and the manufacturer’s formula. Mark a true level line instead of measuring repeatedly from an uneven floor. Predrill, install spacers and fasteners in the specified order, and recheck level before final tightening. A tilted rail can make the door roll by itself, which is entertaining exactly once.
8. Hang and Test the Door
Attach anti-jump discs or clips as directed. With a helper, lift the door onto the track. Slide it slowly through the full opening and closing path. Confirm that rollers remain seated and that the door clears trim, fasteners, switches, and the wall.
9. Install Stops and the Bottom Guide
Position track stops so the door fully covers the opening when closed and clears it when open. The bottom guide prevents the slab from swinging away from the wall. Some guides run in a groove cut into the door; adjustable roller guides may require no groove. Plumb the door, align the guide, and test the full travel before tightening everything.
10. Add Pulls and a Latch
Install a face-mounted pull on the accessible side and a recessed finger pull on the wall-facing side. A standard knob on the back can hit the wall and prevent full opening. Add a sliding-door latch when privacy is needed, then patch old jamb holes and touch up the trim.
Design Ideas for an Upcycled Sliding Door
Preserve the patina: Clean and stabilize an intact vintage finish, then protect it with a compatible clear coating. This suits rustic interiors and old houses where wear is part of the appeal.
Create modern panels: Add slim molding in rectangular patterns and paint the entire slab one bold color. A plain door can look custom without pretending it once guarded a prize-winning cow.
Use two narrow doors: Separate a sturdy bifold pair or use matching salvaged panels on a double-door track. Verify that each panel has enough structure for the hangers.
Match the hardware: Coordinate the track, pull, recessed handle, and latch. Black steel feels industrial, while stainless, bronze, or concealed aluminum hardware creates a cleaner contemporary look.
Common DIY Mistakes
- Buying hardware before checking the door’s weight and thickness
- Ignoring casing, baseboard, or switch clearance
- Fastening the track only to drywall
- Skipping the bottom guide or anti-jump devices
- Using a protruding handle on the wall-facing side
- Expecting a sliding door to seal like a hinged door
- Sanding unknown vintage paint without lead precautions
Experience Notes: Lessons From Real Sliding-Door Projects
The biggest lesson is that the dramatic before-and-after photo represents only half the work. The moment everyone notices is when the finished door glides across the opening. The steps that determine whether it still glides six months later happen earlier: studying the hardware diagram, checking the framing, repairing the slab, and measuring the opening often enough that your family starts staging an intervention.
Old houses also have a playful relationship with straight lines. The opening may be square while the floor rises toward one side. The top casing may project less than the baseboard. A door that looked flat against a garage wall may reveal a twist after it is hung. Measuring at several points and using a long level prevents many surprises. When a floor is uneven, establish the track from a true level reference and make sure the bottom edge clears the highest point along the door’s entire route.
Weight is another reality check. A solid-wood door feels manageable while one end rests on the floor, but lifting it high enough to place two rollers on a rail is different. Recruit a helper, protect the floor with hardboard or heavy blankets, and place tools within reach before lifting. Good staging changes the job from an improvised strength contest into a controlled installation.
Old lockset holes often force a design decision. Hiding one completely may require a fitted wood plug, careful sanding, and opaque paint. Sometimes the smarter approach is to keep the hole, cover it with a decorative plate, or make it part of the new pull design. Successful repurposing does not make a door look new; it makes its previous life look deliberate.
Hardware manuals deserve more respect than they usually receive. Kits that appear almost identical can require different rail heights, bolt spacing, spacer arrangements, and guide grooves. Read the entire manual before drilling. Lay out every washer, stop, fastener, and anti-jump part in order. One missing spacer can change wall clearance, while a misplaced stop can prevent the door from covering the opening.
Finishing requires patience, too. Paint both sides, allow the coating to cure, and do not lean a freshly painted slab against a textured wall. When staining, test repaired areas because filler and old wood may absorb color differently. A protective topcoat is especially useful around pulls and edges where hands repeatedly touch the surface.
Finally, expect a short tuning period. Roll the door open and closed repeatedly. Listen for clicks, watch the bottom guide, and see whether the panel drifts when released. Recheck fasteners after several days and again after a few weeks. Wood responds to humidity, bolts settle, and rollers may need minor adjustment. Maintenance is simple when the rail, structure, stops, and guide were installed correctly from the start.
Maintenance
Vacuum dust from the track and rollers, keep the bottom guide free of debris, and periodically check hanger bolts, stops, anti-jump devices, and handles. Do not lubricate rollers unless the manufacturer recommends a specific product; oily sprays may collect dust.
Watch for rubbing marks, unusual noise, or a changing floor gap. These can indicate loose hardware, seasonal wood movement, or a shifted guide. Correcting a small issue early is easier than repairing damaged trim later.
Conclusion
Repurposing an old door as a sliding door combines creative reuse with practical space planning. Start with a sound slab, measure carefully, choose hardware rated for its weight, and anchor a level track into real structural support. Stops, anti-jump devices, and a bottom guide are essential safety and performance parts, not optional decorations.
Take vintage-paint precautions, follow the hardware instructions, and test the full travel before declaring victory. Done well, a forgotten door becomes a useful architectural featureand proof that when one door closes, another can roll sideways with considerably more style.