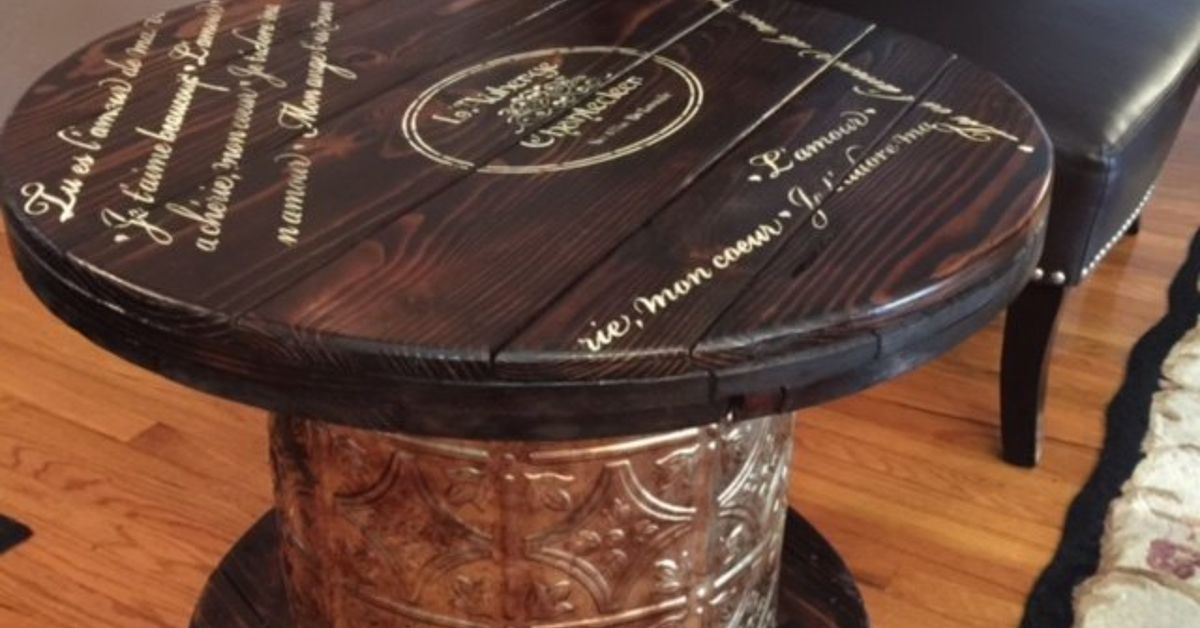
An old wooden cable spool is already suspiciously close to being a table. It has a round top, a pedestal, and a base; all it needs is cleaning, repair, sanding, and a finish that does not leave every guest carrying home a souvenir splinter.
With a usable reel and basic tools, you can create a rustic coffee table, patio table, game table, or rolling storage table. This guide covers safe spool selection, structural repairs, optional casters, indoor and outdoor finishes, design ideas, and the practical lessons that make the difference between “industrial chic” and “something rescued from behind a warehouse.”
Why a Cable Spool Works So Well as a Table
A cable reel’s two circular flanges and central barrel form a ready-made pedestal table. Better Homes & Gardens has featured cable spools as inexpensive patio-table material, and DIY builders commonly adapt the same shape into coffee tables with stain, clear coat, casters, or storage.
The round top is friendly in compact rooms because it has no sharp corners. The barrel can also support dowels, rope, shelves, or cubbies. The structure is already there, so most of the project is careful preparation rather than complicated joinery.
Choose the Right Wooden Cable Reel
Get Permission First
Ask electrical contractors, utility companies, supply houses, or salvage businesses for a nonreturnable reel. Never assume a spool beside a worksite is free. Manufacturers use both returnable and nonreturnable reel systems, so confirm ownership before hauling one away.
Inspect Its Condition
Choose a dry spool with solid flanges, tight center boards, and no major wobble. Reject reels with chemical odors, oily residue, deep rot, severe warping, active insects, or structural cracks. Reels stored in water or around chemicals may be poor furniture candidates regardless of how charmingly weathered they look.
Look for exposed nails, staples, screws, metal straps, and cable fragments. A handheld metal detector is useful before cutting or power sanding. If the spool has an unknown painted coating, test it before creating dust; sanding lead-containing paint can be hazardous. The EPA recommends dust-minimizing methods and HEPA collection when lead paint may be disturbed.
Check the Dimensions
Measure the height and flange diameter. Coffee tables commonly stand about 16 to 18 inches high and should relate to the sofa seat. Standard dining tables are generally about 28 to 30 inches high. A tall spool may suit a patio or game table, while a small reel can become an end table.
Tools and Materials
- Tape measure, pencil, straightedge, and chalk
- Hammer, pry bar, pliers, and adjustable wrench
- Random-orbit sander and sanding block
- Shop vacuum, brush, and microfiber cloths
- Drill/driver and, if reshaping the base, a jigsaw
- Eye protection, hearing protection, and a suitable dust respirator
- Wood glue, stainable filler, and replacement hardware as needed
- Coarse, medium, and fine sandpaper
- Stain or paint plus an interior- or exterior-rated protective finish
- Optional locking casters, backing blocks, rope, dowels, or tempered glass
Match the finish to the location. Exterior products are formulated to handle moisture, sunlight, and temperature changes more effectively than ordinary interior clear coats.
How to Make a DIY Cable Spool Table
1. Pick the Best Side for the Top
Stand the reel upright on a level floor and compare both flanges. Choose the flatter, cleaner face as the tabletop. Mark the underside. Decide whether to preserve printed numbers and industrial stamps; attractive marks can add character if they are clean and safe to seal.
2. Clean and Dry the Spool
Brush off loose dirt, vacuum gaps around the barrel, and wipe ordinary grime with a lightly dampened cloth and mild wood-safe cleaner. Avoid soaking the wood. Let the spool dry fully in a shaded, ventilated place before gluing, filling, sanding, or finishing.
3. Remove Hazards and Tighten the Structure
Pull unnecessary staples and protruding nails. Tighten the rods or bolts that clamp the spool together, working gradually and evenly. Replace badly damaged hardware with appropriately sized bolts, nuts, and wide washers.
Glue separating boards and clamp them until cured. Use stainable filler for small holes and shallow gouges. Do not expect filler to repair rotten wood or a major split; cosmetics cannot substitute for structure.
4. Sand From Rough to Smooth
For battered solid wood, a useful sequence is 60 or 80 grit, then 120, then 180. Start finer on thin plywood or markings you want to preserve. Keep the random-orbit sander moving over broad surfaces and hand-sand edges, bolt recesses, and the barrel. Lowe’s and Bob Vila both stress that poor sanding remains visible after finishing, while finer grits are appropriate for final smoothing.
Ease sharp tabletop edges slightly, then vacuum thoroughly. Dust beneath clear coat becomes a permanent collection of tiny bumps that your fingertips will locate with supernatural accuracy.
5. Modify the Base Only When Needed
Leaving both flanges intact is the strongest and easiest option. If the lower flange crowds feet, mark a smaller concentric circle and trim it with a jigsaw. Keep the cut well away from bolts and supports, verify that no hidden metal lies in the blade path, and seal the fresh edge carefully. When uncertain, preserve the original base and its stability.
6. Install Optional Locking Casters
Casters make a heavy spool much easier to move. Choose wheels rated for the combined weight of the table and its expected load, and confirm whether the published capacity applies to each caster or to the set.
Space three or four casters evenly near the outside of the bottom flange. On thin boards, add solid backing blocks and use through-bolts with washers and locking nuts. Select nonmarking wheels for indoor floors and locking swivel casters so the coffee table does not quietly migrate during movie night.
7. Add Storage or Decorative Details
Install evenly spaced dowels between the flanges to create cubbies for books and magazines. Pre-drill to reduce splitting. Other options include wrapping the barrel with rope, painting the pedestal a contrasting color, applying a stencil, or adding a round plywood cap.
For an especially flat surface, order a tempered-glass top with polished edges and set it on clear rubber bumpers. Avoid loose, thin, non-tempered glass in busy homes.
8. Apply Stain or Paint
Test color on the underside because reel wood may include mismatched boards and end grain that absorb unevenly. Medium and dark stains can unify weathered wood, while paint creates a cleaner finish. Apply stain with the grain and remove excess as directed. For paint, use a compatible primer and several thin coats. Proper cleaning, light sanding, and dust removal improve furniture-paint results.
9. Seal the Entire Table
For indoor use, apply a furniture-rated polyurethane or similar clear coat in thin layers. Sand lightly between coats when the label requires it. For outdoor use, select an exterior stain, paint, spar urethane, or another coating rated for sun and moisture. Seal the top, underside, barrel, base, cut edges, bolt holes, and exposed end grain.
Allow the final finish to cure for the full manufacturer-specified period. Dry to the touch does not necessarily mean ready for a heavy planter, a sweating pitcher, or an enthusiastic board-game tournament.
Four Easy Design Directions
Rustic Coffee Table
Preserve faded markings, use a warm brown stain, add matte black casters, and finish with satin polyurethane.
Coastal Patio Table
Paint the base soft white or blue, leave the top natural, and protect every surface with an exterior-rated finish.
Rolling Game Table
Add a smooth plywood top, a low rim, storage cubbies, and locking wheels for puzzles, cards, and board games.
Plant or Display Table
Use a small reel as a plant stand, but place waterproof saucers under pots and seal the central cable hole against spills.
Common Mistakes to Avoid
- Taking a reel without confirming it is nonreturnable
- Ignoring odors, residue, rot, or structural cracks
- Sanding before checking for paint hazards and hidden metal
- Cutting away so much of the base that the table becomes unstable
- Fastening casters to weak boards without reinforcement
- Using an interior finish on an exposed outdoor table
- Sealing only the visible top and leaving the underside vulnerable
- Loading the table before the finish has fully cured
Frequently Asked Questions
Do I Need to Disassemble the Spool?
Usually not. Keeping a sound reel assembled is easier and preserves strength. Take it apart only when repairs or a more advanced design require it.
How Can I Flatten a Rough Tabletop?
Tighten loose boards, fill minor defects, and sand high spots carefully. If the surface remains badly ridged, add a round plywood cap or tempered-glass top rather than weakening the flange through aggressive sanding.
Can the Project Be Completed in a Weekend?
The hands-on work may fit into a weekend, but glue, stain, paint, and clear coats can extend the schedule. Follow each product’s drying and curing instructions instead of rushing the next step.
Experience Notes: What a Cable Spool Makeover Is Really Like
The most surprising part of a cable spool table project is how little time goes into “building” and how much goes into making the existing object pleasant to touch. At first glance, the reel looks almost finished. It is round. It stands up. It has a top. This creates dangerous optimism. Then you kneel beside it and discover six splinters, three bent staples, a loose nut, dried mud in the barrel, and one board that seems personally offended by the concept of being level.
A realistic first session is mostly inspection and cleaning. Photograph the spool before doing anything, especially if you want to preserve faded lettering. Mark the best tabletop face, circle damaged areas with chalk, and remove every visible metal hazard. This slow start feels less exciting than staining, but it prevents most of the mistakes that make later steps frustrating. It also helps you decide whether the reel deserves a furniture makeover or should remain an outdoor utility object.
Sanding is where the transformation becomes obvious. The first pass removes gray fibers and grime, revealing warmer wood underneath. It is tempting to keep sanding until every stain and dent disappears, but reclaimed material often looks better when some history survives. The useful goal is not “factory new.” It is “smooth, clean, stable, and intentionally rustic.” Preserve shallow scars that do not catch fingers. Remove splinters, sharp corners, loose fibers, and anything that makes the surface difficult to clean.
The spool’s weight is another practical lesson. A large reel may be manageable while rolling on its edge but awkward when lifted flat. Plan the final location before applying the last coats. Use a helper, protect flooring, and avoid grabbing the reel by a loose outer board. Installing casters sounds optional until the finished table is parked six inches away from where it should be. At that point, wheels begin to look like one of civilization’s better ideas.
Color decisions also change once stain touches the wood. Cable reels may contain mismatched boards, dark fastener marks, and end grain that absorbs dramatically. A test patch underneath saves disappointment. Medium and dark stains tend to blend uneven boards, while very pale stains may highlight every repair. Paint offers more consistency, but leaving the tabletop natural preserves the character that made the spool interesting.
The finish stage rewards restraint. Thick coats look efficient but are more likely to sag, bubble, or remain soft. Thin coats, clean tools, good ventilation, and patient drying produce a smoother table. Light sanding between compatible coats can feel counterproductive until the next layer flows evenly and the top begins to feel like furniture rather than construction material.
Finally, expect the table to attract questions. People recognize that it was once industrial equipment, but they may not immediately identify it. That moment of confusion is part of the charm. The best spool tables do not erase their history. They clean it, stabilize it, and give it a much better place to hold a cup of coffee.
Conclusion
Making an old cable spool into a DIY table is primarily a project of selection, preparation, and finishing. Start with a dry, legally obtained reel. Remove fastener hazards, repair loose boards, sand progressively, and seal every face. Add casters, cubbies, rope, paint, or glass only when those details improve how the table will be used.
The finished piece can look rustic, coastal, modern, or industrial while keeping a bulky wooden reel in useful service. It is sturdy furniture with a built-in storyand a satisfying upgrade for an object whose original design was essentially “giant wooden wheel.”