Phone charms have returned from the land of flip phones, frosted lip gloss, and mysteriously low-rise jeans. This time, however, they are more than tiop, make your phone easier to spot, and occasionally save it from an unfortunate meeting with the sidewalk.
Attaching one should be simple, but modern phones rarely include the little charm holes found on older devices. Fortunately, you can still add a beaded phone charm, wrist strap, or decorative dangle without drilling your case, stuffing string into the charging port, or performing unauthorized surgery on a very expensive rectangle.
This guide explains how to attach phone charms to different cases, how to choose a safe attachment method, and how to make a custom phone charm using beads, cord, charms, and basic jewelry-making supplies.
What Is a Phone Charm?
A phone charm is a decorative accessory attached to a phone or, more commonly, its protective case. It may be a short beaded dangle, a wrist-sized loop, a cord strap, or a longer lanyard. Modern designs often use acrylic beads, glass beads, imitation pearls, letter beads, polymer-clay shapes, metal charms, and colorful cord.
Phone charms generally fall into three categories:
- Decorative dangles: Short accessories designed mainly for appearance.
- Wrist straps: Larger loops that can fit around the wrist and improve grip.
- Phone lanyards: Longer straps worn around the neck or across the body.
Do not automatically assume every cute beaded charm is strong enough to catch a falling phone. Decorative cord, elastic, open jump rings, and inexpensive clasps may not be designed to support the full weight of a device during a sudden drop. Manufacturer-designed cases and tethers use dedicated attachment points for that reason. Your Phone Case Before Attaching a Charm
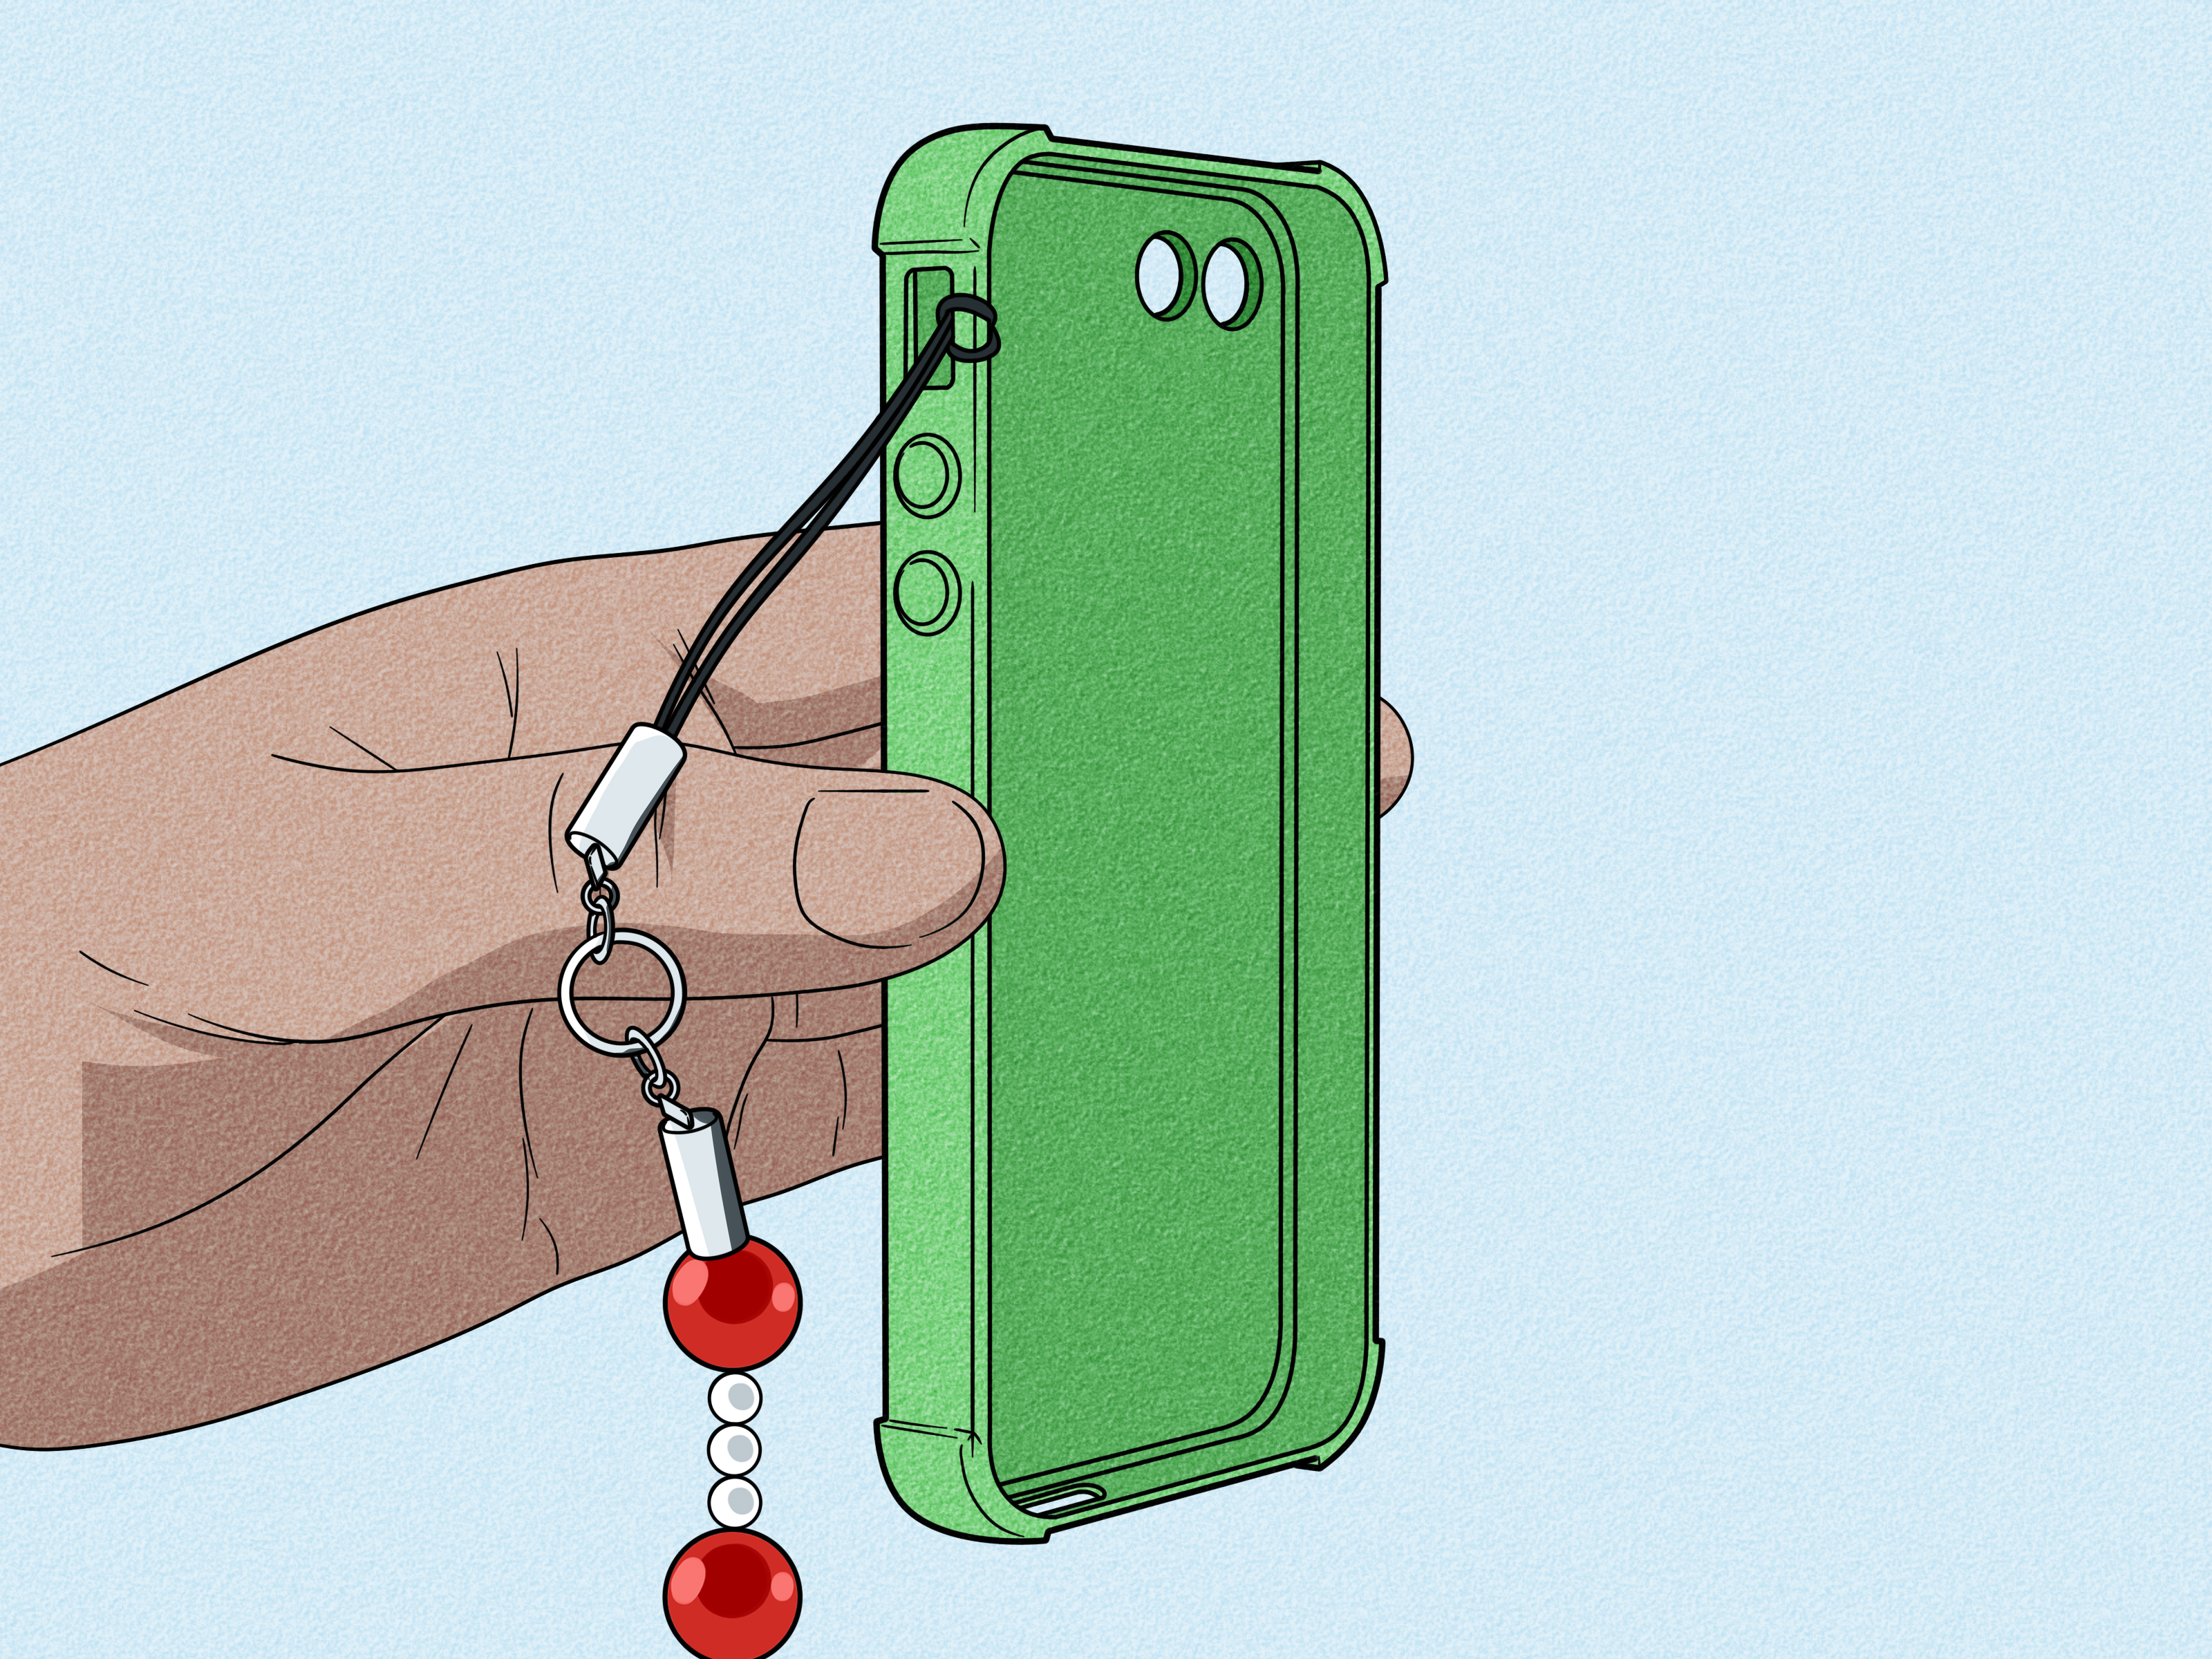
Remove your phone from its case and inspect the bottom corners. Some cases have two tiny holes beside the speaker or charging-port opening. These are lanyard attachment points, not mysterious ventilation holes for microscopic hamsters. Other cases include a reinforced side loop, a metal ring, or two openings designed for a wrist strap. Several protective-case manufacturers specifically advertise built-in attachment points for charms and lanyards. Cases with dedicated holes are usually the cleanest and most secure option because the charm connects to the case rather than to a button, speaker opening, or charging component. case has no attachment point, check whether it has a fully enclosed bottom edge and a charging-port cutout. That design may work with a universal tether tab, also called a phone anchor tab or lanyard patch. This is the best method when your case already has dedicated lanyard holes. Some two-point strap systems use separate connectors installed through paired case openings. In those designs, the connector loop passes through the holes before a ring or clasp secures it. Follow the case or strap manufacturer’s exact direction because the connector orientation can affect how securely it sits. Attach a Phone Charm with a Universal Tether Tab
A universal tether tab is a thin fabric, plastic, or reinforced sheet placed between the phone and its case. A narrow tail extends through the case’s charging-port opening and provides an external ring or loop. The tab exits through the opening around the charging port; it does not go inside the electronic port. A thin, properly positioned tab may still permit corded or wireless charging, but compatibility depends on the case, charger, and tab thickness. Commercial phone-anchor systems are designed around these clearance issues. his method with an open-bottom case because the tab may slide out. It is also a poor choice if the case becomes visibly bowed, does not snap shut, or presses tightly against the phone after installation. Some charms end in a lobster clasp, swivel clasp, split ring, or jump ring instead of a cord loop. These can connect to a built-in metal eyelet, a tether tab, or a dedicated case ring. A lobster clasp is convenient when you enjoy changing charms frequently. A split ring, which resembles a miniature key ring, is harder to install but generally resists opening better than a basic jump ring. When working with an open jump ring, use two pairs of chain-nose pliers. Hold one side of the opening with each pair, then twist one side forward and the other backward. Do not pull the ring outward into a wide “C” shape because it may lose alignment and become difficult to close tightly. Twist it back until the ends meet cleanly. ment Methods You Should Avoid
Never wedge cord, wire, or a metal charm directly into a USB-C or Lightning port. The charging port contains delicate electrical contacts and was not designed as a lanyard anchor. Wrapping cord around the volume or power button may create constant pressure, interfere with normal operation, and allow the charm to slip free. Speaker and microphone openings may resemble attachment holes, but threading cord through them can block sound or place material against internal components. This sounds obvious, but the internet has witnessed more ambitious decisions. Drilling the phone can damage internal parts, compromise water resistance, and turn a functioning device into an unusually expensive craft supply. An adhesive anchor may work on a smooth, rigid case if the surface is properly cleaned and the adhesive is allowed to cure according to its instructions. However, adhesive attachments can peel away from silicone, textured cases, oily surfaces, or flexible materials. They may also interfere with wireless charging if placed over the charging coil. Treat them as light-duty attachment points unless the manufacturer specifically rates them for carrying a phone. Make a Beaded Phone Charm
A homemade phone charm is an excellent beginner craft because it requires little equipment and offers almost unlimited customization. You can create a pastel wrist loop, a minimalist black-and-white dangle, a name charm, or a design that appears to have eaten an entire craft store and has no regrets. Use actual beading cord or coated beading wire rather than ordinary sewing thread. Jewelry-making references recommend selecting stringing material that matches the bead weight and hole condition. Heavy glass or metal beads place more stress on the strand, while rough bead holes can gradually abrade weak cord. thod 1: Beaded Wrist-Loop Phone Charm
Lay the beads on a towel or bead mat before stringing them. Arrange two matching rows if you want a symmetrical wrist loop. Place alphabet beads in the center, use larger shapes as focal points, and separate heavy beads with lightweight spacers. A finished phone wristlet often falls somewhere around 7 to 9 inches in total decorative length, although the ideal size depends on your hand and whether the charm is decorative or wearable. : Cut and Fold the Cord
Cut approximately 24 to 30 inches of cord. It is better to have extra material than to discover, three beads from the finish line, that optimism is not a recognized knotting technique. Fold the cord in half. At the folded end, leave a small loop about 2 to 3 inches long. Tie an overhand knot below this loop using both strands. This smaller loop will attach to the phone case. Separate the two long cord tails. Add beads to each side, following your planned pattern. Periodically hold the two sides together to check their length and balance. Keep the strand flexible. Packing the beads too tightly can make the finished loop stiff, while leaving excessive gaps may expose the cord and encourage tangling. Bring the two cord tails together at the bottom of the design. Tie a surgeon’s knot by crossing the strands twice on the first pass and completing a second securing pass. Pull gradually and evenly so the beads remain aligned. Jewelry-making instructions commonly recommend conditioning elastic before use, leaving extra cord for knotting, and using a surgeon’s knot as a secure finish. A knot may be tucked into a large-hole bead or covered with a crimp cover for a cleaner appearance. : Finish the Knot
Trim the excess cord, leaving a tiny tail rather than cutting directly against the knot. Apply a small amount of adhesive only if it is compatible with the cord and beads. Too much glue can create a hard, scratchy lump that looks less “handcrafted” and more “tiny craft accident.” A single-strand charm is lighter and simpler than a wrist loop. It works well for a short decorative accessory. If you add a metal charm, connect it with a properly closed jump ring or wrapped loop. Jewelry tutorials use both methods to attach charms while allowing them to move freely. thod 3: Phone Charm with Beading Wire and Crimps
Coated beading wire is useful for heavier glass, ceramic, stone, or metal beads. Unlike stretch cord, it resists elongation and gives the charm a more structured shape. Match the crimp size to the wire and use actual crimping pliers when possible. Crimps designed for flexible beading wire can create a strong, tidy connection, but sharp crimp edges may cut into elastic or soft thread. Make Your Phone Charm Stronger
Small beads, rings, and charms can present a choking hazard. Keep loose supplies and finished charms away from babies, toddlers, and pets that might chew or swallow them. U.S. consumer-safety guidance treats detachable small parts as a serious concern in products intended for young children. the charm before intense exercise, machinery work, or any activity where a dangling strap could catch on an object. Do not wrap a short, non-breakaway phone charm around the neck. Keep plated metal, imitation pearls, and coated beads away from perfume, lotion, hand sanitizer, and prolonged moisture. These substances may dull finishes or discolor plated components. Wipe the charm gently with a soft, slightly damp cloth and allow it to dry completely. cal Experiences and Lessons from Everyday Use
The first lesson many phone-charm makers discover is that the prettiest bead is not always the best bead. Large glass hearts, stone beads, metal pendants, and ceramic figures look impressive on a craft table, but combining too many of them can turn a cheerful phone accessory into a tiny medieval flail. The added weight pulls on the cord, knocks against the phone, and makes the charm awkward in a pocket. A practical design usually combines one or two statement beads with lighter acrylic spacers. This keeps the visual personality without making the phone feel like it is carrying its own chandelier. Before finishing the knots, hold the unfinished charm beside the phone and gently move it as you would during normal use. If it repeatedly slams against the screen or camera area, shorten it or reduce the weight. Another common lesson involves elastic cord. Elastic is easy to knot and comfortable around the wrist, but repeated stretching can gradually lengthen the charm. A design that begins as a tidy loop may eventually resemble a necklace made for a very small giraffe. For a charm that will be handled frequently, strong nylon cord or flexible beading wire often provides a more stable result. Elastic is better reserved for lightweight beads and occasional decorative use. Case fit matters just as much as cord strength. A tether tab may appear secure when the case is empty but cause one corner to lift after the phone is reinstalled. That lifted corner weakens the case’s protection and may let dust enter. Always run a finger around the full edge after installation. Every corner should sit at the same height, and the phone should not rock or shift inside the case. Pockets introduce another reality. Long charms catch on bag zippers, seat-belt hardware, desk handles, and apparently every object that has been patiently waiting for something dangly to arrive. For daily use, a compact wrist loop is often easier to manage than a long decorative chain. Longer designs work better when the phone is carried in a handbag rather than a tight jeans pocket. Jump rings deserve special attention. A ring may look closed while still having a hairline gap large enough for thin cord to escape. Twisting the ring open and closed with two pliers preserves its round shape and helps the ends meet cleanly. For frequently changed charms, a small lobster clasp attached to a sturdy split ring creates a convenient modular system. You can switch from a pastel charm to a minimalist strap without untying anything or arguing with a microscopic knot. Color planning also improves with experience. A bowl of individually cute beads does not automatically become a cohesive charm. Limiting the palette to two main colors, one neutral, and one metallic accent usually produces a cleaner design. Repeating a bead shape or color every few positions makes even a playful pattern look intentional. Finally, routine inspection is more important than heroic knot confidence. Cord wears where it bends against a case hole. Metal rings loosen after repeated twisting. Coatings rub away, especially when exposed to hand sanitizer and moisture. Every few weeks, examine the attachment loop, knot, crimp, and case opening. Replacing a twenty-cent piece of cord is much less dramatic than replacing a phone that has just tested the local pavement’s hardness. Learning how to attach phone charms is mostly a matter of matching the accessory to the right case. Use built-in lanyard holes whenever available, choose a properly fitted tether tab when they are not, and never force cord into speakers, buttons, or the charging port itself. For a homemade phone charm, select lightweight beads, durable stringing material, secure knots or crimps, and carefully closed metal findings. Keep the design flexible, test it over a soft surface, and inspect it regularly. Your finished charm should add personality and conveniencenot create a suspense thriller starring your phone and gravity. Note: This article synthesizes practical guidance from phone and case manufacturers, craft retailers, professional beading suppliers, jewelry-making educators, repair references, and U.S. consumer-safety resources.How to Attach a Phone Charm Using Built-In Case Holes
What You Need
Step-by-Step Instructions
Installation Steps
How to Attach a Charm with a Lobster Clasp or Jump Ring
Do Not Insert String into the Charging Port
Do Not Tie a Charm Around a Button
Do Not Use Speaker Holes as Lanyard Holes
Do Not Drill the Phone
Be Careful with Adhesive Anchors
Materials and Tools
Step 1: Plan the Pattern
Step 3: String the Beads
Step 4: Join the Ends
DIY Method 2: Single-Strand Phone Dangle
Phone Charm Safety and Care
Conclusion