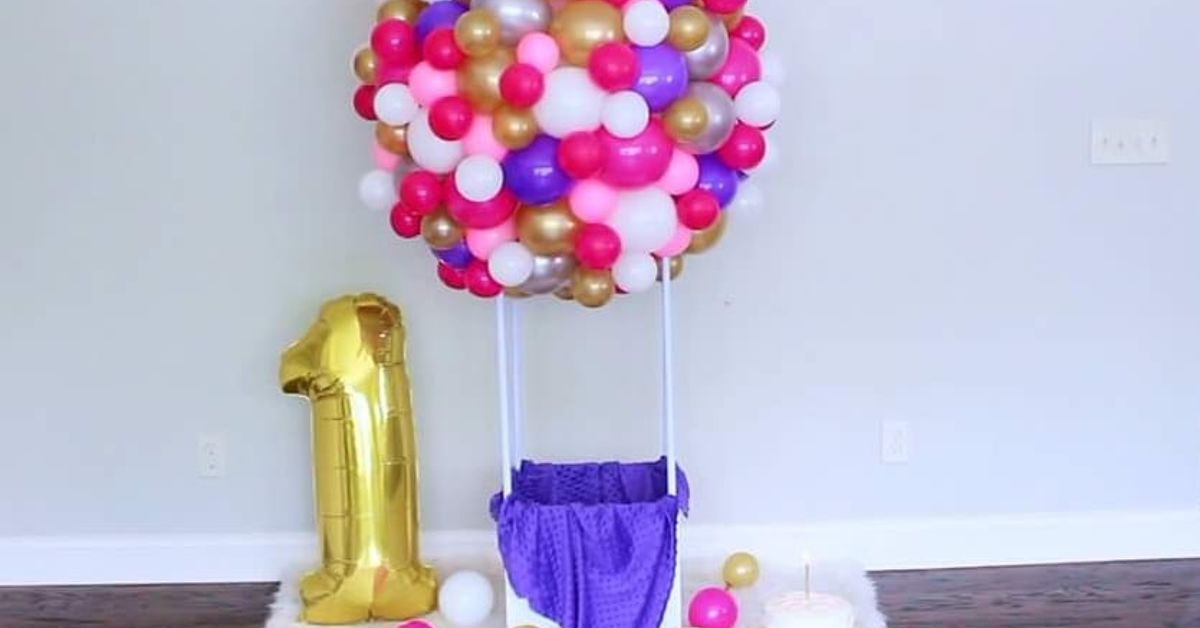
Some decor politely sits on a shelf. Some decor whispers, “I have excellent taste.” And then there is a handmade hot air balloon sculpturefloating, charming, slightly storybook, and just dramatic enough to make guests pause mid-sentence and say, “Wait, did you make that?” Yes. Yes, you did.
DIY Organic Hot Air Balloon Sculpture Decor blends the whimsy of a vintage balloon with the warmth of natural materials: jute, rattan, paper mache, dried flowers, moss, raffia, linen ribbon, wood beads, and earthy paint colors. It is part craft project, part wall art, part conversation starter, and part “I cannot believe this started with a balloon and some newspaper.”
This guide walks you through how to create a lightweight decorative hot air balloon sculpture for a nursery, reading nook, party backdrop, boho bedroom, cottagecore corner, craft room, wedding display, or seasonal mantel. The project is beginner-friendly, affordable, and flexible. You can keep it soft and minimal, make it woodland-inspired, add dried florals, or go full enchanted market stall. No judgment. We support tasteful whimsy here.
What Is Organic Hot Air Balloon Sculpture Decor?
Organic hot air balloon sculpture decor is a handmade decorative piece shaped like a hot air balloon and styled with natural textures. Unlike shiny party balloons or plastic decorations, this version uses earthy materials and handcrafted finishes. Think paper mache instead of foam, jute instead of nylon ribbon, dried grasses instead of glitter explosions, and muted color palettes instead of neon chaos.
The “organic” part does not necessarily mean every material is certified organic. In decor language, it usually means the finished piece feels natural, imperfect, tactile, and inspired by materials you might find in a garden shed, flower studio, or charming little craft shop where everything smells faintly of cedar and possibility.
Why This DIY Decor Works So Well
Hot air balloon decor has a timeless visual appeal because it suggests adventure without requiring anyone to actually leave the house. That is a major win. The balloon shape adds height and movement, while the basket creates a grounded, cozy detail. When made with natural fibers and soft textures, the sculpture can fit into many popular decor styles, including bohemian, farmhouse, Scandinavian, vintage nursery, woodland, cottagecore, and biophilic home design.
This project also works because it is lightweight. A paper mache balloon shell can hang safely when made properly, while small baskets, twine, and dried botanicals add visual richness without adding much weight. It is also customizable. You can make one large statement balloon, a trio in different sizes, or a small tabletop version that sits on a branch stand or wooden base.
Materials You Will Need
You do not need a professional art studio for this project. A kitchen table, a drop cloth, and the willingness to get a little glue on your fingers will do nicely.
For the Balloon Shape
- One round latex balloon, 10 to 14 inches wide
- Newspaper, kraft paper, or recycled packing paper
- White craft glue mixed with water, or flour-and-water paper mache paste
- Paintbrush or foam brush
- Large bowl to support the balloon while drying
- Fine-grit sandpaper
- Acrylic paint, chalk paint, or natural mineral-style paint
- Matte sealer, optional but useful
For the Organic Finish
- Jute twine, hemp cord, raffia, or cotton string
- Small woven basket, paper cup, mini berry basket, or handmade cardboard basket
- Dried flowers, seed pods, bunny tail grass, wheat stems, lavender, or small preserved greenery
- Sheet moss, reindeer moss, or dried fern pieces
- Wood beads, mini dowels, or bamboo skewers
- Linen ribbon, cotton lace, or torn fabric strips
- Hot glue gun or strong craft glue
- Clear fishing line or sturdy cotton cord for hanging
Optional Tools
- Craft knife
- Scissors
- Hole punch
- Wire cutters
- Floral wire
- Small clamp or clothespins
- Needle for popping the balloon
Choosing the Right Organic Style
Before you start gluing things with the confidence of a person who has not yet cleaned hot glue off a table, choose your design direction. This keeps the sculpture cohesive instead of making it look like a craft drawer had a weather event.
Boho Neutral
Use cream, tan, warm gray, and muted clay tones. Wrap the balloon seams in jute and finish the basket with raffia tassels. Add bunny tail grass or pampas grass for softness.
Woodland Nursery
Choose sage green, mushroom beige, warm white, and soft brown. Add tiny moss patches, miniature pinecones, pressed fern shapes, and a woven basket. This version looks wonderful above a crib area, but always hang it securely and out of reach.
Vintage Travel
Paint the balloon in faded stripes, antique cream, dusty blue, or muted terracotta. Add tiny paper flags, faux leather straps, and a basket that looks like it could hold a very small explorer with excellent luggage.
Dried Floral Romance
Use ivory paint, blush accents, dried roses, strawflowers, lavender, and soft linen ribbon. This version is beautiful for bridal showers, baby showers, garden parties, or a dreamy bedroom wall.
Step-by-Step: How to Make a DIY Organic Hot Air Balloon Sculpture
Step 1: Prepare Your Work Area
Cover your table with newspaper, parchment paper, or a washable craft mat. Paper mache is not difficult, but it has a mysterious talent for appearing on elbows, chair backs, and occasionally the family dog. Keep a bowl of water and a towel nearby for quick cleanup.
Step 2: Inflate the Balloon
Blow up the balloon to your preferred size and tie it securely. A 12-inch balloon creates a nice medium sculpture for wall or ceiling decor. Set it in a large bowl with the knot facing down. This keeps it stable while you apply paper strips.
Step 3: Mix the Paper Mache Paste
You can use a glue mixture or a simple flour paste. For the glue method, mix about two parts white craft glue with one part water. For the flour method, mix flour and water until it resembles thin pancake batter. The glue version usually dries a bit stronger and smoother, while the flour version is inexpensive and gives a classic handmade finish.
If you live in a humid climate, add extra drying time and avoid making the paste too thick. A thick paste can trap moisture between layers, and trapped moisture is the villain in this otherwise charming story.
Step 4: Apply Paper Strips
Tear newspaper or kraft paper into strips. Torn edges blend better than sharply cut edges. Dip each strip into the paste, remove excess with your fingers, and smooth it onto the balloon. Overlap the strips in different directions to strengthen the shell.
Apply three to four layers for a lightweight sculpture. If you want a sturdier piece, add a fifth layer, but do not overdo it. Too many layers can make the balloon heavy and slow to dry. Leave a small uncovered area around the balloon knot so you can remove the balloon later.
Step 5: Let It Dry Completely
Place the balloon in a dry, well-ventilated area. Drying may take overnight or up to two days depending on humidity, paste thickness, and the number of layers. The shell should feel firm, dry, and room temperature. If it feels cool to the touch, it may still contain moisture. Be patient. This is the part where the project teaches character.
Step 6: Remove the Balloon
Once the shell is fully dry, pop the balloon gently and pull it out through the opening. Trim the opening if needed. If the shell dents slightly, you can usually reshape it carefully from the inside with your fingers.
Step 7: Smooth and Paint the Balloon
Lightly sand rough spots. Do not aim for factory-perfect smoothness; a little texture is part of the organic charm. Paint the balloon in your chosen base color. Warm white, sand, clay, muted ochre, sage, dusty rose, and faded blue all work beautifully.
For a classic hot air balloon look, paint vertical panels or soft stripes. Use painter’s tape if you want crisp lines, or freehand the panels for a relaxed handmade look. Dry brushing with a slightly lighter paint color can highlight the paper texture and create a weathered, vintage effect.
Step 8: Create the Basket
A small woven basket is the easiest option. You can also wrap a paper cup with jute cord, use a small berry basket, or build a cube from cardboard and cover it with raffia. The basket should be proportionate to the balloon. If the basket is too large, the sculpture may look bottom-heavy; too small, and it may look like the balloon is carrying a thimble.
To make a simple basket, cut a small cup to the height you want, coat the outside with glue, and wrap it tightly with jute twine from bottom to top. Add a tiny strip of linen ribbon around the rim for a finished edge.
Step 9: Attach Suspension Cords
Cut four equal lengths of jute, hemp cord, or cotton string. Attach them evenly around the lower sides of the balloon and connect them to the four corners or sides of the basket. Hot glue works quickly, but a strong craft glue can provide a cleaner bond if you have time to let it cure.
Check the balance before everything dries permanently. Hold the sculpture by the top and see whether the basket hangs level. Adjust the cord lengths as needed. This is much easier now than after the glue sets and the sculpture starts acting like it has opinions.
Step 10: Add Organic Embellishments
Now comes the fun part. Add dried florals around the basket rim, a tiny moss cluster on one side, wood beads on the cords, or a small garland around the balloon. Keep embellishments light and balanced. A few natural details can look elegant; too many can make the balloon resemble a floating salad.
For a refined look, repeat materials in small amounts. For example, if you use lavender near the basket, add one tiny sprig near the top. If you use moss on the basket, add a small patch where the cords meet the balloon. Repetition makes the design feel intentional.
Step 11: Seal and Finish
If the sculpture will be displayed long-term, brush on a thin layer of matte sealer. Avoid glossy finishes unless that is your style. Organic decor usually looks best with soft, low-sheen surfaces. Let the sealer dry fully before hanging.
How to Display Your Hot Air Balloon Sculpture
This DIY sculpture can be used in more ways than you might expect. Hang it from a ceiling hook, suspend it from a branch mounted on a wall, add it to a nursery mobile, display it over a reading chair, or use several balloons as a party backdrop. For tabletop styling, attach the balloon to a curved wire armature secured in a wooden base, then disguise the base with moss and dried botanicals.
For a nursery or child’s room, place the sculpture where it can be admired but not grabbed. It should be decorative only, not a toy. Use secure hardware and avoid hanging it directly over a sleeping area unless you are absolutely confident in the installation. Lightweight does not mean “ignore gravity.” Gravity remains undefeated.
Color Palette Ideas
Earthy Minimal
Warm white, oat, sand, pale gray, and natural jute create a calm and modern look.
Garden Cottage
Use dusty rose, sage, cream, lavender, and muted brown. Add dried flowers and linen ribbon.
Desert Boho
Try terracotta, clay, ivory, camel, and faded peach. Pair with raffia and wood beads.
Forest Storybook
Choose moss green, mushroom beige, bark brown, and soft ivory. Add fern shapes, twigs, and tiny pinecones.
Common Mistakes to Avoid
Using Too Much Paste
Paper strips should be coated, not drowning. Excess paste causes wrinkles, long drying times, and weak spots.
Skipping Dry Time
If the shell is not fully dry before painting, moisture can become trapped. This may lead to softness, warping, or unpleasant odors.
Making the Basket Too Heavy
Use lightweight materials. A heavy basket can pull the cords out of place or make the sculpture difficult to hang.
Overdecorating
Natural embellishments are beautiful, but restraint matters. Let the balloon shape remain the star.
Ignoring Placement
Keep the sculpture away from candles, fireplaces, humid bathrooms, and direct sunlight. Dried flowers can fade, and paper mache does not appreciate steam baths.
Eco-Friendly and Budget-Friendly Tips
This project is excellent for using recycled and leftover materials. Old newspapers, shipping paper, cardboard packaging, fabric scraps, twine remnants, and thrifted baskets can all become part of the design. You can also collect fallen twigs, dried seed pods, and pressed leaves, as long as they are clean, dry, and pest-free.
For a more sustainable finish, choose water-based paints, reuse party balloons as molds before discarding them, and compost natural scraps when possible. If you buy dried flowers, choose varieties that last a long time, such as strawflowers, lavender, globe amaranth, wheat, statice, and bunny tail grass. These hold their shape well and bring texture without needing much maintenance.
Creative Variations to Try
Mini Hot Air Balloon Garland
Make several small balloons using water balloons as molds. Attach tiny baskets made from corks, paper cups, or wrapped cardboard. String them across a wall for a birthday party, nursery, or craft room.
Seasonal Balloon Sculpture
Use dried orange slices, cinnamon sticks, and pine sprigs for winter. Try pressed flowers and pastel paint for spring. Use wheat, seed pods, and terracotta ribbon for fall.
Wall-Mounted Half Balloon
Create only the front half of the balloon shell and mount it to a wooden plaque. This works well when ceiling hanging is not practical.
Illuminated Balloon Decor
Add a battery-operated micro LED strand inside the basket or around the cords. Use only cool-touch LED lights and never place real candles near paper, dried flowers, raffia, or twine.
Care and Maintenance
Dust the sculpture gently with a soft brush or a cool hair dryer on the lowest setting. If dried flowers shed, apply a very light mist of floral sealer or unscented hairspray before attaching them. Keep the sculpture indoors and away from moisture. If a cord loosens, remove the sculpture from display and repair it before hanging again.
Store seasonal versions in a sturdy box with tissue paper around the balloon and basket. Avoid crushing dried flowers. Label the box clearly so no one mistakes it for “random craft stuff” and stacks a waffle maker on top. A tragic ending for a noble balloon.
Real-Life Experience: What Making This Decor Teaches You
The first experience most people have with DIY organic hot air balloon sculpture decor is surprise. It looks like the kind of decor that should require a boutique price tag, a mysterious artisan, and possibly a waiting list. But once the materials are on the table, the project becomes very approachable. A balloon becomes the mold, paper becomes structure, and twine becomes architecture. It is a lovely reminder that beautiful home decor does not always begin in a store. Sometimes it begins with yesterday’s newspaper and a bowl of glue.
One practical lesson is that drying time matters more than enthusiasm. Enthusiasm says, “Let’s paint it now.” The shell says, “Absolutely not, I am still damp inside.” Waiting an extra day often leads to a cleaner, stronger result. The sculpture feels firmer, paint goes on more smoothly, and the final shape holds better. This is especially true in humid areas, where paper mache can take longer to dry than expected. Patience is not glamorous, but neither is a sagging balloon.
Another experience is learning the value of proportion. The basket may look adorable on its own, but once attached to the balloon, it needs to feel visually balanced. A chunky basket can make the sculpture look clumsy, while a tiny basket can seem disconnected. The best approach is to test the basket size before decorating it. Hold it under the balloon, step back, and look at the shape as a whole. If it feels right from across the room, it will usually work up close.
Working with organic materials also teaches restraint. Dried flowers, moss, raffia, beads, ribbon, and twine are all tempting. They sit there on the table looking charming and whispering, “Add me too.” But the most elegant sculptures usually use a limited palette and repeat a few textures. A small bundle of dried grass on the basket, a few wood beads on the cords, and one soft ribbon detail can be more beautiful than covering every inch. Negative space gives the eye a place to rest.
One of the most enjoyable parts of this project is how personal it becomes. A nursery version might include soft neutrals and a tiny name banner. A wedding shower version might use dried flowers from the event palette. A reading nook version might feature vintage map paper under a thin wash of paint. A fall version could include wheat, seed pods, and warm clay tones. The same basic structure can become sweet, rustic, elegant, playful, or dramatic depending on the finish.
This project is also a confidence builder. It uses simple techniques, but the result looks layered and impressive. Beginners learn paper mache, surface finishing, basic hanging balance, and natural styling in one project. Experienced crafters can take it further with wire armatures, sculpted ribs, handmade baskets, painted panels, or tiny handmade accessories. It offers enough structure to guide you and enough freedom to make it your own.
Most importantly, DIY organic hot air balloon sculpture decor brings a sense of wonder into a room. It softens blank corners, adds movement overhead, and creates a little visual story. In a world full of flat screens, straight lines, and practical storage bins, a floating handmade balloon feels refreshingly imaginative. It says the room is not just decorated; it is cared for, played with, and given a bit of personality. And if someone asks where you bought it, you get the satisfaction of saying, “Actually, I made it,” which is the crafting equivalent of a mic drop.
Conclusion
DIY organic hot air balloon sculpture decor is a beautiful project for anyone who wants handmade home decor with charm, texture, and personality. By combining paper mache, natural fibers, dried botanicals, and a thoughtful color palette, you can create a lightweight sculpture that feels whimsical without looking childish and earthy without looking unfinished.
The key is balance: enough structure to keep the balloon strong, enough natural detail to make it interesting, and enough restraint to let the design breathe. Whether you hang one above a reading chair, create a trio for a nursery, or use it as a romantic party centerpiece, this project proves that simple materials can rise to delightful heights. No actual flight license required.