Plain tea towels are the quiet interns of the kitchen. They dry dishes, rescue counters from coffee spills, wrap warm bread, and occasionally get flung over your shoulder when you want to look like a person who has their life together. But let’s be honest: a stack of blank white or beige towels can feel a little too “rental apartment starter pack.” The good news? You do not need a design degree, a craft room, or a suspiciously perfect Pinterest personality to turn them into charming kitchen decor.
Decorating tea towels is one of the easiest DIY kitchen projects because the canvas is small, affordable, useful, and forgiving. If your first painted lemon looks more like a yellow potato, congratulations: you have created rustic farmhouse character. Whether you love embroidery, fabric paint, stencils, iron-on vinyl, dye, trims, or simple hand-drawn designs, there is a method that can fit your skill level and your patience level.
This guide shares 10 lovely ways to decorate plain tea towels with practical steps, design ideas, care tips, and examples you can actually use. The focus keyword is simple: decorate plain tea towels. The bigger idea is even better: make everyday kitchen towels feel personal, giftable, seasonal, and far too cute to hide in a drawer.
Why Decorated Tea Towels Are Worth the Tiny Effort
Tea towels are typically made from cotton, linen, or cotton-linen blends, which makes them great candidates for stamping, painting, embroidery, dyeing, and sewing. Their thin texture also makes them easier to fold, hang, frame, or use as reusable gift wrap. A decorated tea towel can become a housewarming gift, a holiday accent, a hostess present, a small business product, or the thing that makes your oven handle look like it has a stylist.
Before you start any tea towel craft, wash and dry the towel first. This helps remove factory finishes, reduces shrinkage later, and gives paint, dye, thread, or heat-transfer vinyl a cleaner surface to grip. Iron it flat, too. Wrinkles are adorable on puppies, not on your stamping area.
1. Stamp Them With Citrus Prints
Fresh, cheerful, and slightly juicy
Citrus stamping is one of the prettiest beginner-friendly ways to decorate plain tea towels. Cut lemons, limes, oranges, or grapefruits in half, blot the fruit until it is not dripping, and dip the cut side lightly into fabric paint or acrylic paint mixed with fabric medium. Then press the fruit onto the towel to create bright, summery slices.
For a clean print, avoid overloading the fruit with paint. Too much paint fills the little pulp lines and turns your lemon into a blob with ambition. Test the stamp on scrap paper first, then move to the towel. Arrange prints in a border, scatter them diagonally, or create a “fruit market” look with different citrus colors.
Example idea: stamp yellow lemons along the bottom edge, add small green fabric-painted leaves between them, and write “Fresh Squeezed” in simple script near one corner.
2. Try Potato Stamping for Charming Patterns
The humble potato finally gets its art-school moment
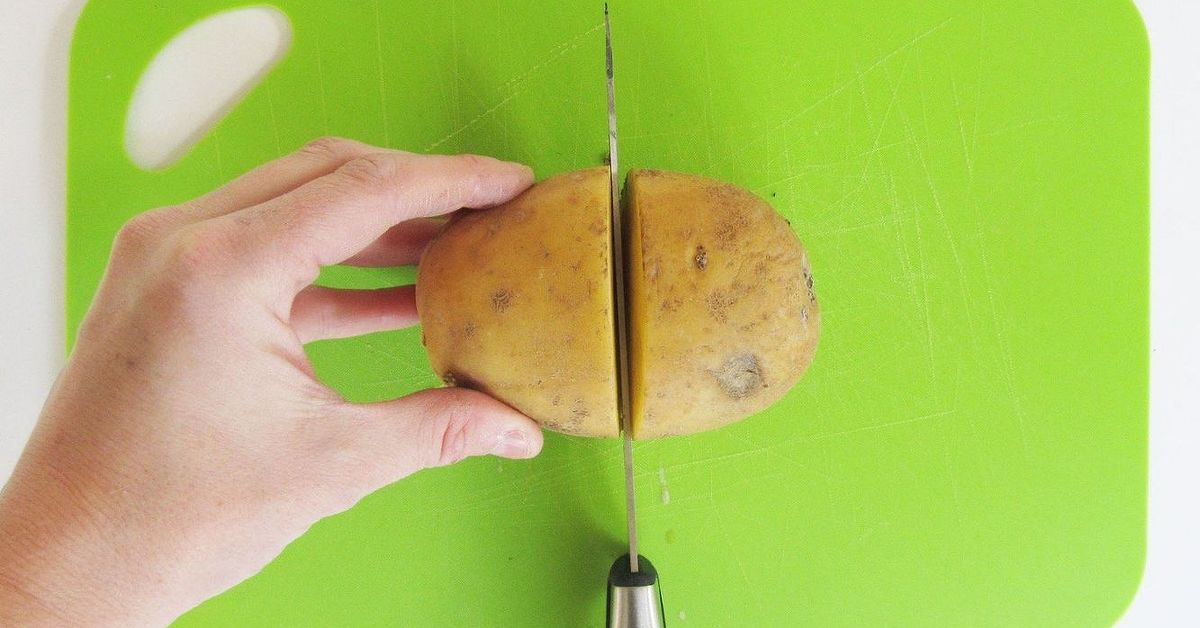
Potato stamping is wonderfully low-cost and surprisingly stylish. Cut a potato in half, press a cookie cutter into the flat side, and trim around the shape to create a raised stamp. Stars, hearts, leaves, flowers, circles, and simple geometric shapes work especially well.
Use a brush to apply a thin layer of paint to the potato stamp instead of dunking it. Place cardboard or heavy paper under the towel to prevent bleed-through, then press down evenly. Repeat your shape in rows for a modern pattern or vary the angle for a hand-crafted look.
Potato-stamped towels are perfect for family crafts, but an adult should handle the knife work. Kids can help stamp, choose colors, and proudly explain that the kitchen towel is “limited edition,” which technically it is.
3. Paint a Simple Border With Fabric Paint
Minimal effort, maximum “I bought this at a boutique” energy
If all-over patterns feel intimidating, paint a border. A simple stripe, scallop, checkerboard, vine, or row of tiny dots can completely transform a plain tea towel. Use painter’s tape to mark straight lines, or go freehand if you prefer a loose handmade style.
Fabric paint is designed to flex with fabric, while acrylic paint usually needs fabric medium to make it softer and more washable. Apply thin layers and let each layer dry before adding details. A dry brush works better than a soggy brush because tea towel fabric can absorb paint quickly.
Example idea: tape off three narrow stripes near the bottom of a white towel. Paint the stripes in muted blue, sage, and mustard for a modern farmhouse look. Add a tiny monogram in the corner if you are feeling fancy and have not yet consumed too much coffee.
4. Add Hand Embroidery for a Keepsake Look
Slow, sweet, and impossible to fake
Hand embroidery gives tea towels a warm, heirloom quality. You can stitch flowers, herbs, fruit, kitchen tools, initials, seasonal phrases, or tiny motifs such as bees and mushrooms. Beginner stitches like backstitch, stem stitch, running stitch, satin stitch, lazy daisy, and French knots are enough to create beautiful designs.
Transfer a design with a washable fabric pen, lightbox, sunny window, or iron-on embroidery pattern. Keep the design away from areas that will get heavy scrubbing if the towel will be used daily. For decorative towels, go wild. For hard-working towels, keep the embroidery small and secure.
Example idea: embroider a row of herbs along the lower edge: rosemary, basil, thyme, and mint. Label each one with tiny backstitched text. It will look charming even if your real basil plant on the windowsill is currently fighting for its life.
5. Use Stencils for Crisp, Repeatable Designs
For people who like handmade results but also enjoy straight lines
Stencils are great when you want clean shapes without drawing everything by hand. Choose a reusable stencil with words, botanical designs, bees, stars, tiles, or geometric patterns. Tape the stencil firmly in place, then dab fabric paint through it using a stencil brush or foam pouncer.
The trick is to use very little paint. A loaded brush can push paint under the stencil edges and blur the design. Tap off excess paint on a paper towel first, then build color gradually. Peel the stencil while the paint is still slightly wet to avoid lifting dry paint.
Example idea: use a vintage-style bee stencil on the lower corner of a linen tea towel, then sew a small strip of lace or cotton trim along the edge. Suddenly your towel looks like it belongs in a French countryside kitchen, even if your kitchen currently contains cereal boxes and one mysterious takeout sauce packet.
6. Make Iron-On Vinyl Tea Towels
Fast, bold, and perfect for funny kitchen quotes
Heat-transfer vinyl, often called iron-on vinyl or HTV, is a great option for sharp lettering and graphic designs. You can cut shapes with a craft cutting machine or buy pre-cut iron-on decals. Popular tea towel designs include names, family recipes, holiday phrases, coffee jokes, baking quotes, and minimalist line art.
Prewash the towel without fabric softener so the vinyl can adhere properly. Follow the vinyl brand’s instructions for temperature, pressure, and pressing time. After applying the design, wait before washing, and wash gently to protect the decoration.
Example idea: create a towel that says “Alexa, do the dishes” in black vinyl on a white cotton towel. Hang it near the sink and enjoy the emotional support of a joke that understands your struggle.
7. Dye Them With Ombre or Watercolor Effects
When plain white needs a dramatic little vacation
Dyeing is a beautiful way to decorate tea towels without adding a surface design. You can create ombre edges, soft watercolor patches, dip-dyed corners, or tie-dye patterns. Cotton and linen usually take dye well, but always check the towel fiber content and the dye instructions before starting.
For an ombre towel, mix fabric dye in a container, dip one end of the towel into the dye bath, and gradually lift it out so the bottom edge stays in the dye longer. The result is a soft fade from deep color to pale color. For a watercolor look, apply diluted dye or fabric paint with a brush and let colors blend naturally.
Example idea: dye the bottom third of a towel in soft indigo, then embroider tiny white stars over the dyed area once it is dry. It becomes part kitchen towel, part night sky, part evidence that you are more artistic than your junk drawer suggests.
8. Sew on Fabric Scraps, Ruffles, or Trim
A scrap-busting project with cottage charm
If you have fabric scraps from old sewing projects, leftover quilting cotton, vintage linens, ribbon, pom-pom trim, rickrack, or lace, use them to decorate plain tea towels. Sew a patterned fabric strip across the bottom edge, add a ruffle, or create a patchwork band.
This method is ideal if you want texture without paint. Choose washable trims, and prewash fabric scraps before sewing so they do not shrink later. A straight stitch is usually enough, but a zigzag stitch can help secure raw edges.
Example idea: sew a two-inch strip of floral cotton across the bottom of a white flour sack towel, then add thin rickrack above the seam. It gives the towel a sweet cottage feel and makes your kitchen look like it has homemade pie cooling somewhere, even when the only thing cooling is leftover pizza.
9. Draw Custom Designs With Fabric Markers
The easiest route from blank towel to personality
Fabric markers are ideal for doodles, handwritten recipes, family names, kids’ artwork, and small details. They are less messy than paint and easier to control. Place cardboard under the towel, smooth the fabric, and use light pencil guidelines if needed.
You can trace a printed design by slipping it under a thin towel, then drawing over it. This works especially well with flour sack towels because they are usually lightweight enough to see through. Let the ink dry fully and follow the marker brand’s heat-setting or washing instructions.
Example idea: ask each family member to draw one tiny vegetable, then label them like a farmers market poster. The carrot may look like an orange lightning bolt. That is not a failure; that is family history.
10. Turn Tea Towels Into Decorative Cafe Curtains or Wall Art
Because towels deserve a promotion
Decorating tea towels does not always mean changing the fabric. Sometimes the loveliest upgrade is using them differently. Pretty tea towels can become cafe curtains, shelf liners, framed textile art, bread basket liners, reusable gift wrap, or mini wall hangings.
To make cafe curtains, clip drapery rings to the top edge of two matching tea towels and hang them from a small tension rod or cafe rod. To create wall art, place a printed or embroidered towel in a simple frame or hang it with a wooden poster hanger. This is a clever way to show off special towels you do not want someone using to wipe spaghetti sauce. Boundaries are healthy.
Example idea: decorate a towel with a seasonal stencil, then hang it from a small dowel with twine. Swap it out for fall, Christmas, spring, and summer. It is easier than changing your entire kitchen decor and significantly less expensive than buying new throw pillows for a room that does not even have a couch.
Best Tea Towel Materials for DIY Decorating
The best material depends on your project. Cotton flour sack towels are affordable, absorbent, lightweight, and easy to paint or embroider. Linen towels have a refined texture and look beautiful with simple embroidery, citrus stamping, or monograms. Cotton-linen blends offer a nice balance of softness, durability, and decorative appeal. Microfiber can work for some printed designs, but it may not behave the same way with paint, dye, or heat transfer, so testing is important.
For beginners, white or natural cotton towels are the easiest starting point. They show color clearly, accept many craft materials, and are inexpensive enough that you will not panic if your first attempt looks like it was supervised by a raccoon.
How to Make Your Decorated Tea Towels Last
Always let painted, stamped, dyed, or marked towels dry completely before heat-setting or washing. Many fabric paints and markers need time to cure. When heat-setting, place a pressing cloth between the iron and the design, and follow the product instructions. For iron-on vinyl, avoid ironing directly over the decoration.
Wash decorated tea towels gently, especially at first. Cold or warm water, mild detergent, and line drying can help preserve painted, stitched, or vinyl details. Avoid bleach unless the product instructions say it is safe. If the towel has embroidery, wash it inside a mesh laundry bag or by hand when possible. Decorative towels can still be useful, but the more delicate the design, the kinder you should be.
Gift Ideas Using Decorated Tea Towels
Hand-decorated tea towels make thoughtful gifts because they are personal without being overly dramatic. Nobody opens a tea towel and thinks, “Wow, this is a lot of emotional pressure.” Pair a lemon-stamped towel with homemade cookies, a wooden spoon, and a jar of jam. Gift an embroidered herb towel with a small potted basil plant. Wrap a loaf of bread in a hand-painted towel and tie it with cotton ribbon. Create a set of monogrammed towels for a housewarming or bridal shower.
For holiday gifting, make sets in seasonal colors: red berries for winter, pastel florals for spring, citrus for summer, and copper leaves for fall. If you sell handmade products online or at craft fairs, decorated tea towels are also practical inventory because they are lightweight, easy to package, and useful in nearly every home.
My Experience: What I Learned From Decorating Plain Tea Towels
The first time I tried decorating tea towels, I made the classic beginner mistake: I treated the towel like paper. I loaded the brush with too much paint, pressed too hard, and expected the fabric to behave politely. It did not. Fabric has texture, movement, and opinions. The paint spread a little, the edge looked fuzzy, and my neat row of dots turned into a group of tiny planets experiencing weather. But after the towel dried, something surprising happened: it still looked cute. Not perfect, but warm, handmade, and far more interesting than the blank towel I started with.
The biggest lesson is that tea towel decorating rewards preparation. Washing, drying, and ironing the towel sounds boring, but it makes a huge difference. A smooth towel gives you cleaner paint lines, easier stitching, and better placement. I also learned to fold the towel the way it will hang before choosing where to decorate it. A gorgeous design hidden on the back fold is still gorgeous, technically, but it is also shy. Place your main design where people can see it when the towel is hanging from an oven handle, hook, or drawer pull.
Another useful experience: choose the decoration method based on how the towel will be used. For a towel that will dry dishes every day, keep decorations near the lower edge or corner and use washable, low-profile techniques. Heavy embroidery across the center may look beautiful, but it can feel awkward when drying glassware. For display towels, you can add trims, layered fabric, bold vinyl quotes, and more delicate embellishments. In other words, let the towel tell you whether it wants a work uniform or a party dress.
Stamping is the fastest confidence booster. Citrus stamping and potato stamping are fun because they do not require perfect control. Uneven prints look charming rather than wrong. Stenciling is better when you want repeatable results, but it demands patience with paint. The best stencil advice is simple: use less paint than you think you need. Then use even less. Fabric markers are wonderful for small details, but they can drag on textured towels, so test first. Embroidery takes the longest, but it creates the most sentimental result. A tiny stitched herb, flower, or name can make a basic towel feel like a keepsake.
I also learned that color restraint helps. When every color in the craft drawer joins the project, the towel can start looking like a parade got lost in the kitchen. Two or three colors often look more polished. A navy stripe, a yellow lemon, a sage green leaf, a red monogram, or a black line drawing can be enough. White and cream towels give the most flexibility, but colored towels can be beautiful with white paint, metallic accents, or tone-on-tone stitching.
Finally, decorated tea towels make excellent gifts because they are useful and personal. People may not need another decorative object, but almost everyone can use a kitchen towel. Add a handmade touch, wrap it around bread, cookies, coffee, or a wooden spoon, and it becomes a gift that feels thoughtful without being fussy. The project is small enough to finish in an afternoon, inexpensive enough to repeat, and forgiving enough for beginners. That combination is rare in DIY. Usually crafts demand either money, time, storage space, or emotional resilience. Tea towels mostly ask you to relax, make a little mess, and enjoy turning something plain into something lovely.
Conclusion
Decorating plain tea towels is a small project with a big payoff. With fabric paint, stamps, embroidery floss, stencils, dye, trims, markers, or iron-on vinyl, you can turn basic kitchen towels into cheerful decor, practical gifts, or personalized everyday essentials. The best part is that there is no single correct style. A minimalist stripe, a messy lemon print, a stitched bouquet, or a funny kitchen quote can all work beautifully.
Start with one towel, one technique, and one simple idea. Prewash it, test your materials, decorate the visible area, and let the finished piece dry or cure properly before washing. Soon, that forgotten stack of plain towels will become a collection of custom kitchen accents. And if one design does not turn out exactly as planned, call it handmade charm and hang it with confidence. The kitchen has seen worse. Usually around dinner time.