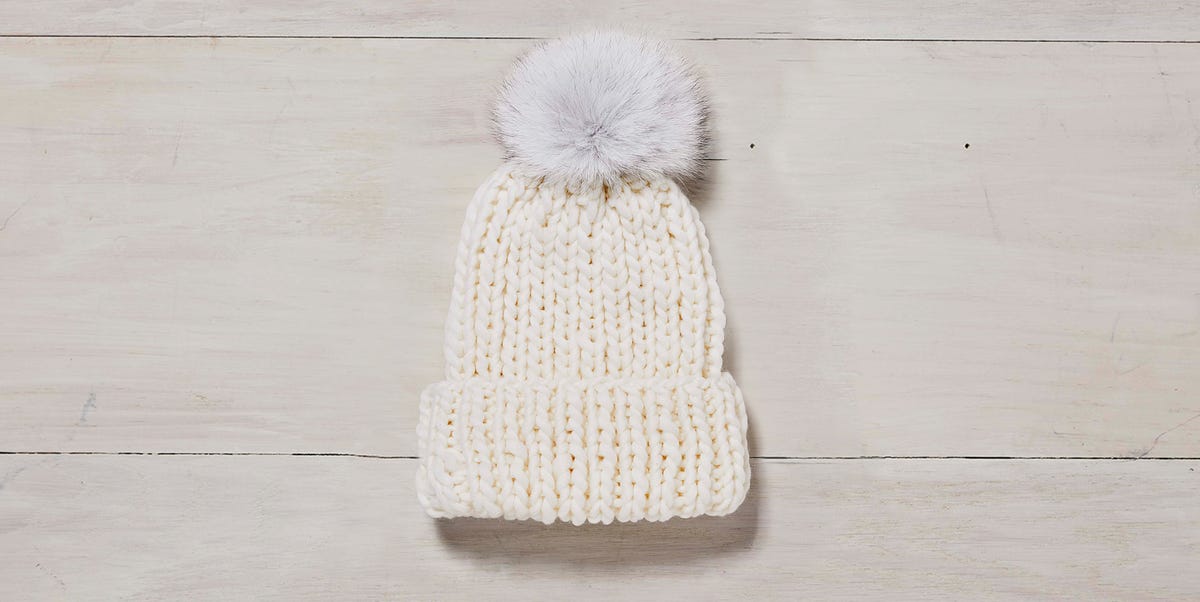
If you can knit a rectangle, you can learn how to knit a hat. Yes, even if your first scarf looked like a lasagna noodle with commitment issues. A basic knit hat is one of the friendliest beginner knitting projects because it teaches useful skills without demanding a PhD in yarn physics. You practice casting on, knitting in the round, making ribbing, shaping the crown, and finishing neatlyall while creating something you can actually wear without pretending it is “abstract fiber art.”
This easy knit hat for beginners tutorial walks you through the whole process step by step. We will use simple stitches, beginner-friendly tools, and clear measurements so you can make a cozy beanie that fits an average adult head. You will also learn how to adjust the size, avoid common mistakes, and understand why gauge matters before your hat becomes either a thimble or a lampshade.
Why a Hat Is a Great Beginner Knitting Project
A hat is small enough to finish quickly but interesting enough to teach real knitting skills. Unlike a scarf, which can feel like knitting a driveway, a hat gives you a satisfying beginning, middle, and end. You cast on, work the brim, build the body, decrease the crown, and then gather the top closed. The result is wearable, giftable, and wonderfully practical.
Beginner knitters often start with flat projects, but learning to knit a hat in the round opens the door to cowls, sleeves, mittens, socks, and seamless garments. Circular needles may look mysterious at first, but they are simply two needle tips connected by a flexible cable. Once the stitches are joined, you knit around and around like a tiny yarn carousel.
Supplies You Need to Knit a Beginner Hat
Before you begin, gather your tools. You do not need a giant craft-room setup or a drawer full of mysterious gadgets. For this easy knit hat pattern, keep things simple.
Materials List
- One skein of bulky weight yarn, about 100 to 140 yards
- US size 10 or 10.5 circular needles, 16 inches long
- Double-pointed needles in the same size, or a long circular needle for magic loop
- One stitch marker
- Tapestry needle for weaving in ends
- Scissors
- Measuring tape
- Optional pom-pom maker or faux fur pom-pom
Bulky yarn is a smart choice for a beginner knit hat because it works up quickly and makes the stitches easier to see. Light-colored yarn is also helpful. Black yarn may look stylish, but for a first project, it can make your stitches disappear like socks in a dryer.
Best Yarn for a Beginner Knit Hat
For your first knitted hat, choose a smooth bulky or super bulky yarn. Wool blends are warm, stretchy, and forgiving. Acrylic yarn is affordable, washable, and easy to find. A wool-acrylic blend gives you the best of both worlds: warmth, softness, durability, and less drama on laundry day.
Avoid slippery yarns, fuzzy novelty yarns, and splitty cotton yarn for your first hat. They can make it harder to read your stitches. Save the glitter eyelash yarn for the day you feel emotionally prepared to argue with a skein.
Understanding Hat Size and Fit
Most adult heads measure around 21 to 24 inches in circumference. A knitted hat usually needs negative ease, which means the finished hat should be slightly smaller than the head so it stretches and stays in place. For an average adult beanie, a finished circumference of about 18 to 21 inches usually works well depending on yarn stretch and stitch pattern.
For this tutorial, we will make a simple adult hat designed to fit most heads between 21 and 23 inches. The ribbed brim stretches nicely, while the stockinette body keeps the project beginner-friendly.
Basic Adult Hat Measurements
- Finished circumference: about 19 to 20 inches unstretched
- Total length before closing crown: about 8.5 to 9 inches
- Brim length: about 2 to 3 inches
- Body length before decreases: about 6 inches from cast-on edge
Gauge: The Tiny Test That Saves the Whole Hat
Gauge means how many stitches and rows you get per inch. It may sound like the least exciting part of knitting, but it is the reason one hat fits a human and another fits a grapefruit. Different knitters create different tension, even when using the same yarn and needle size.
For this beginner knit hat pattern, aim for about 3.5 to 4 stitches per inch in stockinette stitch with bulky yarn. If your stitches are too tight and you get more stitches per inch, go up a needle size. If your stitches are loose and you get fewer stitches per inch, go down a needle size.
To check gauge, knit a small swatch in the round or knit a flat sample and measure the center. Do not stretch it while measuring. Your future hat will thank you politely.
Easy Knit Hat Pattern for Beginners
This pattern is worked from the bottom up in the round. You will start with a stretchy ribbed brim, continue with a simple knit body, then decrease at the top to shape the crown.
Pattern Details
- Skill level: Beginner to advanced beginner
- Finished size: Average adult
- Yarn weight: Bulky
- Main stitches used: Knit, purl, knit two together
- Construction: Knit in the round from brim to crown
Abbreviations
- CO: Cast on
- K: Knit
- P: Purl
- K2tog: Knit two stitches together
- Sts: Stitches
- Rnd: Round
Step 1: Cast On Stitches
Cast on 72 stitches using your 16-inch circular needles. The long-tail cast-on is a good choice because it is stretchy and neat. If you are brand new to knitting, use any cast-on method you already know. The knitting police are not coming.
After casting on, make sure your stitches are not twisted around the cable. Lay the circular needle on a table and check that the cast-on edge points toward the center all the way around. Place a stitch marker on the right needle to mark the beginning of the round.
Step 2: Join in the Round
To join, knit the first stitch of the round, pulling the working yarn gently so there is no gap between the first and last stitches. Be careful not to twist your stitches. A twisted join creates a Möbius-strip hat, which is fascinating mathematically but not ideal for ears.
Once joined, continue working in rounds. Every time you reach the stitch marker, you have completed one round.
Step 3: Knit the Ribbed Brim
Work in knit 2, purl 2 ribbing for 2.5 inches:
Ribbing round: K2, P2. Repeat from beginning to end of round.
Ribbing makes the brim stretchy and helps the hat hug the head comfortably. It also gives the edge a polished look. If you want a folded brim, knit the ribbing for 4 to 5 inches instead. A folded brim is extra warm and gives the hat a classic beanie style.
Step 4: Knit the Body of the Hat
After the brim, switch to knitting every round. When you knit every round on circular needles, you create stockinette stitch. That means the outside of the hat will show smooth little “V” shapes.
Continue knitting every round until the hat measures about 6 inches from the cast-on edge for a regular beanie. For a slouchy hat, continue until it measures 7 to 8 inches before starting decreases.
Try the hat on carefully while it is still on the needles if your cable allows. If not, measure it flat. Remember that the crown decreases will add another 2 to 3 inches of height.
Step 5: Shape the Crown
Now comes the part that turns your knitted tube into an actual hat. Crown shaping is done by decreasing stitches evenly around the top. The easiest decrease for beginners is K2tog, which means knitting two stitches together as one.
For 72 stitches, use this simple decrease sequence:
- Round 1: K7, K2tog. Repeat around. You now have 64 stitches.
- Round 2: Knit all stitches.
- Round 3: K6, K2tog. Repeat around. You now have 56 stitches.
- Round 4: Knit all stitches.
- Round 5: K5, K2tog. Repeat around. You now have 48 stitches.
- Round 6: Knit all stitches.
- Round 7: K4, K2tog. Repeat around. You now have 40 stitches.
- Round 8: Knit all stitches.
- Round 9: K3, K2tog. Repeat around. You now have 32 stitches.
- Round 10: K2, K2tog. Repeat around. You now have 24 stitches.
- Round 11: K1, K2tog. Repeat around. You now have 16 stitches.
- Round 12: K2tog around. You now have 8 stitches.
As the crown gets smaller, your 16-inch circular needle may become too wide to comfortably hold the stitches. At that point, switch to double-pointed needles or use the magic loop method with a longer circular needle.
Step 6: Close the Top
Cut the yarn, leaving a tail about 8 to 10 inches long. Thread the tail through a tapestry needle. Slip the needle through the remaining 8 stitches, remove the knitting needles, and pull the yarn snug to close the top of the hat.
Turn the hat inside out and weave the yarn tail through the inside stitches to secure it. Weave in the cast-on tail at the brim as well. Trim the extra yarn, but do not cut too close to the fabric. Yarn likes to wiggle, and we do not want any surprise unraveling.
Step 7: Add a Pom-Pom or Leave It Classic
A pom-pom is optional, but it does add a cheerful “yes, I made this” energy. You can make a yarn pom-pom with a pom-pom maker, cardboard circles, or even your fingers. You can also attach a faux fur pom-pom with ties or a button so it can be removed before washing.
If you prefer a clean, classic look, skip the pom-pom. A simple knit beanie never goes out of style.
How to Customize Your Knit Hat
Once you understand the basic structure, you can personalize your hat in many ways. Keep the same stitch count and construction, then adjust small design details.
Make It Slouchy
Add 1 to 3 inches to the body before beginning crown decreases. A slouchy knit hat has a relaxed look and works especially well with soft wool blends.
Make a Folded Brim
Knit the ribbing for 4 to 5 inches instead of 2.5 inches. Fold the brim upward when wearing. This makes the hat warmer around the ears and gives it a cozy winter style.
Add Stripes
Change yarn colors every few rounds for stripes. For clean stripes in the round, switch colors at the beginning marker and carry the unused yarn neatly up the inside if the stripes are narrow.
Use a Different Rib
Try K1, P1 ribbing for a tighter, stretchier brim. You can also knit the entire hat in ribbing for a snug, stretchy watch cap style.
Common Beginner Mistakes and How to Fix Them
My Stitches Are Twisted
If you notice the twist after only one or two rounds, it is usually best to start over. Twisted stitches in the round cannot be fixed later without unraveling. Annoying? Yes. Faster than pretending it is fine for six inches? Also yes.
My Hat Is Too Big
Your gauge may be too loose, or your yarn may stretch more than expected. Try going down a needle size or casting on fewer stitches in a multiple that works with your ribbing. For K2, P2 ribbing, use a multiple of 4.
My Hat Is Too Small
If the hat feels tight enough to make your thoughts louder, you need more stitches, larger needles, or stretchier yarn. You can also block the finished hat gently, but blocking cannot perform miracles.
I Dropped a Stitch
Use a crochet hook to pull the dropped stitch back up through each ladder of yarn. If the stitch has dropped several rows and you are unsure what to do, place a locking stitch marker through it so it cannot unravel further.
There Is a Gap at the Join
Pull the first few stitches of the round gently but firmly. When weaving in the tail, you can close a small gap by sewing it neatly from the inside.
Washing and Blocking Your Finished Hat
Check your yarn label before washing. Some yarns are machine washable, while others need hand washing. In general, hand washing is the safest method for handmade hats.
Fill a sink or bowl with cool water and a small amount of gentle wool wash. Soak the hat for about 10 to 15 minutes, then press out the water without wringing. Roll the hat in a towel to remove extra moisture. Lay it flat to dry, shaping it gently with your hands.
Blocking helps even out stitches and gives the hat a finished look. If your ribbing looks a little shy or your crown decreases seem slightly dramatic, blocking can smooth things out beautifully.
Beginner Tips for Knitting a Better Hat
Use stitch markers between decrease sections if you lose count easily. For this pattern, you can place markers every 9 stitches before the first decrease round. Then you will always know where each K2tog belongs.
Count your stitches after each decrease round. It takes a minute and prevents confusion later. If your stitch count is off, find the mistake right away instead of carrying it forward like a tiny yarn tax.
Keep your tension relaxed. Many beginners grip the needles tightly because they are concentrating. Your stitches should slide along the needle without needing a motivational speech.
Finally, do not judge your hat before it is finished. Knitting often goes through an awkward teenage phase. The brim may curl, the crown may look strange on the needles, and the whole thing may seem suspiciously tube-like. Trust the process until the last end is woven in.
Experience Notes: What Beginners Learn When Knitting Their First Hat
Knitting a first hat is rarely just about making a hat. It is a small lesson in patience, problem-solving, and accepting that handmade things have personality. The first thing most beginners notice is that circular needles feel awkward for about five minutes and then suddenly make sense. At first, the cable seems to have its own agenda. The stitches bunch up, the marker falls off, and the yarn ball rolls away like it has somewhere better to be. But after a few rounds, your hands settle into a rhythm.
One of the biggest beginner experiences is learning to read your knitting. At the start, knit stitches and purl stitches may look like secret code. After working the ribbed brim, you begin to recognize the difference. Knit stitches look like neat little V shapes, while purl stitches have small bumps. This skill matters because it helps you catch mistakes early. Instead of simply following instructions, you begin to understand what the fabric is doing.
Another helpful lesson is that tension improves with practice. Your first few rounds may be tight enough to qualify as emotional support armor. Later rounds may loosen up. This is normal. By the time you finish the hat, your hands usually relax, your stitches become more even, and your confidence grows. If your first hat has a slightly uneven texture, that is not failure. That is proof that a real person made it, not a factory robot with perfect lighting.
Beginners also learn that measuring is better than guessing. A hat can look long enough while it is on the needles, but once the crown is shaped, it may sit higher than expected. That is why measuring from the cast-on edge before decreasing is important. If you want full ear coverage, make the body a little longer. If you want a fitted beanie, keep it closer to the recommended length. Knitting teaches you that one extra inch can be the difference between cozy and “why are my ears outdoors?”
The crown decrease section is often the most exciting part because the project finally becomes hat-shaped. It can also feel intimidating when the stitches no longer fit comfortably around the circular needle. Switching to double-pointed needles or magic loop may seem like entering advanced territory, but it is simply a tool change. Go slowly, keep your stitches from sliding off, and remember that the top of the hat is forgiving. Small uneven spots near the crown usually disappear once the final stitches are pulled closed.
Many knitters find that finishing the hat brings a surprising sense of pride. Weaving in the ends may be a small step, but it turns the project from “pile of yarn with ambition” into a wearable accessory. Trying on the finished hat is the reward. Maybe it fits perfectly. Maybe it is a little slouchier than planned. Maybe the pom-pom leans slightly to the left like it has opinions. Either way, you made something useful with your own hands.
The best experience-based advice is to knit the first hat as a learning project, not a perfection contest. Choose yarn you like, follow the steps, and allow yourself to make small mistakes. After one hat, the second one will be easier. After three hats, you may start casually saying things like “I adjusted the crown shaping,” which is how you know the yarn has officially claimed you.
Conclusion
Learning how to knit a hat is one of the most rewarding beginner knitting projects because it is practical, quick, and full of useful skills. With bulky yarn, circular needles, a stretchy ribbed brim, and simple crown decreases, you can make a cozy handmade beanie even if you are still new to knitting. Start with an easy pattern, measure carefully, check your gauge, and give yourself permission to learn as you go.
Your first knit hat may not be flawless, but it will be yours. It will carry the tiny quirks of your hands, your patience, and possibly the memory of muttering at a stitch marker. That is part of the charm. Once you finish one, you will understand why knitters keep making hats for friends, family, neighbors, pets who tolerate fashion, and anyone with a cold-looking head.
Note: This article is based on widely used beginner knitting methods, standard hat-sizing principles, common yarn-label guidance, and practical hat construction techniques used by reputable craft education and yarn resources.