If you have ever stepped outside your Minecraft starter hut at night wearing absolutely nothing but confidence, you probably learned one important lesson: confidence has terrible durability. Zombies do not care about your optimism. Skeletons have the aim of a bored Olympic archer. Creepers, meanwhile, treat personal space like a polite suggestion.
That is why learning how to make armor in Minecraft is one of the most important survival skills in the game. Armor lets you explore caves longer, survive mob attacks, fight bosses, raid structures, cross the Nether, and look dramatically cooler while doing all of it. Whether you are crafting your first leather cap, rushing iron armor before sunset, experimenting with copper armor, or upgrading diamond gear into netherite, this guide walks you through everything clearly.
In this complete Minecraft armor crafting guide, you will learn the recipes for helmets, chestplates, leggings, and boots; which materials are worth using; how to upgrade armor to netherite; how armor trims work; and what practical strategy makes sense for survival mode. Bring a crafting table, a few ingots, and maybe a snack. We are about to become fashionably harder to kill.
What Is Armor in Minecraft?
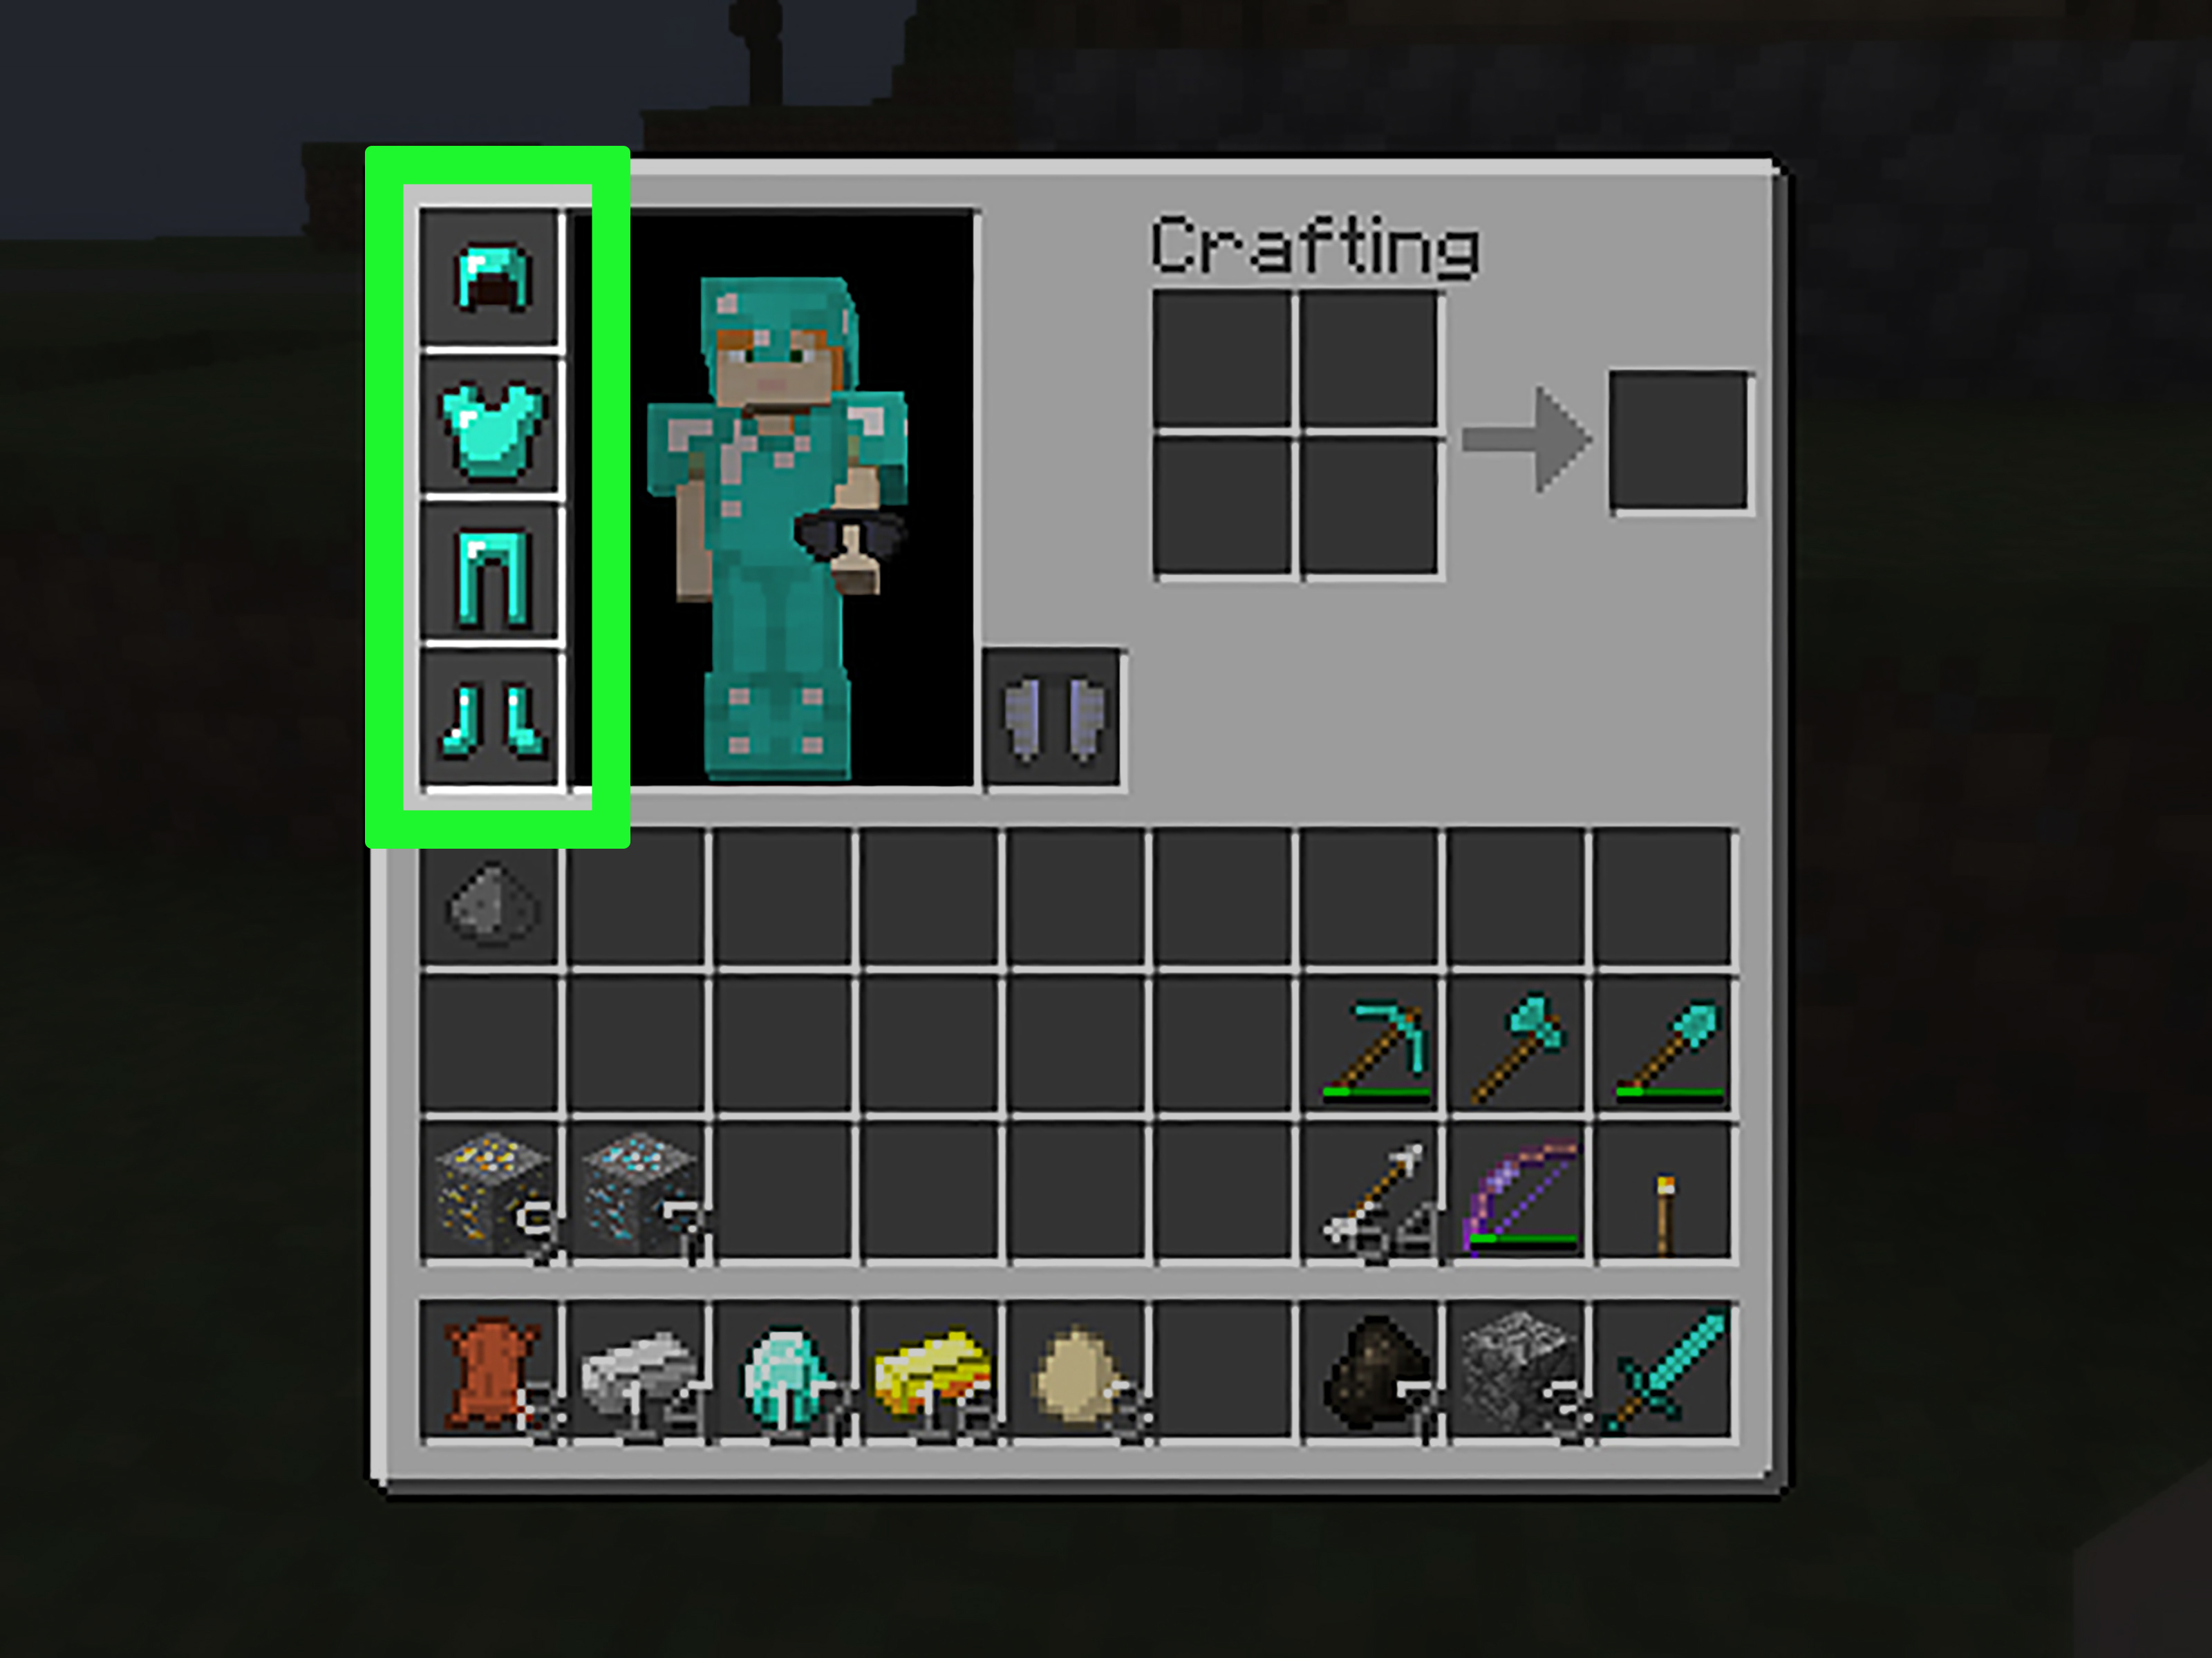
Armor in Minecraft is wearable equipment that reduces incoming damage from many common threats, including melee attacks, arrows, explosions, and general monster nonsense. A standard armor set has four pieces:
- Helmet or cap
- Chestplate or tunic
- Leggings or pants
- Boots
Each piece protects a different equipment slot. A full set gives much better protection than one lonely helmet, although that helmet may still make you feel emotionally prepared. Most armor is made at a crafting table using one main material, such as leather, copper ingots, iron ingots, gold ingots, or diamonds. Netherite armor works differently: it is not crafted directly from raw netherite. Instead, you upgrade diamond armor at a smithing table.
Materials You Can Use to Make Armor
The main craftable armor materials in current Minecraft are leather, copper, gold, iron, and diamond. You can also obtain chainmail armor, turtle shells, and netherite armor, but these have special rules.
Leather Armor
Leather armor is the earliest traditional armor type. You make it from leather, usually collected from cows, horses, llamas, hoglins, or loot sources. It offers low protection, but it has one fun advantage: leather armor can be dyed. If you want to survive in style as a blueberry, traffic cone, or suspiciously fashionable swamp goblin, leather is your friend.
Copper Armor
Copper became an official equipment tier with Minecraft’s Copper Age update. Copper armor sits between leather and iron in usefulness. It is not as strong as iron, but copper is often easier to gather in large amounts early in the game. This makes copper armor a practical “better than nothing, cheaper than iron” option when you want to save iron for buckets, shields, tools, and other essentials.
Gold Armor
Gold armor is shiny, enchantable, and fragile. It has lower durability than iron and is usually not the best long-term survival choice. However, wearing at least one piece of gold armor in the Nether helps prevent piglins from attacking you on sight. In other words, gold boots may not make you powerful, but they can make piglins think, “Ah yes, one of us. Weird face, but acceptable.”
Iron Armor
Iron armor is the classic early-to-mid-game survival standard. It is durable, protective, and realistic to craft after your first mining trip. If you are wondering what armor to make first in Minecraft, the answer for most players is simple: make iron armor as soon as you can.
Diamond Armor
Diamond armor is a major upgrade. It offers excellent protection and durability, making it ideal before fighting bosses, raiding ancient cities, exploring dangerous Nether areas, or preparing for endgame adventures. Diamonds are rarer than iron, so many players craft diamond armor gradually, starting with the chestplate.
Netherite Armor
Netherite armor is the strongest standard player armor tier. It has better durability than diamond, adds knockback resistance, and does not burn in lava if dropped as an item. To make netherite armor, you must upgrade diamond armor using a netherite ingot and a netherite upgrade smithing template at a smithing table.
How to Make Armor in Minecraft: Basic Crafting Recipes
To craft most armor pieces, you need a crafting table and enough of the same material. The patterns are the same for leather, copper, gold, iron, and diamond armor.
How to Make a Helmet
A helmet requires 5 pieces of your chosen material. Place three materials across the top row of the crafting grid, then one on the left and one on the right of the middle row. Leave the center square empty. This makes a helmet, cap, or equivalent head armor.
Materials: 5 leather, copper ingots, gold ingots, iron ingots, or diamonds.
How to Make a Chestplate
A chestplate requires 8 pieces of material. Fill every slot in the crafting grid except the top-middle slot. This recipe gives the most protection from a single armor piece, so if you only have enough diamonds for one item, the chestplate is usually the smartest first choice.
Materials: 8 leather, copper ingots, gold ingots, iron ingots, or diamonds.
How to Make Leggings
Leggings require 7 pieces of material. Fill the entire top row, place one material in the left and right slots of the middle row, then one material in the left and right slots of the bottom row. Leave the center of the middle and bottom rows empty.
Materials: 7 leather, copper ingots, gold ingots, iron ingots, or diamonds.
How to Make Boots
Boots require 4 pieces of material. Place two materials in the left column and two in the right column, leaving the middle column empty. Boots are cheap, useful, and especially valuable once enchanted with Feather Falling.
Materials: 4 leather, copper ingots, gold ingots, iron ingots, or diamonds.
How Many Materials Do You Need for a Full Armor Set?
A complete armor set requires 24 total materials:
- Helmet: 5
- Chestplate: 8
- Leggings: 7
- Boots: 4
That means you need 24 leather for full leather armor, 24 copper ingots for full copper armor, 24 iron ingots for full iron armor, 24 gold ingots for full gold armor, or 24 diamonds for full diamond armor. Minecraft is generous with trees, suspicious with diamonds, and emotionally complicated with cows.
Best Armor to Craft First in Survival Mode
The best armor to craft first depends on your resources, biome, and play style. In most survival worlds, your best path looks like this:
Early Game: Use Copper or Iron
If you find copper quickly and iron slowly, copper armor can help you survive your first caves without spending precious iron. However, iron armor is still the stronger early-game goal. Once you have 24 iron ingots, a full iron set can carry you through mining, building, village defense, and casual monster disagreements.
Mid Game: Upgrade to Diamond
After you have stable food, tools, and mining access, start collecting diamonds. Prioritize a diamond pickaxe first if you need obsidian or ancient debris progression. For armor, the diamond chestplate gives the biggest defensive jump, followed by leggings, helmet, and boots.
Late Game: Upgrade Diamond to Netherite
Netherite armor is the endgame goal for many players. You will need diamond armor first, then a smithing table, netherite ingots, and netherite upgrade smithing templates. This process is more expensive than simple crafting, but the result is armor that can handle serious danger.
How to Make Netherite Armor
You cannot craft netherite armor directly in a crafting table. To make netherite armor in Minecraft, follow these steps:
- Craft or obtain diamond armor.
- Find ancient debris in the Nether.
- Smelt ancient debris into netherite scraps.
- Craft netherite ingots using 4 netherite scraps and 4 gold ingots.
- Find a netherite upgrade smithing template in a bastion remnant.
- Use a smithing table to combine the template, diamond armor piece, and netherite ingot.
You need one netherite ingot for each armor piece, so a full netherite set requires 4 netherite ingots. Because each ingot needs 4 netherite scraps, a full set requires 16 netherite scraps total. Since ancient debris is rare, this is not a “quick afternoon stroll” project unless your idea of strolling involves explosions, lava, and panic mining in the Nether.
How to Duplicate Netherite Upgrade Smithing Templates
Smithing templates are consumed when used, so duplicating them is smart. To duplicate a netherite upgrade smithing template, use a crafting table with:
- 1 netherite upgrade smithing template
- 7 diamonds
- 1 netherrack block
This creates extra templates, letting you upgrade more armor pieces without repeatedly raiding dangerous bastions. Keep one original template safe if possible. Do not carry your only template into lava unless you enjoy character-building experiences.
Can You Craft Chainmail Armor?
No, chainmail armor cannot be crafted in normal survival mode. You can get it through loot, mob drops, trading, or other non-standard sources depending on the version and world settings. Chainmail is more of a collector’s item than a practical crafting goal. If you find some, enjoy it. If you do not, iron armor will do the job better and with fewer medieval fashion complications.
How to Make a Turtle Shell Helmet
A turtle shell is a special helmet made from turtle scutes. To craft one, collect 5 turtle scutes and place them in the same pattern as a regular helmet. Turtle scutes are dropped by baby turtles when they grow into adults.
The turtle shell provides protection and gives a water-breathing benefit when worn, making it useful for ocean exploration, underwater building, and pretending you are a very blocky sea wizard.
How to Customize Armor with Armor Trims
Armor trims are decorative patterns that can be applied to armor using a smithing table. They do not increase protection, but they do make your armor look unique. That matters because if you are going to get launched by a creeper, you might as well look legendary during takeoff.
What You Need for Armor Trims
To trim armor, you need:
- An armor piece
- An armor trim smithing template
- A trim material such as iron, copper, gold, lapis, emerald, diamond, netherite, redstone, amethyst, or quartz
- A smithing table
The template controls the pattern. The material controls the color. Armor trims can be found in structures throughout the world, including desert pyramids, shipwrecks, jungle temples, ancient cities, woodland mansions, strongholds, bastion remnants, trail ruins, and other special locations.
Best Enchantments for Minecraft Armor
Crafting armor is only step one. Enchanting it turns good gear into survival insurance. Some of the best armor enchantments include:
- Protection: Excellent general damage reduction.
- Feather Falling: Essential for boots, especially if cliffs keep introducing themselves.
- Unbreaking: Makes armor last longer.
- Mending: Repairs armor using experience orbs.
- Respiration: Great for helmets during underwater exploration.
- Aqua Affinity: Helps you mine faster underwater.
- Thorns: Damages attackers, though it can reduce durability faster.
- Soul Speed: Useful for boots in the Nether.
- Depth Strider: Makes water movement much smoother.
For a balanced survival set, aim for Protection, Unbreaking, and Mending on every piece. Add Feather Falling to boots as soon as possible. Many Minecraft deaths are not caused by dragons, wardens, or raids. They are caused by confidently saying, “I can make that jump.”
How to Repair Armor
Armor loses durability when it absorbs damage. You can repair armor in several ways:
Use an Anvil
An anvil lets you repair armor while preserving enchantments. You can combine two damaged pieces of the same type, or repair a piece using its matching material, such as iron ingots for iron armor or diamonds for diamond armor. This costs experience levels.
Use Mending
Mending is the best long-term repair method. When armor has Mending, collected experience orbs restore durability. A good XP farm or regular mob fighting can keep your favorite armor alive for a very long time.
Use a Grindstone Carefully
A grindstone can combine damaged items, but it removes most enchantments. Use it only for plain armor or when you intentionally want to strip enchantments.
Practical Tips for Making Armor Faster
If you want armor quickly, start by mining exposed stone and making stone tools. Then search caves, stony hills, and underground areas for iron and copper. Smelt raw ores into ingots using a furnace or blast furnace. A blast furnace smelts armor-related ores faster, which is helpful when your inventory looks like a geology museum exploded.
Villages can also speed up armor progression. Blacksmith-style buildings, armorers, and loot chests may provide armor pieces, ingots, or useful equipment. Trading with villagers can eventually become one of the best ways to obtain enchanted diamond armor without mining every diamond yourself.
For leather armor, create a cow farm early. Breed cows with wheat, collect leather, and craft pieces as needed. Still, leather armor usually takes more effort than it seems. By the time you have enough leather for a full set, you may already have enough iron for better protection.
Common Mistakes When Making Armor
The first common mistake is crafting armor in the wrong order. If resources are limited, prioritize the chestplate because it gives strong protection for one item. The second mistake is wasting diamonds before you have a diamond pickaxe. A diamond pickaxe unlocks obsidian mining and netherite progression, so it often deserves priority.
Another mistake is ignoring shields. A shield is not technically armor, but it is one of the best defensive items in the game. One iron ingot and planks can block arrows, melee hits, and creeper blasts when used correctly. Armor keeps you alive after damage happens; a shield helps stop damage from happening in the first place.
Finally, do not forget backup gear. Keep older armor in a chest near your bed. If you die far away, backup armor can turn a desperate recovery mission into a heroic rescue instead of a second disaster wearing wooden shoes.
Personal Experience: What Making Armor in Minecraft Teaches You
The first time I made armor in Minecraft, I treated it like a luxury item. I had a dirt house, a crafting table, half a roof, and the unearned confidence of someone who had survived exactly one night. I thought, “Armor can wait. I need windows.” This was a bold architectural decision and a terrible survival strategy. A skeleton outside my unfinished wall politely disagreed with my priorities.
That experience taught me that armor is not just equipment. It changes how you play. Without armor, every cave sound feels like a legal threat. With armor, you start exploring deeper, fighting smarter, and taking on challenges that previously made you sprint home like your keyboard owed you money. The first full iron set is one of the best feelings in survival mode because it marks the moment you stop being a tourist and start becoming a resident of the world.
In practical gameplay, I have found that the chestplate-first strategy is almost always worth it. If I only have eight iron ingots, I make a chestplate before anything else. If I have enough for a shield and partial armor, I make the shield too. That combination can save you from early skeletons, zombies, and surprise creepers. Boots come later, but once Feather Falling enters the picture, boots become sacred. A good pair of enchanted boots has saved more Minecraft lives than most players will admit.
Copper armor also changes the early game in an interesting way. Before copper gear became official, many players rushed straight from stone tools to iron everything. Copper armor gives you a reason to use a resource that often piles up in chests. It is not stronger than iron, but that is not the point. Its value is efficiency. If copper protects you while your iron becomes tools, buckets, shears, hoppers, or rails, then copper has done its job. It is the helpful intern of Minecraft armor: not the boss, but surprisingly useful.
Diamond armor feels different. Crafting it is a commitment. You remember where those diamonds came from. Maybe you mined them near lava. Maybe you found them in a chest. Maybe you used Fortune and made noises no adult should make over blue pixels. When you finally wear full diamond armor, your confidence rises. Then Minecraft humbles you with lava, the Warden, or a badly planned Enderman stare. Diamond armor is strong, but it does not replace good decisions.
Netherite armor, on the other hand, feels like a trophy. The process requires Nether exploration, ancient debris mining, gold, templates, diamonds, and patience. By the time you upgrade a full set, you have earned it. That is why I recommend not rushing every step. Enjoy the progression. Wear leather if you want color. Use copper when it makes sense. Make iron your workhorse. Save diamond for serious adventures. Upgrade to netherite when your world has grown enough to deserve it.
The best armor in Minecraft is not always the strongest one you can theoretically make. It is the armor that fits your current adventure. For a new cave, iron may be perfect. For the Nether, gold boots may save you from piglin trouble. For ocean ruins, a turtle shell can be surprisingly handy. For endgame fights, enchanted netherite is king. Learning how to make armor in Minecraft is really learning how to prepare, adapt, and survive one more ridiculous story at a time.
Conclusion
Making armor in Minecraft is one of the core steps in becoming a stronger survival player. The basic recipes are simple: 5 materials for a helmet, 8 for a chestplate, 7 for leggings, and 4 for boots. A full set costs 24 materials, whether you are using leather, copper, gold, iron, or diamond. From there, you can enchant, repair, trim, and eventually upgrade diamond armor into netherite.
For most players, the best armor path is copper or iron early, diamond in the mid game, and netherite when you are ready for serious endgame challenges. Add smart enchantments, keep a shield nearby, and do not underestimate the power of backup gear. Minecraft is a sandbox, yes, but sometimes the sandbox contains spiders. Dress accordingly.