If your kitchen drawer has become a tiny museum of plastic wrap, zip-top bags, and mysterious twist ties, it may be time for a smarter swap. Reusable beeswax wraps are one of the easiest DIY projects for anyone who wants to reduce single-use plastic, store food more naturally, and feel slightly smug every time they cover a bowl of leftovers. The good news? You do not need a craft room, a homestead, or a personality built around mason jars. You only need cotton fabric, beeswax, a little oil, optional pine resin, and about an afternoon of hands-on fun.
This guide explains exactly how to make reusable bees wax wraps DIY style, including the best fabric to use, the right wax blend, step-by-step instructions, troubleshooting tips, care advice, and practical examples for everyday food storage. By the end, you will have washable, reusable food wraps that can cover bowls, wrap sandwiches, hug half an avocado, protect cheese, and make your fridge look like it belongs to someone who has their life together.
What Are Reusable Beeswax Wraps?
Reusable beeswax wraps are pieces of natural fabric coated with a thin layer of beeswax. Many recipes also include jojoba oil and pine resin. The beeswax creates a protective coating, the oil keeps the wrap flexible, and the resin adds tackiness so the wrap can cling to bowls, jars, fruit, bread, and itself. When you warm the wrap with your hands, it softens slightly and molds around the item you are covering.
Think of beeswax wraps as the mellow, eco-friendly cousin of plastic wrap. They are not meant to replace every storage method in your kitchen, but they are fantastic for many daily tasks. Use them for bread, cheese, fresh herbs, celery, carrots, sandwiches, cut apples, snack packs, and covering bowls. Do not use them for hot foods, microwaves, dishwashers, raw meat, raw poultry, or raw seafood. Beeswax melts with heat, and reusable wraps cannot be washed in hot water strongly enough to safely handle raw animal proteins.
Why Make Beeswax Wraps at Home?
Buying premade beeswax wraps is convenient, but making them yourself has several advantages. First, DIY beeswax wraps are customizable. You choose the fabric patterns, sizes, ingredients, thickness, and shape. Want tiny wraps for lemon halves? Done. Need a large wrap for a bread loaf? Easy. Want your leftovers covered in cheerful strawberries or tiny chickens wearing hats? That is between you and the fabric aisle.
Second, homemade reusable food wraps can be more affordable over time, especially if you already have cotton scraps, old pillowcases, or fabric from previous projects. Third, this is a satisfying beginner-friendly sustainability project. It is simple enough for adults, older kids with supervision, and anyone who has ever looked at a roll of plastic wrap and thought, “Why does this stuff fight me like it has a personal grudge?”
Best Fabric for DIY Beeswax Wraps
The best fabric for reusable beeswax wraps is lightweight or medium-weight 100% cotton. Cotton absorbs the melted wax mixture well and becomes flexible after coating. Organic cotton is a great choice if you want the most natural option, but clean cotton quilting fabric, old cotton shirts, pillowcases, napkins, or fabric remnants can also work beautifully.
Good fabric choices include:
- 100% cotton quilting fabric
- Thin cotton muslin
- Clean cotton pillowcases
- Old cotton button-down shirts
- Lightweight linen or hemp fabric
- Cotton tea towels that are not too thick
Avoid these fabrics:
- Polyester, nylon, or synthetic blends
- Thick terry cloth towels
- Fuzzy flannel that sheds fibers
- Stretchy jersey that curls badly at the edges
- Fabric treated with unknown chemicals or heavy dyes
Before making the wraps, wash and dry the fabric. This removes dust, sizing, and residue from manufacturing or storage. It also pre-shrinks the fabric, so your wraps do not surprise you later by becoming tiny waxy postage stamps.
Supplies You Need
Here is a practical supply list for making reusable bees wax wraps DIY style at home.
Ingredients
- 1/2 cup beeswax pellets or grated beeswax
- 2 tablespoons pine resin powder or crushed pine resin, optional but helpful for cling
- 1 tablespoon jojoba oil
- 6 to 8 pieces of clean 100% cotton fabric
Tools
- Baking sheet
- Parchment paper
- Paintbrush or pastry brush used only for wax projects
- Heat-safe glass jar or metal bowl for melting
- Small saucepan for a double boiler
- Pinking shears or sharp fabric scissors
- Tongs or clothespins
- Clothesline, hanger, or cooling rack
Choose food-grade beeswax when possible. If you use pine resin, buy a clean resin meant for craft or wrap making. Jojoba oil is popular because it is shelf-stable and helps keep the wrap pliable. Some recipes use coconut oil, but jojoba is less likely to become greasy or develop an off smell.
Best Sizes for Homemade Beeswax Wraps
You can cut your wraps into squares, rectangles, or circles. Pinking shears help reduce fraying, although the wax coating will also help seal the edges.
Helpful sizes to make:
- 7 x 7 inches: Good for lemon halves, small jars, snack cups, and little produce pieces.
- 10 x 10 inches: A great all-purpose size for sandwiches, cheese blocks, cut fruit, and medium bowls.
- 13 x 13 inches: Useful for dinner plates, large bowls, bunches of herbs, and bigger produce.
- 8 x 14 inches: Perfect for baguette pieces, celery sticks, cucumbers, and long vegetables.
If this is your first batch, make a few different sizes. You will quickly discover what your kitchen actually uses. In many homes, the medium wrap becomes the MVP because it handles sandwiches, leftovers, cheese, and bowls without drama.
How to Make Reusable Bees Wax Wraps DIY: Step-by-Step
Step 1: Wash, Dry, and Cut the Fabric
Wash your cotton fabric with mild detergent, dry it completely, and iron it if it is wrinkled. Flat fabric is easier to coat evenly. Cut the fabric into your chosen sizes using pinking shears or fabric scissors. Make sure each piece fits comfortably on your baking sheet.
Step 2: Prepare Your Work Area
Line a baking sheet with parchment paper. Place one piece of fabric on the parchment. Keep extra parchment nearby because wax can wander, and it has the confidence of a toddler with a marker. Use tools you do not mind dedicating to wax projects, because beeswax is difficult to remove completely from brushes and jars.
Step 3: Melt the Beeswax Blend
Create a simple double boiler by placing a heat-safe jar or metal bowl into a saucepan with a few inches of water. Add the beeswax, jojoba oil, and pine resin to the jar. Heat gently until everything melts together. Stir carefully with a wooden stick or spoon reserved for crafts.
Pine resin can take longer to melt than beeswax, so be patient. Keep the heat low to medium and never leave melting wax unattended. Beeswax does not need aggressive heat; it needs gentle coaxing, like a cat deciding whether it likes you.
Step 4: Brush the Mixture onto the Fabric
Preheat the oven to about 200°F to 225°F. Lightly brush the melted mixture over the fabric. Aim for a thin, even coating. The most common beginner mistake is using too much wax. A wrap should feel coated, not armored for battle.
Do not worry if the wax starts to harden while brushing. The oven will help redistribute it. Focus on reaching the corners and edges, because dry edges curl and wear out faster.
Step 5: Warm the Fabric in the Oven
Place the baking sheet in the oven for 2 to 5 minutes, just until the wax mixture melts into the fabric and the surface looks evenly wet. Remove the sheet carefully. Use the brush to spread any shiny puddles into dry-looking areas.
If you see too much wax, place a second piece of fabric on top and press lightly. The new fabric will absorb the extra coating. This trick saves supplies and prevents thick, flaky wraps.
Step 6: Lift and Cool
Use tongs or your fingers if the fabric is cool enough to safely handle. Lift the wrap from the parchment and wave it gently for a few seconds, or hang it with clothespins. It should cool and stiffen quickly. Once dry, it will feel slightly tacky, flexible, and waxy.
Step 7: Test the Wrap
Wrap it around a bowl or fold it around a piece of fruit. Warm it with your hands for a few seconds. If it molds and holds its shape, you did it. If it feels too dry, add a tiny amount more wax mixture and rewarm it. If it feels too heavy or cracks when folded, you probably used too much wax. Place another fabric piece over it and reheat to absorb the excess.
Beginner Beeswax-Only Method
If you want the simplest possible version, you can make wraps with only cotton fabric and beeswax. Sprinkle grated beeswax or beeswax pellets over the fabric, warm it in the oven, and brush the melted wax across the surface. This method is easy, affordable, and great for beginners.
However, beeswax-only wraps may not cling as well as wraps made with pine resin and jojoba oil. They are better for folding around sandwiches, produce, and dry snacks than sealing tightly over bowls. If your goal is maximum cling, use the full beeswax, resin, and oil blend.
How to Use Beeswax Wraps
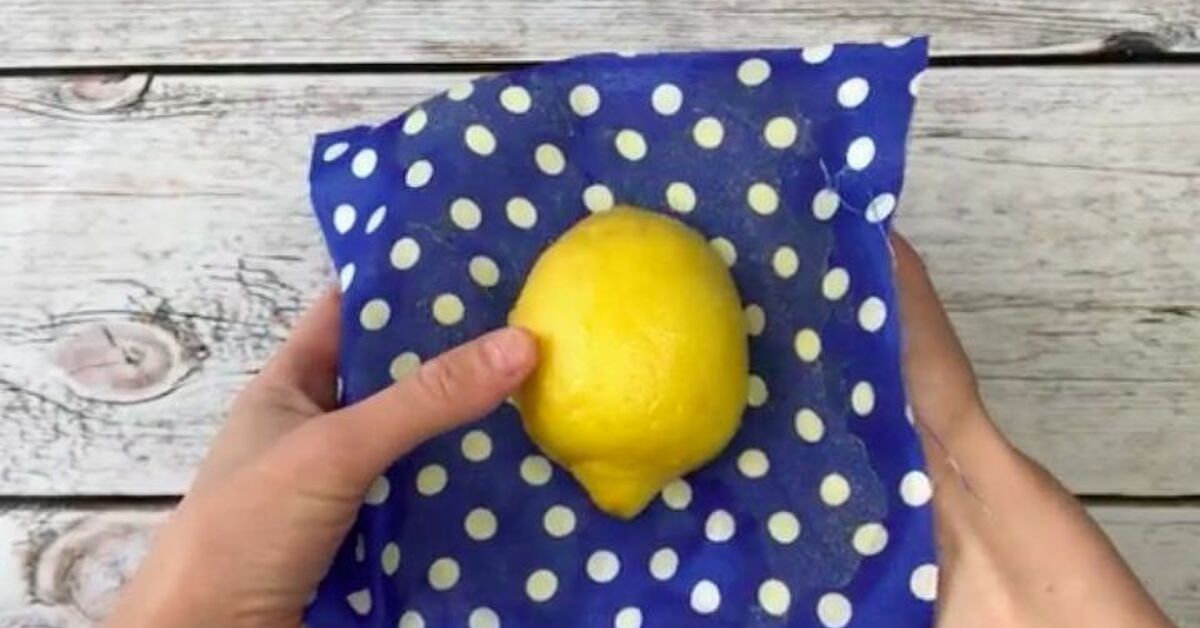
To use a beeswax wrap, place it over your food or container and press it gently with warm hands. The warmth softens the wax coating just enough to mold and seal. After a few seconds, the wrap cools and holds its shape.
Best uses for reusable beeswax wraps:
- Wrapping cheese
- Covering bowls of leftovers
- Storing bread or rolls
- Wrapping sandwiches and snack packs
- Covering cut apples, lemons, cucumbers, and onions
- Bundling fresh herbs
- Covering jars, cups, and containers without lids
Do not use beeswax wraps for:
- Raw meat, poultry, seafood, or raw eggs
- Hot food or hot containers
- Microwave heating
- Dishwasher cleaning
- Oven use after the wrap is finished
- Very oily, saucy, or wet foods that may stain or cling
Let hot leftovers cool before covering them. Heat can melt the beeswax coating, leaving you with a limp piece of fabric and a small kitchen tragedy.
How to Wash and Care for Beeswax Wraps
Wash beeswax wraps by hand in cool water with mild dish soap. Use a soft sponge or cloth to wipe away crumbs and residue. Rinse gently, then air-dry on a rack, hanger, or towel. Once dry, store the wraps folded loosely, rolled, or flat in a drawer.
Avoid hot water because it can melt or thin the wax coating. Avoid scrubbing aggressively because it can wear down the surface. Do not wring the wraps like a dishcloth. They are reusable food wraps, not gym towels after spin class.
With good care, homemade beeswax wraps can last several months and often up to about a year, depending on how often you use them. When they lose cling, look dry, or develop creases, refresh them by placing them back on parchment paper, adding a small amount of wax mixture, and warming them in the oven for a few minutes.
Troubleshooting Common Beeswax Wrap Problems
The wrap is too stiff
You may have used too much beeswax or resin. Reheat the wrap with a clean piece of fabric on top to absorb extra coating. Next time, apply a thinner layer.
The wrap is oily or sticky
Too much oil can make the wrap greasy. Add a little more beeswax to balance the mixture, or press the wrap between parchment and another fabric piece while warming.
The wrap does not cling
Beeswax-only wraps may not seal tightly. Add pine resin to the recipe for better grip. Also remember to warm the wrap with your hands before shaping it.
The wax flakes off
The fabric may be too thick, synthetic, or oversaturated. Use lightweight natural fabric and apply a thinner coating.
The wrap smells strong
Fresh beeswax and resin have a natural scent. Air the wraps for a day before using. If the smell is rancid, the oil may be old and should not be used for food storage projects.
Smart Food Safety Tips
Reusable beeswax wraps are useful, but they are not magic shields. Always start with clean hands, clean fabric, and clean surfaces. Use wraps for low-risk foods such as bread, fruit, vegetables, herbs, and cheese. Keep raw meat and seafood in washable glass or plastic containers that can be cleaned with hot, soapy water.
If a wrap develops mold, heavy staining, a sour smell, or a texture that will not clean well, retire it. Natural does not mean immortal. At the end of its life, a cotton and beeswax wrap can usually be cut into strips and composted if all materials are compost-friendly, or used as a fire starter where safe and appropriate.
Cost-Saving Tips for DIY Beeswax Wraps
To make this project budget-friendly, use fabric scraps, old cotton shirts, or leftover quilting cotton. Buy beeswax pellets in bulk if you plan to make multiple batches. Start with smaller wraps while learning because they are easier to coat evenly. Once you understand how the wax behaves, make larger wraps for bread, bowls, and produce.
Another smart tip is to make beeswax wraps as gifts. Stack three sizes, tie them with cotton string, and add a small care card. They are practical, charming, and far more useful than another novelty mug that says “Don’t Talk to Me Before Coffee.” Though, to be fair, that mug is emotionally accurate.
Experience-Based Notes: What I Learned Making Reusable Bees Wax Wraps DIY
The first thing you learn when making reusable beeswax wraps is that less wax is almost always better than more wax. On the first batch, it is tempting to paint the fabric like you are waterproofing a boat. Resist that urge. A heavy coating makes the wrap stiff, bulky, and prone to cracking. The best wraps come from a thin, even layer that melts into the cotton instead of sitting on top like candle frosting.
The second lesson is that fabric matters more than people expect. Lightweight cotton works beautifully because it drinks in the wax blend and stays flexible after cooling. Thick fabric can feel durable at first, but it becomes awkward around bowls and fruit. Very thin fabric can work for small wraps, but it may not hold up as well with repeated washing. My favorite result came from plain quilting cotton because it had the perfect balance of structure and softness.
The third lesson is to make multiple sizes. Before trying this project, it is easy to assume one medium square can do everything. In reality, small wraps are wonderful for lemon halves, little jars, and snack portions. Medium wraps are the daily workhorses. Large wraps are the heroes when you bake bread, cover a serving bowl, or need to protect a mountain of chopped vegetables while pretending dinner is “almost ready.” Rectangles are surprisingly useful for celery, carrots, sandwiches, and leftover baguettes.
The fourth lesson is that beeswax wraps improve your kitchen habits in small but noticeable ways. Because they need to be washed and dried by hand, you become more aware of what you are storing. You stop wrapping random mystery leftovers and start using better containers for messy foods. You reach for glass jars more often. You save half-used produce instead of letting it dry out in the refrigerator. A simple wrap can quietly push your kitchen toward less waste without turning your life into a sustainability boot camp.
The fifth lesson is that they are not perfect, and that is fine. Beeswax wraps will not seal like plastic wrap. They should not touch raw meat. They do not love heat. They can pick up strong smells from onions or garlic. But when used for the right jobs, they are genuinely helpful. They are especially good for cheese, bread, herbs, sandwiches, and cut produce. Once you build the habit, grabbing a beeswax wrap feels just as easy as tearing plastic wrap, except there is no wrestling match with a clingy plastic sheet that refuses to tear straight.
Finally, refreshing old wraps is worth doing. After months of use, a wrap may look tired, creased, or less sticky. A few minutes in a warm oven with a small sprinkle of beeswax can bring it back to life. That makes DIY beeswax wraps feel less like a disposable product and more like a kitchen tool you maintain. The project is simple, practical, and oddly satisfying. Plus, every time you open the fridge and see colorful fabric covering your leftovers, it feels like your kitchen is giving single-use plastic a polite but firm resignation letter.
Conclusion
Learning how to make reusable bees wax wraps DIY is a simple way to reduce plastic waste, personalize your kitchen, and create practical food storage wraps from natural materials. The process is straightforward: choose clean cotton fabric, coat it with a thin beeswax blend, warm it gently, let it cool, and use it for everyday foods like bread, cheese, produce, herbs, and sandwiches.
The most important tips are easy to remember. Use natural fabric, apply less wax than you think you need, keep wraps away from heat, wash them with cool water, and avoid raw meat or seafood. With proper care, your homemade beeswax wraps can be reused again and again, refreshed when needed, and eventually retired responsibly. Not bad for a project that starts with fabric scraps and a little melted wax.