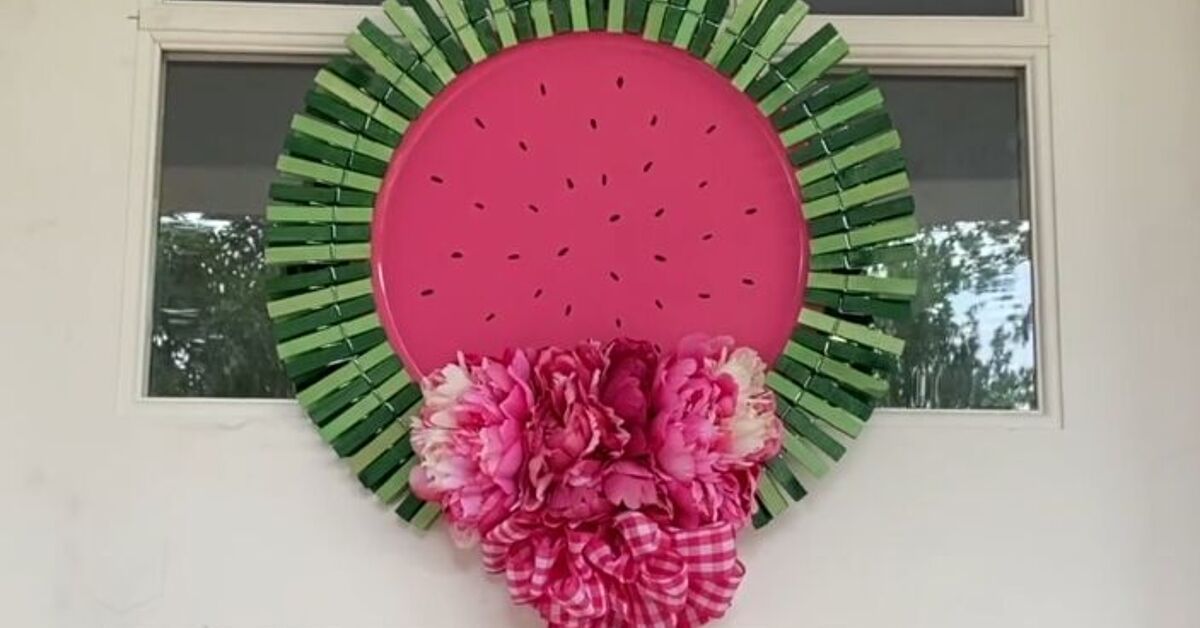
A pizza pan may not look glamorous at first. It is flat, round, usually silver, and built for cheese emergencies. But in the crafty world of budget home decor, that humble pan is basically a blank canvas wearing an apron. With a little paint, ribbon, greenery, scrapbook paper, faux flowers, and the kind of hot glue confidence that says “I definitely know what I’m doing,” you can turn a dollar-store pizza pan into a charming seasonal wreath for your front door, kitchen wall, porch, entryway, or mantel.
DIY pizza pan wreaths are popular because they solve three decorating problems at once: they are inexpensive, easy for beginners, and endlessly customizable. Unlike bulky grapevine wreaths or foam forms, a pizza pan gives you a smooth surface for lettering, decoupage, stencils, peel-and-stick wallpaper, napkins, vinyl decals, mini signs, and layered embellishments. It also has a sturdy shape, so your wreath will not flop around like a sad pancake in a rainstorm.
In this guide, you will find five easy DIY pizza pan wreath ideas for spring, summer, fall, winter, and year-round decorating. Each idea includes supply suggestions, step-by-step instructions, styling tips, and smart shortcuts. Whether your vibe is farmhouse, cottagecore, coastal, rustic, modern, playful, or “I bought too much ribbon and now I must justify it,” these projects will help you create seasonal decor that looks polished without draining your wallet.
Why Use a Pizza Pan for a DIY Wreath?
The main appeal of a pizza pan wreath is its simplicity. A basic metal pizza pan is lightweight, cheap, and easy to paint. It works like a round sign, a shallow tray, and a wreath base all at once. You can hang it with jute twine, ribbon, a sawtooth hanger, adhesive hooks, or even a strong magnetic hook if you are displaying it on a metal door.
Traditional wreaths usually require a frame, floral wire, greenery, and enough patience to wrestle stems into a circle. A pizza pan wreath skips much of that drama. You decorate the front surface, add a bow or florals around one side, attach a hanger, and call it done. The finished look can be sweet and simple or surprisingly boutique-style, especially when you layer textures such as burlap, wood beads, faux greenery, lace ribbon, mini florals, or seasonal picks.
Basic Supplies for Most Pizza Pan Wreaths
Before choosing a seasonal design, gather a few common materials. You do not need everything at once, but these basics will cover most projects:
- One metal pizza pan, preferably 12 to 14 inches wide
- Chalk paint, acrylic paint, or spray paint
- Paintbrushes or foam brushes
- Hot glue gun and glue sticks
- Strong craft adhesive for heavier pieces
- Ribbon, burlap, jute rope, or twine
- Faux flowers, greenery, leaves, berries, or seasonal picks
- Scrapbook paper, printed napkins, peel-and-stick wallpaper, or vinyl decals
- Scissors, wire cutters, pencil, ruler, and craft knife
- Clear sealer if the wreath will hang outdoors under cover
For a cleaner finish, lightly sand the glossy surface of the pizza pan before painting. Wipe away dust, apply a thin coat of primer if needed, and let each paint layer dry fully. This one tiny step helps paint stick better and prevents your masterpiece from peeling like a sunburned tomato.
1. Spring Garden Pizza Pan Wreath
A spring pizza pan wreath should feel fresh, soft, and cheerful. Think pastel colors, faux tulips, daisies, lavender, eucalyptus, tiny butterflies, gingham ribbon, and a friendly message like “Hello Spring,” “Bloom,” or “Welcome.” This design works beautifully on a front door, breakfast nook wall, garden shed, or covered porch.
Supplies
- Pizza pan
- White, sage, blush, or pale yellow chalk paint
- Floral napkin, scrapbook paper, or spring-themed vinyl decal
- Mod Podge or decoupage glue
- Faux spring flowers and greenery
- Gingham ribbon or lace ribbon
- Jute twine for hanging
- Hot glue and craft adhesive
How to Make It
Start by painting the pizza pan in a soft background color. White gives a classic farmhouse look, while sage green feels calm and garden-inspired. Once dry, add a decorative center. You can decoupage a floral napkin onto the pan, apply scrapbook paper cut into a circle, or use a vinyl decal with a spring phrase. If using a napkin, separate the printed top layer from the plain backing layers before applying it with decoupage glue. Smooth gently from the center outward to reduce wrinkles.
Next, build a floral cluster along the lower left or upper right edge of the pan. Asymmetrical designs often look more stylish than perfectly even arrangements. Start with greenery, then layer larger flowers, smaller filler flowers, and a ribbon bow. Glue the stems flat against the pan or tuck them behind the rim if possible.
Finish by attaching jute twine or ribbon to the back for hanging. A small bow at the top adds charm, but do not overdo it. Spring decor should feel breezy, not like the craft aisle exploded and landed on your door.
Style Tip
For a high-end look, limit your color palette to three shades. For example, use white, sage, and blush; or cream, lavender, and soft green. A controlled palette makes inexpensive supplies look intentional and elegant.
2. Summer Lemonade Pizza Pan Wreath
Summer wreaths should look sunny, relaxed, and ready for porch sitting. A lemon-themed pizza pan wreath is one of the easiest ways to bring bright seasonal energy to your home. It works especially well for kitchens, patios, pool houses, breakfast corners, and front doors. The look is fresh, cheerful, and slightly sassy, like a glass of lemonade that knows it is the main character.
Supplies
- Pizza pan
- White or pale blue paint
- Lemon-patterned napkin, scrapbook paper, or printable
- Faux lemons or lemon slices
- Faux greenery, boxwood, eucalyptus, or fern stems
- Yellow, blue, or black-and-white ribbon
- Wood beads or jute rope
- Hot glue and clear sealer
How to Make It
Paint the pizza pan white for a clean farmhouse base or pale blue for a coastal summer feel. Add a lemon-themed center using decoupage, scrapbook paper, or vinyl lettering. Good phrases include “Fresh Lemonade,” “Hello Sunshine,” “Squeeze the Day,” or “Welcome Summer.” If you prefer a simpler design, paint the pan white and glue a small wooden sign or lemon cutout in the middle.
For the outer edge, glue jute rope or wood beads around the rim. This step instantly makes the wreath look more finished. Then create a greenery cluster on one side and tuck faux lemons into the leaves. Add a ribbon bow in yellow gingham, blue stripe, or black-and-white buffalo check. The ribbon is where the wreath gets personality, so choose one that matches your home’s style.
If the wreath will hang outdoors, use a clear protective sealer and place it in a covered area. Pizza pans are sturdy, but paper, faux fruit, and glue do not enjoy being personally attacked by thunderstorms.
Style Tip
Want a beachy variation? Replace lemons with starfish, rope, shells, and navy ribbon. The same pizza pan base can become a nautical summer wreath with almost no extra effort.
3. Fall Pumpkin Farmhouse Pizza Pan Wreath
Fall is the season when home decor becomes legally required to include pumpkins. A pizza pan pumpkin wreath is warm, rustic, and easy to customize. It can be farmhouse-neutral with cream pumpkins and burlap, or bold and colorful with orange leaves, berries, plaid ribbon, and sunflower accents.
Supplies
- Pizza pan
- Orange, cream, copper, or deep green paint
- Wood-look peel-and-stick wallpaper or scrapbook paper
- Mini faux pumpkins or pumpkin cutouts
- Faux fall leaves, berries, wheat, or eucalyptus
- Burlap, plaid, velvet, or buffalo-check ribbon
- Jute twine
- Hot glue and wire cutters
How to Make It
Paint the pizza pan in a warm neutral shade such as ivory, tan, or muted orange. For extra texture, cover the center with wood-look wallpaper or rustic scrapbook paper. This creates the illusion of a wooden round sign without needing actual wood, power tools, or a dramatic trip to the hardware store.
Add a seasonal message such as “Hello Fall,” “Gather,” “Thankful,” or “Pumpkin Patch.” You can use vinyl, stencils, rub-on transfers, or a small pre-made sign. Around the bottom edge, attach fall leaves, berry picks, mini pumpkins, and a large ribbon bow. Place the biggest pieces first, then fill gaps with smaller leaves or greenery.
For a classic farmhouse look, use cream pumpkins, eucalyptus, burlap, and black-and-white ribbon. For a cozy harvest style, use orange pumpkins, plaid ribbon, sunflowers, and copper accents. Both versions look great, but they send different messages. One says “modern rustic elegance.” The other says “I own a cinnamon candle and I am not afraid to use it.”
Style Tip
Layering is the secret to a fuller fall wreath. Use flat leaves as the base, then add berries, then pumpkins, then ribbon. This creates depth and keeps the design from looking pasted on.
4. Winter Holiday Pizza Pan Wreath
A winter pizza pan wreath can lean Christmas, snowy farmhouse, woodland, or neutral winter. The best part is that you can design it to stay up beyond December. Instead of only using red and green, try white, silver, evergreen, pinecone, plaid, or deep navy accents. That way, your wreath does not scream “Santa was here” on January 12.
Supplies
- Pizza pan
- White, black, red, green, or metallic paint
- Evergreen sprigs, pinecones, berries, or faux snow accents
- Holiday napkin, scrapbook paper, stencil, or vinyl phrase
- Plaid, velvet, satin, or burlap ribbon
- Wood beads, mini bells, or small ornaments
- Hot glue and strong craft adhesive
- Optional clear glitter paint or snow texture paste
How to Make It
Paint the pan white for a snowy look, black for modern farmhouse contrast, or red for a classic Christmas style. Add a center phrase such as “Let It Snow,” “Merry & Bright,” “Peace on Earth,” or “Winter Welcome.” You can also decoupage a holiday napkin or calendar image onto the surface for an easy illustrated design.
Next, create a crescent-shaped arrangement with evergreen sprigs, pinecones, berries, and ribbon along one side. Keep the greenery tips pointing in the same general direction so the wreath has movement. Add small ornaments or bells for shine, but avoid making the pan too heavy. A pizza pan wreath should hang securely, not audition for a role as a door knocker.
If you want a winter design that works after Christmas, skip Santa, elves, and obvious holiday wording. Use snowflakes, pinecones, white berries, evergreen, and a neutral bow. This makes the wreath feel cozy all winter long.
Style Tip
For a polished finish, paint the back of the pan too. It is a small detail, but it prevents the wreath from looking unfinished if it swings slightly when the door opens.
5. Interchangeable Year-Round Pizza Pan Wreath
If you want one pizza pan wreath that can work every season, make an interchangeable design. This project uses a neutral base and removable accents. Instead of permanently gluing every decoration, attach seasonal pieces with magnets, hook-and-loop dots, removable adhesive strips, or small clips. It is the craft version of a capsule wardrobe: one dependable base, many cute outfits.
Supplies
- Pizza pan
- Neutral paint such as white, cream, black, sage, or gray
- Permanent center phrase like “Welcome” or “Home”
- Magnets or hook-and-loop fasteners
- Seasonal mini decorations
- Ribbon in several seasonal colors
- Greenery stems
- Hot glue and craft adhesive
How to Make It
Paint the pizza pan in a neutral color. Add a permanent word such as “Welcome,” “Home,” or your family name in the center. Keep the base simple so it can pair with different seasonal decorations. Attach a basic greenery swag to one side, but leave room for removable accents.
Now create small seasonal bundles. For spring, use pastel flowers or a tiny bunny cutout. For summer, use lemons, shells, or patriotic stars. For fall, use mini pumpkins, leaves, or acorns. For winter, use pinecones, snowflakes, bells, or evergreen picks. Glue magnets or hook-and-loop fasteners to the back of each bundle, then attach the matching piece to your pizza pan wreath when the season changes.
You can also make removable bows. Use pipe cleaners, floral wire, or twist ties on the back of each bow so you can swap ribbon without damaging the wreath. Store extra accents in labeled bags, and your future self will feel extremely organized for approximately eight minutes, which still counts.
Style Tip
Choose a base ribbon that works all year, such as burlap, black-and-white stripe, or neutral linen. Then add smaller seasonal ribbon on top when you want extra color.
Helpful Tips for Better Pizza Pan Wreaths
Use the Right Glue
Hot glue is quick and convenient for lightweight decorations, but heavier items need stronger craft adhesive. If you are attaching metal signs, wood pieces, thick rope, or chunky embellishments, use a durable adhesive and let it cure fully before hanging.
Seal Outdoor Wreaths
A pizza pan wreath can be displayed outdoors, but it will last longer in a covered area. Rain, strong sun, and humidity can damage paper, ribbon, and glue. A clear sealer helps protect painted and decoupaged surfaces.
Balance the Weight
Decorate one side or the bottom edge, but avoid adding too many heavy pieces to a single area. If the wreath tilts when hung, adjust the hanger placement or add a small counterweight on the back.
Hide the Mechanics
Professional-looking wreaths usually hide glue blobs, cut stems, and hanger knots. Use ribbon tails, greenery, small flowers, or extra leaves to cover messy spots. The goal is not perfection; it is strategic camouflage.
Shop Your Stash First
Before buying new supplies, check your craft bin, holiday storage, gift wrap drawer, and old decor pieces. Leftover ribbon, faux flowers, napkins, ornaments, and scrapbook paper can all become part of a pizza pan wreath. This is budget crafting at its finest: half creativity, half “I knew I saved this for a reason.”
of Real-Life Crafting Experience: What I Learned Making Pizza Pan Wreaths
The first thing you learn when making a DIY pizza pan wreath is that the project looks almost suspiciously easy. You stare at the pan, the ribbon, the flowers, and the glue gun and think, “This will take twenty minutes.” Sometimes it does. Sometimes you spend forty-five minutes deciding whether the bow should sit at ten o’clock or four o’clock like you are negotiating international peace. That is part of the fun.
One of the best experiences with this craft is how forgiving it is. A pizza pan gives you a wide, flat surface, so if a paint color looks wrong, you can repaint it. If a decal bubbles, you can cover it with a bow. If a flower falls off, you can glue it back on and pretend it was a design pause. Unlike more complicated DIY projects, this one does not punish beginners. It encourages experimenting.
Another lesson is that texture makes a huge difference. A plain painted pan can look a little too much like, well, a painted pan. But once you add jute rope around the rim, a layered bow, greenery, or wood beads, the whole project changes. Suddenly it feels like decor instead of kitchenware going through an identity crisis. The best pizza pan wreaths usually combine smooth surfaces with soft ribbon, natural-looking greenery, and one or two standout accents.
Paint choice matters too. Chalk paint tends to cover metal nicely and gives a soft matte finish. Acrylic paint works, but it may need multiple coats. Spray paint is fast, but it should be used carefully in a well-ventilated area and allowed to dry completely. If the pan has a very slick surface, sanding it lightly first is worth the extra few minutes. Skipping that step can lead to scratches, chips, or peeling, especially if you are applying tape, vinyl, or stencils.
Bow-making is often the most intimidating part, but it does not need to be fancy. A simple looped bow tied with floral wire can look great. Wired ribbon is easier to shape than floppy ribbon, especially for front-door decor. If the bow looks too flat, fluff the loops and curl the tails slightly. If it looks too dramatic, trim the tails. If it still looks strange, add greenery behind it. Greenery fixes many things. It is the concealer of the craft world.
The biggest practical tip is to dry-fit everything before gluing. Lay out the flowers, ribbon, sign, and seasonal pieces on the pan. Take a quick photo with your phone, then glue the pieces down one at a time. The photo helps you remember the arrangement after you inevitably bump the table and scatter everything like a tiny craft tornado.
Pizza pan wreaths are also excellent group crafts. They are affordable enough for a family craft night, classroom-style workshop, church group, or weekend project with friends. Everyone can start with the same basic pan and end with a totally different wreath. One person makes a farmhouse pumpkin design, another makes a lemon summer sign, and another somehow creates a glittery winter masterpiece that sheds sparkle until next July.
Most of all, these projects remind you that seasonal decorating does not have to be expensive or complicated. A small handmade wreath can make a front door feel more welcoming, brighten a kitchen wall, or add personality to a porch. It is simple, cheerful, and satisfying. Plus, every time someone compliments it, you get to say, “Thanks, I made it from a pizza pan,” which is exactly the kind of low-stakes crafting victory we all deserve.
Conclusion
DIY pizza pan wreaths are proof that beautiful seasonal decor does not need to come from an expensive boutique. With a basic metal pizza pan, a few affordable supplies, and a little creative confidence, you can make custom wreaths for spring, summer, fall, winter, and every day in between. The key is to start with a clean base, choose a simple color palette, layer textures, and let the season guide your accents.
Whether you love pastel florals, bright lemons, rustic pumpkins, snowy evergreens, or an interchangeable year-round design, these easy DIY pizza pan wreath ideas can help you decorate your home with personality and charm. And if your first wreath is not perfect, do not worry. Add a bow. Crafting has survived on that advice for generations.
Note: This article is written for web publishing and is based on real DIY wreath-making practices, seasonal craft trends, and common budget decor techniques used by U.S. craft and home decor publishers.