Some birthday cards say, “I remembered.” A pop up birthday card says, “I remembered, planned ahead, wrestled with scissors, and made a tiny paper surprise jump out at you like a cheerful jack-in-the-box.” That is the magic of DIY pop up cards: they are personal, affordable, creative, and wonderfully dramatic without requiring a professional craft studio or a glitter budget large enough to concern your accountant.
In this guide, you will learn how to make a pop up birthday card in 13 easy steps using simple supplies like cardstock, scissors, glue, markers, and colored paper. The project is beginner-friendly, but the finished result can look impressive enough to make the birthday person say, “Wait, you made this?”which is basically the Olympic gold medal of handmade cards.
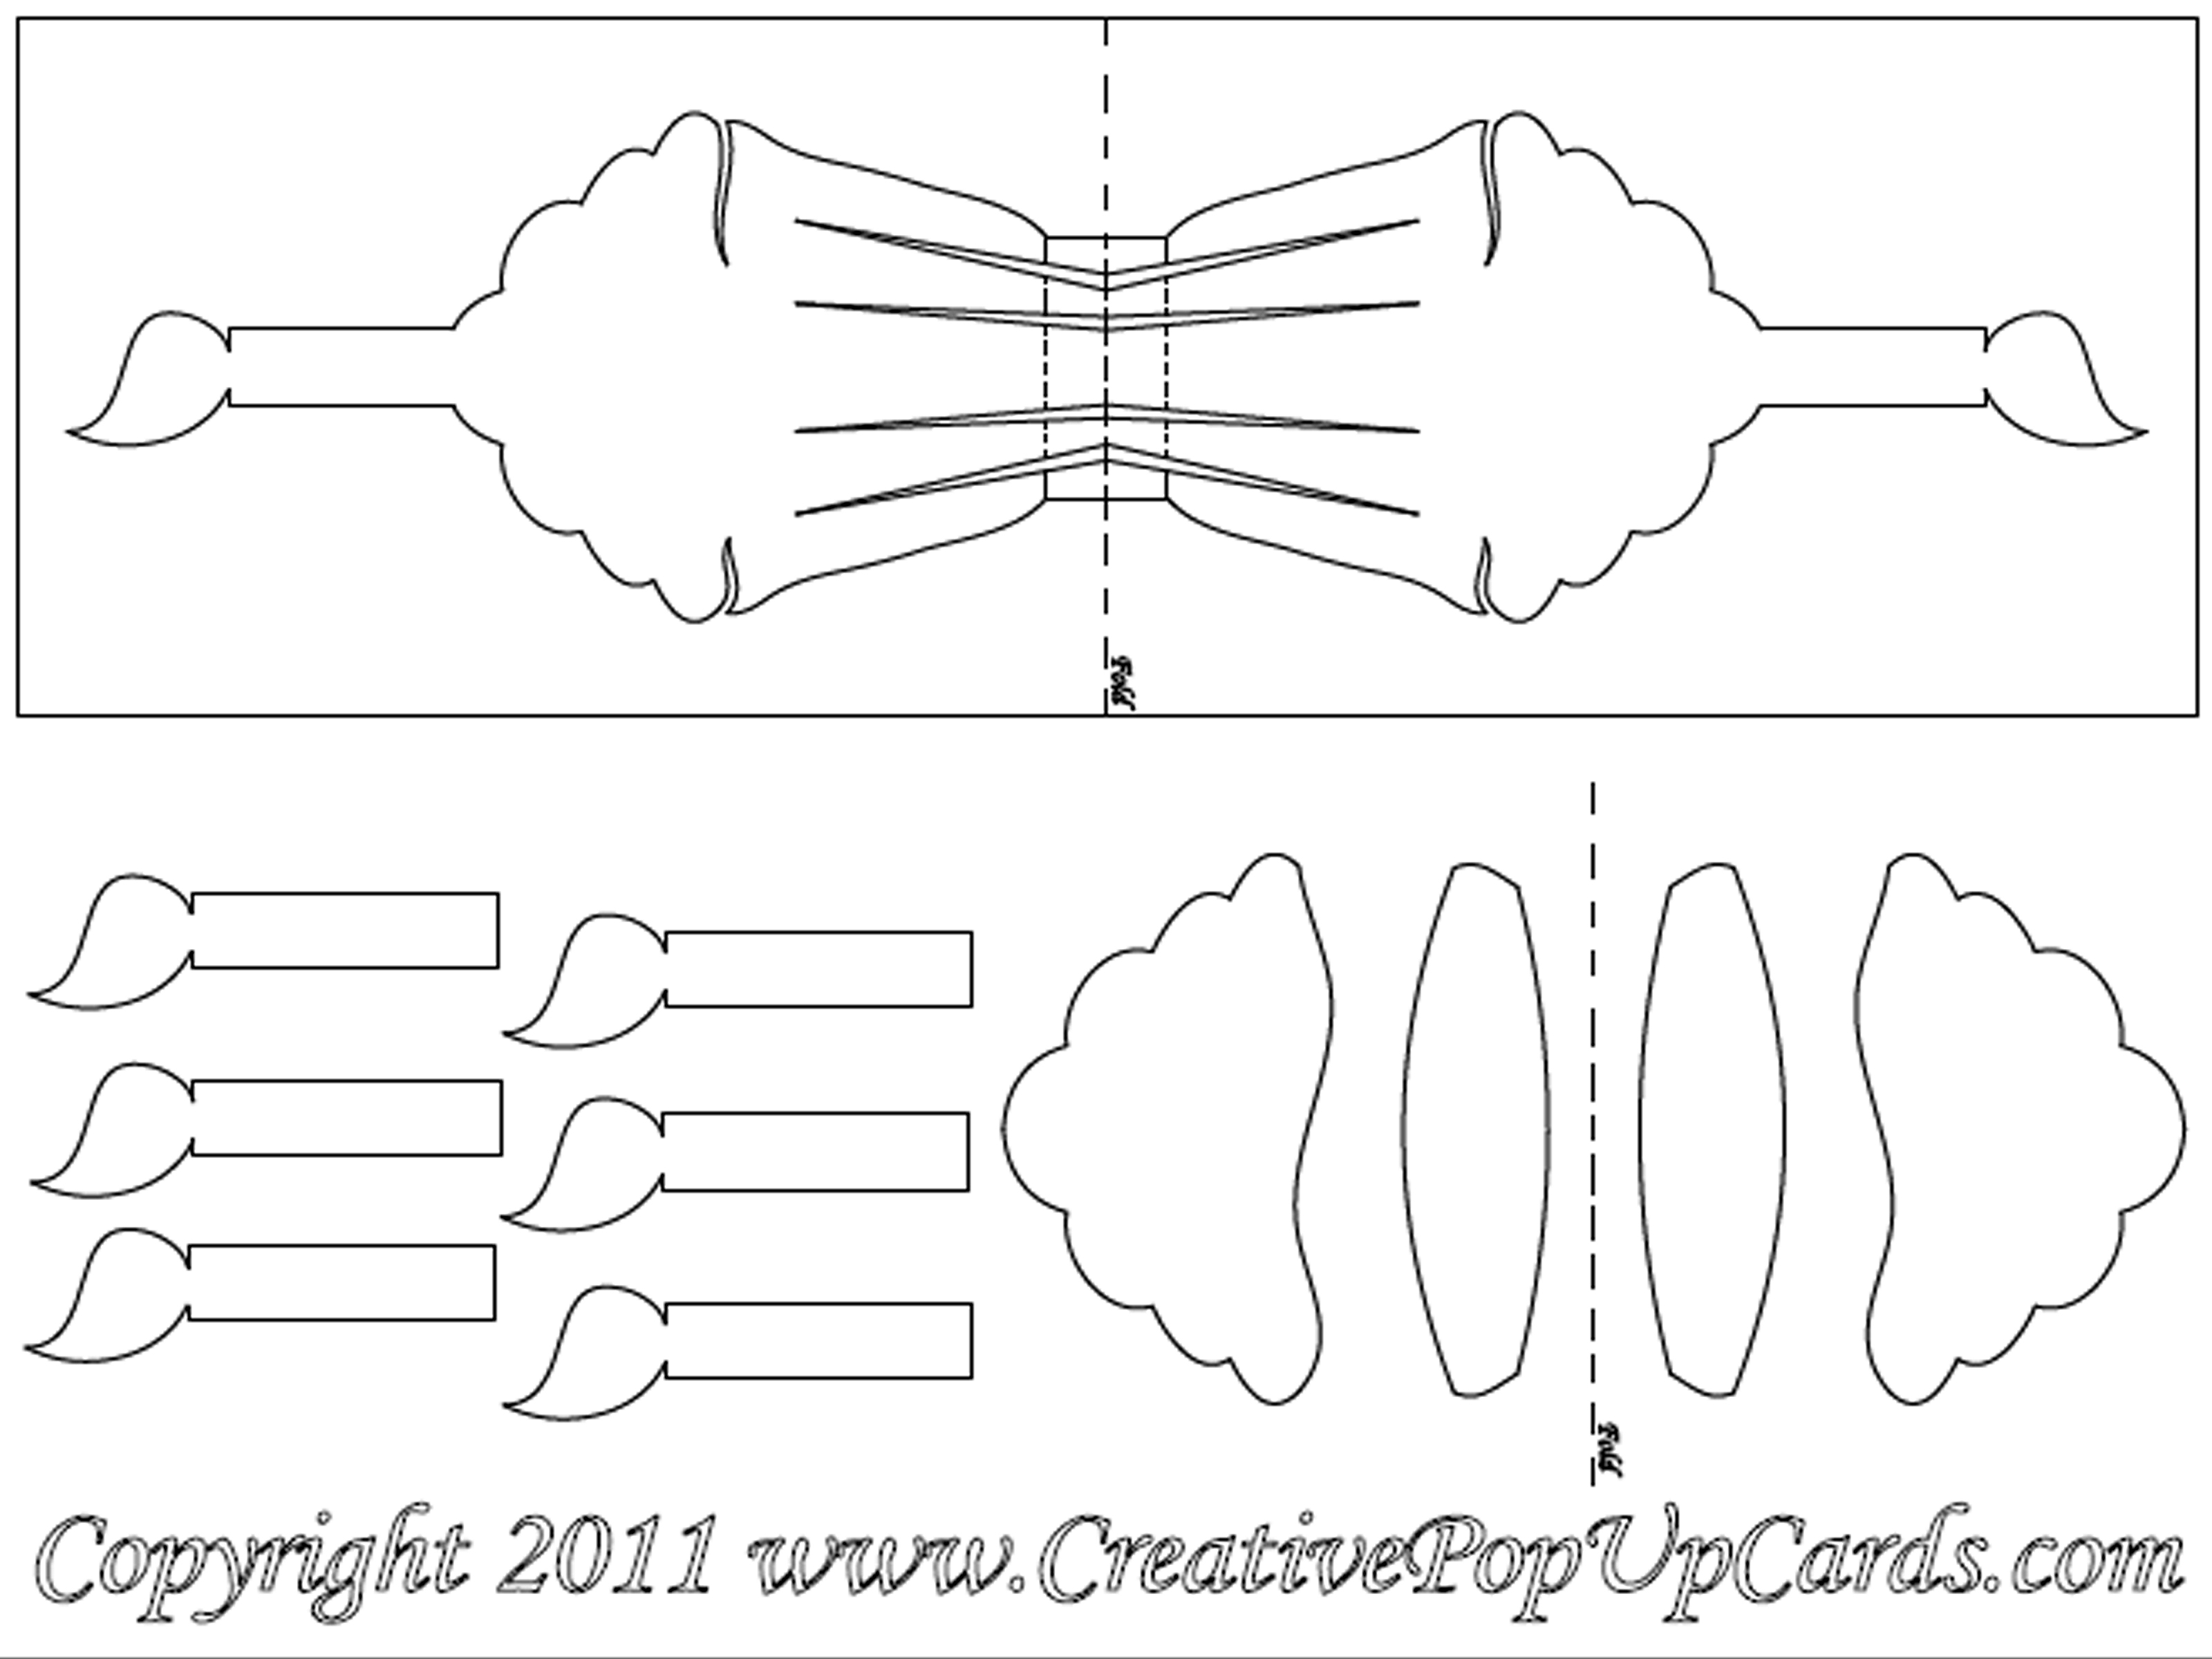
The basic idea is simple: you create a folded card base, cut small tabs or supports inside the card, attach decorative elements to those supports, and let the design rise when the card opens. Once you understand that one mechanism, you can customize it with birthday cakes, balloons, candles, flowers, photos, confetti shapes, name banners, or a tiny paper version of the recipient’s dog wearing a party hat. Strongly encouraged, honestly.
Why Make a Pop Up Birthday Card?
A handmade pop up birthday card feels more memorable than a standard greeting card because it adds movement, depth, and surprise. The recipient does not just read the cardthey interact with it. That little “pop” moment turns a flat piece of paper into a mini celebration.
Making your own card also gives you total creative control. You can match the birthday person’s favorite colors, add an inside joke, write a personal message, or design the pop up around something they love. A store-bought card might say “Happy Birthday” beautifully, but a handmade pop up card can say, “Happy Birthday, here is a paper taco because we both know your love language is guacamole.”
Materials You Will Need
Before you start cutting and folding like a tiny paper architect, gather your supplies. You do not need fancy equipment, though a few helpful tools can make the card cleaner and easier to assemble.
Basic Supplies
- Two sheets of cardstock: one for the outer card and one for the inner pop up layer
- Colored paper or patterned paper for decorations
- Scissors
- Glue stick, craft glue, or double-sided tape
- Pencil
- Ruler
- Markers, pens, or colored pencils
- Optional: stickers, ribbon, glitter paper, washi tape, photos, or printed designs
Helpful Optional Tools
- Bone folder or the back of a spoon for crisp folds
- Craft knife and cutting mat for precise cuts
- Scoring board for clean fold lines
- Paper trimmer for straight edges
- Circle punch, star punch, or balloon-shaped punch for decorations
If children are helping, use child-safe scissors and keep craft knives, hot glue, and sharp tools for adult hands only. A birthday card should cause delight, not a dramatic family first-aid moment.
How to Make a Pop Up Birthday Card: 13 Steps
Step 1: Choose Your Card Size and Theme
Start by deciding what kind of birthday card you want to make. A classic folded card size is around 5 inches by 7 inches, but you can make it smaller, larger, vertical, or horizontal. If you plan to mail the card, make sure it fits inside an envelope and does not become so thick that it requires postage negotiations with the universe.
Pick a simple birthday theme. Great beginner ideas include a pop up cake, balloons, candles, wrapped presents, stars, flowers, or a “Happy Birthday” banner. For your first card, choose one main pop up element and a few small decorations. You can always go full paper fireworks later.
Step 2: Fold the Outer Card Base
Take your first sheet of cardstock and fold it in half. This will be the outer card, so choose a sturdy color that works with your theme. Press the fold firmly with your fingers, a bone folder, or the smooth edge of a ruler. A crisp fold helps the card open and close neatly.
If the cardstock is very thick, score the middle line lightly before folding. Scoring means making a shallow line that guides the fold without cutting through the paper. This small step makes the card look more polished.
Step 3: Make the Inner Pop Up Layer
Take the second sheet of cardstock and trim it slightly smaller than the outer card. This inner layer will hide your cuts and create a clean background for the pop up mechanism. For example, if your outer card is 5 by 7 inches when folded, make the inner layer about 4.75 by 6.75 inches.
Fold the inner layer in half just like the outer card. Make sure the fold lines match. When the card is finished, this inner layer will be glued inside the outer base, but do not glue anything yet. The pop up needs room to do its grand entrance.
Step 4: Plan the Pop Up Placement
Open the inner layer and look at the center fold. This fold is where the pop up magic begins. Use a pencil and ruler to mark where you want the pop up tab or tabs to go. For a birthday cake, you might use one wide tab in the center. For balloons or flowers, you might use three smaller tabs at different heights.
Keep your design balanced. Leave enough space around the edges so your decorations do not stick out when the card closes. A quick test is to lay your cutout shapes inside the folded card and check whether they stay within the borders.
Step 5: Cut Two Parallel Slits for the Main Tab
With the inner layer still folded, cut two short parallel slits from the folded edge toward the open edge. These slits create the main pop up tab. For a simple card, make each slit about 1 inch long and space them about 1 to 1.5 inches apart.
The longer the slits, the farther the tab will pop forward. The wider the distance between the slits, the wider the support will be. For a birthday cake, a wider tab works well. For a single balloon, a narrower tab is enough.
Step 6: Push the Tab Inward
Open the inner card layer. You should see the two cuts you made. Gently push the cut section inward so it folds in the opposite direction from the card fold. Crease the top and bottom edges of the tab so it forms a little step or box shape inside the card.
Close and open the card a few times. The tab should move smoothly and pop forward when the card opens. If it resists, adjust the creases. Paper can be stubborn, but it usually responds well to calm folding and mild encouragement.
Step 7: Add More Tabs for Extra Dimension
If you want a more exciting design, repeat the cutting process to make additional tabs. Try smaller tabs on either side of the main tab for candles, balloons, gifts, or stars. Varying the tab size creates depth and makes the pop up scene feel layered.
For beginners, two or three tabs are plenty. Too many tabs can make the inside crowded and harder to close. Think charming birthday surprise, not paper traffic jam.
Step 8: Create the Pop Up Decorations
Now make the decorations that will attach to the tabs. Cut a birthday cake from colored paper, draw candles, make balloons from circles or ovals, or cut little rectangles for presents. You can also use printed photos, stickers, or magazine cutouts.
For a classic birthday cake pop up, cut three stacked rectangles in different sizes. Decorate them with marker icing, dots, stripes, or tiny paper candles. For balloons, cut several oval shapes and draw strings with a marker. For a name banner, cut small triangles or rectangles and write one letter on each piece.
Step 9: Test the Layout Before Gluing
Before reaching for the glue, arrange your decorations on the tabs and close the card gently. Make sure nothing sticks outside the edges or gets crushed in an awkward way. This test is important because glue has a sneaky habit of becoming permanent right after you realize something is crooked.
Check the angle of each decoration. Pop up pieces usually look best when they face the reader directly as the card opens. If a piece leans too far forward or backward, move it slightly on the tab.
Step 10: Glue the Decorations to the Tabs
Apply a small amount of glue or double-sided tape to the front of each tab. Attach your decorations carefully and press them down for a few seconds. Use only enough glue to hold the paper in place. Too much glue can wrinkle the cardstock or make the mechanism stiff.
Let the pieces dry before testing the card again. Open and close it slowly. If everything moves smoothly, congratulations: you have officially entered the world of paper engineering, and your membership card is probably also a pop up.
Step 11: Decorate the Background
Once the main pop up elements are secure, decorate the inside background. Add confetti dots, stars, streamers, little hearts, or a handwritten birthday message. Keep the decorations mostly flat so they do not interfere with the pop up movement.
Try writing a message like “Hope your day pops with joy!” or “You deserve cake, confetti, and absolutely no chores.” A playful message pairs perfectly with the surprise design.
Step 12: Glue the Inner Layer Into the Outer Card
Now it is time to hide the back of the cuts and make the card look finished. Apply glue to the back of the inner layer, but avoid putting glue directly behind the pop up tabs. Carefully place the inner layer inside the outer card, aligning the center folds.
Press the flat areas gently and let the card dry under a book for a few minutes. Do not use a heavy book if your decorations are bulky. The goal is neat adhesion, not turning your birthday cake into a pancake.
Step 13: Finish the Front and Final Message
Decorate the front of the card with a title, drawing, paper cutouts, or the recipient’s name. A simple “Happy Birthday” on the front works beautifully, especially if the inside contains the big surprise. You can also add a small clue like “Open for cake!” or “Warning: celebration inside.”
Finally, write a personal message. Mention a shared memory, a sincere wish, or a funny detail that only the recipient will understand. The pop up design makes the card fun, but the message makes it meaningful.
Easy Pop Up Birthday Card Ideas
Pop Up Birthday Cake Card
A birthday cake is the most classic choice because it instantly says celebration. Use a large center tab to hold the cake shape. Add candles, sprinkles, and layers of colored paper. If you want extra depth, attach candles to smaller tabs behind the cake.
Balloon Pop Up Card
Cut balloons from bright paper and attach them to narrow tabs. Draw strings that lead down to a small paper bow or gift box. You can make the balloons different heights to create a floating effect.
Gift Box Pop Up Card
Use square and rectangular paper shapes to make presents. Add ribbon strips from contrasting paper. A gift box pop up card is easy to customize for any age, from children to adults who still deserve stickers. Which is everyone, obviously.
Photo Pop Up Card
Print a small photo of the birthday person, a pet, a favorite place, or a funny memory. Attach it to the main tab and decorate the background with party shapes. This turns the card into a keepsake instead of something that gets politely admired and placed near the fruit bowl.
Tips for Making Your Pop Up Card Look Professional
Use cardstock instead of thin printer paper for the base. Cardstock holds its shape better and gives the card a clean, sturdy feel. For decorations, lighter paper is often easier to layer because it does not weigh down the tabs.
Make clean folds. A messy fold can throw off the entire pop up mechanism. Score the paper first if needed, then crease firmly. Keep your cuts straight by using a ruler and pencil marks. If you are using a craft knife, always cut on a mat and keep your fingers safely away from the blade.
Do not overload the tabs. Heavy decorations, thick embellishments, and large glue blobs can stop the card from closing properly. If you want sparkle, use glitter paper or metallic markers instead of loose glitter. Loose glitter may look festive, but it also has a lifetime commitment to your carpet.
Choose a color palette before decorating. Three main colors usually look cleaner than ten competing colors. For example, try blue, silver, and white for a modern card; pink, yellow, and mint for a cheerful look; or black, gold, and cream for an elegant adult birthday card.
Common Mistakes to Avoid
Making the Pop Up Too Large
A decoration that looks perfect when the card is open may stick out when it closes. Always test the size before gluing. Fold the card gently and check the edges from all sides.
Using Too Much Glue
Excess glue can warp paper, create bumps, or accidentally seal the tab shut. Use a thin layer of glue or small pieces of double-sided tape. Let each layer dry before adding more decorations.
Skipping the Practice Version
If you are new to pop up cards, make a quick practice card with scrap paper first. This helps you understand how the tabs move. Once you know the mechanism, the final version will be much easier.
Forgetting the Envelope
A beautifully chunky card is fun until you realize it fits into exactly zero envelopes. If you plan to mail the card, keep the decorations fairly flat and measure the finished card before sealing it.
How to Personalize Your Birthday Pop Up Card
The best part of making a handmade birthday card is personalization. Add the recipient’s name in bold letters, use their favorite colors, or include symbols related to their hobbies. A music lover might enjoy pop up notes and a tiny stage. A gardener might love flowers, leaves, and a “Hope your year blooms” message. A foodie might appreciate a pop up cupcake, pizza slice, or taco.
You can also add a small pocket for a gift card, handwritten coupon, photo strip, or tiny note. Keep the pocket flat and place it on the inside cover, not on the moving pop up mechanism. That way, the card still opens smoothly.
Experience Section: What I Learned Making Pop Up Birthday Cards
The first time you make a pop up birthday card, you may feel like you are performing a delicate science experiment with paper. You fold, cut, open the card, and suddenly a little tab appears. It is oddly satisfying. Then you add a decoration, close the card, open it again, and there it isa tiny paper object standing proudly like it just won a talent show.
One of the biggest lessons from making pop up cards is that simple designs often work best. It is tempting to add everything: cake, balloons, confetti, flowers, stars, banners, fireworks, and possibly a miniature marching band. But the most charming cards usually have one clear focal point. A bright birthday cake in the center with a few decorations around it can look cleaner and more delightful than a crowded scene where every paper object is fighting for attention.
Another helpful experience is learning to test constantly. Open and close the card after every major step. Test after cutting the tabs. Test after folding them inward. Test after placing decorations. Test again after gluing. This may sound repetitive, but it saves the project from surprise problems. A pop up card is a moving object, and moving objects like to reveal their drama at the least convenient time.
Cardstock choice also matters more than many beginners expect. Very thin paper can collapse or wrinkle, while extremely thick paper can be difficult to fold cleanly. Medium-weight cardstock is usually the sweet spot for the base. For decorations, lighter colored paper works nicely because it adds detail without weighing down the tabs. If the pop up piece is too heavy, it may sag like it stayed up too late at its own birthday party.
Glue choice makes a difference too. A glue stick is easy and neat for most paper pieces, especially for kids or beginners. Double-sided tape gives a clean finish and holds quickly. Liquid craft glue can be strong, but it should be used sparingly because too much moisture may wrinkle the paper. The best approach is to apply less glue than you think you need, press firmly, and allow drying time.
Personal messages are where the card becomes special. The pop up design creates the wow factor, but the words create the emotional connection. A funny message can make the card feel playful, while a heartfelt note can turn it into a keepsake. Even one specific sentence“I hope this year brings more beach days, better coffee, and fewer meetings that could have been emails”can make the card feel like it was made only for that person.
If you are making cards with children, the experience becomes even more fun. Kids may not cut perfectly straight lines or place every sticker exactly where an adult would, but that is part of the charm. Let them choose colors, draw decorations, or write the message. An adult can handle the measuring and cutting, while children take over the imagination department, where they are usually senior executives.
After making a few pop up birthday cards, you start seeing possibilities everywhere. A folded tab can become a cake, a flower, a dinosaur, a rocket ship, a stack of books, or a tiny paper cat. That is the beauty of this craft: once you understand the basic mechanism, you can adapt it endlessly. Each card becomes a small handmade performance, opening with a surprise and closing with a smile.
Conclusion
Learning how to make a pop up birthday card is easier than it looks, and the results are wonderfully rewarding. With cardstock, scissors, glue, and a little patience, you can create a handmade card that feels personal, playful, and memorable. The key is to start with a simple design, cut clean tabs, test the movement before gluing, and decorate with intention.
Whether you make a birthday cake, balloons, gifts, flowers, or a photo surprise, your card will carry something no store-bought design can fully replicate: your time, humor, and thoughtfulness. And honestly, that is the real pop up moment.
Note: This article is written in original, publish-ready American English and synthesizes practical, real-world cardmaking guidance into a fresh tutorial without source-link elements or citation placeholders.