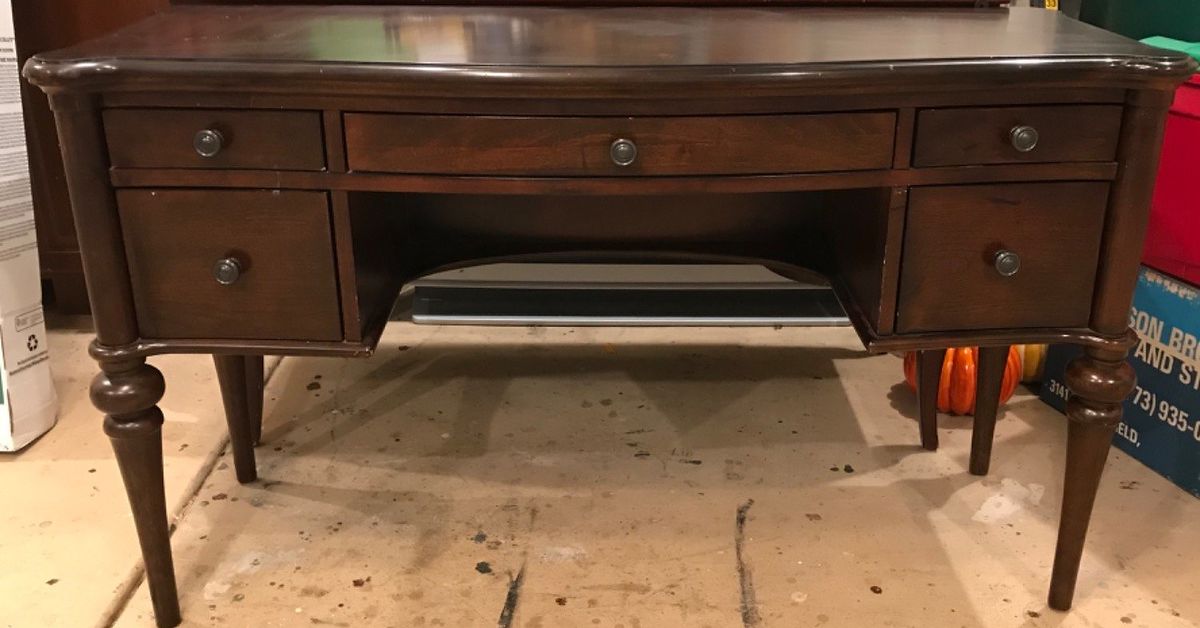
A vanity desk is basically a tiny stage where your skincare routine performs nightly theater. If the “set design” is looking a little tired (scratches, water rings, mystery scuffs from 2019), painting it is one of the easiest DIY glow-ups you can dowithout buying a brand-new piece that costs as much as a small appliance you actually need.
This guide walks you through how to paint a vanity desk the right way: the prep that prevents chipping, the paint choices that won’t feel sticky, and the finishing steps that make it look more “boutique furniture” and less “I panicked in the garage at 10 p.m.”. Expect clear steps, practical options, and a couple of friendly reminders that dust is, unfortunately, a lifestyle.
Why Paint a Vanity Desk Instead of Replacing It?
Painting lets you keep a sturdy piece (especially older solid-wood desks) while upgrading the style, color, and finish. It’s also a budget win: you can get a high-end look with a primer + paint combo and a weekend of effort. Plus, you can customize detailstwo-tone drawers, a sleek matte top, or new hardware that instantly says “designer” even if you bought it during a late-night cart spiral.
Before You Start: Figure Out What Your Vanity Desk Is Made Of
The best way to avoid peeling and chipping is to match your prep to the surface. Here’s the cheat sheet.
Solid Wood
Solid wood is the easiest to paint and the most forgiving. Light sanding + primer (often) + durable paint is usually enough. If it’s stained wood, you’ll still want proper cleaning and either sanding or a primer that grips well.
Veneer (Thin Wood Layer Over Another Material)
Veneer can look like solid wood, but it’s thinner and easier to sand through. Use a light touch when sandingyour goal is to dull the sheen, not excavate the desk. Veneer paints beautifully when prepped gently.
Laminate / “IKEA-Style” Surfaces
Laminate is slick and non-porous, so paint needs help sticking. Translation: clean thoroughly, scuff sand lightly, and use a strong bonding primer designed for shiny or difficult surfaces. Skipping the bonding primer is how you get that heartbreaking “peels off in sheets” moment.
MDF / Particleboard
These materials can paint well, but edges are thirsty and can swell if soaked. Keep coats thin, don’t over-wet with cleaner, and prime wellespecially on raw edges or any spots where the finish is damaged.
Old Painted Furniture (Lead Paint Warning)
If your vanity desk is older and already paintedespecially anything that could be from before 1978consider a lead paint test kit before sanding or scraping. If you’re not sure, err on the safe side and avoid creating dust until you’ve checked.
Tools and Materials
Grab what fits your project. You don’t need everythingbut you do need the basics.
Prep
- Drop cloth or plastic sheeting + painter’s tape
- Screwdriver (for removing drawers, pulls, knobs)
- Cleaner/degreaser (dish soap + warm water works; a dedicated degreaser is even better)
- Microfiber cloths or lint-free rags
- Sandpaper or sanding sponge (120/150, 180/220; optional 320 for between coats)
- Tack cloth or a slightly damp lint-free cloth (for dust removal)
- Wood filler + putty knife (for dents, chips, old hardware holes)
Prime + Paint
- Bonding primer (especially for laminate, glossy finishes, or previously coated surfaces)
- Paint: durable enamel/cabinet paint for high-touch surfaces (recommended)
- High-quality angled brush (for corners) + small foam roller (for smooth, low-brush-mark panels)
- Paint tray + liner
Protect + Reassemble
- Optional topcoat (water-based polyurethane/polycrylic for extra durability)
- New hardware (optional, but wildly satisfying)
- Felt pads (drawer bottoms, legs, and anywhere paint could stick while curing)
Step-by-Step: How to Paint a Vanity Desk DIY (No Regrets Edition)
Step 1: Set Up a Workspace That Won’t Ruin Your Week
Pick a well-ventilated area with good lighting. Lay down a drop cloth. Remove drawers and hardware, and label anything that could confuse you later (bag screws per drawerfuture you will send a thank-you note).
Step 2: Clean Like You Mean It
Furniture fails are often grease and polish fails. Vanity desks collect hair spray residue, lotion fingerprints, and that fine layer of “I swear I cleaned this.” Wash all surfaces thoroughly and let them dry completely.
Pay extra attention to drawer fronts, handles, and the desktop edgehigh-touch zones where oils live rent-free.
Step 3: Repair Dings, Chips, and Old Hardware Holes
Fill dents and scratches with wood filler. If you’re swapping hardware and the hole spacing doesn’t match, fill the old holes too. Let filler dry fully, then sand it smooth. Run your hand over repairsyour fingers catch what your eyes miss.
Step 4: Sand (or Degloss) for Adhesion
You don’t always need to sand down to bare wood. Most of the time, you’re just scuffing the surface so primer and paint can grip. If the finish is glossy, sanding matters more. Use a sanding sponge or sandpaper and aim for a dull, even surface.
- Solid wood or sturdy finishes: 150–220 grit to scuff.
- Laminate/veneer: light scuffingdon’t press hard; don’t oversand.
- Rough patches or drips: start with 120/150, then finish with 180/220.
Remove dust thoroughly afterward. Dust left behind becomes “texture,” which is a polite word for “grit you will stare at forever.”
Step 5: Prime (Yes, Even When Paint Claims It’s Optional)
Primer is your insurance policy. For glossy surfaces, laminate, or anything you’re worried might reject paint, choose a bonding primer. Apply a thin, even coat. Let it dry as directed, then lightly sand with a fine grit (often 220) to knock down any nibs, and wipe clean.
When primer is especially important: laminate desks, slick factory finishes, and any surface that previously had furniture polish or wax. If you suspect stain bleed (like reddish wood tannins), a stain-blocking primer can save your topcoat from weird discoloration later.
Step 6: Choose the Right Paint for a Vanity Desk
A vanity desk gets daily contacthands, rings, bottles, drawers sliding, and occasional “oops” spills. For that reason, the best option is usually a durable enamel or cabinet/furniture-rated paint designed to cure hard.
- Cabinet/trim enamel (water-based enamel or waterborne alkyd): Smooth finish, excellent leveling, durable for desktops and drawers.
- Acrylic enamel: Good durability and easier cleanup; still benefits from proper cure time.
- Chalk-style paint: Easy to use and great for a vintage look, but usually needs a protective topcoat for high-wear surfaces.
Step 7: Paint in Thin Coats (Your Patience Will Be Rewarded)
Apply paint in thin, even coats. Thick coats are the fast lane to drips, brush marks, and that “it’s still soft a week later” problem. Use a brush for edges and details, and a small foam roller for flat surfaces to get a smoother finish.
Let the first coat dry fully. Then apply a second coat. Most vanity desks look best with two coats; some colors (especially bright whites, deep navy, or black) may need a third for perfect coverage.
Step 8: Sand Lightly Between Coats for a Pro Finish
If you want that silky, furniture-store finish, lightly sand between coats once they’re dryjust enough to knock down any dust nibs or roller texture. Use 220–320 grit with a gentle hand, then wipe away dust before recoating.
Step 9: Add a Protective Topcoat (Optional, but Smart for Desktops)
Some cabinet and furniture paints are durable enough on their own once cured. But the desktop of a vanity desk deals with constant contact: bottles sliding, makeup spills, curling iron bases (please use a heat-safe mat), and cleaning.
If you want extra protection, choose a clear topcoat compatible with your paint system. Water-based polycrylic/water-based polyurethane stays clearer and is popular for light colors. Apply thin coats, avoid over-brushing, and lightly sand between topcoats if needed for smoothness.
Important: If you used wax (common with chalk-style paints), many clear topcoats won’t adhere properly over it. Decide early: wax finish or poly-style topcoatdon’t mix them unless the product specifically says it’s compatible.
Step 10: Reassemble CarefullyThen Let It Cure
Once everything is dry to the touch, reinstall hardware and drawers gently. Add felt pads where drawers might rub. Then let the finish cure before heavy use.
Dry Time vs. Cure Time (The Part People Skip, Then Regret)
“Dry” means you can touch it lightly. “Cured” means the paint has hardened and reached its tougher, more durable state. Your vanity desk can feel dry quickly but still be soft underneath for days (sometimes weeks), depending on the product, humidity, and how thick you painted.
- Dry to touch: often hours (varies by product and conditions).
- Ready for light use: commonly about a week (varies).
- Fully cured: frequently 2–4 weeks for many water-based systems; some topcoats specify about 21 days.
During curing, treat the desk gently. Avoid harsh cleaners, don’t tape anything to it, and don’t stack heavy items on the desktop. If you want a quick “is it cured?” test: press a fingernail in an inconspicuous area. If it dents, it needs more time.
Common Mistakes That Make Painted Vanity Desks Chip
- Skipping cleaning: paint doesn’t bond to lotion residue and furniture polish.
- No bonding primer on laminate/glossy finishes: adhesion failure waiting to happen.
- Applying thick coats: drips, texture, and longer soft-curing time.
- Rushing recoat times: trapped moisture can cause tackiness or later peeling.
- Ignoring cure time: the finish seems “done” until a drawer sticks and peels paint right off the edge.
Design Ideas to Make Your Vanity Desk Look Custom
Two-Tone Finish
Paint the base one color and the desktop another. A classic combo: soft white base + warm wood-toned top (sealed), or a bold color base + crisp white top.
Drawer Pop Moment
Paint drawer fronts one shade darker than the body, or add removable wallpaper inside drawers for a surprise “boutique unboxing” vibe.
Hardware Upgrade (High Impact, Low Effort)
Swapping knobs and pulls can make a painted vanity desk look expensive instantly. Brushed brass warms up cooler paint colors; matte black feels modern. If hole spacing changes, fill and drill new holes after paint cures.
Soft Distressing (If You Like Vintage)
After paint dries, lightly sand edges where natural wear would happencorners, drawer edges, and around knobs. Seal if needed, especially if the desk will see daily use.
Quick FAQ
Do I have to sand?
Often, yesat least lightly. Think of sanding as “giving paint a grip.” On glossy finishes or laminate, scuff sanding + bonding primer is the reliable path.
Can I paint a vanity desk without primer?
Sometimes, depending on paint type and surfacebut primer dramatically improves adhesion and durability, especially on slick surfaces, stained wood, or any piece that’s been polished.
How do I avoid brush marks?
Use thin coats, don’t overwork the paint, and consider a foam roller for flat areas. Light sanding between coats helps too. A high-quality enamel paint that levels well can also reduce visible strokes.
Do I need a clear coat?
Not always. Many cabinet/furniture enamels cure to a durable finish on their own. But for vanity desktops (high wear, frequent cleaning), a compatible clear topcoat can add scratch and moisture resistance.
How long before I can use my painted vanity desk?
You can often reassemble after it’s dry to the touch, but treat it gently for at least several days. For full durability, many finishes need a longer cure periodoften a few weeks. If you can wait, your future finish will thank you.
Real-World Experience: of “What I Wish I Knew”
The first vanity desk I ever painted taught me a humbling lesson: paint does not care how confident you feel. It only cares how clean the surface is. I did the classic beginner movegave the desk a quick wipe, told myself it was “fine,” and started painting like I was hosting a home makeover show. The color was gorgeous. I was smug. Then, three days later, I slid a drawer in and watched a perfect little strip of paint peel right off the edge like a sunburn. The desk hadn’t failed me. I had failed the desk (dramatic, but accurate).
Attempt two went better, mostly because I stopped rushing the boring parts. I removed the hardware, cleaned everything like it had personally offended me, and scuff sanded until the sheen turned dull. That dull finish is the quiet sign you’re doing it right. I also learned the joy of a bonding primer. It’s not glamorous, but it’s the difference between “freshly painted” and “why is this flaking when I barely touched it?”
My biggest upgrade was switching how I applied paint. I used to over-brushgoing back again and again trying to “fix” tiny streaks. That’s how you end up with more streaks. A foam roller for flat surfaces changed everything. I’d cut in corners with a good angled brush, roll the larger areas, and then leave it alone. It felt wrong at first, like walking away from an unfinished task, but the finish leveled out better when I stopped fussing with it.
Then there’s cure timethe part nobody wants to hear about. I once set a heavy perfume bottle on a “dry” desktop and created a perfect ring imprint. The paint wasn’t fully cured, so it politely accepted the bottle as a permanent roommate. Now I treat curing paint like a new friendship: gentle at first, no pressure, let it develop trust. I’ll use the desk lightly, but I don’t drag organizers across it, and I avoid harsh cleaners. Felt pads became my best friendson drawer bottoms, inside runners, anywhere friction could happen.
Finally, I learned to plan for vanity reality: water splashes, makeup powder, and daily wiping. For a high-use top surface, I choose a durable enamel paint, and if the desk will be cleaned often, I add a compatible clear topcoat. It’s not about making it “indestructible”it’s about making it forgiving. Because real life is messy, and your vanity desk should be cute enough to handle it.
Conclusion
Painting a vanity desk DIY-style is mostly about three things: prep that creates grip, paint that cures hard, and patience between coats. Clean thoroughly, scuff sand with intention, use a primer that matches your surface (especially laminate), and apply thin coats you let dry properly. Add a protective topcoat if your desktop will see heavy use, then give the finish time to cure before you treat it like a workhorse. Do that, and your vanity desk won’t just look refreshedit’ll stay that way.