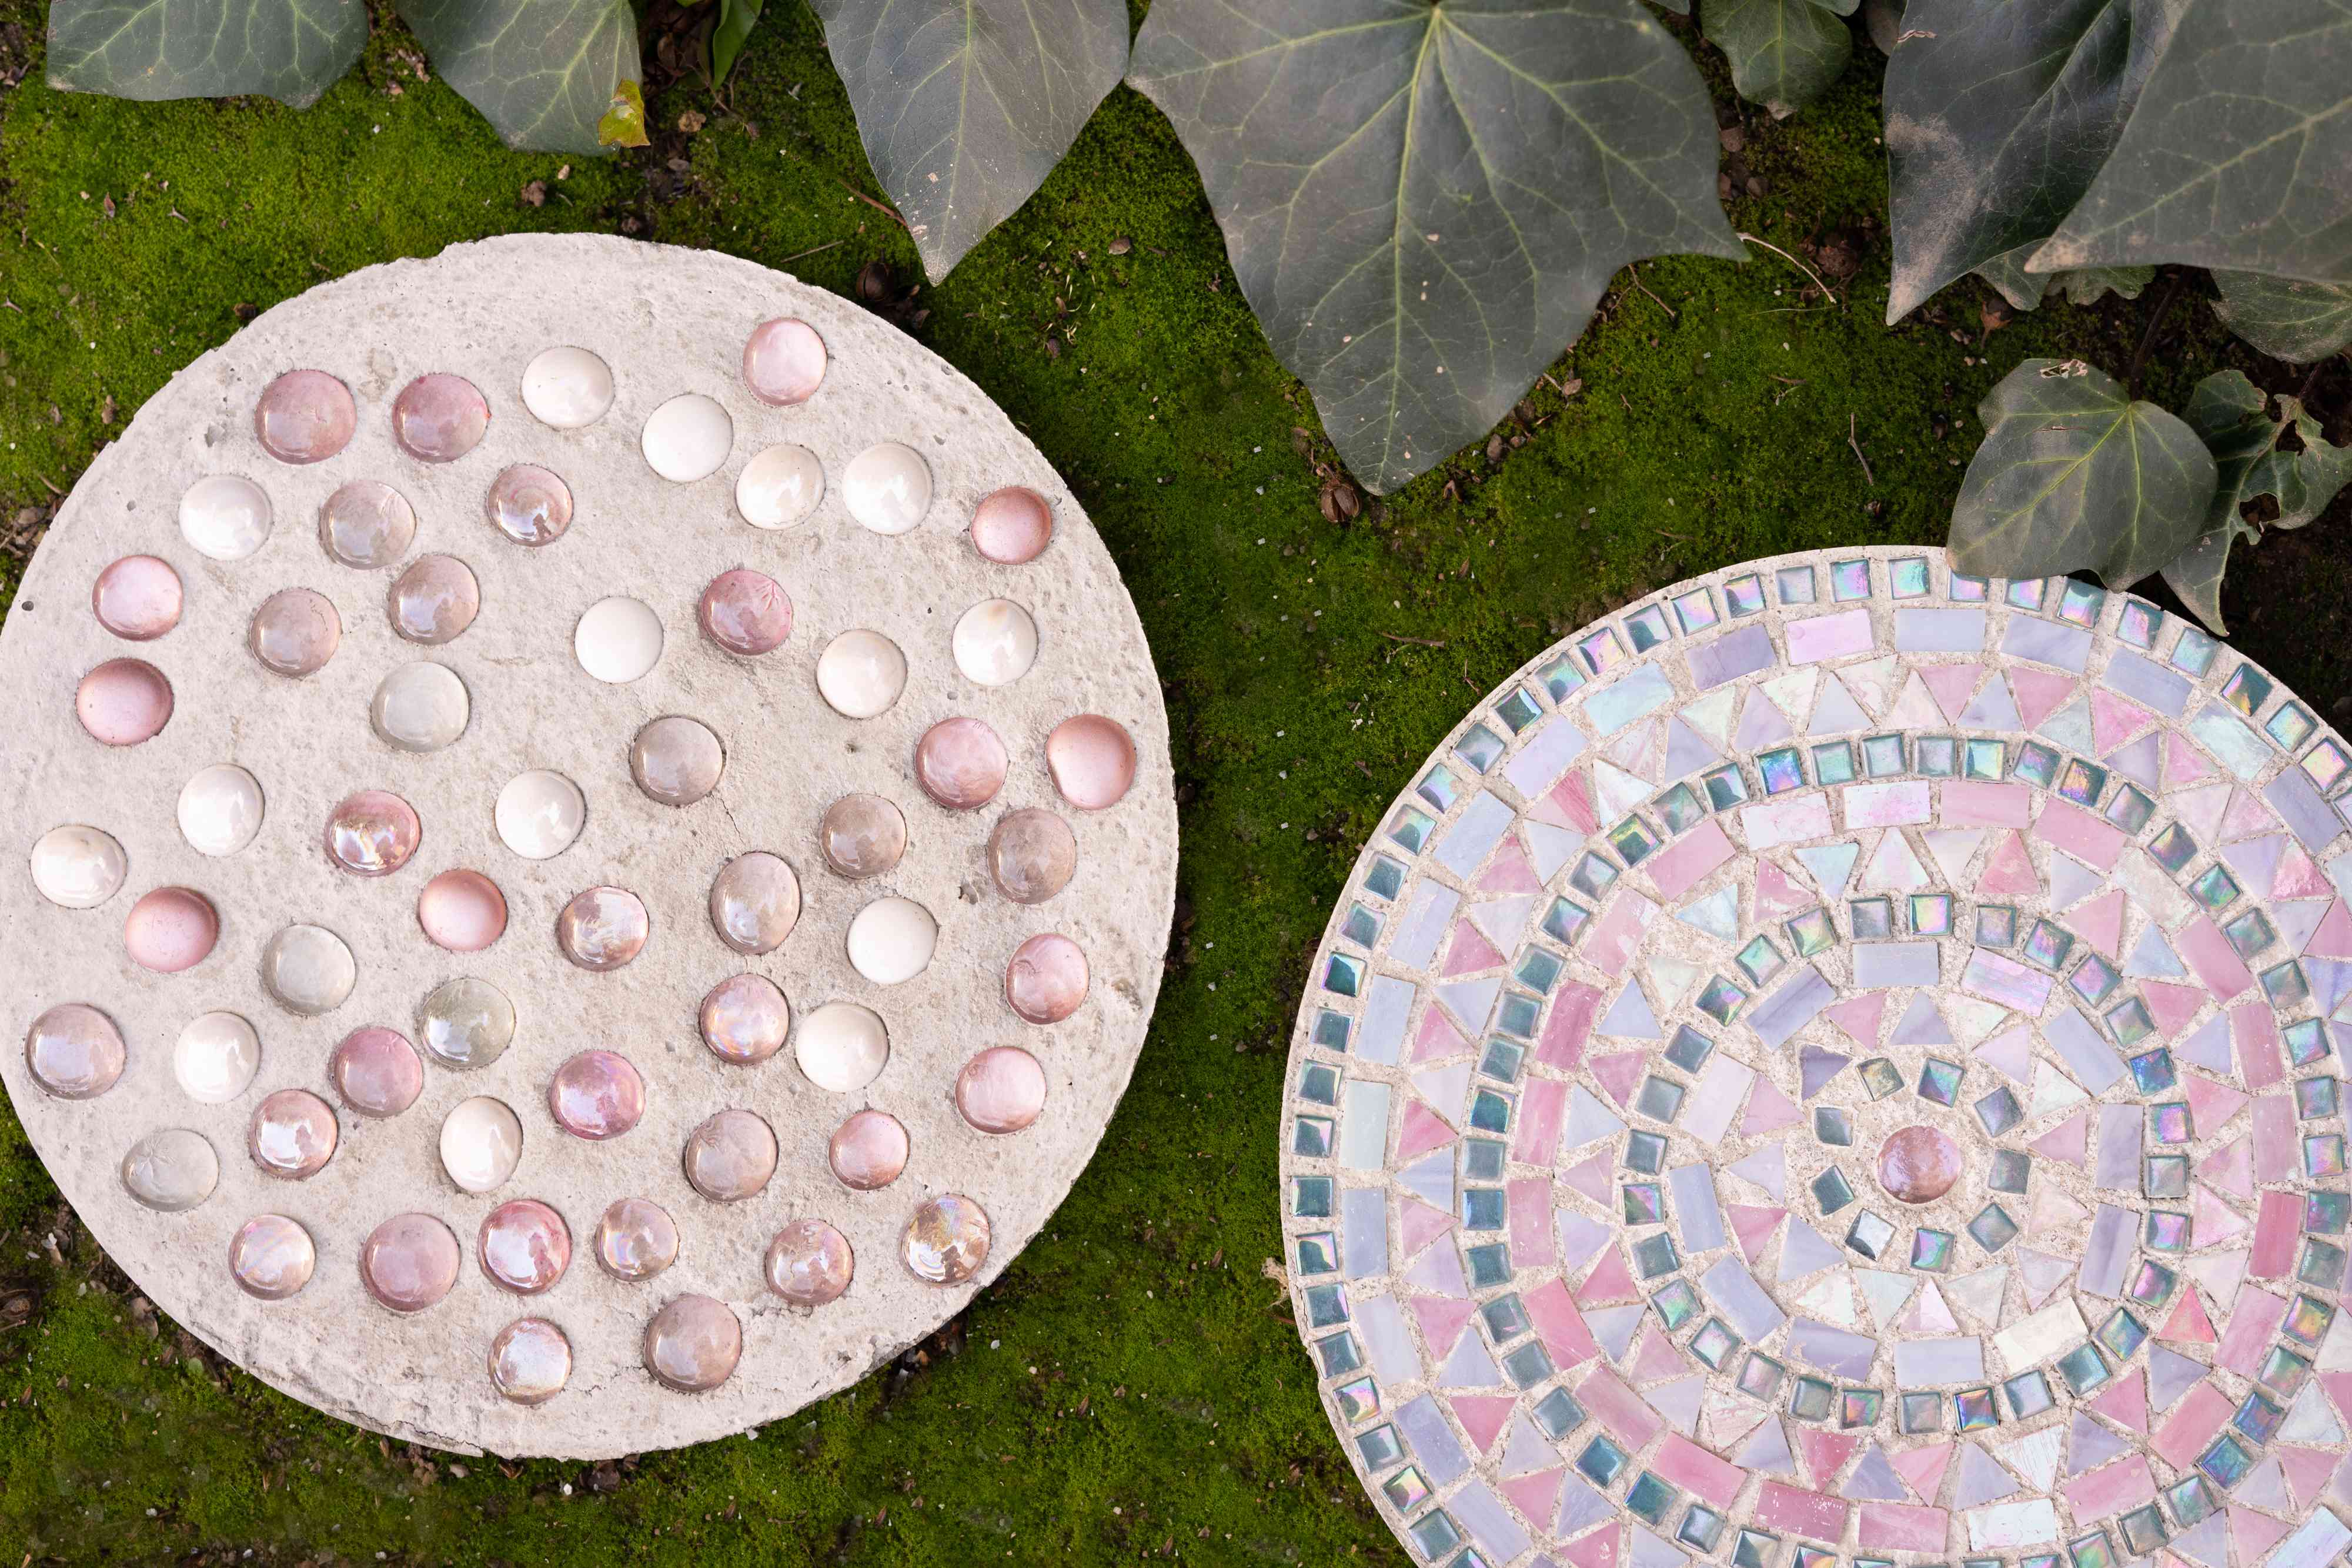
Garden stepping stones are the little heroes of the backyard. They guide muddy shoes away from your lawn, create a charming path through flower beds, and make your garden feel planned instead of “I dropped a few rocks and hoped for the best.” The best part? You can make them yourself with concrete, a simple mold, and a bit of creativity.
Learning how to make garden stepping stones is a beginner-friendly DIY project that can be practical, decorative, and surprisingly fun. You do not need a landscaping degree, a giant workshop, or a mysterious uncle named Gary who “knows concrete.” With the right materials, a stable base, and enough curing time, you can create custom stepping stones for garden paths, side yards, patios, vegetable beds, or that one soggy shortcut everyone keeps taking across the grass.
This guide walks you through the entire process: planning your path, choosing concrete, making molds, decorating the stones, curing them properly, installing them securely, and avoiding common mistakes. By the end, you will know how to make DIY garden stepping stones that look good, feel sturdy, and do not wobble like a nervous pancake.
Why Make Your Own Garden Stepping Stones?
Store-bought pavers are convenient, but homemade stepping stones let you control the size, shape, color, texture, and personality. Want a rustic leaf imprint? Done. A mosaic made from broken tiles? Absolutely. Smooth modern circles? Yes. A stone with your child’s handprint? Adorable, though you may need to act fast before the handprint becomes a full-body concrete incident.
DIY stepping stones are also useful. They protect grass from foot traffic, reduce muddy patches, make garden maintenance easier, and create a clear route through your yard. They can connect a patio to a shed, a gate to a vegetable garden, or a driveway to a front door. In small yards, a curved stepping stone path can make the space feel larger and more inviting.
Plan the Path Before Mixing Concrete
Before opening a bag of concrete mix, decide where your stepping stones will go. A good path should feel natural. Walk through your garden the way you normally would and notice your route. If you already have a worn strip in the grass, congratulations: your feet have been doing landscape design without asking for credit.
Choose the Route
For informal gardens, curves usually look better than ruler-straight lines. A gentle winding path feels relaxed and organic, especially around flower beds, shrubs, or trees. Straight paths work well for modern landscapes, side yards, and direct routes from one functional area to another.
Check the Spacing
Lay temporary markers where each stone will go and walk the route. Your foot should land comfortably in the center of each stone. For most garden paths, spacing stones about 6 to 10 inches apart works well, depending on stride length and the purpose of the path. Closer spacing feels slower and safer; wider spacing can feel more casual but may be awkward for children or guests.
Think About Width
A single-file garden path can be narrow and charming, while a front walkway should feel more generous. If you plan to move a wheelbarrow, garden cart, or mower through the area, make the stones larger and closer together. A path that looks cute but makes you drag mulch like a medieval prisoner is not a win.
Materials and Tools You Will Need
You can make basic concrete stepping stones with affordable supplies from a hardware store or garden center. Here is a practical list:
- Concrete mix or sand/topping mix
- Water
- Mixing tub, wheelbarrow, or sturdy bucket
- Hoe, trowel, or mixing paddle
- Stepping stone molds
- Cooking spray, petroleum jelly, or mold-release spray
- Rubber gloves
- Eye protection
- Respirator or dust mask suitable for concrete dust
- Trowel or putty knife
- Level
- Builder’s sand or paver sand
- Decorative items such as pebbles, tiles, shells, glass gems, leaves, or stamps
- Concrete sealer, optional but recommended for long-term durability
Choosing the Best Concrete for Stepping Stones
Concrete and cement are often used as if they mean the same thing, but they are not identical. Cement is one ingredient in concrete. Concrete mix usually includes cement plus aggregates such as sand, gravel, or small stones. For stepping stones, you want a mix that is strong enough to handle foot traffic but workable enough to fit your mold.
Concrete Mix vs. Sand/Topping Mix
General concrete mix contains gravel or stone, which makes it strong but sometimes rough for decorative surfaces. Sand/topping mix has a finer texture, making it easier to create smooth surfaces, detailed imprints, and mosaic designs. If you want a rugged stone with a natural look, regular concrete mix can work well. If you want a polished or highly decorative stepping stone, sand/topping mix is usually easier to handle.
How Thick Should Garden Stepping Stones Be?
For most foot-traffic garden paths, aim for a thickness of about 2 inches. Thinner stones may crack, especially if the ground shifts or the stone is stepped on near the edge. Larger stones may need extra thickness or reinforcement, such as wire mesh cut smaller than the mold, but be careful to keep any reinforcement fully embedded in concrete.
Step-by-Step: How to Make Garden Stepping Stones
Step 1: Prepare a Level Workspace
Choose a flat, shaded work area where the stones can sit undisturbed while they cure. Cover the surface with plastic sheeting, cardboard, or a drop cloth. Concrete is not shy. If it spills, it will leave evidence.
Step 2: Choose or Make Your Molds
You can buy reusable plastic stepping stone molds, use round concrete form tubes, repurpose shallow pans, or build square molds from scrap wood. Pizza boxes lined with plastic can work for casual square stones, while plant saucers create nice round shapes. Whatever you use, make sure the mold is sturdy enough to hold wet concrete without bowing.
Coat the inside of the mold lightly with cooking spray, petroleum jelly, or mold-release spray. This helps the stone release cleanly after curing. Do not overdo it; a greasy puddle can affect the surface finish.
Step 3: Mix the Concrete
Put on gloves, eye protection, and a respirator or dust mask before handling dry concrete mix. Add water gradually according to the manufacturer’s instructions. The ideal texture should be thick, damp, and moldable. Think heavy brownie batter, not soup. If the mix is too dry, it will crumble. If it is too wet, the finished stone may be weaker and more likely to crack.
A simple test: squeeze a handful of wet mix while wearing gloves. It should hold together without dripping water. If it collapses like a bad soufflé, add a little more dry mix. If it sheds dust, add a small amount of water.
Step 4: Fill the Mold
Scoop the concrete into the mold in layers. Press it firmly into corners and edges to reduce air pockets. Tap the sides of the mold or gently shake it to help bubbles rise to the surface. Fill to about 2 inches thick for a standard garden stepping stone.
Use a trowel to smooth the surface. If you want a textured top, do not make it mirror-slick. A slightly rough surface gives shoes better traction, especially after rain.
Step 5: Add Decorations or Texture
This is where plain concrete becomes garden art. Press decorative pieces gently into the top while the concrete is still workable. Pebbles, flat marbles, glass gems, shells, and broken ceramic tiles can all look beautiful. Make sure every piece is pressed securely into the concrete so it will not pop loose later.
For leaf-imprint stepping stones, place a large leaf vein-side-down onto the wet concrete and press gently. Remove it after the concrete has firmed slightly or leave it until unmolding, depending on the effect you want. Hostas, rhubarb leaves, elephant ears, and large ferns can create dramatic natural patterns.
For mosaic stepping stones, arrange tile or plate pieces in a pattern. Always wear safety glasses when breaking ceramic, and handle shards carefully. Keep sharp edges embedded below the surface or use grout later to smooth the gaps.
Step 6: Let the Stones Cure
Curing is not the same as drying. Concrete hardens through a chemical reaction that needs moisture. Let the stepping stones sit in their molds for at least 48 hours before attempting to remove them. For stronger stones, keep them lightly moist and protected from direct sun, wind, and heavy rain for several days.
You can mist the surface with water and cover the stones loosely with plastic. Do not rush this stage. Concrete that is moved too soon may crack, chip, or break your heart in a very dusty way.
Step 7: Remove the Stones From the Molds
Once the stones are firm, gently flex or tap the mold to release them. Turn the mold over carefully and support the stone as it comes out. If a stone resists, do not attack it like a raccoon opening a trash can. Work slowly around the edges until it loosens.
Step 8: Seal the Stones
Sealing is optional, but it can help protect decorative surfaces, reduce staining, and make cleaning easier. Choose an exterior concrete sealer and apply it according to the label directions. If your stepping stones have glass, tile, or painted details, test the sealer on a small area first.
How to Install Garden Stepping Stones
Making the stones is only half the project. Installing them properly is what keeps them from wobbling, sinking, or becoming tiny ankle traps.
Lay Out the Path
Place the finished stones on the ground where you want them. Walk the path again and adjust spacing until it feels natural. Turn irregular shapes until each stone looks balanced and gives your foot a comfortable landing spot.
Cut Around Each Stone
Use a garden spade or edging tool to cut around each stepping stone. Remove the stone and dig out the turf or soil inside the outline. The hole should be deep enough to fit the stone plus a layer of sand.
Add a Sand Base
Add 1 to 2 inches of builder’s sand or paver sand to the bottom of each hole. Sand helps support the underside of the stone and makes it easier to level. For hard or rocky soil, a sand layer is especially useful because it reduces wobbling.
Set and Level Each Stone
Place the stepping stone into the sand bed and press it down. Use a level to check the surface. The stone should sit slightly above the surrounding soil at first; after settling, it should be close to flush with the ground. For paths near a house or structure, create a slight slope away from the building so water drains properly.
Backfill Around the Edges
Fill gaps around the stone with soil, mulch, pea gravel, or groundcover plants. Press the material firmly into place. If you are using gravel around the stones, consider edging to keep it from wandering into the lawn like it has travel plans.
Creative Design Ideas for DIY Stepping Stones
Leaf-Imprint Stepping Stones
Use large leaves to create botanical impressions. These look especially beautiful in cottage gardens, shade gardens, and natural landscapes. For extra contrast, stain or paint the leaf imprint after the concrete cures.
Mosaic Stepping Stones
Broken plates, ceramic tiles, and glass gems can create colorful designs. Try flowers, sunbursts, spirals, house numbers, initials, or abstract patterns. Keep the surface relatively even so the stone remains comfortable and safe to walk on.
Modern Minimalist Stones
For a clean contemporary look, use round or square molds with a smooth finish. Add concrete colorant in charcoal, tan, or soft gray. Repeat the same shape throughout the path for a calm, organized design.
Kid-Friendly Memory Stones
Handprints, footprints, names, dates, and small stamped designs turn stepping stones into keepsakes. Use letter stamps or a stick to write in the wet concrete once it has firmed slightly. Supervise children closely around wet concrete and wash skin right away if contact occurs.
Common Mistakes to Avoid
Adding Too Much Water
More water makes concrete easier to pour, but it can weaken the finished stone. Add water slowly and stop when the mix is workable.
Making Stones Too Thin
Thin stepping stones may look elegant, but they can crack under pressure. About 2 inches thick is a smart target for most garden paths.
Skipping Safety Gear
Dry concrete dust can irritate the lungs, and wet concrete can irritate or burn skin. Wear gloves, eye protection, long sleeves, and a respirator or suitable dust mask when mixing.
Installing on Uneven Soil
A beautiful stepping stone on a bad base will wobble. Use sand, check with a level, and adjust until the stone feels stable.
Decorating With Sharp Pieces
Tile and glass can be gorgeous, but sharp edges should be embedded securely or covered with grout. A garden path should not feel like a pirate obstacle course.
How to Maintain Garden Stepping Stones
Concrete stepping stones are low-maintenance, but not maintenance-free. Sweep off soil and leaves regularly. Rinse dirt with a garden hose. Pull weeds from edges before they become tiny green bodybuilders. If stones shift after freeze-thaw cycles, heavy rain, or settling soil, lift them, refresh the sand base, and reset them.
Reseal decorative stones as needed, especially if they include painted designs, mosaics, or exposed pebbles. Avoid harsh deicing salts on decorative concrete because they can damage the surface over time. In shady areas, clean off algae or moss if the stones become slippery.
Extra Experience: What Making Garden Stepping Stones Teaches You
The first thing you learn when making garden stepping stones is that concrete has a personality. It looks simple in the bag, but once water enters the relationship, things get serious. The mix changes quickly, and your best results usually come from staying calm, adding water little by little, and resisting the urge to make it pour like cake batter. A thicker mix may seem harder to work with at first, but it often produces a stronger, cleaner stone.
Another practical lesson is that molds matter more than people expect. A flimsy mold can bulge, leak, or create a stone that looks like it had a difficult childhood. Reusable plastic molds are convenient, but homemade molds can work beautifully if they are supported well. Round plant saucers, wooden square frames, and lined boxes all create different moods. If you want a neat set of matching stones, use the same mold repeatedly. If you want a more whimsical path, mix shapes and sizes while keeping thickness consistent.
Decorating also teaches patience. It is tempting to push every pretty pebble, shell, and tile into one stone, but restraint usually looks better. Choose one design idea per stone: a leaf print, a border of pebbles, a mosaic center, or a stamped word. When everything competes for attention, the stone can look cluttered. Think of each stepping stone as a small garden accent, not a yard sale trapped in cement.
Installation is where many beginners discover the difference between “made” and “finished.” A stone that looks perfect on the worktable can feel awkward if the spacing is wrong. Always test the path with real steps. Walk it slowly, then at a normal pace, and notice whether your feet land naturally. If you have family members with different stride lengths, invite them to test it too. A path should welcome people through the garden, not make them perform interpretive dance.
One of the most useful experiences is learning how much a sand base improves stability. Even a small amount of sand can help the stone sit level and reduce rocking. If a stone wobbles, do not ignore it. Lift it, adjust the sand, and set it again. A stable stepping stone feels professional, even if you made it in your driveway while wearing old sneakers and questioning your life choices.
Finally, homemade stepping stones make a garden feel personal. They age with the landscape. Plants soften their edges, moss may appear in shady corners, and the path begins to look as if it has always belonged there. That is the magic of this project: you are not just making concrete shapes. You are building a route through your outdoor space, one step at a time.
Conclusion
Making garden stepping stones is one of the most rewarding DIY landscaping projects because it combines function, creativity, and a very satisfying amount of mess. With a good plan, the right concrete mix, sturdy molds, proper curing, and a stable sand base, you can create stepping stones that guide foot traffic, protect your lawn, and add charm to your garden.
Whether you prefer rustic leaf imprints, colorful mosaics, modern concrete rounds, or memory stones with handprints, the process is flexible enough for almost any style. Take your time, wear safety gear, let the concrete cure properly, and install each stone with care. Your garden path will not only look betterit will feel more inviting every time you step outside.