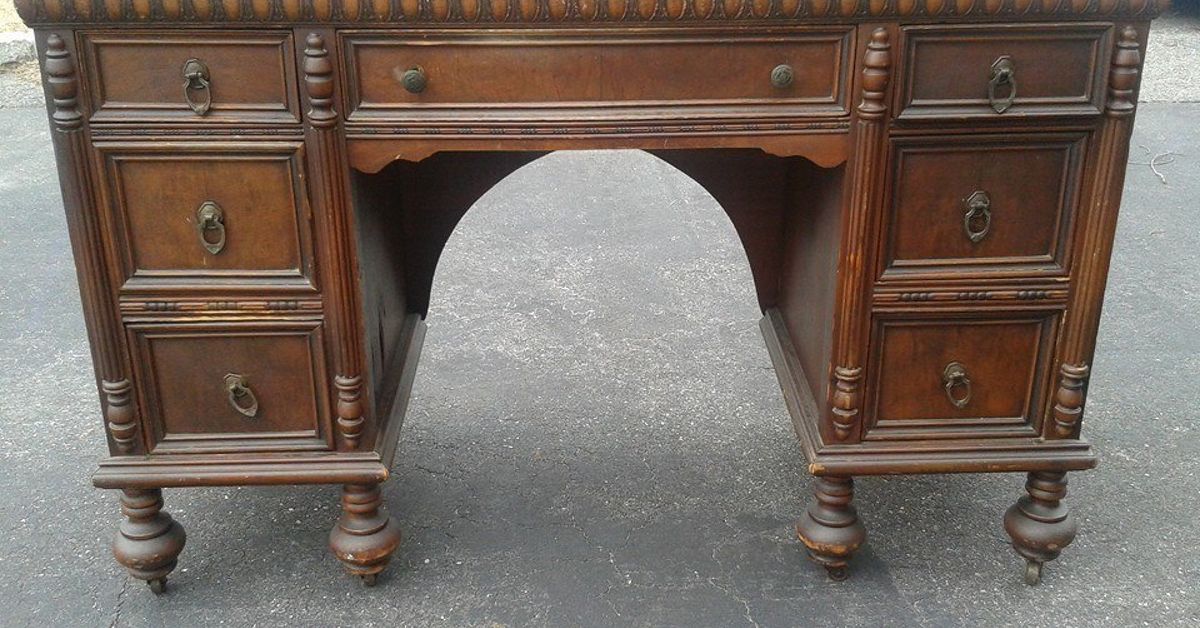
Some people see a scratched-up, abandoned piece of furniture on the curb and think, “Trash day came early.” I see it and think, “Hold my coffee.” That is exactly how a forgotten garbage find became a charming vanity for my daughtera little DIY magic, a lot of sanding dust, and one very patient family later.
Turning discarded furniture into something beautiful is more than a weekend project. It is part creativity, part problem-solving, and part rescue mission. A small desk, old dresser, console table, or even a beat-up nightstand can become a custom vanity with the right plan. Better yet, it can save money, reduce waste, and create a one-of-a-kind piece that no big-box store can copy.
This guide walks through how a curbside furniture find can be transformed into a vanity for a child or teen bedroom, including inspection, cleaning, repair, painting, styling, and safety. Think of it as a “trash to treasure” makeover with a practical brain and a sentimental heart.
Why a Garbage Find Can Make the Perfect Vanity
A vanity does not have to begin life as a vanity. Many of the best DIY vanity makeover projects start with furniture that already has the right bones: a flat top, a drawer or two, enough legroom for a stool, and a size that fits the room. The magic is in seeing possibility before polish.
An old desk can become a makeup station. A small writing table can become a hair-styling corner. A narrow dresser can work if you remove the center drawer and create knee space. Even a damaged sideboard can be reimagined with paint, new hardware, and a mirror mounted safely above it.
One reason upcycled furniture is so satisfying is that older pieces often have better structure than they first appear to. Solid wood, dovetail drawers, and sturdy legs are worth saving. The dents and scratches may look dramatic, but many are surface-level problems. A little wood filler, sanding, primer, and paint can take a piece from “please remove this from the sidewalk” to “wait, where did you buy that?”
Step One: Inspect the Furniture Before Bringing It Home
Before dragging a curbside find into the house like a proud raccoon with a prize, inspect it carefully. Not every free furniture piece is a good candidate. Some are too damaged, unsafe, moldy, or infested to be worth the trouble.
Check the Structure
Start by giving the piece a gentle shake. If it wobbles like it has had three cups of espresso, look at the joints, legs, and frame. Loose screws, missing braces, and separated joints can often be fixed. Rotten wood, split load-bearing pieces, or severe water damage are bigger red flags.
Open and close every drawer. Look for cracked runners, broken bottoms, or warped panels. A sticky drawer is usually fixable with sanding or wax. A drawer that falls apart in your hands may be politely returned to the curb.
Look for Mold, Moisture, and Odors
Hard surfaces can often be cleaned with detergent and water, then dried thoroughly. However, if the furniture has soft upholstery, swollen particleboard, or a persistent musty smell, be cautious. Mold can be difficult to remove from porous materials, and no vanity is worth introducing a mystery science project into your child’s bedroom.
Watch for Pests
Inspect seams, drawer corners, screw holes, underside panels, and wood joints. Look for tiny holes, powdery dust, droppings, eggs, or live insects. Used furniture can be wonderful, but it should never come with roommates.
Consider Lead Paint
If the piece is very old and has layers of chipped paint, do not start sanding aggressively without thinking first. Older painted furniture may contain lead-based paint. When in doubt, use a lead test kit or consult a professional. Disturbing old paint without proper precautions can create hazardous dust, especially in a home with children.
Step Two: Plan the Vanity Design
Once the piece passes the “not gross, not dangerous, not secretly haunted” test, it is time to plan. A successful DIY vanity makeover starts with function before decoration.
Measure the Space
Measure the wall or corner where the vanity will sit. Leave enough room for a stool or chair to slide in and out comfortably. If the vanity is for a young child, keep the height practical. If it is for a teen, think ahead. A vanity that works for hair accessories today may hold skincare, makeup, jewelry, and school supplies tomorrow.
Decide What It Needs to Store
A daughter’s vanity can become command central for bows, brushes, nail polish, lip balm, journals, and the mysterious collection of tiny objects children treasure like museum artifacts. Before painting, decide how much drawer space is needed. Small organizers, trays, jars, and drawer dividers make a big difference.
Choose a Style
The best part of turning a garbage find into a vanity is customizing it. For a soft bedroom look, try white, cream, blush, sage green, or pale blue. For a dramatic style, navy, charcoal, emerald, or black can look surprisingly elegant. New knobs can completely change the personality of the piece. Crystal pulls feel fancy. Brass knobs feel warm and classic. Painted wooden knobs can keep the look playful.
Step Three: Clean It Like You Mean It
Before sanding or painting, clean the furniture thoroughly. Paint does not like dirt, grease, old furniture polish, or sticky mystery spots. Frankly, neither do humans.
Use mild soap and warm water for most surfaces, then wipe everything dry. For greasy residue, a gentle degreasing cleaner can help. Remove drawers and clean inside the cavities. Vacuum corners and undersides. If there is old contact paper in the drawers, peel it out and remove any adhesive residue before moving on.
Let the piece dry completely. Moisture trapped under primer or paint can cause bubbling, peeling, or mildew. Patience at this stage saves a lot of grumbling later.
Step Four: Repair Scratches, Dents, and Loose Parts
Most garbage finds have a few battle scars. That is part of their charm, but a vanity should still feel smooth, sturdy, and intentional.
Fill Holes and Gouges
Use wood filler for scratches, dents, missing veneer spots, or old hardware holes. Apply slightly more than needed, let it dry, then sand it smooth. If you plan to change from handles to single knobs, fill the extra holes and drill new ones after painting.
Tighten the Frame
Check screws, corner brackets, legs, and drawer slides. Wood glue and clamps can repair separated joints. Small metal braces can strengthen weak corners. If a leg is uneven, furniture levelers or felt pads can help stabilize it.
Replace What Cannot Be Saved
Do not be afraid to replace damaged drawer pulls, missing screws, broken drawer bottoms, or cracked backing. A project does not lose its “upcycled” badge because you bought a few supplies. Even Cinderella needed shoes.
Step Five: Sand, Degloss, and Prime
Preparation is the difference between a vanity that looks beautiful for years and one that starts peeling the first time someone sets down a hairbrush with attitude.
Sanding for Better Paint Adhesion
Light sanding helps rough up glossy finishes so primer and paint can grip. For most painted furniture projects, you do not need to sand down to bare wood. The goal is to smooth rough areas and dull the surface. Use a medium grit for problem spots and a finer grit for finishing. Always wipe away dust before priming.
When to Use Deglosser
If the piece has a very shiny finish or detailed curves that are hard to sand, a liquid deglosser can help prepare the surface. Use gloves, eye protection, and good ventilation. Follow the product directions carefully.
Why Primer Matters
Primer creates a better base for paint, helps cover stains, and can prevent old finishes from bleeding through. For a vanity that will be touched daily, primer is not the boring stepit is the bodyguard.
Step Six: Paint the Vanity
Now comes the fun part: color. A daughter’s vanity should feel special, but it should also survive real life. Choose a durable furniture paint or enamel that cures to a washable finish. Low-odor or low-VOC options are smart for indoor projects, especially when the finished piece will live in a bedroom.
Use thin, even coats instead of one thick coat. Thick paint can drip, streak, and take forever to dry. A brush works well for corners and details, while a small foam roller can give flat surfaces a smoother finish. Let each coat dry according to the paint instructions, then lightly sand between coats if needed for a polished result.
For a charming look, consider painting the body one color and the drawers another. A soft white vanity with blush drawers feels sweet without being too babyish. A pale green piece with brass hardware has a vintage garden feel. A natural wood top with painted legs can look warm and timeless.
Step Seven: Seal It for Daily Use
A vanity sees action. Hair products, water glasses, lotions, jewelry, nail polish, and the occasional “I swear I did not spill glitter” moment all happen here. A protective topcoat helps preserve the finish.
Use a clear water-based polyurethane, furniture wax, or a durable clear coat compatible with your paint. For a child’s vanity, a wipeable satin or semi-gloss finish is practical. Matte finishes look beautiful, but they can show smudges more easily.
Let the finish cure fully before heavy use. Dry paint and cured paint are not the same thing. Paint may feel dry after a few hours but still be soft underneath. Give it time before loading the drawers and adding accessories.
Step Eight: Add the Mirror Safely
A vanity needs a mirror, but safety comes first. Do not simply lean a heavy mirror against the wall and hope everyone behaves. Children, pets, and gravity form a very unreliable committee.
Mount the mirror securely to the wall using hardware appropriate for the wall type and mirror weight. If the mirror attaches to the vanity, make sure the frame is strong enough to support it. For taller furniture or any piece with drawers, anchor the vanity to the wall to reduce tip-over risk. This is especially important in a child’s room.
A lightweight framed mirror, acrylic mirror, or wall-mounted round mirror can work well. Add a small lamp, but keep cords managed and away from drawer tracks or walking paths.
Step Nine: Style the Vanity for a Daughter’s Room
Styling is where the project becomes personal. Add a stool that fits neatly underneath. Use a cushion in a washable fabric. Place a small tray on top for daily items. Add jars for brushes, clips, or cotton rounds. A jewelry stand can make necklaces easier to find and harder to transform into one giant knot of despair.
For younger children, keep the top simple. A mirror, brush, and a few accessories are enough. For teens, add drawer organizers, a skincare tray, and a small trash bin nearby. Good lighting matters too. A soft lamp or daylight-style vanity bulbs can make the space more useful.
The goal is not to create a showroom. The goal is to create a place where your daughter feels seen, independent, and maybe slightly less likely to leave hair ties in every room of the house.
Budget Breakdown: What a DIY Vanity Makeover Might Cost
The furniture may be free, but the makeover usually needs supplies. A realistic budget might include sandpaper, cleaner, primer, paint, brushes, a roller, wood filler, hardware, a mirror, and a protective topcoat.
A simple project can often be completed for far less than buying a new vanity. If you already own basic tools, the cost may stay low. Hardware and mirrors can raise the budget quickly, so shop carefully. Thrift stores, reuse centers, clearance aisles, and online marketplaces are excellent places to find affordable finishing touches.
Common Mistakes to Avoid
Skipping the Cleaning Step
Paint over dust and grime, and you are basically making a dirt sandwich. Clean first, paint later.
Painting Too Soon After Washing
If the furniture is still damp, paint may not bond well. Let it dry completely before sanding or priming.
Ignoring Safety
Lead paint, mold, unstable furniture, and unsecured mirrors are not aesthetic choices. Check them before the piece enters daily use.
Using the Wrong Paint
Wall paint may not hold up as well on furniture. Choose a product designed for cabinets, trim, or furniture when possible.
Forgetting the Child Who Will Use It
A vanity should match your daughter’s needs, not just your Pinterest board. Make it pretty, but also reachable, sturdy, washable, and useful.
The Emotional Value of a Trash-to-Treasure Vanity
There is something special about giving a child a piece of furniture you made with your own hands. A store-bought vanity can be beautiful, but an upcycled vanity carries a story. It says, “I saw potential here.” It says, “I made this for you.” It says, “Yes, the garage was a disaster for a week, but love is messy.”
For a daughter, that story can matter. The vanity becomes more than a place to brush hair or store lip gloss. It becomes a reminder that old things can be renewed, imperfect things can be beautiful, and creativity can turn almost nothing into something meaningful.
500 More Words: Real-Life Experience Turning a Garbage Find Into a Vanity for My Daughter
The best part of this project was not the paint color, although I did spend a ridiculous amount of time comparing shades that were all basically “soft white but emotionally different.” The best part was watching my daughter realize that the sad little furniture piece from the curb was going to become hers.
At first, she was skeptical. Children are honest in a way that can humble even the most confident DIY parent. She looked at the scratched top, the dusty drawers, and the missing knob and gave me a face that clearly said, “This is garbage because it came from garbage.” Fair point. The piece did not exactly sparkle with promise. It had scuffs, one drawer stuck halfway, and the finish looked like it had survived a small household war.
But once we cleaned it, the shape started to show. It had curved legs, a sweet little drawer, and just enough surface space for a mirror and a brush. My daughter helped choose the color. She wanted something light, pretty, and not too “baby.” We settled on a warm white with gold knobs. The knobs were her favorite part because they made the vanity feel “fancy,” which is apparently the highest possible compliment in her design vocabulary.
The sanding stage was less glamorous. Sanding never looks cute while it is happening. It is noisy, dusty, and somehow makes every project feel worse before it gets better. Still, it taught her something important: transformation has middle chapters. Not everything looks beautiful while it is being fixed. Some things need repair, patience, and a second coat.
When the first coat of primer went on, she started to believe. When the paint went on, she hovered nearby like a tiny project manager. By the time we added the mirror and stool, she was arranging her hairbrush, bracelets, and lip balm as if she were opening a boutique hotel for dolls.
One small but important lesson was that function matters as much as appearance. We added drawer organizers because otherwise the drawer would have become a tiny junk cave by day three. We used a washable topcoat because kids do not gently “use” furniture; they live on it. We anchored the piece and secured the mirror because pretty should never outrank safe.
The finished vanity was not flawless. If you crouch down and inspect it like a furniture detective, you can find a slightly uneven patch near one leg and a brush mark on the side. But those tiny imperfections make it ours. They are proof that a real person made it, not a factory machine.
Now my daughter sits there to brush her hair, organize her treasures, and occasionally give herself a pep talk in the mirror. Every time I see it, I remember the day it was sitting unwanted by the trash. That is the beauty of upcycling. You do not just save furniture. Sometimes, you create a memory that gets used every single day.
Conclusion
Turning a garbage find into a vanity for my daughter was practical, creative, and surprisingly meaningful. With careful inspection, smart repairs, proper prep, safe painting practices, and thoughtful styling, an unwanted piece of furniture can become a custom bedroom feature full of personality.
This kind of DIY furniture makeover is not only budget-friendly; it also supports a reuse mindset. Instead of buying something new, you rescue something overlooked. Instead of accepting a generic design, you create a piece that fits your child, your home, and your story.
The next time you see a discarded desk or forgotten table on the curb, look twice. It may not be trash. It may be a vanity waiting for its second act.
Note: This article was written from practical DIY experience and informed by established U.S. guidance on reuse, furniture safety, lead-safe renovation, indoor air quality, mold cleanup, and furniture painting best practices.