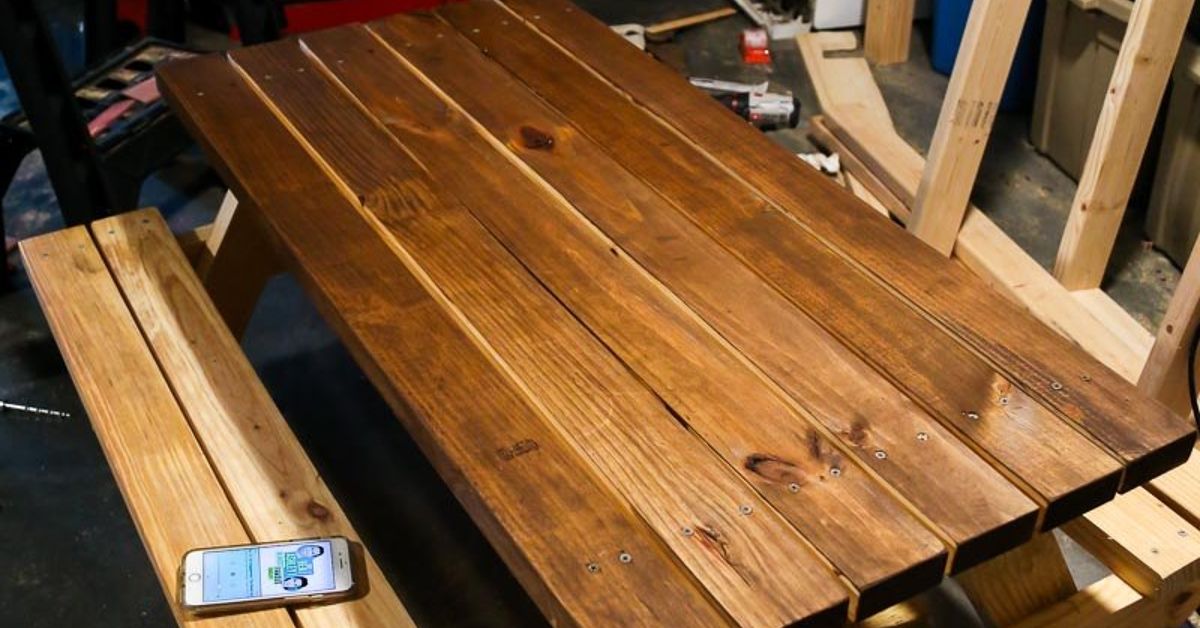
A plain picnic table is perfectly useful. It holds burgers, lemonade, watermelon slices, board games, homework, and at least one mysterious sticky spot nobody wants to claim. But a painted picnic table with a fun pattern? That is no longer just outdoor furniture. That is backyard personality with legs.
Learning how to paint a fun pattern on a DIY picnic table is one of the easiest ways to turn a basic wooden table into the star of your patio, deck, garden, or weekend cookout zone. Whether you built your own picnic table from lumber, rescued one from the garage, or found a weathered secondhand table that looked like it had survived three family reunions and a raccoon committee meeting, paint can give it a fresh new life.
The trick is not simply slapping color on wood and hoping for Pinterest-level magic. A picnic table lives outdoors. It faces sunlight, rain, temperature swings, spills, shoes, elbows, and the occasional plate of barbecue sauce that goes rogue. To make your design last, you need the right prep, exterior-rated products, clean pattern planning, and enough patience to let the finish cure before everyone attacks it with paper plates.
This guide walks you through every step: choosing a pattern, prepping the wood, taping crisp lines, painting bold colors, sealing the surface, and adding personal touches that make your DIY picnic table feel playful without looking chaotic. Grab your painter’s tape. We are about to give that table a glow-up.
Why Paint a Pattern on a Picnic Table?
A solid-color picnic table can look clean and classic, but a pattern adds energy. It can make a backyard feel more intentional, help an old table hide scratches, and create a custom look without buying expensive patio furniture. A pattern also gives you freedom. You can go cheerful with stripes, nostalgic with gingham, modern with geometric blocks, coastal with waves, or kid-friendly with painted game boards.
Patterned picnic table painting works especially well because the table already has natural sections: a tabletop, two benches, side supports, and legs. Each area can become part of the design. You might paint the tabletop in a bold checkerboard pattern and keep the benches simple. Or you might use one color for the base, another for the bench seats, and a stencil border around the top. Think of the table as a blank canvas that also happens to hold potato salad.
Best Patterns for a DIY Picnic Table
Before you open a paint can, decide what kind of pattern fits your outdoor space. A great design looks fun, but it also works with your skill level and the shape of the table.
1. Classic Stripes
Stripes are beginner-friendly and timeless. Wide stripes feel bold and beachy, while narrow stripes look more tailored. For a picnic table, horizontal stripes across the tabletop are simple to tape and paint. You can repeat the stripe colors on the benches for a coordinated look.
2. Checkerboard or Gingham
A checkerboard picnic table is playful and practical. It gives instant picnic-blanket energy without requiring you to wash an actual blanket. A gingham effect uses overlapping stripes in two tones, creating a softer farmhouse or cottage look.
3. Geometric Color Blocks
Triangles, diamonds, angled blocks, and asymmetrical shapes create a modern outdoor table. This style is forgiving because the design does not need to be perfectly traditional. If one triangle is larger than another, congratulations, you have invented “custom abstract geometry.”
4. Stenciled Motifs
Stencils are perfect for flowers, stars, leaves, lemons, suns, fish, or repeating tile-like patterns. They are especially useful if you want detail but do not trust your freehand painting skills. No shame there. Painter’s tape and stencils exist because human hands sometimes behave like caffeinated squirrels.
5. Painted Game Table
For families, consider painting a checkerboard, tic-tac-toe grid, hopscotch-style numbers, or a simple road map for toy cars. A picnic table can become a snack station and entertainment center in one.
Tools and Supplies You Will Need
The right supplies make the difference between a polished outdoor furniture project and a table that starts peeling before the hot dogs hit the grill.
- Exterior wood cleaner or mild soap and water
- Scrub brush or sponge
- Medium-grit and fine-grit sandpaper
- Orbital sander, sanding block, or sanding sponge
- Tack cloth or microfiber cloth
- Wood filler for cracks, dents, or screw holes
- Exterior-rated primer for wood
- Exterior acrylic latex paint or exterior furniture paint
- Painter’s tape in one or more widths
- Paintbrushes, foam brushes, and small rollers
- Reusable stencils, if using a stencil pattern
- Measuring tape, ruler, pencil, and straightedge
- Drop cloths or plastic sheeting
- Clear exterior topcoat, if recommended for your paint system
- Gloves, safety glasses, and a dust mask for sanding
Choose products labeled for exterior use. Interior paint is not made to handle UV rays, rain, humidity, and outdoor temperature changes. It may look fine at first, then crack, fade, or peel like it suddenly remembered it hates the outdoors.
Step 1: Pick a Color Palette That Can Survive Real Life
A fun pattern needs color, but color planning matters. Too many bright shades can make a picnic table look like a birthday party exploded. A good rule is to choose one main color, one or two accent colors, and one neutral. For example, navy, white, and coral feel coastal. Sage, cream, and terracotta feel earthy. Yellow, sky blue, and white feel cheerful without becoming visually loud.
Also consider heat. Very dark colors can get hot in direct sun. If your table sits in an uncovered yard, use dark colors as accents rather than covering every seat and tabletop surface in them. Nobody wants to sit down and discover the bench has entered “fresh skillet” territory.
Step 2: Clean the Picnic Table Thoroughly
Paint needs a clean surface to bond well. Dirt, pollen, mildew, grease, old food residue, and loose wood fibers can prevent primer and paint from sticking. Start by brushing off debris, then wash the table with mild soap and water or an exterior wood cleaner. Scrub the tabletop, bench seats, legs, and undersides. Picnic tables collect grime in sneaky places, especially where boards meet.
Rinse well and let the table dry completely. Do not paint damp wood. Moisture trapped under paint can cause bubbling, poor adhesion, or peeling. If the table has been rained on recently, give it a sunny drying period before moving forward.
Step 3: Sand for a Smooth, Paint-Ready Surface
Sanding is not the glamorous part of the project, but it is the part your future self will thank you for. Sand rough spots, splinters, peeling finish, and glossy areas. If the wood is new, a light sanding helps smooth the surface and opens it up for primer. If the table is old, sand more aggressively where paint is flaking or the surface feels uneven.
Use medium-grit sandpaper first, then follow with fine-grit sandpaper for a smoother finish. Always wipe away sanding dust with a tack cloth or microfiber cloth before priming. Dust left behind can create bumps and weak spots in the finish. It can also make your beautiful pattern look like it has tiny crumbs baked into it, which is not the rustic charm we are going for.
Step 4: Repair Cracks and Holes
Inspect the table for nail holes, screw holes, cracks, dents, or damaged corners. Fill small imperfections with exterior-rated wood filler. Let the filler dry according to the product directions, then sand it smooth. This step is especially important for patterned designs because crisp lines look better on an even surface.
If a board is badly rotted, replace it instead of painting over it. Paint can beautify wood, but it cannot magically turn decayed lumber into a sturdy picnic table. Even the best exterior paint is not a carpenter in a can.
Step 5: Prime the Table
Primer helps paint adhere, evens out the surface, blocks stains, and improves durability. For bare wood, use an exterior wood primer. For a previously painted table, choose a primer that works over old paint and helps seal patched areas. Apply primer with the grain of the wood using a brush or roller.
Let the primer dry fully. Then lightly sand any raised grain or bumps and wipe away dust. This creates a smoother base for your pattern. If your design includes light colors over dark wood or old paint, primer is especially important. Without it, you may need extra coats, and nobody wants to spend Saturday applying the fourth coat of yellow because the table refuses to stop looking beige.
Step 6: Paint the Base Color
Before painting the pattern, apply your base color. This is the color that will show between stripes, under stencils, or around geometric shapes. Use exterior acrylic latex paint or exterior furniture paint. Apply thin, even coats rather than one thick coat. Thick paint can drip, pool, and cure poorly.
Paint with the grain on wood surfaces, and use a brush to reach between boards and around edges. A small roller works well on broad tabletop sections and benches. Let the first coat dry, then apply a second coat if needed for full coverage. Allow the base coat to dry thoroughly before taping your design.
Step 7: Plan and Mark the Pattern
This is where the fun begins. Measure the tabletop and decide how the pattern will fit. For stripes, divide the width into equal sections. For a checkerboard, mark a grid with a pencil and straightedge. For geometric blocks, lightly sketch your angles. For stencils, decide whether you want a border, a centered motif, or a repeating pattern.
Take your time here. Pattern planning is like assembling a sandwich: if the foundation is crooked, everything gets weird fast. Stand back and look at the layout before painting. If something feels off, adjust it now while the only thing at risk is a pencil mark.
Step 8: Tape Like You Mean It
Painter’s tape is your best friend for crisp lines. Apply it firmly along your marked lines, pressing down the edges. For extra-clean stripes, run a fingernail or plastic putty knife along the tape edge to seal it. On rough wood, paint can bleed under tape, so this step matters.
A smart trick is to seal the tape edge with a thin coat of the base color before applying the accent color. If any paint bleeds under the tape, it will be the base color, not the stripe color. Once that thin sealing coat dries, paint your accent color over it. This method helps create sharper lines, especially on textured picnic table boards.
Step 9: Paint the Pattern
Now apply your accent colors. Use thin coats and avoid overloading the brush. For stripes or blocks, brush away from the tape edge rather than pushing paint underneath it. For stencils, use a nearly dry brush, stencil brush, or foam roller. Too much paint is the main reason stencils bleed. Dab lightly and build color gradually.
If your design has multiple colors, let one color dry before taping over it for the next section. This keeps edges clean and prevents accidental smudging. It may feel slow, but rushing a pattern is how you end up with fingerprints in the corner and a suspicious streak you decide to call “movement.”
Step 10: Remove Tape at the Right Time
For many paint projects, removing painter’s tape while the paint is still slightly wet can help prevent tearing. Pull the tape back slowly at a 45-degree angle. If the paint has dried and seems to be lifting, score the tape edge gently with a utility knife before removing it.
Do not panic if you find a tiny bleed or uneven edge. Let the paint dry, then touch up with a small artist brush. Outdoor furniture does not need to look machine-made. A few hand-painted details can make it feel more charming.
Step 11: Add Small Details
Once the main pattern is dry, consider adding details that make the table unique. Paint small dots along stripe edges, add a border around the tabletop, stencil leaves on the benches, or paint each seat end in a different color. You can also add a monogram, house number, family name, or a tiny hidden ladybug for kids to find.
Just remember that functional furniture benefits from restraint. The tabletop needs to hold plates and drinks, so avoid overly busy patterns that make spills hard to see. A design can be joyful without causing visual whiplash.
Step 12: Protect the Finish
Some exterior paints are durable enough on their own, while others benefit from a clear exterior topcoat. Follow the paint manufacturer’s instructions. If you use a clear protective finish, make sure it is compatible with your paint and suitable for outdoor use. Apply thin coats with the grain, and let each coat dry as directed.
Pay special attention to the tabletop and bench seats because they get the most wear. These areas handle sliding plates, elbows, shoes, bags, and weather. A protective finish can help reduce scratches and make cleaning easier.
Step 13: Let the Table Cure Before Heavy Use
Dry paint is not always cured paint. A surface may feel dry to the touch but still be soft underneath. Before hosting a backyard feast, give the finish time to cure according to the paint label. During this period, keep heavy objects, damp tablecloths, and sticky decorations off the surface.
Yes, waiting is hard. But curing time is the difference between a durable finish and a plate leaving a permanent ring that says, “I was too excited about tacos.”
Maintenance Tips for a Painted Picnic Table
A painted DIY picnic table is easy to maintain if you treat it kindly. Clean it with mild soap and water instead of harsh chemicals. Wipe spills promptly, especially oily foods, sauces, and drinks with strong color. Use placemats or trays for hot dishes. If the table sits under trees, brush off leaves and pollen regularly.
When not in use for long periods, consider covering the table or moving it to a sheltered area. At the start of each outdoor season, inspect the finish. Touch up chips or worn spots before moisture reaches the wood. Small touch-ups are quick. Waiting until the whole table peels is how a weekend project turns into a dramatic home-improvement opera.
Fun Picnic Table Pattern Ideas to Try
Sunny Citrus Table
Paint the base white, add yellow stripes, and stencil small lemons along the edges. This pattern looks great in gardens and poolside spaces.
Campground Cabin Table
Use forest green, cream, and warm brown. Add plaid-inspired stripes on the tabletop and solid green benches. It feels cozy, outdoorsy, and ready for s’mores.
Backyard Board Game Table
Paint a checkerboard in the center of the table and leave the rest in a solid color. Store bottle caps or painted stones nearby as game pieces.
Coastal Stripe Table
Try navy, sky blue, and white stripes across the tabletop, with white legs and navy benches. It is classic, crisp, and ideal for seafood nights.
Modern Confetti Table
Paint the table a soft neutral color, then add scattered geometric shapes in three accent colors. Keep the shapes spaced out so the design feels playful rather than messy.
Common Mistakes to Avoid
The biggest mistake is skipping prep. Paint cannot stick well to dirt, dust, loose finish, or damp wood. Another mistake is using interior paint outdoors. Even if the color is perfect, the formula is not built for weather. Painting in poor conditions is also risky. Avoid extreme heat, cold, rain, fog, and high humidity when possible.
Do not rush between coats. Follow drying times. Do not use too much paint with stencils. Do not tape over paint that has not dried enough. And do not forget the undersides and edges of the boards, because moisture can enter from exposed wood and shorten the life of the finish.
of Real-Life Experience: What Painting a Patterned Picnic Table Actually Teaches You
Painting a fun pattern on a DIY picnic table sounds simple when you describe it in a sentence: clean it, sand it, paint it, enjoy it. In real life, it becomes a small lesson in patience, planning, and accepting that outdoor wood has opinions. The first thing you learn is that picnic tables are bigger than they look. A table that seemed modest in the yard suddenly becomes a wooden continent when you are sanding every bench edge and crawling around to reach the underside.
The second lesson is that prep work is not optional. On one picnic table project, the most tempting shortcut was to skip a second round of sanding after primer. The table already looked better, and the paint cans were sitting there looking cheerful. But the primer had raised the wood grain in a few spots. Once those bumps were sanded smooth and wiped clean, the final paint went on noticeably better. The pattern looked cleaner, and the tabletop felt nicer under your hands. That extra fifteen minutes made the difference between “cute backyard project” and “I might brag about this at dinner.”
Painter’s tape also teaches humility. The tape may look straight when you are leaning over the table, but from six feet away, one stripe can appear to be wandering off toward a new life. Stepping back before painting saves frustration. Measuring twice is useful, but looking twice is even better. For stripes, marking both ends of each board helps keep lines consistent across gaps. For checkerboards, drawing the full grid lightly before taping helps prevent a final row of awkward half-squares that look like the table ran out of math.
Another real-world tip: choose a forgiving pattern if the table surface is rough. Perfectly crisp geometric designs are easier on smooth boards. If your picnic table is older, stencils, wide stripes, gingham, or rustic color blocks may work better. Slight imperfections blend into the charm instead of looking like mistakes. Outdoor furniture does not need the seriousness of a museum piece. It should be friendly, durable, and ready for corn on the cob.
Color choices are also more emotional than expected. A color that looks calm on a paint chip can look loud across an entire tabletop in bright sun. Testing small swatches on the underside or a scrap board is worth it. Outdoor light changes everything. White may feel crisp, cream may feel softer, and bright red may announce itself to neighboring counties. A balanced palette keeps the project fun without making the table compete with the flowers, grill, and patio cushions.
The most satisfying moment is removing the tape. Pulling back a strip to reveal a clean line is the DIY version of opening a tiny present. The least satisfying moment is finding a bleed. But even that is fixable. A small brush, a steady hand, and a little touch-up paint can rescue most edges. After sealing and curing, the table becomes more than painted wood. It becomes a place where people gather, eat, laugh, spill lemonade, and ask, “Did you really paint this yourself?” And yes, you did. With sanding dust in your hair and pride in your heart.
Conclusion
Painting a fun pattern on a DIY picnic table is one of the most rewarding backyard upgrades you can tackle. It is affordable, creative, and practical when done with the right materials. The secret is to treat the table like outdoor furniture first and an art project second. Clean it well, sand it smooth, prime it properly, use exterior-rated paint, plan your pattern carefully, and protect the finish so your hard work lasts beyond one sunny weekend.
Whether you choose stripes, gingham, stencils, checkerboards, or bold geometric shapes, the goal is to create a table that makes outdoor meals feel more inviting. A patterned picnic table adds color, charm, and personality to your space. It says, “Yes, we eat outside here, and yes, we have excellent taste in lemonade presentation.”
With a little patience and a few smart painting techniques, your DIY picnic table can become the happiest piece of furniture in the yard.