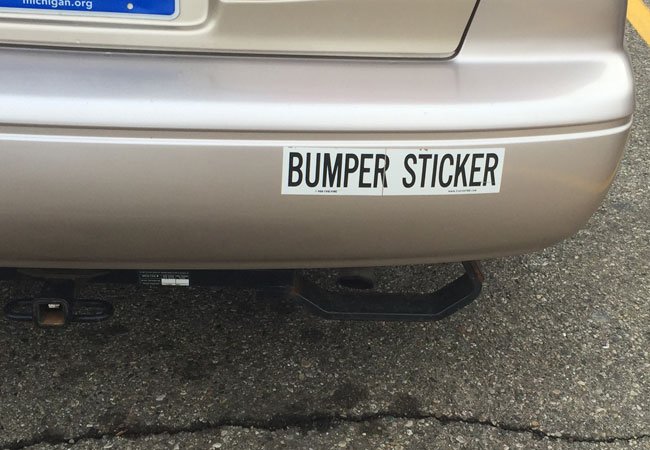
A bumper sticker can be a tiny billboard for your favorite band, your kid’s honor roll, or your bold opinion about squirreled sticker can outstay its welcome. Maybe you bought a used car decorated like a rolling scrapbook. Maybe your political enthusiasm expired before the sticker did. Or maybe you simply want your bumper to stop shouting.
The good news: removing a bumper sticker does not require a blowtorch, a crowbar, or a dramatic goodbye speech. The secret is to soften the adhesive, lift the sticker slowly, and clean away residue without attacking the paint like it owes you money. With the right method, most bumper stickers can come off cleanly while your car keeps its clear coat, dignity, and resale appeal.
This guide explains three practical ways to remove a bumper sticker safely: an automotive adhesive remover, gentle heat, and white vinegar. Each method works best in different situations, from fresh vinyl decals to ancient stickers that seem chemically fused to the bumper.
Before You Remove a Bumper Sticker: Know What You’re Working With
Not all bumper stickers are created equal. A newer vinyl decal may peel off in one satisfying sheet. An old paper sticker that has spent five summers baking in direct sunlight may crumble into confetti and leave behind glue with the personality of industrial cement.
Before choosing a method, inspect the sticker and the area around it. Look for cracked paint, peeling clear coat, faded plastic trim, aftermarket paintwork, or a bumper that feels unusually rough. If the paint is already damaged, even a gentle removal method can reveal more of the problem underneath.
Wash the bumper first with car-safe soap and water, then dry it with a clean microfiber towel. Dirt and road grit can act like sandpaper when you start rubbing or scraping. A clean surface gives you a better chance of removing the sticker without adding tiny scratches to the finish.
What You’ll Need
- Car wash soap and water
- Microfiber towels
- A plastic card, plastic scraper, or plastic razor blade
- A hair dryer
- White vinegar or automotive adhesive remover
- Rubbing alcohol for light residue cleanup
- Car wax, sealant, or spray protectant
Important: Never use a metal razor blade on painted body panels or plastic bumpers. A metal blade can cut through clear coat faster than your car can disappoint you with a dashboard warning light. Metal razor blades are generally reserved for glass, not painted automotive surfaces.
Method 1: Use an Automotive Adhesive Remover
This is usually the best method for old bumper stickers, leftover glue, dealership decals, parking permits, and stickers that have become one with the vehicle’s molecular structure. A product specifically labeled for automotive paint is generally safer than grabbing a random household cleaner from under the kitchen sink.
Automotive adhesive removers are designed to loosen sticky residue without relying on abrasive scrubbing. Some products are formulated for cured automotive paint, vinyl, and glass, but you should still read the label carefully and test the product in an inconspicuous spot first.
Step 1: Test the Product
Spray or apply a small amount of adhesive remover on a hidden area, such as the lower edge of the bumper. Wait according to the product instructions, then wipe it away. Check for discoloration, haze, softening, or any unusual reaction before moving to the sticker.
Step 2: Soften the Sticker and Adhesive
Apply the remover to a microfiber cloth rather than soaking the entire bumper. Hold the damp cloth over the sticker for a few minutes. This gives the solvent time to work its way under the edges without letting it run across nearby trim, seams, or freshly painted surfaces.
Step 3: Lift Slowly
Use your fingernail, a plastic card, or a plastic scraper to lift one corner. Peel slowly at a low angle, pulling the sticker back over itself rather than yanking it straight away from the bumper. If the sticker tears, stop, apply more remover, and give it another minute. Patience is cheaper than repainting.
Step 4: Remove Remaining Glue
Once the sticker is gone, apply a small amount of remover to the remaining residue. Wipe gently with a microfiber towel. Avoid aggressive scrubbing. Several light passes are safer than one furious attack fueled by caffeine and regret.
Finish by washing the area with car-safe soap and water to remove any product residue. Then apply wax or paint protectant to restore slickness and add a protective layer.
Method 2: Remove a Bumper Sticker With Gentle Heat
Heat is often the fastest option for vinyl bumper stickers, newer decals, and paper stickers that are still mostly intact. The goal is not to roast the bumper. You simply want to warm the adhesive enough that it relaxes and lets go.
A hair dryer is the safest heat tool for most DIY jobs. It produces less intense heat than a heat gun, which lowers the risk of warping plastic, dulling paint, or creating a surprise science experiment on your bumper.
Step 1: Park in the Shade
Work on a cool vehicle in a shaded, well-ventilated area. Do not start with a bumper that has been sitting in direct sun all afternoon. Hot paint and solvents are not an ideal partnership, and some cleaners can dry too quickly on warm surfaces.
Step 2: Warm the Sticker
Set the hair dryer to low or medium heat. Hold it roughly 6 inches away from the bumper sticker and keep it moving from side to side for about a minute. Avoid focusing heat in one spot. Concentrated heat can damage paint or soften plastic bumper covers.
Step 3: Start at a Corner
Once the sticker feels warm, lift a corner with your fingernail or a plastic card. Use a shallow angle and slide under the sticker gently. Do not jab at the paint. Your bumper is not a lottery scratch-off ticket.
Step 4: Keep Heating While You Peel
Peel the sticker slowly while continuing to warm the section just ahead of your progress. If the decal begins tearing into small pieces, pause and reapply heat. Slow removal gives the adhesive more time to release and usually leaves less residue behind.
Step 5: Clean and Protect the Surface
Use a light automotive adhesive remover or a small amount of diluted rubbing alcohol on a microfiber towel to clean leftover glue. Rubbing alcohol can help remove adhesive residue when used sparingly, but full-strength alcohol and other solvents should not sit on paint for long periods.
Wash the spot, dry it thoroughly, and apply wax or sealant. That final step helps restore shine and makes the bumper look less like it just survived a DIY surgery.
Method 3: Remove a Bumper Sticker With White Vinegar
White vinegar is the low-cost, low-drama option. It can be useful when you are dealing with a small sticker, moderate adhesive residue, or a situation where you would rather not use a stronger commercial solvent.
Vinegar is not magic, despite its enthusiastic fan club. It may take longer than a dedicated automotive adhesive remover, especially on decals that have been exposed to years of heat and weather. Still, it can be surprisingly effective when given enough contact time.
Step 1: Soak a Paper Towel or Soft Cloth
Pour white vinegar into a small bowl. Saturate a paper towel or soft cloth, then place it directly over the bumper sticker. Let it sit for three to five minutes so the vinegar can begin loosening the adhesive.
Step 2: Lift the Edges
Remove the towel and test a corner with your fingernail or a plastic card. If the edge lifts easily, continue peeling slowly. If the sticker remains stubborn, repeat the vinegar soak rather than forcing it.
Step 3: Wipe Away Residue
Use a fresh cloth dampened with vinegar to wipe away thin adhesive residue. For thicker glue, switch to a paint-safe automotive adhesive remover rather than escalating into increasingly strange household chemistry experiments.
Step 4: Wash and Wax
Wash the bumper after using vinegar, dry it with microfiber, and apply car wax or a spray protectant. This restores shine and helps protect the exposed paint from future grime, sunlight, and the temptation to apply another sticker.
How to Remove Stubborn Bumper Sticker Residue
Sometimes the sticker comes off, but the glue remains behind like an unwanted houseguest. Sticky residue is normal, especially with older decals. The trick is to soften it before wiping.
Apply a small amount of automotive adhesive remover to a microfiber cloth and gently work on the residue. Use light pressure and short passes. Do not use abrasive pads, steel wool, rough paper towels, or magic erasers on painted surfaces. These can leave dull spots or fine scratches that become very visible in sunlight.
If needed, use a plastic scraper while keeping the surface lubricated with detailing spray or adhesive remover. The lubrication helps create a buffer between the tool and the paint. Older decals may require more than one treatment, so do not assume the first pass needs to win the championship.
What Not to Use on a Car Bumper
- Metal razor blades: Fine for glass when used carefully, but risky on paint and plastic.
- High heat for long periods: Excessive heat can warp plastic or damage paint.
- Harsh acetone or paint thinner: These can damage paint, trim, clear coat, or nearby plastic.
- Dry scraping: A dry surface makes scratches more likely.
- Abrasive scrubbers: Rough pads can dull clear coat and leave visible marks.
- Rushing: The quickest route to a clean bumper is usually slow, controlled removal.
What If a Sticker Leaves a Shadow or Outline?
Sometimes the adhesive is gone, the surface is clean, and yet you can still see the shape of the sticker. This is often not residue. It may be a difference in paint fading: the surrounding bumper received more UV exposure while the sticker-covered section stayed protected.
A quality car polish or light paint correction may reduce the contrast, but it may not erase it completely. On older vehicles, the outline can be permanent. That is not a failed sticker-removal job; it is simply your bumper preserving a little archaeological evidence from its previous life.
When to Call a Professional
Consider a professional detailer or body shop when the sticker covers a large area, the bumper paint is peeling, the decal is heavily cracked, or you are dealing with a wrapped vehicle, matte paint, fresh repaint, or paint protection film. Professionals have specialized tools and products for stubborn adhesive, and they can assess whether the issue is glue, clear-coat failure, or faded paint.
A body shop is also a smart choice when the sticker was applied over damaged paint. Pulling it off may expose chips, peeling clear coat, or previous repair work that needs more than a microfiber towel and optimism.
Real-World Bumper Sticker Removal Experiences and Lessons
The first lesson most people learn is that bumper sticker removal is rarely difficult because of the sticker itself. It is difficult because of time. A sticker that has been on a car for six months may peel off with a hair dryer and a little finger pressure. A sticker that has survived eight winters, several car washes, two parking-lot incidents, and one questionable road trip may behave like it has legal ownership of the bumper.
Many DIYers begin with too much confidence. They see one corner lifting and assume the rest of the sticker will cooperate. Then the paper layer tears, leaving behind a patchwork of tiny fragments and a glue pattern that resembles a failed abstract painting. This is the point where slowing down matters most. Reapplying heat or solvent feels less exciting than pulling harder, but it saves time in the long run.
Another common experience is discovering that the bumper sticker was hiding more than paint. Dirt can collect around the edges, especially on textured plastic bumpers. After the sticker comes off, the surrounding area may look cleaner or darker than the rest of the bumper. A thorough wash and a light trim-safe cleaner can make the difference between “sticker successfully removed” and “why does my car now have a mysterious rectangle?”
Heat also teaches an important lesson: more is not always better. A hair dryer is usually enough. People who switch immediately to a heat gun often discover that modern bumpers are mostly plastic, and plastic has strong opinions about excessive heat. The best approach is gentle warming, constant movement, and frequent checks. If the surface is uncomfortable to touch, give it time to cool.
Adhesive remover can be equally humbling. A tiny amount on a microfiber towel is usually more effective than flooding the bumper. Too much product can drip into seams, collect dust, or leave an oily film that makes the area look cloudy until it is washed again. Small applications, short dwell times, and repeated light cleaning usually produce better results than one oversized chemical assault.
One of the most frustrating experiences is the “ghost sticker.” The decal comes off perfectly, but a faint outline remains. This often happens on older cars that have spent years outdoors. The sticker protected the paint beneath it from sunlight, while the surrounding finish faded gradually. No amount of glue remover can fix a color difference caused by years of UV exposure. Light polishing may reduce the contrast, but sometimes the bumper simply keeps the memory.
Finally, the best bumper sticker removal experience ends with protection. Wax, sealant, or spray detailer may seem like an optional final flourish, but it makes the cleaned area look more even and helps restore a smooth finish. It also gives you a chance to inspect your work in good lighting before declaring victory. And once the bumper is clean, take a moment before applying another decal. Future You may have different musical taste, political opinions, or feelings about cartoon frogs.
Conclusion
Removing a bumper sticker is mostly a matter of patience, not brute force. Start with a clean surface, choose the method that fits the sticker’s age and condition, and soften the adhesive before peeling. Automotive adhesive remover is excellent for stubborn glue, gentle heat works well for vinyl decals, and white vinegar offers a budget-friendly alternative for lighter jobs.
Take your time, use plastic tools instead of metal blades, and finish with a wash and protective wax. With the right approach, your bumper can go from cluttered message board to clean, polished surface without becoming a cautionary tale for the neighborhood group chat.