Every carved pumpkin begins life with big Halloween dreams. It wants to glow on the porch, impress the neighbors, and avoid turning into a saggy orange raisin by Tuesday. Sadly, once you cut into a pumpkin, the countdown begins. Air gets in, moisture gets out, microbes move in like uninvited party guests, and warm weather turns your masterpiece into a mushy cautionary tale.
The good news? You do not need bleach to slow that process down. A simple homemade carved pumpkin preserving spray can help your jack-o’-lantern stay fresher longer, especially when you pair it with smart carving habits, a cool display spot, and a little moisture protection around the cut edges. If your goal is a cleaner, no-bleach method that still feels practical, affordable, and easy to make at home, you are in the right patch.
In this guide, you will learn how to make a homemade carved pumpkin preserving spray, how to use it the right way, what mistakes cause pumpkins to rot faster, and which extra tricks actually help. There will also be a few reality checks, because preserving a carved pumpkin is not magic. It is more like pumpkin first aid. Helpful? Absolutely. Immortal? Not even close.
Why Carved Pumpkins Rot So Fast
A whole pumpkin is protected by its skin. The moment you cut through that shell, everything changes. The inner flesh is exposed to air, temperature swings, mold spores, bacteria, insects, and moisture loss. That is why carved pumpkins can go from “adorably spooky” to “haunted salad bar” in what feels like no time.
There are three big enemies of a carved pumpkin:
1. Moisture loss
Once the flesh is exposed, the pumpkin starts drying out. The edges curl, the face shrinks, and your once-sharp grin turns into a tired smirk. This is why carved areas need light protection after spraying.
2. Mold and microbial growth
Pumpkins are produce, and produce naturally breaks down. The wetter and dirtier the inside is, the easier it is for mold and decay to show up. Stringy pulp left behind inside the cavity is basically a welcome mat for trouble.
3. Heat and sunlight
Direct sun, warm porches, and real candles speed up softening and spoilage. Your jack-o’-lantern may look dramatic with a live flame, but your pumpkin is not enjoying its little sauna.
Why Choose a No-Bleach Pumpkin Preserving Spray?
Bleach has been a longtime pumpkin-preserving trick, but many people would rather skip it. Some do not like the smell. Some want a gentler option for a family craft setup. Others plan to compost their pumpkin later and prefer a simpler treatment. That is where a no-bleach spray comes in.
The most practical bleach-free choice is a diluted white vinegar spray. Vinegar is popular because it is inexpensive, easy to find, and commonly recommended as a natural alternative for slowing mold and bacterial growth on carved pumpkins. It is not a miracle shield, but it is a solid, realistic option for people who want a more natural method.
Another common no-bleach approach uses peppermint soap or a peppermint-based spray. Many DIY pumpkin fans like it because it smells fresher than vinegar and fits the “homemade Halloween hack” vibe very nicely. If your pumpkin could end up in compost, the plain vinegar-and-water method is the simplest path.
The Best Homemade Carved Pumpkin Preserving Spray – No Bleach
Option 1: Simple Vinegar Preserving Spray
This is the easiest, most practical no-bleach formula for most households.
- 2 1/2 cups cool water
- 1/4 cup white vinegar
- 1 clean spray bottle
How to make it: Pour the water and vinegar into a clean spray bottle. Shake gently to combine. That is it. No chemistry degree, no cauldron, no dramatic soundtrack required.
Option 2: Peppermint Soap Spray
If you want a minty-smelling alternative, try this version.
- 2 cups water
- 1 tablespoon peppermint castile soap
- Optional: 4 to 5 drops peppermint essential oil
- 1 clean spray bottle
How to make it: Add the ingredients to a spray bottle and shake gently. Use a light hand when spraying so the pumpkin is coated, not drenched.
Which recipe is better? If you want the most straightforward no-bleach preserving spray, use the vinegar version. If you want a nicer scent and do not mind a slightly more “DIY craft room” formula, the peppermint version is a fun alternative.
How to Use the Spray for the Best Results
Even the best pumpkin spray cannot save a poorly prepped pumpkin. Technique matters. Here is the best way to use your homemade preserving spray.
Step 1: Start with a healthy pumpkin
Choose a pumpkin with firm skin, no soft spots, no deep bruises, and a sturdy stem. A damaged pumpkin is already halfway to mush before you even touch a carving tool.
Step 2: Wash the outside
Rinse off dirt and debris before carving. A dirty rind can carry the very grime and microorganisms you are trying to keep away from the cut flesh.
Step 3: Use clean tools
Sharp, clean carving tools help you make neater cuts and reduce the mess. Jagged cuts damage more flesh, and dirty tools do your pumpkin zero favors.
Step 4: Scoop out everything
Remove the seeds, strings, and soft pulp thoroughly. Be a little obsessive here. The cleaner and drier the cavity, the better your odds of keeping mold at bay.
Step 5: Let the inside dry
Before spraying, pat the cavity dry and let it air out for a bit. A swampy pumpkin interior is not a preservation strategy. It is a microbial spa.
Step 6: Spray the inside, edges, and carved openings
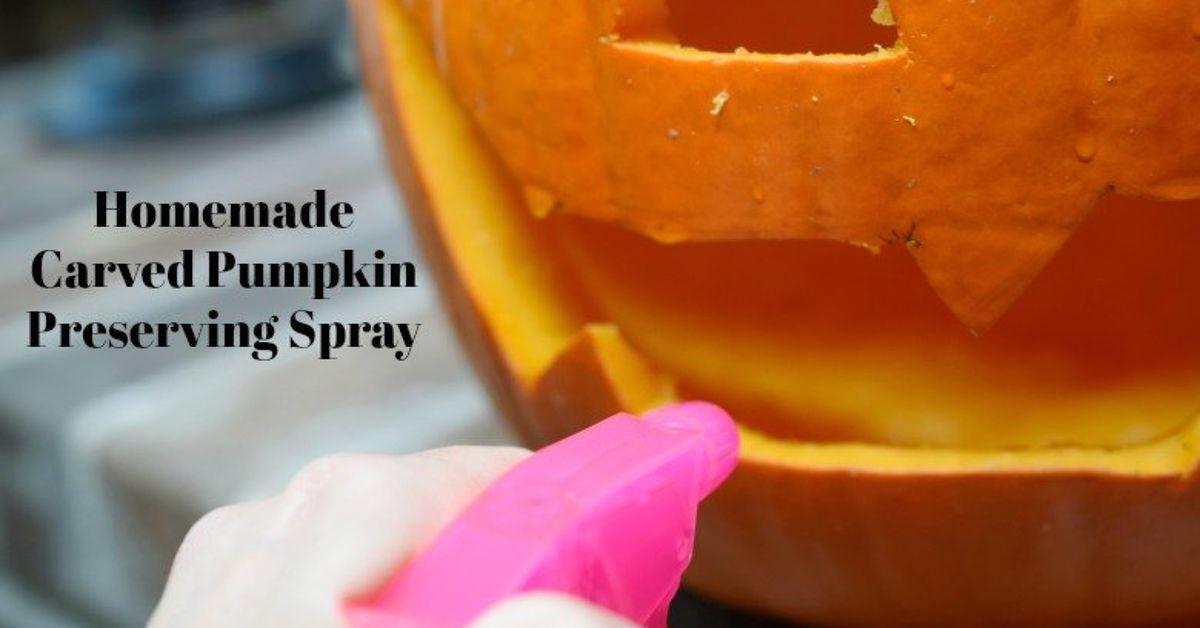
Mist the inside cavity, the carved face, and the cut edges with your preserving spray. Aim for an even coating, not dripping saturation. The goal is coverage, not a pumpkin shower.
Step 7: Let it dry before lighting
Allow the spray to settle and dry. If you want to go the extra mile, lightly blot excess moisture with a paper towel.
Step 8: Seal the cut edges if needed
Once the spray dries, you can rub a very thin layer of petroleum jelly on the carved edges to slow moisture loss. This is especially helpful if your pumpkin tends to shrivel before it molds. Just use a light touch. Too much can feel greasy and may trap unwanted moisture.
Important: Do not use petroleum jelly, vegetable oil, or similar coatings if you are placing a real candle inside. Use a battery-operated candle or glow stick instead.
How Often Should You Reapply It?
Reapply your homemade preserving spray once a day if the weather is warm, humid, or rainy. In cooler, drier conditions, every couple of days may be enough. If the carved edges start looking dry, give the pumpkin another light mist and check whether the cut surfaces need a tiny bit more sealing.
If your pumpkin already has visible fuzzy mold or feels slimy, do not expect the spray to perform a Halloween resurrection. At that point, the best move is to clean it up as much as possible, chill it, and enjoy whatever good face-time it has left.
Extra Tricks That Make Your Pumpkin Last Longer
Keep the stem intact
A pumpkin with its stem attached tends to hold up better. Instead of cutting a lid around the top, consider opening the pumpkin from the bottom or back. You preserve the classic look and avoid stressing the stem area.
Keep it cool and dry
Put your pumpkin in a shaded, protected spot away from harsh sun, rain, and heat. If you have room in the fridge or a cool garage at night, even better. Yes, refrigerating a jack-o’-lantern sounds ridiculous. It is also surprisingly smart.
Use LED lights instead of candles
Real candles create heat inside the pumpkin, which speeds drying and spoilage. Battery-operated candles, mini LEDs, or glow sticks are friendlier to your masterpiece and much safer around decorations.
Do not carve too early
If Halloween is the main event, wait until a few days before. Even with a great preserving spray, a pumpkin carved too early is asking for trouble. Think of it this way: carving two weeks ahead is confidence. Carving the night before is strategy.
Keep it off the ground
Placing your pumpkin on a stand, crate, or step can help reduce pest problems and limit excess moisture from the ground. It also gives your display a little more style, which never hurts.
Mistakes That Ruin a Pumpkin Faster
- Leaving stringy pulp inside the cavity
- Spraying too heavily and trapping excess moisture
- Setting the pumpkin in full sun
- Using a real candle with oily or jelly-like sealants
- Carving a damaged or bruised pumpkin
- Skipping daily checks when the weather is humid
The biggest mistake, though, is expecting one spray to do all the work. Preserving a carved pumpkin is a system, not a single trick. Clean pumpkin, clean tools, dry interior, gentle spray, cool location, and smart lighting all work together.
What a Realistic Pumpkin-Preservation Routine Looks Like
If you want a simple routine that actually feels doable, follow this schedule:
The day you carve
- Wash the pumpkin
- Use clean tools
- Remove all pulp and seeds
- Dry the inside
- Spray with vinegar solution
- Let dry, then lightly seal the cut edges
- Display in a cool, shaded spot with an LED light
Each day after that
- Check for dryness or soft spots
- Re-mist lightly as needed
- Move it out of heat or rain
- Refrigerate overnight if you want extra credit
That is the sweet spot: easy enough to maintain, helpful enough to matter.
Experiences from Real-Life Pumpkin Preservation
Here is what usually happens when people try a homemade carved pumpkin preserving spray in the real world, where porches are breezy, weather is annoying, and at least one neighbor has already put out a twelve-foot skeleton.
First, the spray works best when the pumpkin was in good shape to begin with. A firm pumpkin with no mystery dents has a much better chance than one that looked tired at the store. People often think the preserving spray is the hero of the story, but the real hero is often the pumpkin you picked in the first place. A healthy pumpkin gives the spray something worth saving.
Second, most good results come from combining the spray with better habits. People who wash the pumpkin, remove every last stringy bit, dry the cavity well, and keep the display out of direct sun usually notice a clear difference. Their carved edges stay crisper, the face keeps its shape longer, and the pumpkin does not collapse emotionally or physically quite so fast. On the other hand, if someone carves a warm pumpkin, leaves half the pulp inside, sets it in the sun, and lights it with a real candle, the spray is basically showing up to a disaster scene with a paper towel.
Third, weather changes everything. In cool fall weather, a no-bleach preserving spray can seem almost magical. In hot, humid weather, it is more like damage control. People in mild climates often say their pumpkins keep a fresher look for noticeably longer with a daily misting routine. People in warm, damp weather usually report that the spray helps, but they still need to watch for softening and mold. Translation: the pumpkin is not being dramatic. The weather really is part of the plot.
Fourth, many DIYers end up liking the vinegar spray more than they expected. It is simple, cheap, and easy to remake. The smell fades, especially outdoors, and the routine feels manageable. Peppermint soap sprays also get positive reactions because they smell more pleasant and feel a bit more boutique, like your pumpkin just booked a spa appointment. Still, many people circle back to vinegar because it is uncomplicated and dependable.
Finally, one of the most useful experiences people share is this: preserving a carved pumpkin is less about finding one miracle formula and more about stacking small advantages. Clean it well. Spray it lightly. Keep it cool. Skip the candle. Check it daily. Refrigerate it at night if you are feeling ambitious. Those tiny decisions add up. The result is not a forever pumpkin, but a better-looking jack-o’-lantern that survives the week with more dignity and far less shriveling. And honestly, for a vegetable with a face cut into it, that is a respectable achievement.
Final Thoughts
A homemade carved pumpkin preserving spray without bleach is a smart, simple way to help your Halloween pumpkin last longer without turning your porch project into a chemistry lab. A diluted vinegar spray is the most practical no-bleach option, while a peppermint soap spray is a fun alternative for people who prefer a fresher scent. Pair either one with a well-cleaned pumpkin, dry carved surfaces, a cool display area, and LED lighting, and your jack-o’-lantern has a much better shot at looking festive instead of tragic.
Will it last forever? No. It is still a carved pumpkin, not an enchanted heirloom. But with the right homemade spray and a little daily care, you can absolutely slow the sad slump, keep the mold at bay for longer, and enjoy more glow from your great pumpkin masterpiece.