Few things humble a driver faster than turning the key and hearing nothing but a weak click, a sad whirr, or the mechanical version of a shrug. A dead battery can strike in a grocery store parking lot, before work, during a road trip, or right when you are already late and emotionally fragile. The good news is that learning how to jumpstart a car battery with jumper cables is not complicated. The better news is that once you know the correct order and a few safety rules, you can handle the situation without turning your engine bay into a science experiment.
This guide breaks down exactly how to jump-start a car safely, what tools you need, which mistakes to avoid, and what to do after the engine finally roars back to life. We will also cover common reasons batteries die, what to watch for with modern vehicles, and real-world experiences that make this skill worth learning before you need it. Because the best time to learn battery basics is not while standing in a dark parking lot holding two mystery cables and a growing sense of regret.
Why Car Batteries Die in the First Place
Before you grab the jumper cables, it helps to know why your battery went flat. In many cases, the battery is not being dramatic. It is simply drained, worn out, or not being charged properly.
Common reasons a car battery dies include leaving headlights or interior lights on, letting the vehicle sit too long without driving it, extremely hot or cold weather, corrosion on the terminals, loose battery connections, or an aging battery that is nearing the end of its life. In some cases, the real culprit is not the battery at all. A bad alternator, a failing starter, or an electrical drain can create the same no-start headache.
That matters because a jump-start is often a temporary solution. It gets you moving again, but it does not magically fix a battery that has already clocked out for retirement. If your vehicle needs frequent jump-starts, it is asking for help in the only language it speaks: inconvenience.
What You Need Before You Start
If you want to jumpstart a car battery with jumper cables, gather the right gear first. This is not a job for random wires from the garage and optimism.
Basic jump-start tools
- A working vehicle with a compatible 12-volt battery, or another approved power source
- A quality set of jumper cables with clean, undamaged clamps
- Safety gloves
- Eye protection, if available
- Your owner’s manual for vehicle-specific battery or jump terminal locations
Heavier-duty jumper cables are usually a smarter choice than thin bargain-bin cables. Cheap cables may struggle in cold weather or with larger engines. The thicker the cable and the better the clamp quality, the less likely you are to be standing there wondering why absolutely nothing is happening.
When You Should Not Jump-Start a Car Battery
This is the part many people skip, and it is the part that saves headaches, money, and eyebrows.
Do not attempt to jump-start a battery if the battery case is cracked, leaking, badly swollen, or frozen. Do not proceed if you smell strong chemical odors, see obvious damage, or notice heavy corrosion that makes the terminals unsafe to access. In those cases, you need professional help, not a heroic attitude.
You should also check your owner’s manual before you do anything. Some vehicles have remote jump-start terminals instead of a traditional under-hood battery setup. Others may have sensitive electronics, trunk-mounted batteries, under-seat batteries, or special procedures for hybrids and EVs. And with electric vehicles, you should never mess with the high-voltage battery system. If the vehicle uses a 12-volt battery for accessory power and starting procedures, follow the manual exactly. Modern cars are amazing until you ignore the manual and accidentally start an expensive argument with the electrical system.
How to Jumpstart a Car Battery With Jumper Cables
Now for the main event. The exact sequence matters. The goal is to connect the cables in a way that reduces the chance of sparks near the dead battery.
Step 1: Park the vehicles correctly
Move the working vehicle close enough so the jumper cables can reach both batteries or approved jump points. The vehicles should not touch each other. Put both vehicles in park or neutral, shut them off, engage the parking brakes, and turn off headlights, climate control, radio, and other accessories.
Step 2: Locate the battery terminals or jump points
Open both hoods and locate the battery or designated jump terminals. The positive terminal is usually marked with a plus sign and often has a red cover. The negative terminal is marked with a minus sign and is often black. If the battery is hidden in the trunk or under a rear seat, look for the manufacturer’s remote jump-start points.
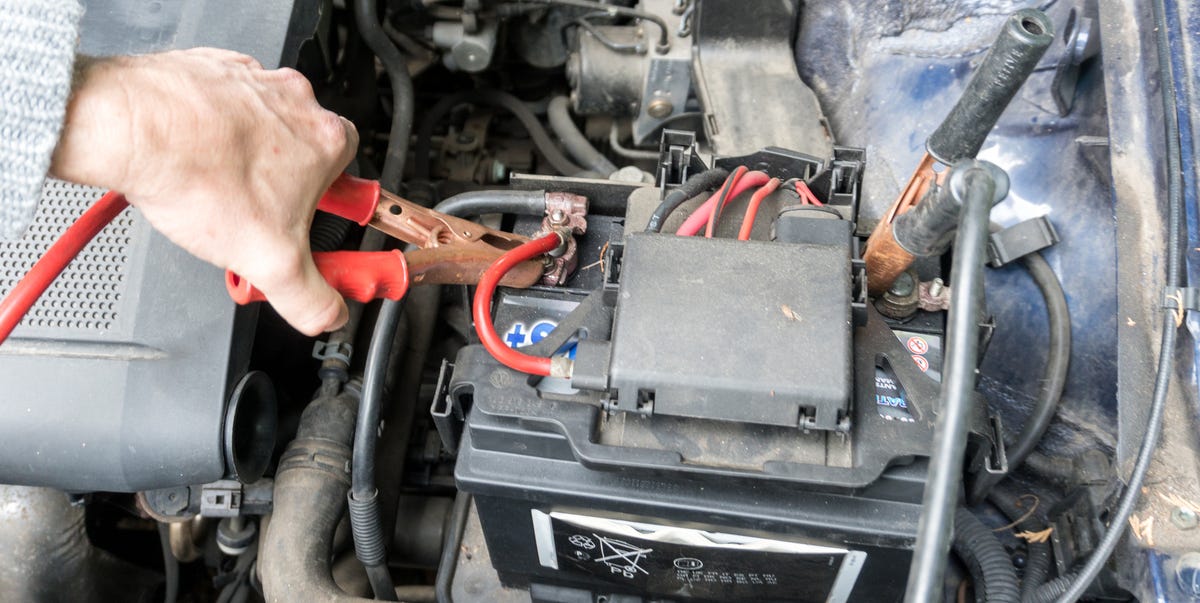
Step 3: Connect the red clamp to the dead battery’s positive terminal
Take one red clamp and attach it firmly to the positive terminal on the dead battery. Make sure the clamp grips securely. A loose connection can keep the jump-start from working and make you question reality for no good reason.
Step 4: Connect the other red clamp to the good battery’s positive terminal
Attach the second red clamp to the positive terminal on the donor vehicle’s battery. Red goes to positive. Positive goes to positive. This is not the moment for freestyle cable choreography.
Step 5: Connect one black clamp to the good battery’s negative terminal
Attach one black clamp to the negative terminal on the working battery.
Step 6: Attach the last black clamp to a metal ground on the dead car
Do not attach the final black clamp directly to the dead battery’s negative terminal unless your owner’s manual specifically tells you to do so. Instead, connect it to a clean, unpainted metal surface on the dead vehicle, such as a bracket, bolt, engine block point, or designated grounding stud, ideally several inches away from the battery.
This step matters because it helps reduce the risk of sparking near the battery, where flammable gases may be present.
Step 7: Start the donor vehicle
Start the working vehicle and let it idle for a few minutes. In some cases, a slight increase above idle can help move more charge, but there is no need to floor it like you are auditioning for an action movie. Give the dead battery a few minutes to wake up.
Step 8: Start the vehicle with the dead battery
Try to start the disabled vehicle. If it starts, let it idle. If it does not start on the first try, wait another minute or two and try again. If you still get nothing after a few attempts, stop and reassess. The issue may be loose connections, severe battery failure, or another problem entirely, such as a bad alternator or starter.
Step 9: Remove the cables in reverse order
Once the dead vehicle is running, disconnect the jumper cables carefully in the reverse order of installation:
- Remove the black clamp from the grounded metal point on the revived vehicle.
- Remove the black clamp from the donor battery’s negative terminal.
- Remove the red clamp from the donor battery’s positive terminal.
- Remove the red clamp from the revived battery’s positive terminal.
Keep the clamps from touching each other or any metal while removing them. Also make sure the cables stay clear of belts, fans, and other moving engine parts.
Step 10: Let the revived car keep running
Let the vehicle run and, ideally, drive it for at least 20 to 30 minutes so the alternator can recharge the battery. A short idle in the parking lot may not be enough, especially if the battery was deeply drained. If the car dies again soon after, you likely need battery testing, charging, or replacement.
Common Jump-Start Mistakes to Avoid
Even a simple job can go sideways when people rush. Here are the most common errors when using jumper cables:
Mixing up positive and negative
Reversing polarity can damage the battery, blow fuses, and potentially harm the vehicle’s electronics. Always confirm the plus and minus markings before attaching anything.
Connecting the last black clamp to the dead battery
Many people assume black goes straight to the dead battery’s negative terminal. In reality, the safer general method is connecting that final black clamp to a grounded metal point on the disabled vehicle.
Letting the clamps touch
Once the cables are laid out, do not let the metal ends touch each other. That can cause sparks or shorting. In other words, the clamps are not social creatures.
Ignoring the owner’s manual
Some cars hide their batteries, use remote jump posts, or have specific cautions. Guessing your way through a modern engine bay is not a character-building exercise.
Assuming a jump-start solves everything
If your battery is more than a few years old or keeps dying, a jump-start is just the first chapter. You still need a diagnosis.
What to Do After a Successful Jump-Start
Getting the engine running is great, but the story is not over yet.
Drive the car long enough to help recharge the battery. Then have the battery and charging system tested if any of the following are true: the battery is older, the vehicle struggled to start even after the jump, the battery dies again soon, or you notice dim lights, dashboard warnings, or electrical quirks.
Many auto parts stores can test a battery and charging system. This is especially smart if the battery is more than three years old, if the car has been sitting unused, or if the problem appeared without an obvious cause like a light left on overnight.
How to Prevent Another Dead Battery
Nobody wants to become a jump-start regular. A few habits can reduce the odds of getting stranded again.
- Drive the vehicle regularly so the battery stays charged.
- Turn off lights and accessories before leaving the car.
- Keep the battery terminals clean and tight.
- Replace an aging battery before it fails at the worst possible moment.
- Keep jumper cables or a portable jump starter in your trunk.
- Have the charging system checked if the battery repeatedly goes dead.
If your vehicle sits for long periods, a battery maintainer may help. If you live in an area with extreme heat or cold, battery care matters even more. Weather has a talent for exposing weak batteries at precisely the least convenient time.
How Long Does It Take to Jump-Start a Car?
In many cases, the process takes around 10 to 15 minutes from setup to restart. Sometimes it is quicker, especially if the battery was only lightly drained. Sometimes it takes longer, especially if the battery is older or the car sat for weeks. The key is patience, proper cable placement, and not panicking just because the car does not spring back to life in three seconds.
Common Real-World Experiences With Jump-Starting a Car Battery
To make this topic more practical, it helps to look at the kinds of jump-start experiences drivers often run into in real life. These situations are common, relatable, and surprisingly educational.
One of the most common experiences happens in a store parking lot. A driver finishes shopping, loads the trunk, jumps in, turns the key, and gets only a weak clicking sound. The culprit is often simple: headlights were left on, a door did not fully close, or an interior light stayed lit longer than expected. In this situation, a jump-start usually works well because the battery may only be drained, not ruined. Drivers often remember how helpful it is to have jumper cables in the trunk and how unhelpful it is to realize they own three reusable grocery bags and zero emergency tools.
Another classic scenario happens on a freezing morning. Cold weather can make a weak battery act much worse than it did the day before. The car may crank slowly or not at all, even though it seemed fine recently. Drivers in this situation often learn two lessons fast: first, batteries do not enjoy winter nearly as much as ski resorts do; second, thin, cheap jumper cables can struggle when you need them most. A solid set of cables and a few extra minutes of charging from the donor vehicle can make all the difference.
Road-trip jump-starts create a different kind of memory. Picture a gas station stop, a quick restroom break, and then absolutely nothing when it is time to leave. Sometimes a battery is old and has been hanging on by a thread for weeks. The jump-start gets the engine running, but the car dies again at the next stop because the battery is too far gone. This is the experience that teaches drivers an important truth: a successful jump-start does not always mean the battery is healthy. Sometimes it means you have just bought yourself enough time to reach a repair shop.
Helping another driver can also be eye-opening. Many people know how to drive for years without ever learning the correct jumper cable order. Then one day they are the “person with the good battery” and suddenly realize they are ten seconds away from guessing their way through basic electrical safety. These moments tend to stick because the process feels simple once you know it: red to dead positive, red to good positive, black to good negative, black to a metal ground on the dead car. It is a short sequence, but it feels like a superpower once you have it memorized.
Some experiences involve modern vehicle surprises. A driver opens the hood and cannot even find the battery because it is tucked away under trim, mounted in the trunk, or replaced by remote jump terminals under a cover. This is where the owner’s manual earns its paycheck. Drivers often assume every car battery sits in plain view like it did in older vehicles, but newer models can be less obvious. Learning to use the designated jump points instead of hunting around blindly saves time and helps avoid mistakes.
In almost every real-world experience, the biggest takeaway is the same: preparation wins. The people who keep cables in the car, understand the correct steps, and know when to stop and call for help usually get back on the road faster and with far less stress. Everyone else gets an unforgettable lesson in battery maintenance, electrical systems, and the emotional power of a single click.
Final Thoughts
Knowing how to jumpstart a car battery with jumper cables is one of those practical skills that feels minor right up until the moment you desperately need it. The process is simple when you respect the order, follow basic safety rules, and avoid shortcuts. Start with the red cable on the dead battery, finish with the final black cable on a grounded metal surface, remove everything in reverse, and let the revived car keep running long enough to recharge.
Most importantly, remember that a jump-start is a solution for the moment, not always a cure for the problem. If your battery keeps dying, have it tested. If the battery is damaged, frozen, or leaking, do not touch it. And if your car’s setup looks more spaceship than sedan, trust the owner’s manual before trusting your instincts.
Note: This article is for informational purposes and should be used along with your vehicle owner’s manual, especially for hybrids, EVs, trunk-mounted batteries, and remote jump-start terminals.