Note: In this article, “vegetable glue” means a simple plant-based, starch-derived paste made fr, or flour. It is designed for paper, lightweight crafts, labels, and temporary projectsnot for repairing furniture, shoes, electronics, or anything expected to survive a hurricane.
Store-bought glue is handy, but sometimes you need an adhesive that is inexpensive, plant-based, washable, and made from ingredients already hiding in your kitchen cabinet. That is where vegetable glue comes in. No laboratory coat required. No mysterious chemical names that sound like rejected space robots. Just starch, water, heat, and a little stirring.
Homemade vegetable glue has been used in many forms for generations. Starch-based pastes are especially useful for paper crafts, papier-mâché, collage projects, lightweight gift tags, handmade decorations, and simple classroom activities. The secret is starch gelatinization: when starch is mixed with water and heated, the granules absorb water, swell, and create a thick paste that can hold porous materials together as it dries. e result will not replace epoxy, super glue, construction adhesive, or the mysterious force keeping old duct tape attached to the garage wall. But for the right job, vegetable glue is wonderfully effective. It is affordable, customizable, and much more forgiving than many commercial adhesives. If you make it too thick, add water. Too thin? Cook it a little longer or whisk in a touch more starch. Your glue is not judging you. It is mostly starch.
What Is Vegetable Glue?
Vegetable glue is a broad term for an adhesive made from plant-based ingredients. The most common homemade versions use starch from corn, potatoes, rice, wheat, or tapioca. These starches create a paste when heated with water, and that paste can bond materials with absorbent surfaces.
In practical terms, vegetable glue behaves more like craft paste than like a powerful commercial glue. It works best when it can soak slightly into paper fibers, cardboard, untreated fabric, or porous plant materials. As the water evaporates, the starch film dries and helps hold the surfaces together.
Professional paper conservators have long used carefully prepared wheat and rice starch pastes for delicate paper repairs, often alongside Japanese tissue. The appeal is not brute strength; it is control, flexibility, reversibility, and compatibility with paper materials. at said, a kitchen-made paste is not automatically archival. A homemade flour paste may contain proteins and other materials that can age, discolor, or attract pests more readily than purified conservation starches. For family crafts and temporary decorations, that is usually no big drama. For valuable documents, rare books, artwork, heirloom photographs, or your grandmother’s irreplaceable recipe card, step away from the saucepan and consult a conservator.
Why Make Your Own Plant-Based Glue?
There are several good reasons to make vegetable glue at home. First, it is cheap. A few tablespoons of cornstarch cost far less than a specialty craft adhesive. Second, it is easy to make in small batches, which means less waste and fewer half-empty bottles growing crusty in a drawer.
It is also useful for people who prefer a simpler, plant-derived craft option. Commercial glues can contain synthetic polymers, preservatives, solvents, or additives designed for durability, flexibility, water resistance, or shelf stability. Those features are helpful when you need them. But for a paper crown, a school collage, or a cardboard spaceship that will retire honorably by Friday, starch paste is usually more than enough.
Vegetable glue is also easy to clean. Before it dries, warm water and a cloth can usually remove it from hands, bowls, utensils, and many work surfaces. This makes it especially useful for messy family projects, where the official crafting plan somehow turns into a glue-covered table, two sticky elbows, and a dog with a paper star on its ear.
How Vegetable Glue Works
Starch is made of long chains of glucose molecules. In dry form, cornstarch looks harmless and powdery. Add water and heat, however, and the starch granules begin to swell and thicken. This process creates a paste that spreads over a surface and settles into tiny gaps in porous materials.
As the paste cools and dries, it forms a film that helps hold the materials together. The bond is strongest when the surfaces are clean, absorbent, and pressed together while the glue dries. Paper, cardboard, tissue paper, and unfinished wood are generally friendly territory. Plastic, waxed paper, glossy magazine pages, silicone, metal, and oily surfaces are much less cooperative. They are the party guests who refuse to dance.
Starch adhesives are widely documented in paper and book conservation, but their performance depends on the material being repaired. Water-based starch paste can be unsuitable for very moisture-sensitive papers, slick surfaces, or oily paper. asic Cornstarch Vegetable Glue Recipe
This is the easiest and most reliable homemade vegetable glue recipe for lightweight crafts.
Ingredients
- 2 tablespoons cornstarch
- 1/2 cup cold water
- 1 cup hot water
- Optional: 1 teaspoon sugar for a slightly tackier paste
- Optional: a tiny pinch of salt to slow spoilage slightly
Tools
- Small saucepan
- Whisk or spoon
- Measuring spoons and cup
- Heat-safe jar or container with a lid
- Small paintbrush, sponge brush, or craft stick for application
Step-by-Step Instructions
- Make a smooth slurry. Add the cornstarch to the cold water in a bowl. Whisk until the mixture is completely smooth. Starting with cold water helps prevent lumpy glue. Think of this as avoiding tiny starch meatballs.
- Heat the water. Pour the hot water into a small saucepan and warm it over medium-low heat. It does not need to be violently boiling like a volcano in a science-fiction movie.
- Add the slurry slowly. While whisking the hot water, slowly pour in the cornstarch mixture. Keep stirring continuously.
- Cook until translucent. Continue stirring for about 2 to 5 minutes. The mixture should become glossy, thicker, and slightly translucent.
- Adjust the texture. If it looks too thick, stir in a teaspoon of water at a time. If it is too thin, continue cooking gently for another minute or two.
- Cool before using. Remove the saucepan from the heat and let the glue cool completely. It thickens more as it cools, so do not panic if it seems a little loose while hot.
- Transfer and label. Place the cooled paste in a clean, covered container. Write the date on it, because homemade glue has a short shelf life and your future self deserves answers.
The finished glue should have a smooth, brushable consistency similar to a thin pudding or wallpaper paste. It should spread easily without soaking paper so heavily that the project curls into a sad little tube.
Three Vegetable Glue Variations to Try
1. Flour Paste for Papier-Mâché
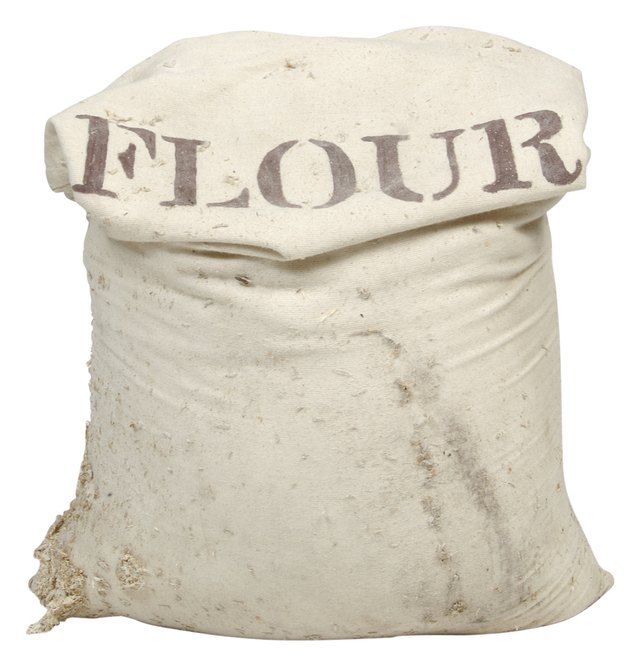
Flour paste is one of the oldest homemade adhesives for paper projects. It is inexpensive and works well for papier-mâché, cardboard sculpture, piñatas, paper lanterns, and large temporary decorations.
Mix 1/2 cup all-purpose flour with 1 cup cold water until smooth. Heat 2 cups of water in a saucepan, then slowly whisk in the flour mixture. Cook over low heat until it thickens into a smooth paste. Let it cool completely before using.
Flour paste is often thicker and more opaque than cornstarch paste. It can be excellent for large craft projects but may dry with more visible residue. It is also more likely to spoil quickly, so make only what you plan to use within a day or two.
2. Potato Starch Glue for Smooth Paper Crafts
Potato starch can make a smooth, flexible paste with a soft texture. Use the same method as the cornstarch recipe: mix 2 tablespoons potato starch with 1/2 cup cold water, then whisk it into 1 cup hot water while heating gently.
Potato starch paste can feel slicker and silkier than flour paste. It works nicely for collage, lightweight paper labels, paper flowers, and craft projects that need a less grainy finish.
3. Rice Starch Paste for Delicate Paper
Rice starch paste is often associated with paper conservation and traditional paper mounting methods. It can be smoother than flour paste, especially when made from refined rice starch rather than regular rice flour. Conservation professionals use carefully prepared starch pastes for repair work because the adhesive can be applied in thin, controlled layers. r household crafts, combine 1 tablespoon rice starch with 1/2 cup cold water. Heat 1 cup water separately, then whisk in the slurry and cook gently until the mixture becomes clear and lightly thickened. Use it for paper projects, lightweight tissue paper, and delicate collage work.
How to Apply Vegetable Glue Properly
Making the paste is only half the job. Applying it correctly is what keeps your project from looking like it survived a gravy accident.
Use a Thin Layer
Apply vegetable glue in a thin, even coat. Too much paste can wrinkle paper, soak through lightweight materials, and create shiny lumps when it dries. A small brush, sponge brush, or craft stick works better than pouring glue directly onto the project.
Work in Small Sections
For large sheets of paper, coat one section at a time. Place the material carefully, smooth it from the center outward, and press out air bubbles with clean fingers, a dry cloth, or a plastic card wrapped in wax paper.
Press While It Dries
For flat projects, place wax paper or parchment paper over the glued area, then add a lightweight book or flat board. This helps prevent warping and improves contact between the surfaces. Keep the project pressed until it is mostly dry.
Let It Dry Completely
Most lightweight projects dry within a few hours, though thicker cardboard or papier-mâché layers may need overnight drying. Avoid rushing the process with extremely high heat. A warm, ventilated space is better than turning your craft project into a crispy starch pancake.
Best Uses for Homemade Vegetable Glue
Vegetable glue is most useful for projects where flexibility, low cost, and easy cleanup matter more than industrial-strength bonding.
- Paper collage and scrapbook-style crafts
- Children’s art projects with supervision
- Papier-mâché bowls, masks, and piñatas
- Paper flowers and party decorations
- Cardboard models and school displays
- Gift tags, envelopes, and lightweight paper labels
- Temporary poster mounting on suitable surfaces
- Simple book or paper mending practice on nonvaluable materials
For paper repairs, use a tiny amount of glue and test first on scrap paper. Professional conservation methods often use wheat starch paste with thin Japanese tissue because the materials can be flexible and removable. However, that does not mean every old paper item should receive a homemade repair. Valuable documents and photographs can react badly to moisture, staining, or adhesives. hat Vegetable Glue Cannot Do
Vegetable glue is charming, useful, and humble. It is not magical. Do not expect it to repair a broken chair, fix a ceramic mug, bond plastic toys, seal a leaky container, attach metal hardware, or rescue the sole of a sneaker before a job interview.
A starch paste is generally not waterproof. Humidity can soften it, and direct water can dissolve or weaken it. It also struggles with smooth, nonporous, glossy, greasy, or flexible surfaces. If you need a waterproof bond, a high-strength structural repair, or a permanent outdoor adhesive, choose a product designed for that job.
Vegetable glue should also not be used around food-contact surfaces, inside cooking tools, or for repairs that could affect safety. Just because the ingredients began in a kitchen does not mean the finished paste belongs in a sandwich.
How to Fix Common Vegetable Glue Problems
The Glue Is Too Thick
Add warm water one teaspoon at a time and stir until the paste loosens. Do not dump in a large amount at once unless you enjoy creating glue soup.
The Glue Is Too Thin
Return it to low heat and stir gently for another minute or two. You can also mix a small amount of starch with cold water, then whisk that slurry into the warm paste.
The Glue Has Lumps
Lumps usually happen when dry starch meets hot water too quickly. Strain the paste through a fine mesh strainer while warm, or blend gently with a whisk. Next time, always make a cold-water slurry first.
The Paper Is Wrinkling
Use less paste, apply it more evenly, and avoid soaking thin paper. Press the project between layers of wax paper and clean books while it dries. Heavier paper is also more forgiving than tissue paper.
The Bond Is Weak
Check whether the surface is glossy, dusty, greasy, or nonporous. Vegetable glue needs absorbent surfaces. Clean the materials, use a slightly thicker paste, and press them together longer. If the item is heavy, switch to an appropriate commercial adhesive rather than asking starch paste to become a superhero.
Storage, Cleanup, and Safety Tips
Homemade vegetable glue is perishable because it contains water and plant-based starch. Store it in a covered container in the refrigerator and make small batches. If it develops mold, an off smell, unusual discoloration, or a fuzzy science-project personality, discard it immediately. Mold should be removed when seen or smelled, and moisture is what allows it to thrive. r best results, use homemade glue within two to three days. You may see advice suggesting that starch paste lasts much longer, but the safest and most practical habit is to make only what you need. Food-safety guidance also emphasizes prompt refrigeration for moist leftovers and short storage periods for perishable materials. sh tools immediately with warm water and dish soap. Once dried, starch paste can become stubborn, crusty, and weirdly determined to remain part of your saucepan forever. If children are helping, supervise the heating step and keep hot glue paste away from skin, eyes, and mouths.
Is Vegetable Glue Really Eco-Friendly?
Vegetable glue can be a lower-waste choice for simple crafts because it uses renewable plant starches, can be made in tiny batches, and does not require buying a plastic bottle for every small project. Still, “natural” does not automatically mean perfect. Food ingredients, water, packaging, energy for heating, and discarded crafts all have environmental impacts.
The most eco-friendly approach is usually the least dramatic one: make only the amount you need, use leftover paper and cardboard, avoid wasting ingredients, and select the right adhesive for the job. A small batch of cornstarch paste for a paper project is sensible. Repeatedly re-gluing a broken outdoor planter with it is less sustainable, mostly because you will eventually buy three more planters.
Frequently Asked Questions About Vegetable Glue
Can I make vegetable glue without cooking it?
You can mix flour and water into a basic cold paste, but cooking usually creates a smoother, stronger, more stable starch glue. Heat helps the starch gelatinize, which improves the paste’s thickness and bonding behavior.
Can I add vinegar to homemade vegetable glue?
A tiny amount of vinegar is sometimes added to homemade paste recipes, mainly because people hope it will slow spoilage. It may alter the smell and acidity, however, and it does not turn homemade glue into a shelf-stable product. Refrigerate it and discard it when it changes.
Can I use vegetable glue on wood?
You can use it for lightweight paper-on-wood crafts or temporary decorations on unfinished wood. Do not use it for structural wood repairs, furniture joints, cutting boards, or items exposed to moisture.
Can I use it for wallpaper?
For a tiny craft project or dollhouse wallpaper, possibly. For real household wallpaper, use a wallcovering adhesive recommended by the wallpaper manufacturer. Full-size wallpaper requires reliable adhesion, mold resistance, and long-term durability that homemade starch paste may not provide.
Is vegetable glue safe for kids?
It can be suitable for supervised craft projects because the basic ingredients are simple, but it should not be eaten, stored carelessly, or handled near hot cookware. Adults should prepare the heated paste, and children should use it only after it has cooled.
Hands-On Experiences With Homemade Vegetable Glue
The first time you make vegetable glue, it is easy to underestimate how much difference texture makes. A paste that looks perfect in the saucepan may feel too thick once it cools. That is normal. Cornstarch paste is a little like homemade gravy: five minutes after you think you have nailed it, it decides to become more confident. The best approach is to keep a small cup of warm water nearby and adjust the consistency gradually.
For paper collage, a thinner paste usually performs better than a thick one. When the glue is spreadable and light, paper edges lie flatter and the finished project dries with fewer bumps. A thick paste can be useful for cardboard, but on thin construction paper it may create wrinkles so dramatic they deserve their own weather forecast.
One especially useful experiment is to test several formulas on scrap materials before beginning the real project. Try cornstarch glue on printer paper, cardboard, tissue paper, glossy magazine paper, and a piece of plastic packaging. The results make the limits of vegetable glue very clear. It usually grips ordinary paper and cardboard well, but glossy and plastic surfaces often peel apart once dry. This is not a failure of the recipe. It is simply the chemistry of smooth, nonabsorbent surfaces refusing to cooperate.
Papier-mâché is where homemade flour paste often shines. The paste does not need to be elegant because the project itself is built in layers. Dip strips of newspaper into the paste, remove excess glue with your fingers, and smooth each strip over a form. The important lesson is moderation. Soaking paper until it becomes a wet noodle can make the project sag and dry slowly. Lightly coated strips build a stronger shape and dry more evenly.
For gift tags and lightweight labels, rice or cornstarch paste can be surprisingly useful. A thin coating is enough to attach paper labels to paper bags, cardboard boxes, or plain wrapping paper. The key is to avoid sealing anything that may later need to be removed cleanly. Vegetable glue can be reversible with water on many surfaces, but the paper underneath may still wrinkle, stain, or tear during removal.
Another practical experience involves drying time. Freshly glued paper often feels secure after ten minutes, but that is not the same as being fully dry. When possible, leave flat projects under light weight for several hours. Wax paper between the project and the weight helps prevent accidental bonding. Nobody wants to explain why a favorite cookbook is now permanently attached to a cardboard dragon.
Storage is another lesson learned quickly. Homemade starch glue looks harmless in a jar, but after a few days it can change texture, separate, or develop an unpleasant smell. Small batches solve almost every storage problem. Make enough for the project in front of you, refrigerate any tiny remainder briefly, and discard it at the first sign that it has become questionable. Fresh glue spreads better anyway.
Finally, homemade vegetable glue is most satisfying when treated as a useful craft tool rather than a miracle product. It is not meant to compete with industrial adhesives. Its strengths are simplicity, affordability, easy cleanup, and the small pleasure of making something practical from pantry staples. When the job is paper, cardboard, or lightweight decoration, this humble paste can do an impressive amount of work without bringing a single chemical-sounding villain into the room.
Final Thoughts
Learning how to make vegetable glue is one of those small DIY skills that feels almost absurdly useful once you try it. With cornstarch, water, gentle heat, and a few minutes of stirring, you can create a versatile plant-based paste for paper crafts, classroom projects, collage, papier-mâché, labels, and temporary decorations.
The biggest secret is choosing the right job. Use vegetable glue for porous, lightweight materials. Apply it thinly. Press pieces together while they dry. Make small batches. Store it briefly. And when you need strength, waterproofing, or a permanent structural bond, let a purpose-built adhesive take the stage. Starch paste is wonderful, but it does not need the pressure of being responsible for your kitchen chair.