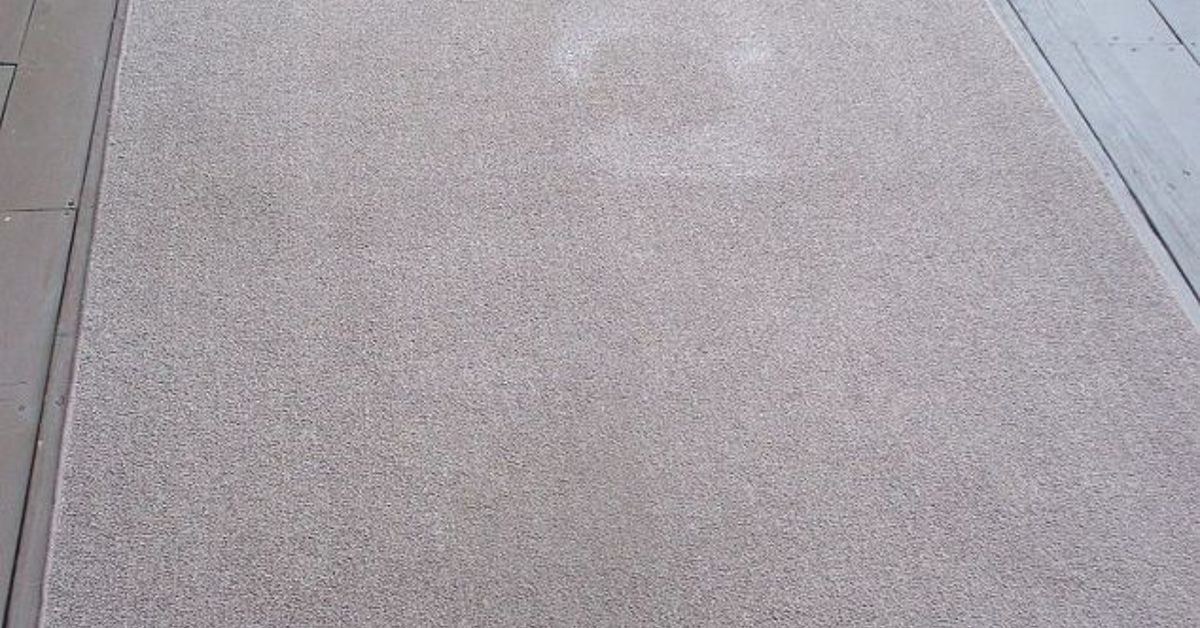
A tired rug can make an otherwise lovely room look as though it has given up on life. The colors appear dull, the edges curl, and one mysterious stain keeps staring at you from beneath the coffee table. Fortunately, replacing the rug is not your only option.
With paint, dye, leftover fabric, inexpensive trim, and a little creative rearranging, you can give an old floor covering a surprisingly stylish second act. Many of these cheap DIY rug makeovers can be completed in an afternoon, and several cost less than a takeout dinner.
The key is choosing a makeover that suits the rug’s material. Flat-weave cotton, low-pile synthetic, jute, sisal, and washable rugs are generally easier to customize than valuable wool, silk, antique, or hand-knotted pieces. Always read the care label and test paint, cleaner, or dye on a hidden corner first. Cleaning experts consistently recommend spot-testing because fibers and colors can react differently than expected.
Before You Begin Your Budget Rug Makeover
Start by vacuuming both sides of the rug. Embedded grit can interfere with paint, dye, glue, and stain treatments. Consumer Reports notes that gritty soil can abrade a rug’s backing over time, while the Carpet and Rug Institute recommends shaking washable rugs before cleaning and following the temperature listed on the care label.
Next, identify the fiber. Cotton and linen accept many fabric dyes. Wool and silk require more careful treatment. Polyester and other synthetics may need specialized products and higher temperatures. Rubber-backed rugs are poor dye candidates because the backing may absorb color without retaining it, potentially allowing dye to transfer to the floor later.
Finally, gather simple supplies: painter’s tape, fabric or outdoor paint, foam brushes, stencils, scissors, a tape measure, gloves, drop cloths, and whichever decorative extras your project requires. Now let us rescue that rug before it quietly moves itself to the curb.
12 Easy, Quick, and Cheap DIY Rug Makeovers
1. Paint Bold Stripes With Painter’s Tape
Stripes are among the easiest ways to update a plain cotton, sisal, or low-pile outdoor rug. They look intentional, modern, and far more complicated than they actually arewhich is exactly what we want from a budget project.
Lay the clean rug on a drop cloth and decide whether you want narrow pinstripes, chunky cabana stripes, or a combination of both. Measure carefully and press painter’s tape firmly into the fibers. Apply fabric paint, chalk-finish paint, or an outdoor acrylic product with a foam roller. Use several light coats rather than one paint tsunami.
Better Homes & Gardens recommends working with a smooth, low-pile rug to produce cleaner lines. Its painted-rug method also uses measured tape spacing and lightly thinned chalk-finish paint to help the color move across the textured surface.
Estimated cost: $8–$25
Estimated time: Two to four hours, plus drying
2. Create a Stenciled Statement Rug
A stencil can transform a plain discount rug into something resembling a boutique purchase. Choose a large geometric, floral, Moroccan, southwestern, or abstract design. Oversized patterns are usually easier because they require fewer repetitions and create fewer opportunities for your measurements to wander into another ZIP code.
Begin in the center and work outward. Secure the stencil with removable tape, load a foam brush with a small amount of paint, and dab vertically. Do not brush sideways, as that pushes paint beneath the stencil. Home Depot’s doormat instructions similarly recommend light dabbing with straight up-and-down motions, while HGTV projects emphasize removing excess paint before applying it.
Allow each section to become touch-dry before positioning the stencil beside it. Clean the stencil occasionally so dried paint does not create bumpy, blurry edges.
Estimated cost: $10–$30
Estimated time: Three to six hours
3. Add a Modern Color-Block Design
Color blocking is perfect for beginners because the shapes do not need to be delicate. Divide the rug into large rectangles, arches, triangles, or asymmetrical sections using painter’s tape. Select two or three coordinating colors, leaving part of the original rug visible for balance.
Muted terracotta, cream, and charcoal create a warm modern look. Navy, white, and sage feel coastal without requiring decorative seashells. For a playful children’s room, try peach, aqua, mustard, and dusty pink.
Apply thin layers and let each color dry before taping over an adjacent section. Watered-down acrylic craft paint has also been used successfully to create artistic effects on inexpensive woven rugs, although a test patch remains essential.
Estimated cost: $6–$20
Estimated time: Two to four hours
4. Give a Faded Rug an Overdyed Look
If the pattern is still attractive but the colors feel dated, overdyeing can create a rich, vintage-inspired finish. This works best on washable natural-fiber rugs without rubber backing.
Dark blue, forest green, burgundy, charcoal, and deep teal are forgiving choices because they can help blend existing colors and minor discoloration. Clean the rug first, wet it evenly, and prepare the dye according to its fiber-specific instructions. Wear gloves unless you want matching hands.
Rit’s rug projects recommend wetting and vacuuming the rug before applying color. Its immersion-dye guidance emphasizes continuous movement during the early part of the dye bath to reduce uneven patches. Natural fibers such as cotton may use salt to strengthen color, while wool, silk, and nylon commonly use vinegar according to the manufacturer’s directions.
Estimated cost: $10–$25
Estimated time: One afternoon, plus thorough drying
5. Make an Ombre Dip-Dyed Rug
An ombre makeover gives a small cotton runner or washable throw rug a gradual fade from dark to light. It is an excellent option when you want color without a precise pattern.
Prepare the dye bath, then lower one end of the damp rug into the darkest section. After several minutes, lift part of the rug out while keeping the bottom submerged. Repeat in stages so the lowest portion receives the longest exposure.
Blend harsh transition lines by gently moving the rug up and down. Remember that wet fabric often appears darker than the final dried color, so do not panic if your pale-blue plan initially looks like midnight at the bottom of the ocean. Rit specifically notes that dyed rugs generally dry lighter than they appear when wet.
Estimated cost: $8–$20
Estimated time: Two to three hours, plus drying
6. Paint a Border Around the Rug
A painted border is faster than covering the entire surface and can make an inexpensive rug appear more tailored. Tape a line three to six inches from the edge, then paint the outer band in black, navy, rust, or another room-friendly accent.
For extra character, add a second narrow line inside the larger border. A crisp black frame on a natural jute rug works well with modern farmhouse, industrial, coastal, and minimalist decor. Apparently black borders are the little black dresses of floor coverings.
Use a nearly dry brush and work paint into the texture gradually. Heavy applications can leave stiff ridges, particularly on coarse fibers.
Estimated cost: $5–$15
Estimated time: One to two hours
7. Add Tassels, Fringe, or Pom-Pom Trim
Sometimes the rug itself is fine; it simply needs accessories. Sew or securely attach ready-made tassel trim, cotton fringe, or oversized yarn pom-poms along the short ends of a flat-weave runner.
Match the existing color for a subtle designer finish, or use a contrasting shade for a cheerful bohemian look. Black tassels sharpen a cream rug, while mustard or rust adds warmth to navy and gray.
Hand-stitching is usually more durable than hot glue, especially in busy areas. If you use adhesive, choose a flexible fabric product and apply it to the rug backing rather than coating the visible fibers. Keep pom-poms out of spaces where robot vacuums roam unless you enjoy watching a tiny machine fight decorative yarn.
Estimated cost: $5–$25
Estimated time: One to three hours
8. Patch Stains With Decorative Fabric Shapes
A stain that refuses to disappear can become part of the design. Cut circles, leaves, arches, stars, or abstract blobs from durable upholstery fabric or another flat-weave rug remnant. Arrange several patches across the rug so the repair looks decorative rather than desperate.
Turn the edges under when possible and attach each shape with strong thread or flexible fabric adhesive. A blanket stitch in contrasting thread adds a handmade finish. For a child’s room, try clouds, flowers, planets, or colorful geometric shapes.
For more serious damage, carpet-patching techniques generally use a matching donor piece and specialized adhesive. This Old House estimates that a basic carpet patch can be completed with a patch kit and a few simple tools, although valuable rugs should be handled by an experienced restorer.
Estimated cost: $0–$20
Estimated time: One to two hours
9. Join Several Small Rugs Into One Large Rug
Large area rugs can be expensive, but small flat-weave rugs and runners are frequently discounted. Buy several coordinating pieces, arrange them into a larger rectangle, and join their touching edges from the back using strong upholstery thread, carpet tape, or another rug-compatible joining method.
HGTV recommends combining small coordinating rugs with whip stitches, allowing DIYers to create custom sizes and unusual shapes without purchasing one oversized rug.
For a patchwork appearance, mix related patterns in a consistent color palette. For a seamless look, use identical rugs and align their stripes or motifs before joining them. Add a single nonslip pad beneath the finished piece to help the sections behave like one rug.
Estimated cost: $20–$80
Estimated time: Two to four hours
10. Deep-Clean and Revive the Original Colors
Not every rug needs paint. Sometimes it simply needs several years of dust, spills, and questionable snack crumbs removed.
Check the care label before adding water. Vacuum both sides, spot-treat stains, and use a cleaning method appropriate for the fiber. Martha Stewart’s woven-rug guidance recommends mild dish soap, warm water, gentle brushing in the direction of the weave, careful rinsing, and complete air-drying for suitable washable rugs. Direct sunlight may fade some materials, so choose a ventilated shaded location.
Avoid soaking jute, antique, delicate, glued, or color-unstable rugs. Professional cleaning is safer when the label says dry-clean only or when you cannot confidently identify the materials.
Estimated cost: $3–$20
Estimated time: One to three hours, plus drying
11. Turn a Plain Rug Into Abstract Art
Freehand painting is ideal for anyone who believes rulers are overly controlling. Sketch loose arches, brushstrokes, imperfect circles, squiggles, checkerboard sections, or organic shapes with fabric paint.
Begin with the largest pale shapes, let them dry, and layer smaller or darker details on top. Limit yourself to three or four colors so the result looks like modern art rather than a paint-store accident.
Use a dry-brush effect for a faded vintage appearance or dilute compatible craft paint slightly for a watercolor-style finish. An inexpensive IKEA woven rug was transformed into art using watered-down acrylic craft paint and paint markers, demonstrating how a very basic floor covering can become a decorative focal point.
Estimated cost: $5–$20
Estimated time: Two to five hours
12. Layer, Rotate, and Restyle What You Already Own
The cheapest makeover requires no permanent changes. Place a small patterned rug over a larger neutral one, rotate a rectangular rug ninety degrees, move a bedroom rug into the living room, or use two runners side by side beneath a dining table.
Layering works especially well when the bottom rug is natural jute or sisal and the upper rug has stronger color. Leave enough of the lower layer visible to create a deliberate frame.
Rotation can also distribute wear and sun exposure more evenly. Rug-care professionals recommend periodic rotation because it can help extend a rug’s useful life and reveal stains or damage that might otherwise remain hidden under furniture.
Estimated cost: $0
Estimated time: Ten to thirty minutes
How to Make a DIY Rug Makeover Last Longer
Allow painted rugs to cure fully before placing furniture on them. Dry-to-the-touch paint is not necessarily ready for shoes, chair legs, or an enthusiastic dog performing a victory lap.
Vacuum customized rugs gently and avoid aggressive beater bars when they could damage paint, fringe, tassels, or delicate fibers. Use upholstery attachments around decorative edges. Blot spills rather than scrubbing them, and test every cleaning product in a hidden location.
Place a suitable nonslip rug pad underneath the finished piece. Besides reducing movement, a pad can add cushioning and limit friction between the rug and floor. Trim the pad so it remains slightly smaller than the rug on every side.
When decorating, choose the makeover based on traffic. Painted details may last longer in a bedroom or home office than in a muddy entryway. Outdoor rugs need weather-resistant paint, while washable kitchen runners benefit from dye, stitching, or removable decoration instead of thick surface coatings.
Real-World Experiences From Budget Rug Makeover Projects
After experimenting with inexpensive rug updates, one lesson becomes obvious: preparation is responsible for most of the final result. The exciting part is choosing colors and imagining compliments from visitors. The successful part is vacuuming, measuring, testing, and waiting for things to dry. Naturally, the successful part is less glamorous.
On one small flat-weave cotton rug, a simple painted border produced the best improvement for the least effort. The rug originally looked washed out and undersized in front of a console table. A four-inch charcoal border gave it stronger visual weight and made the center appear brighter. The entire makeover used only part of a paint sample. The most important step was pressing the tape repeatedly into the weave. Where the tape was loose, the line became slightly fuzzy. Fortunately, a small artist’s brush turned those fuzzy sections into clean edges.
A stencil project required more patience. The first instinct was to load the foam brush heavily so the color would appear solid in one pass. That created paint bleed under the stencil and a texture similar to dried frosting. The better technique was to dab off most of the paint first, then build the color gradually. Moving between different areas while previous sections dried also prevented smudging. The finished design was not perfectly machine-made, but the tiny variations made it look hand-printed rather than defective.
Dyeing brought a different challenge: predicting color. A beige cotton runner dipped into dark green dye initially emerged looking almost black. After rinsing and drying, it softened into a deep olive shade. The existing beige fibers gave the green a warmer appearance than the color shown on the dye package. That experience made a hidden swatch test feel less like an optional suggestion and more like a peace treaty between the project and the floor.
Adding tassels was the easiest transformation to personalize. Store-bought tassel trim looked convenient, but individual handmade tassels created a more substantial finish. Wrapping yarn around a piece of cardboard kept them approximately equal in length. “Approximately” did plenty of work in that sentence. Once attached, slightly uneven tassels looked relaxed and intentional.
The most economical makeover involved layering two rugs already in the house. A narrow vintage-style runner seemed too small beside a bed, while a plain woven rug in another room felt boring. Placing the runner over the woven rug solved both problems. The bottom layer supplied size and texture; the top supplied pattern. No glue, paint, or sewing was required, and the arrangement could be changed later.
Cleaning also delivered one of the most dramatic before-and-after results. A supposedly faded rug was actually covered in a uniform layer of dust. Vacuuming the front and back, gently cleaning approved areas, and lifting the pile restored enough color that painting became unnecessary. The experience was a useful reminder that a makeover should begin with diagnosis. Do not perform cosmetic surgery when the patient merely needs a shower.
Budget projects are most satisfying when expectations remain realistic. A $12 rug will not become a hand-knotted heirloom because you added three tassels and a stencil. It can, however, become a stylish, useful piece that fits your room better than it did before. Small imperfections usually disappear once the rug sits beneath furniture and joins the rest of the decor.
The safest approach is to start with a rug you would not be heartbroken to lose. Test one method, use leftover materials when possible, and stop before the design becomes too busy. Many rug makeovers go wrong not because they lack decoration, but because the enthusiastic decorator does not know when the rug is finished. Sometimes one border is enough. The rug does not always need stripes, tassels, pom-poms, stars, inspirational words, and a portrait of the family cat.
Conclusion
A good rug makeover does not require expensive equipment or advanced crafting skills. It requires a practical plan, compatible materials, and enough patience to let each layer dry before you step on it.
Start with the simplest solution. Deep-clean a dull rug, rotate it, or layer it with another piece. If it still needs personality, add a painted border, stencil, dye treatment, fabric patch, or decorative fringe. These easy budget rug makeover ideas can hide wear, introduce color, and help an ordinary rug feel custom-made.
Most importantly, treat valuable, antique, wool, silk, and hand-knotted rugs differently from inexpensive DIY candidates. When the rug has financial or sentimental value, professional cleaning or restoration is usually a smarter bargain than an irreversible experiment.
Note: Costs are approximate and vary by rug size, materials, and local prices. Always follow the manufacturer’s care label, work in a ventilated area, protect the floor beneath the rug, and test cleaners, paints, adhesives, and dyes on an inconspicuous section. This article synthesizes practical methods and safety guidance from reputable home-improvement, decorating, dye-manufacturer, cleaning-industry, and consumer-testing resources, including HGTV, Better Homes & Gardens, Apartment Therapy, Home Depot, Rit Dye, Martha Stewart, the Carpet and Rug Institute, Consumer Reports, This Old House, and Bob Vila.