Kitchen cabinets are mysterious little caves. One minute they are holding plates, mugs, spices, and a perfectly reasonable number of food containers. The next minute, they are hiding three lidless containers, a dusty waffle maker, and a bag of quinoa you bought during an unusually optimistic health phase. Learning how to organize kitchen cabinets is not about becoming a minimalist monk who owns one bowl and smiles at empty shelves. It is about creating a kitchen that works with your real life.
The best kitchen cabinet organization system is simple: keep what you use, group similar items together, store things where you need them, and make every item easy to see and grab. When cabinets are organized well, cooking feels faster, unloading the dishwasher becomes less annoying, and you stop buying duplicate cinnamon because the first jar was hiding behind the taco shells.
This step-by-step guide will walk you through practical, budget-friendly ways to organize kitchen cabinets, from decluttering and cleaning to choosing smart cabinet organizers, creating kitchen zones, arranging cookware, taming food storage containers, and keeping the whole system tidy after the big organizing day.
Why Kitchen Cabinet Organization Matters
A well-organized kitchen saves time, money, and patience. When you can see what you own, you waste less food, avoid buying duplicates, and move through daily routines with fewer tiny frustrations. Good cabinet organization also protects your dishes, cookware, pantry staples, and cleaning supplies from damage, spills, and the dreaded “cabinet avalanche.”
More importantly, organized cabinets make your kitchen easier to use. The goal is not perfection. The goal is function. A cabinet full of matching containers may look beautiful online, but if you have to move seven things to reach the rice, the system has failed. Your cabinets should support how you cook, clean, snack, meal prep, entertain, and survive Tuesday dinner.
Step 1: Empty Every Cabinet Before You Organize
Yes, every cabinet. This is the step people want to skip, which is why many “quick organizing projects” turn into moving clutter from one shelf to another. Start with one section at a time if your kitchen is large. Empty the upper cabinets, lower cabinets, pantry cabinets, or one problem cabinet first. Place everything on the counter or table so you can see the full inventory.
This part may look worse before it looks better. That is normal. Your kitchen may briefly resemble a yard sale hosted by a very confused chef. Do not panic. Emptying the cabinets gives you a clear view of what you own, what you use, and what has been silently taking up space since the last presidential administration.
Sort Items Into Clear Categories
Create basic piles: keep, donate, recycle, toss, and relocate. The “relocate” pile is for items that belong somewhere else, such as batteries, school papers, tools, or mystery cables that somehow migrated into the kitchen. Be honest with specialty gadgets. If you have not used the avocado slicer, spiralizer, or novelty popcorn bowl in years, it may be time to free the shelf.
Step 2: Declutter Before Buying Organizers
Buying cabinet organizers before decluttering is like buying luggage before deciding where you are going. First, reduce the volume. Toss expired food, stale spices, chipped dishes, cracked mugs, warped plastic containers, and anything with a missing partner. Match food storage containers with their lids. If a lid has no container or a container has no lid, thank it for its service and let it go.
Next, evaluate duplicates. Most kitchens need a few mixing bowls, not twelve. You may need several mugs, but probably not enough to hydrate a marching band. Keep the items that fit your household, cooking style, and storage space. Donate usable extras, especially duplicate utensils, serving pieces, small appliances, and dishes you no longer love.
Ask Three Simple Questions
When you are unsure whether to keep something, ask: Do I use this? Do I like this? Would I buy this again today? If the answer is no to all three, it is probably clutter. If the item is seasonal or sentimental, store it in a harder-to-reach cabinet or outside the kitchen so your daily shelves stay practical.
Step 3: Clean the Cabinets While They Are Empty
Once the cabinets are empty, wipe shelves, doors, handles, and corners. Use a vacuum attachment or dry cloth first to remove crumbs, then wipe with a gentle cleaner suitable for your cabinet finish. Let shelves dry completely before putting items back. This is also a good time to add shelf liner if you want extra protection under oils, spices, cleaning supplies, or heavy cookware.
Check for sticky spots, loose hinges, damaged shelves, or signs of moisture under the sink. A clean cabinet is not just nicer to look at; it helps prevent odors, pests, and spills from becoming long-term residents.
Step 4: Measure Cabinets Before Choosing Storage Tools
Before buying bins, risers, pull-out shelves, turntables, or drawer dividers, measure the cabinet width, depth, and height. Also check hinges, door clearance, plumbing, and shelf adjustability. A beautiful organizer that does not fit is just clutter with a receipt.
Write down measurements for tricky areas such as corner cabinets, deep lower cabinets, narrow cabinets, and under-sink spaces. When shopping, compare product dimensions carefully. For renters or budget-conscious households, start with low-cost tools such as shelf risers, clear bins, tension rods, adhesive hooks, and vertical dividers before investing in custom pull-outs.
Step 5: Create Kitchen Zones Based on Real Routines
The smartest way to organize kitchen cabinets is by zones. A zone is simply a storage area based on activity. Instead of asking, “Where can this fit?” ask, “Where do I use this?” That one question can transform a chaotic kitchen into a smooth little cooking machine.
Common Kitchen Cabinet Zones
Create a cooking zone near the stove for pots, pans, oils, frequently used spices, and cooking utensils. Create a prep zone near the main counter for mixing bowls, cutting boards, measuring cups, and knives. Create a serving zone for plates, bowls, glasses, and mugs near the dishwasher or dining area. Create a baking zone for flour, sugar, baking sheets, muffin tins, and decorating tools. Create a cleaning zone under or near the sink for dish soap, sponges, trash bags, and safe household cleaners.
You can also make a coffee or tea station near your coffee maker with mugs, filters, sweeteners, tea bags, and travel cups. This is a tiny change with a big morning payoff. Nobody should have to hunt for a coffee mug before caffeine. That is how villain origin stories begin.
Step 6: Put Daily Items in the Easiest Spots
Prime cabinet space should go to items you use every day. Store everyday plates, bowls, glasses, and mugs on easy-to-reach shelves. Keep heavy cookware in lower cabinets where it is safer to lift. Store occasional items, holiday dishes, oversized platters, and rarely used appliances on higher shelves or in less convenient cabinets.
Think about the people using the kitchen. If children help set the table, place kid-safe dishes in a lower cabinet or drawer. If someone in the home has limited mobility, prioritize pull-out shelves, lightweight bins, and waist-height storage. Kitchen cabinet organization should make the room easier for the household, not just prettier for guests.
Step 7: Organize Dishes and Glassware
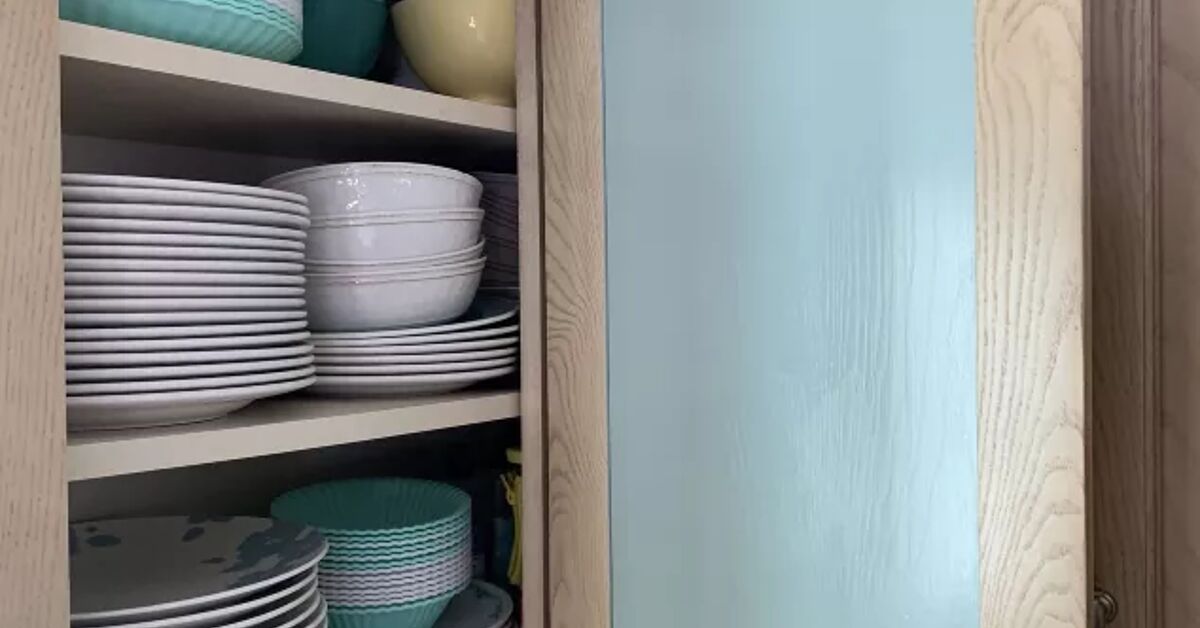
Group dishes by type: dinner plates with dinner plates, bowls with bowls, mugs with mugs, and glassware with glassware. Stack only as high as you can safely lift. If a stack of plates makes you hold your breath when you pull one out, it is too tall.
Shelf risers can double vertical storage space by creating a second level for small plates, bowls, or mugs. Plate racks can keep dishes upright and easier to grab. For glass-front cabinets, keep the most attractive and matching pieces in view, while less coordinated items can live behind solid doors. This is not deception; it is interior design diplomacy.
Step 8: Organize Pots, Pans, and Lids
Pots and pans often cause the loudest cabinet chaos. Store them near the stove if possible. Nest pans by size, but avoid stacking so many that you have to excavate the cabinet every time you scramble eggs. Use pan protectors, soft cloths, or paper towels between nonstick pans to prevent scratches.
Lids are easier to manage when stored vertically. Use a lid rack, tension rod, file organizer, or vertical divider. Baking sheets, cutting boards, cooling racks, muffin tins, and serving trays also work well in vertical dividers because you can slide out one item without disturbing the entire cabinet.
Consider Pull-Out Shelves for Deep Cabinets
Deep lower cabinets can turn into black holes. Pull-out shelves or sliding baskets make items at the back visible and reachable. If built-in pull-outs are not in the budget, use large bins as removable drawers. Label the front of each bin so you know what belongs inside.
Step 9: Tame Food Storage Containers
Food storage containers deserve their own emotional support group. Start by matching every base with a lid. Keep only the sizes you actually use. Nest containers by shape and size, then store lids vertically in a divider, bin, or wall file mounted inside a cabinet door.
Square and rectangular containers usually store more efficiently than round ones. Clear containers help you see what you have, but do not feel pressured to replace everything at once. The best system is one you can maintain. A cabinet of mixed containers that are neatly nested beats a pricey matching set that turns into plastic confetti after one week.
Step 10: Arrange Pantry Cabinets by Category
If you store food in cabinets, organize pantry items by category. Keep breakfast foods together, baking ingredients together, snacks together, canned goods together, grains and pasta together, and oils or vinegars together. Use clear bins or baskets to prevent small packages from spreading across the shelf like they own the place.
Decanting dry goods into clear containers can make shelves look cleaner and help you see inventory quickly. However, only decant if you will keep up with it. Always label containers with the food name and expiration date or cooking instructions when needed. Nothing humbles a home cook faster than staring at three unlabeled white powders and playing “flour, sugar, or pancake mix?”
Use Turntables for Corners and Bottles
Lazy Susans are excellent for oils, vinegars, sauces, condiments, vitamins, sprinkles, and awkward corner cabinets. They bring items from the back to the front with one spin. Use a tray under oils and sticky bottles to catch drips and make cleanup easier.
Step 11: Store Spices the Smart Way
Spices should be easy to see and stored away from heat, moisture, and direct sunlight. Avoid keeping delicate spices right above the stove if that area gets hot. A drawer with labeled jar tops, a tiered spice shelf, a pull-out spice rack, or a narrow cabinet near the cooking zone can all work well.
Arrange spices alphabetically, by cuisine, or by frequency of use. The method matters less than consistency. If taco seasoning, cumin, chili powder, and paprika are used together often, keep them near one another. Replace old spices when their aroma fades. They may not become dangerous overnight, but they can become flavorless little jars of disappointment.
Step 12: Use Cabinet Doors and Vertical Space
The backs of cabinet doors are valuable storage real estate. Add lightweight racks, hooks, or adhesive organizers for measuring spoons, pot lids, cutting boards, wraps, cleaning gloves, or small spice jars. Make sure door organizers do not crash into shelves when the cabinet closes.
Vertical space also matters. Use shelf risers for plates, cups, cans, and pantry items. Use under-shelf baskets for lightweight items such as napkins, dish towels, or wraps. Use hooks under shelves for mugs if the cabinet allows it. The goal is to avoid wasting air space while keeping everything easy to remove.
Step 13: Organize the Under-Sink Cabinet Safely
The under-sink cabinet is usually awkward because of plumbing, pipes, and limited light. Start by removing everything and checking for leaks or moisture. Store dish soap, dishwasher pods, trash bags, sponges, gloves, and basic cleaning supplies in bins or caddies. A portable caddy is especially useful because you can carry supplies to another room.
Avoid overstuffing this area. Keep hazardous cleaners, sharp tools, or anything unsafe away from children and pets. If you store cleaning products here, use child-resistant locks when needed and keep labels visible. Add a small battery-powered light if the space is dark.
Step 14: Label Without Going Overboard
Labels are not just for people who own label makers and alphabetize their feelings. Labels help everyone in the household know where items belong. They are especially useful on pantry bins, baking containers, snack baskets, under-sink caddies, and high shelves.
Keep labels simple: snacks, breakfast, pasta, baking, lids, lunch containers, cleaning, trash bags. If you want a polished look, use matching labels. If you want a quick solution, painter’s tape and a marker work just fine. The cabinet does not care whether your label is cute. It only cares whether the granola bars stop invading the pasta shelf.
Step 15: Avoid Common Cabinet Organization Mistakes
One common mistake is organizing by appearance instead of function. Matching jars and perfect rows are lovely, but if the system slows you down, it will not last. Another mistake is keeping too many rarely used gadgets in prime cabinet space. The turkey platter, fondue set, and giant punch bowl do not need front-row seats unless you are running a very festive restaurant.
Also avoid buying too many organizers. Bins, baskets, and dividers are helpful only when they solve a specific problem. Too many storage products can shrink usable space. Finally, do not ignore shelf height. Many cabinets have adjustable shelves. Moving a shelf up or down by a few inches can make room for appliances, pitchers, cereal containers, or stacked bowls.
Step 16: Make the System Easy to Maintain
Kitchen cabinet organization is not a one-time event. It is a system that needs light maintenance. Spend five minutes each week returning items to their zones, tossing expired food, and straightening bins. Do a deeper reset every few months, especially before holidays, school seasons, or big grocery trips.
Use the “one in, one out” rule for mugs, gadgets, and food storage containers. When a new item comes in, remove an old one. Keep a small donation box nearby during big cleanouts. If the system becomes messy again, do not blame yourself. Study the mess. It is giving you feedback. If everyone keeps leaving lunch containers on the counter, maybe the container cabinet is too hard to access. If snacks keep migrating, maybe the snack zone is too small.
Budget-Friendly Kitchen Cabinet Organization Ideas
You do not need a custom kitchen to have organized cabinets. Start with inexpensive solutions. Use clear shoe boxes or small bins for packets and snacks. Repurpose a magazine holder for cutting boards or foil boxes. Use a baking sheet as a tray under oils. Add a tension rod to stand lids upright. Use command hooks for measuring spoons or lightweight tools. Add shelf risers to double space for dishes or canned goods.
For a mid-range upgrade, try pull-out drawers, tiered spice racks, vertical bakeware dividers, lazy Susans, door-mounted racks, and expandable drawer dividers. For a bigger renovation, consider built-in pull-outs, toe-kick drawers, appliance garages, custom pantry cabinets, and deep drawers for cookware.
Small Kitchen Cabinet Organization Tips
Small kitchens require ruthless prioritizing. Keep daily items in the kitchen and store occasional items elsewhere. Use walls, cabinet sides, magnetic strips, hooks, and open shelves when cabinet space is limited. Choose stackable dishes, nesting bowls, and compact appliances. Avoid bulk buying unless you genuinely have storage space.
In a small kitchen, every item should earn its address. If something is used once a year, it does not need to live next to your dinner plates. Store it in a closet, basement, garage shelf, or high cabinet. Your everyday kitchen should serve everyday life.
Personal Experience: What Actually Works in Real Cabinets
The most useful lesson from organizing kitchen cabinets is that the “perfect” layout is usually not the one you imagine at the beginning. It is the one your habits reveal after a few days of cooking, cleaning, and unloading the dishwasher. In my experience, the best cabinet systems start with a practical reset, then improve through small adjustments. The first layout is a draft, not a final exam.
For example, placing plates near the dishwasher sounds obvious, but it can completely change the rhythm of a kitchen. When dishes are stored within one or two steps of the dishwasher, unloading becomes faster and less irritating. The same idea works for mugs near the coffee maker, baking supplies near the mixer, and pots near the stove. These tiny decisions remove friction from daily routines.
Another experience-based tip: deep cabinets need containers that act like drawers. Without bins or pull-outs, the back of a deep cabinet becomes a storage swamp. You put a bag of rice back there in March and discover it in November with the shock of an archaeologist. Large labeled bins solve this because you can pull the whole category forward. One bin for baking, one for snacks, one for pasta, one for extra condimentssimple, visible, and realistic.
Food storage containers are usually the biggest test of whether a system can survive real life. The trick is not just matching lids on organizing day. The trick is making it easy to put them back when you are tired. Lids stored vertically in one small bin work better than lids stacked flat under containers. Containers nested by shape work better than a giant pile of plastic chaos. Keeping fewer containers also helps. Most households use the same favorite sizes again and again.
Spices are another area where practical beats pretty. Alphabetical order is excellent if you naturally maintain it. If not, group spices by use. Keep everyday seasonings in front. Keep baking spices together. Keep grilling rubs together. If you cook a lot of Mexican, Italian, Indian, or Asian-inspired dishes, grouping spices by cuisine can be faster than alphabetizing. The cabinet should match the cook, not the other way around.
The biggest surprise is how much maintenance matters. A kitchen can be beautifully organized on Sunday and mildly rebellious by Friday. That does not mean the system failed. It means kitchens are active spaces. A five-minute weekly reset is usually enough: straighten shelves, return lost items, toss empty boxes, check produce or pantry overflow, and wipe sticky spots. Small resets prevent dramatic cabinet emergencies.
Finally, the best kitchen cabinet organization strategy is one the whole household understands. Labels help. Clear bins help. Simple categories help. But the real secret is making the right action the easiest action. If putting something away requires moving five objects, nobody will do it for long. If everything has an obvious home, your cabinets can stay organized without turning you into the kitchen police.
Conclusion
Learning how to organize kitchen cabinets is really about designing a kitchen that respects your time, space, and habits. Start by emptying and decluttering, then clean, measure, group items by category, and build practical zones. Keep everyday items easy to reach, use vertical storage wisely, store lids and trays upright, add bins or pull-outs for deep cabinets, and label categories so the system is easy to maintain.
You do not need a magazine-perfect kitchen. You need cabinets that open without drama, shelves that make sense, and storage that helps you cook instead of testing your patience. With a little planning and a few smart tools, your cabinets can go from “please do not open that” to “look at this beautiful little system.” And yes, you may still keep one weird mug. Organized does not have to mean boring.