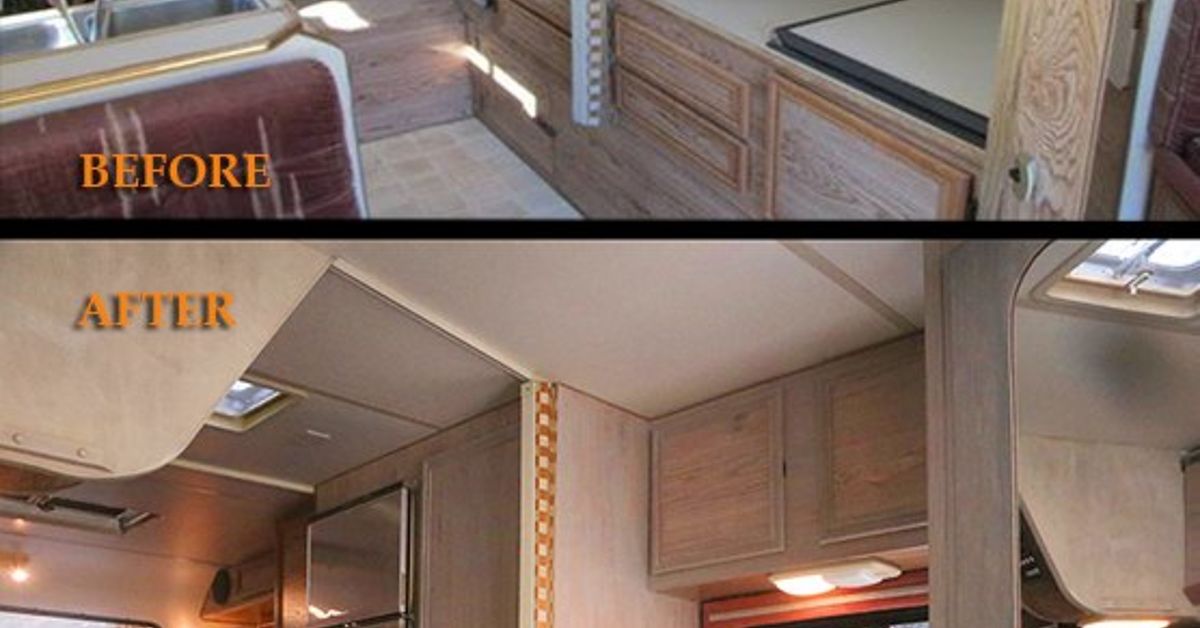
There is a special kind of optimism required to buy an old camper. You look past the peeling faux-wood paneling, the floral curtains that appear to have survived three presidential administrations, and the mysterious cabinet smell that no candle can fully explain. Somewhere beneath the beige upholstery and questionable laminate, you see possibility.
That is the magic of a great camper before and after. It is not just a decorating project. It is a tiny-home rescue mission on wheels. A dated travel trailer can become a bright weekend retreat. A neglected motorhome can turn into a practical family base camp. A vintage camper can regain its personality without pretending it belongs in a luxury hotel lobby.
The best camper makeovers balance two very different goals: making the interior look amazing and making sure it still survives potholes, sharp turns, rainy campsites, and the occasional toddler with a juice box. That is where the madness beginsand where the fun really starts.
Why Camper Before-and-Afters Are So Addictive
A camper renovation is satisfying because the transformation is immediate. In a traditional house, painting one wall may feel like a modest improvement. In a camper, painting the walls, replacing the curtains, and changing the cushions can make the whole interior feel like a different vehicle.
Small spaces are dramatic by nature. Every cabinet door, fabric choice, light fixture, and storage bin has a bigger visual impact because there is nowhere for bad decisions to hide. A gloomy brown dinette can make a camper feel like a waiting room. Replace it with warm wood tones, washable cushions, and better lighting, and suddenly it feels like a tiny cabin near a lake.
That is why camper makeovers often inspire such strong reactions. The “before” is familiar: dark cabinets, bulky furniture, worn flooring, faded valances, and a bathroom that looks like it was designed during an intense national shortage of color. The “after” is proof that even a cramped RV can feel personal, functional, and welcoming.
Before You Remodel: Inspect the Camper, Not Just the Curtains
The first rule of camper renovation is simple: do not use throw pillows to distract from water damage. A beautiful remodel built on a leaking roof is like putting a tuxedo on a raccoon. It may look impressive for a minute, but trouble is still coming.
Start With the Not-So-Fun Checklist
Before ordering peel-and-stick tile or obsessing over cabinet paint colors, inspect the fundamentals. Look carefully around windows, roof seams, vents, skylights, slide-outs, plumbing connections, and exterior corners. Soft spots in the floor, stained walls, bubbling wallpaper, musty odors, or warped wood can signal moisture problems that need attention before decorating begins.
Check appliances, water lines, tires, battery condition, lights, brakes, outlets, and the camper’s heating and cooling systems. A travel trailer may look charming in photos, but charm does not keep the refrigerator cold or the roof dry during a thunderstorm.
Take measurements twice. Measure aisle widths, cabinet depths, ceiling height, door openings, window locations, and the space required for slide-outs. That stylish sofa may be perfect online, but it becomes considerably less perfect when it cannot fit through the camper door.
Respect Weight Like It Is a Very Serious Camping Buddy
Campers are not houses with license plates. Every added countertop, battery, chair, appliance, and storage bin affects cargo capacity and weight distribution. Heavy materials can make an RV harder to tow, harder to handle, and less practical on the road.
When choosing upgrades, favor lightweight materials whenever possible. Vinyl plank flooring, thin plywood panels, lightweight furniture, compact appliances, and fabric storage systems often make more sense than solid stone, oversized furniture, or bulky household fixtures. A camper makeover should feel upgraded, not like it swallowed a kitchen showroom.
The Camper Before-and-After Formula That Actually Works
A successful RV renovation usually follows a simple order: repair, clean, simplify, brighten, organize, and personalize. Skipping straight to “personalize” is how people end up installing decorative wallpaper over a wall that is quietly turning into oatmeal.
Step 1: Remove What Is Making the Space Feel Heavy
Many older campers feel smaller than they really are because they are packed with visual clutter. Dark valances, oversized curtains, busy upholstery, dated wallpaper borders, and bulky furniture can make even a roomy trailer feel cramped.
Start by removing what does not serve a purpose. That might include worn carpeting, unnecessary valances, broken cabinet hardware, damaged blinds, or a bulky dinette that nobody actually enjoys using. The goal is not to strip the camper until it resembles an empty shipping container. The goal is to make room for better choices.
Step 2: Use Color to Create Breathing Room
Light paint colors can make a camper interior feel larger, calmer, and cleaner. Soft whites, warm cream tones, pale gray, muted sage, dusty blue, and light natural wood shades tend to work well in small RV spaces. They reflect available light and help reduce the “I am living inside a brown suitcase” effect.
That does not mean every camper needs to become an all-white farmhouse on wheels. Accent walls, painted lower cabinets, patterned cushions, colored doors, and textured fabrics can add personality without overwhelming the room. A good rule is to use a calm base with a few memorable details.
Step 3: Update Cabinets Without Rebuilding the Entire Universe
Cabinets dominate most camper interiors, so refreshing them often creates the biggest visual payoff. Painting cabinet doors, replacing pulls, updating hinges, or adding simple trim can completely change the look of a galley or sleeping area.
For a modern camper makeover, consider cream or soft-gray upper cabinets paired with darker lower cabinets. For a vintage trailer restoration, warm wood tones, retro hardware, and period-inspired colors can preserve character while still making the space feel clean and intentional.
Do not forget that camper cabinets move with the vehicle. Secure hardware properly, use catches that stay closed during travel, and avoid hanging heavy items on lightweight cabinet doors. The road has a sense of humor, and it loves launching poorly secured mugs at 45 miles per hour.
Five Camper Makeover Ideas That Deliver Big Results
1. The Dark Dinette Becomes a Cozy Lounge
One of the most dramatic camper before-and-afters begins with the dinette. Old dinettes often feature stiff cushions, dark upholstery, and enough brown vinyl to make a 1987 bowling alley jealous.
A better version might include new high-density foam cushions, washable covers, a smaller table, integrated storage benches, and a wall-mounted reading light. The result is still a dining area, but it can also become a work station, game table, nap zone, or rainy-day command center.
2. The Tiny Galley Gets a Big Personality
A camper kitchen does not need a massive renovation to feel fresh. Replacing a worn countertop, repainting cabinets, adding a compact backsplash, upgrading the faucet, and installing under-cabinet lighting can make a small galley feel far more useful.
Choose finishes that are easy to clean and durable enough for travel. A beautiful surface is less impressive when it chips after one weekend on a gravel road. Practical finishes, low-profile storage, and fold-down prep space are often better investments than flashy upgrades that only look good in listing photos.
3. The Bathroom Stops Feeling Like a Plastic Time Capsule
Camper bathrooms can be challenging because they are compact, humid, and often shaped like they were designed by someone who had never met a human elbow. Still, small updates can make a huge difference.
Try a new faucet, updated mirror, washable wallpaper, fresh caulk, modern cabinet pulls, a better shower curtain, or moisture-resistant flooring. Keep ventilation in mind, especially in smaller trailers where showers, wet towels, and rainy-day shoes can create a surprising amount of humidity.
4. The Sleeping Area Becomes a Real Retreat
A camper bedroom should not feel like a storage closet with blankets. Upgrade the mattress if possible, use layered bedding, install small reading lights, and add wall-mounted storage for books, phones, glasses, or travel essentials.
Blackout curtains or insulated window coverings can improve privacy and make sleeping more comfortable. Soft fabrics, warm lighting, and a compact shelf for nighttime essentials can turn a plain bunk or corner bed into a place that actually feels restful.
5. The Exterior Gets a Second First Impression
The outside of a camper matters just as much as the interior. A freshly cleaned exterior, updated decals, repaired seals, new awning fabric, improved outdoor lighting, or a simple color refresh can make an old RV look cared for again.
Exterior work should always prioritize sealing and weather protection before style. Paint is nice. Dry walls are nicer. A vintage camper with repaired seams, polished trim, and a clean exterior often looks more impressive than one covered in trendy decals but quietly collecting rainwater.
Small-Space Storage: The Secret Ingredient in Every Great RV Renovation
The best camper interiors are not necessarily the ones with the most decorations. They are the ones where everything has a home. Storage is the quiet hero of every functional travel trailer remodel.
Use vertical space whenever possible. Add hooks near the door for jackets and bags. Use baskets inside cabinets. Install tension rods under sinks for cleaning supplies. Add drawer dividers for utensils. Use collapsible kitchen tools, nesting bowls, stackable bins, and soft storage cubes in closets.
Think about how you actually camp. A family may need accessible snack storage and a place for wet shoes. A couple working remotely may need charging stations and laptop storage. A weekend adventurer may need room for hiking gear, fishing equipment, or dog supplies. The perfect camper layout is not the one with the most Instagram likes. It is the one that makes daily life easier.
Common Camper Renovation Mistakes to Avoid
Camper madness is fun, but it can become expensive when enthusiasm outruns planning. The most common mistake is starting cosmetic work before resolving water, electrical, plumbing, or structural issues. Another is choosing heavy residential materials that reduce available cargo capacity.
People also underestimate how much movement affects a camper. Household furniture, glass décor, stone surfaces, loose shelves, and fragile accessories may not behave well when the entire room is traveling down a highway. Secure items carefully, use latches, and imagine every shelf experiencing a minor earthquake.
A third mistake is overbuilding. A camper does not need every design trend squeezed into 200 square feet. Too many patterns, too many colors, too many cabinets, and too many accessories can make the space feel smaller. Leave some visual breathing room. A camper should feel adventurous, not like a home décor store exploded during a windstorm.
Camper Madness Experiences: What You Learn After the First Trip
The first night in a renovated camper is when the project stops being a makeover and becomes a real experience. Before that moment, everything is theory. You have chosen the paint, tightened the cabinet pulls, organized the pantry, and photographed every square inch from the most flattering angle. Then you pull into a campground, make dinner, turn on the lights, and discover what actually works.
You may realize the new shelf is beautiful but blocks the window latch. You may discover that the kitchen drawer opens perfectly when parked level and becomes an enthusiastic missile when the camper is tilted slightly toward a lake. You may learn that your cute woven storage baskets are excellent until your dog decides they are chew toys with handles.
That is part of the charm. A camper renovation is not finished when the paint dries. It is finished in stages, after weekends on the road, rainy mornings, hurried breakfasts, muddy shoes, late-night snack runs, and the first time you try to find a flashlight in total darkness.
Many camper owners say the best design ideas appear after travel begins. A hook gets added near the entry because everyone keeps dropping jackets on the bed. A charging station appears because phones always end up tangled on the dinette. A shoe tray becomes essential after one wet hike. A fold-down table turns out to be more useful than the expensive piece of décor that looked great in photos but had no actual job.
There is also a strange pride that comes from surviving the awkward moments. Maybe you installed flooring for the first time. Maybe you learned how to reupholster cushions without accidentally stapling the fabric backward. Maybe you spent an entire Saturday trying to make one cabinet door close properly, only to discover the camper was parked on uneven ground.
Those little frustrations become part of the story. Later, when someone steps inside and says, “Wow, this does not even look like the same camper,” you remember the dust, the paint splatters, the endless measuring, and the moment you thought a tiny bathroom vanity might defeat you emotionally.
The most memorable camper before-and-afters are not perfect. They are personal. They reflect the people who travel in them, the places they go, and the practical lessons learned along the way. A bright galley may remind someone of a rainy weekend in the mountains. A rebuilt dinette may become the place where kids play cards after a long hike. A repaired old trailer may turn into the family’s favorite escape from everyday routines.
That is what makes camper madness worth it. You are not just updating cabinets or changing flooring. You are creating a small, movable place where ordinary weekends can become stories worth repeating.
Final Thoughts
A camper makeover is proof that age, awkward layouts, and questionable wallpaper do not have to be the end of the story. With smart planning, lightweight materials, useful storage, and a little patience, an outdated RV can become a comfortable, road-ready retreat.
The best camper before-and-afters do more than look impressive. They make traveling easier, weekends more relaxing, and the road feel a little more like home. Just remember: fix the leaks first, measure everything twice, secure the cabinets, and never underestimate the emotional power of replacing old floral curtains.