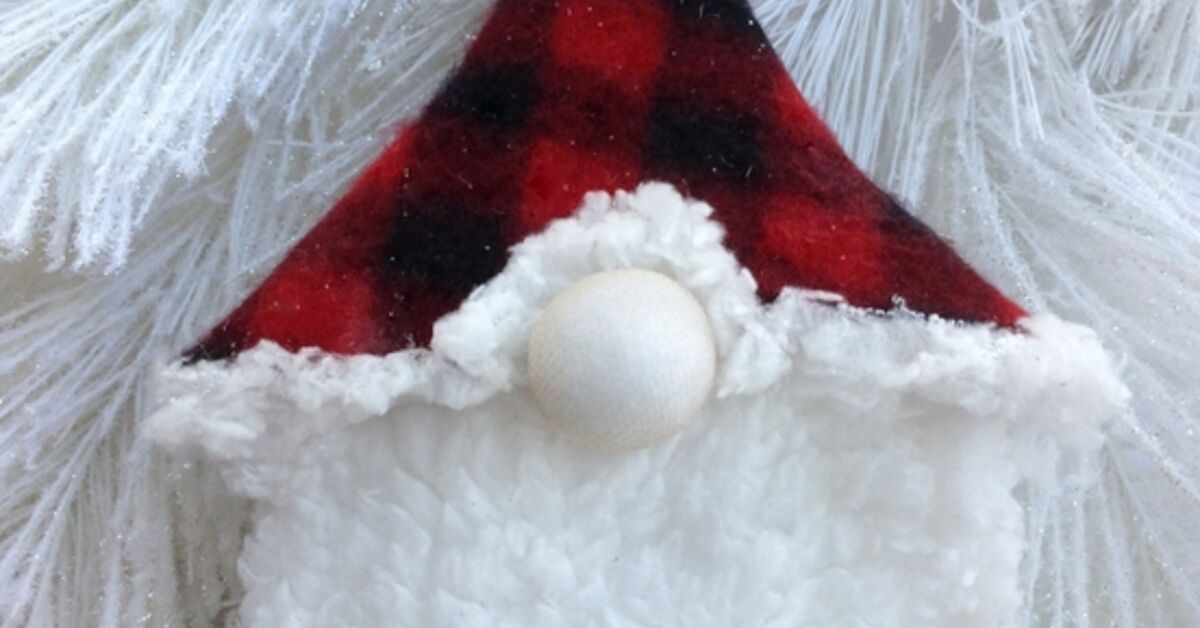
Some Christmas decorations look expensive. Some look handmade in the best possible way. And then there are dollar store gnome ornaments, which somehow manage to look cozy, charming, festive, and slightly mischievous while costing less than a fancy coffee. That is the magic of this Cheap Easy Dollar Store Gnome Christmas Tree Ornament DIY: it uses simple supplies, requires no sewing machine, and delivers a tiny bearded holiday character that looks like he knows where the cookies are hidden.
Christmas gnomes have become a holiday favorite because they fit almost every decorating style. Farmhouse tree? Add a plaid-hat gnome. Scandinavian-inspired Christmas? A red felt hat and soft white beard are perfect. Kids’ tree? Make the gnome’s hat bright green, add a pom-pom, and give him the personality of a cheerful little snow goblin. The best part is that you can make several ornaments in one sitting using affordable materials from the dollar store, craft drawer, or leftover gift-wrap stash.
This tutorial focuses on a no-sew, beginner-friendly method using felt, yarn or mop strands, a wooden bead, ribbon, and hot glue. It is flexible enough for adults, teens, craft parties, classroom projects with supervision, or a quiet night watching Christmas movies while pretending the glitter is not slowly taking over your house.
Why Dollar Store Gnome Ornaments Are Worth Making
Store-bought ornaments are lovely, but handmade ornaments carry personality. A dollar store gnome Christmas tree ornament feels warm because it is not perfectly factory-made. The beard might be a little wild. The hat might lean slightly to one side. The nose might be just a touch too big. Excellent. That is called character, and gnomes are basically built out of character.
This project is also budget-friendly. Many supplies come in multi-packs, so one bag of wood beads, one sheet of felt, and one bundle of yarn can make several ornaments. That makes this DIY especially useful for gift toppers, stocking stuffers, office ornament swaps, teacher gifts, craft fairs, or decorating a second tree without asking your wallet to perform holiday gymnastics.
Another advantage is customization. You can change the color palette, beard texture, hat shape, and embellishments without changing the basic construction. Want rustic? Use jute twine and buffalo check fabric. Want glam? Add metallic ribbon and tiny snowflake charms. Want silly? Give the gnome a giant pom-pom hat and let him live his best festive life.
Supplies You Need for a Cheap Easy Dollar Store Gnome Ornament
Before starting, gather everything on a flat, protected work surface. A piece of cardboard, parchment paper, or an old placemat works well. Hot glue has a talent for appearing exactly where you did not invite it.
Basic Materials
- Felt sheet, mini sock, baby mitten, or scrap fabric for the hat
- Yarn, cotton mop strands, faux fur, or macrame cord for the beard
- Small wooden bead, pom-pom, or pearl bead for the nose
- Ribbon, twine, or ornament cord for hanging
- Hot glue gun and glue sticks, preferably low-temperature
- Scissors
- Cardboard scrap, wood slice, shower curtain ring, or mini craft cone as the base
- Optional: tiny bells, buttons, snowflakes, pine sprigs, glitter, or mini pom-poms
Budget Tip
Use what you already have first. A lonely red sock, leftover yarn, a scrap of sweater sleeve, or ribbon from last year’s gift pile can become gnome treasure. Dollar store crafting works best when you treat the aisle like a suggestion, not a commandment.
Step-by-Step: How to Make a Dollar Store Gnome Christmas Tree Ornament
This version creates a flat-back ornament that hangs nicely on a Christmas tree. It is light, easy to store, and simple enough to make in batches.
Step 1: Create the Ornament Base
Start with a small cardboard triangle, wood slice, craft stick triangle, or shower curtain ring. If using cardboard, cut a triangle about 3 to 4 inches tall. This shape gives the gnome structure and keeps the hat from collapsing. If you want a round macrame-style gnome, use a small plastic or wooden ring instead.
The base does not need to be beautiful because most of it will be covered by the beard and hat. Think of it as the gnome’s skeleton, but in a cheerful, non-spooky Christmas way.
Step 2: Make the Beard
Cut several pieces of yarn, mop strands, faux fur, or cotton cord. For a fuller beard, use 12 to 20 strands, each about 4 to 6 inches long. Line them up across the lower half of the base and glue them in place. If using faux fur, cut from the back side with small snips so the fur stays fluffy instead of looking like it got into an argument with scissors.
After gluing, trim the beard into a rounded point or soft oval. Do not overthink it. Gnome beards are supposed to look a little woodland-wild. If your beard looks too neat, fluff it with your fingers. If it looks too wild, trim the bottom. If it looks like a tiny wizard, congratulations, you are still on theme.
Step 3: Cut and Shape the Hat
Cut a felt triangle large enough to cover the top half of the base and overlap the beard slightly. A good starting size is about 4 inches tall and 3 inches wide at the bottom. Fold the triangle slightly to create a cone-like hat, or keep it flat for a simple ornament style.
Glue the bottom edge of the hat across the top of the beard. The hat should cover the glued beard ends. This creates the classic gnome look: big hat, big beard, tiny nose, zero visible eyes. Gnomes are mysterious like that.
If using a sock, cut the toe section and slide or glue it over the top of the base. A fuzzy sock makes the ornament extra cozy. A patterned sock gives instant personality. A sock with tiny reindeer on it may cause uncontrollable crafting joy.
Step 4: Add the Nose
Glue a wooden bead or pom-pom right under the hat brim in the center of the beard. The nose is the gnome’s whole face, so placement matters. Too high and it disappears. Too low and your gnome looks surprised by gravity. Aim for the spot where the hat meets the beard.
Wood beads create a rustic look. Pink pom-poms feel playful. Pearl beads add a soft, snowy style. You can even paint the bead a light peach or rosy color before gluing it on.
Step 5: Add a Hanging Loop
Cut a 6- to 8-inch piece of ribbon, twine, or ornament cord. Fold it into a loop and glue it to the back top of the hat or base. For extra strength, glue a small scrap of felt over the loop ends on the back. This tiny patch acts like a seatbelt for your ornament. Safety first, even for bearded tree residents.
Step 6: Decorate the Hat
Now comes the fun part. Add a mini pom-pom to the tip of the hat, a bell to the brim, a button on the side, or a small snowflake in the center. Keep decorations lightweight so the ornament hangs properly.
For a farmhouse look, use plaid ribbon and jute. For a snowy look, add white trim and silver accents. For a candy-cane theme, use red-and-white felt or striped ribbon. For a woodland gnome, glue on a tiny pine sprig or faux berry. The gnome does not mind. He is very adaptable for someone with no visible eyes.
Design Variations for Different Christmas Tree Styles
Farmhouse Gnome Ornament
Use buffalo check fabric for the hat, jute twine for the hanger, and a natural wooden bead for the nose. Pair it with a white or gray yarn beard. This version looks great on trees with burlap ribbon, galvanized metal ornaments, wooden stars, and warm white lights.
Scandinavian-Inspired Gnome Ornament
Choose a simple red felt hat, white beard, and unfinished wood bead. Keep embellishments minimal. This style works beautifully with neutral Christmas decor, wood garlands, paper stars, and soft greenery.
Kid-Friendly Colorful Gnome
Use bright felt colors such as green, blue, purple, or pink. Add pom-poms, foam stickers, or tiny bells. For younger crafters, pre-cut the pieces and let them choose the combinations. Adults should handle hot glue or use tacky glue when time allows for drying.
Glam Christmas Gnome
Use velvet ribbon or metallic felt for the hat. Add a pearl bead nose, gold cord hanger, and a small glitter snowflake. This version looks surprisingly elegant for a cheap DIY ornament. It is basically the gnome equivalent of wearing a tuxedo to a cookie exchange.
Helpful Tips for Better Results
First, keep the ornament lightweight. Heavy decorations may pull the gnome forward on the tree branch. If your ornament tilts, glue the hanging loop slightly lower on the back or add a small cardboard brace.
Second, make the beard fuller than you think you need. A thin beard can look flat once the hat and nose are added. Layering yarn or mop strands gives the ornament more texture and makes it look less like a craft experiment and more like something you meant to do.
Third, test the layout before gluing. Place the beard, hat, nose, and decorations on the base first. Once hot glue enters the conversation, decisions become very official very quickly.
Fourth, use low-temperature hot glue when possible, especially if crafting with kids or teens. Hot glue can still burn, so work carefully, keep fingers away from the nozzle, and place the glue gun on a safe surface between uses.
Finally, make one sample ornament before creating a batch. The first gnome teaches you what size hat, beard length, and nose placement you like best. The second gnome usually looks better. By the fifth, you may start giving them names. This is normal.
How to Use These DIY Gnome Ornaments
Of course, the obvious place is the Christmas tree. Mix several gnome ornaments among classic balls, snowflakes, and ribbon for a cozy handmade look. But these little decorations can do more than hang politely on branches.
Use them as gift toppers by tying them onto wrapped presents. Add one to a bottle of sparkling cider, a cookie tin, or a teacher gift bag. String several together into a mini garland for a mantel, window, or bookshelf. You can also attach one to a holiday wreath for a playful accent.
They make great craft night projects because the supplies are inexpensive and the steps are easy to repeat. Set up a small gnome bar with different hat fabrics, beard materials, bead noses, and embellishments. Everyone can build a different gnome, and nobody has to pretend they are “not crafty.” This is glue-and-fluff territory. Perfection is not invited.
Common Mistakes and How to Fix Them
The Hat Looks Too Flat
Add a small cotton ball, scrap felt, or folded tissue inside the hat before gluing it down. This gives the hat a puffier shape. You can also curl the tip slightly and glue it to one side for a whimsical look.
The Beard Is Falling Apart
Use more glue along the top of the beard and press the strands firmly into place with a craft stick. Then cover the glued area with the hat brim. If using yarn, knotting small bundles before gluing can also help.
The Nose Keeps Sliding
Make sure the beard surface is not too loose where the nose sits. Add a small dot of glue directly to the base behind the beard, then press the bead through the yarn so it grips both the beard and backing.
The Ornament Hangs Crooked
Move the hanging loop closer to the center of the ornament’s weight. If the hat is heavy, attach the loop slightly lower on the back. If the beard is heavy, trim it or use lighter yarn next time.
Real Crafting Experience: What Actually Works When Making Dollar Store Gnome Ornaments
After making a few cheap easy dollar store gnome Christmas tree ornaments, one thing becomes clear: the supplies may be simple, but small choices make a big difference. The first experience most crafters have is discovering that the beard controls the whole personality of the ornament. A short, rounded beard makes the gnome look neat and cute. A long, shaggy beard makes him look like he has been living in a peppermint forest for 300 years and has strong opinions about cocoa. Both are good. The trick is choosing the mood before trimming.
Yarn is the easiest beard material for beginners because it is forgiving. If one strand is too long, snip it. If the beard looks thin, glue on another layer. Cotton mop strands create a soft macrame look and are excellent for farmhouse or boho Christmas trees. Faux fur looks the most polished, but it can shed while cutting. The best method is to flip the fur over and cut only the backing. That keeps the front fluffy and saves your table from looking like a tiny polar bear rolled across it.
Hat material also changes the final result. Felt is the easiest because it holds shape, cuts cleanly, and comes in many colors. Socks are cozy and fast, especially fuzzy socks from the dollar store, but they can stretch. If the sock hat looks floppy, tuck a little stuffing inside or glue the tip to one side. Fabric scraps look boutique-style, especially plaid, sweater knit, velvet, or flannel. For a high-end look on a dollar store budget, mix one textured fabric with one simple beard color.
Another lesson: make ornaments in batches, but decorate them individually. Cutting all the beards, hats, and hanging loops at once saves time. However, adding noses and embellishments one by one keeps each gnome from looking too identical. Handmade ornaments are more charming when they look related, not cloned in a secret North Pole laboratory.
Hot glue speed is both a blessing and a tiny holiday challenge. It lets the ornament come together quickly, but it also means you should dry-fit the pieces first. Place the beard, hat, and nose before gluing so you can adjust the proportions. A hat that covers too much beard can make the ornament look squished. A nose placed too low can look funny, which may be exactly what you want, but it is better when the joke is intentional.
Storage matters, too. These ornaments are lightweight, but beards can flatten if packed tightly. Store them in a shallow box or tuck them between sheets of tissue paper. If a beard looks flat next year, fluff it gently with your fingers or comb it with a wide-tooth comb. Avoid pulling too hard because the gnome may not appreciate a dramatic beard renovation in December.
The best experience-related tip is to make extras. Someone will see them and say, “Oh, that’s cute!” That sentence is holiday code for “I would like one.” Luckily, these ornaments are quick, affordable, and easy to personalize. Make a red-hat gnome for traditional decorators, a plaid one for farmhouse fans, a pink one for the person who refuses to follow Christmas color rules, and a tiny gray one for the friend who loves neutral decor. By the end, your tree may look like it has been peacefully invaded by a cheerful bearded village, which is honestly one of the better holiday outcomes.
Conclusion
A Cheap Easy Dollar Store Gnome Christmas Tree Ornament DIY is the kind of holiday project that checks every box: affordable, adorable, beginner-friendly, customizable, and fun enough to make more than one. With felt, yarn, a wooden bead, and a little glue, you can create handmade Christmas ornaments that look charming on the tree, thoughtful on gifts, and festive just about anywhere.
The beauty of this craft is that it does not demand perfection. In fact, the tiny quirks make each gnome better. A crooked hat adds personality. A fluffy beard adds warmth. A bead nose somehow turns basic supplies into a tiny Christmas character with suspiciously strong holiday energy. Whether you are decorating on a budget, planning a family craft night, or making handmade gifts, these dollar store gnome ornaments are a merry little win.