Canvas is the dependable friend of the sewing world: sturdy, practical, slightly stubborn, and always ready to carry groceries, tools, art supplies, picnic snacks, or the emotional weight of your unfinished craft basket. If cotton lawn is a whisper, canvas is a confident handshake. It has structure, durability, and enough personality to turn beginner sewing projects into useful everyday items that look store-bought in the best possible way.
The beauty of easy DIY sewing projects made from canvas is that they do not require couture-level drama. You are not tailoring a wedding gown for royalty. You are making useful, good-looking things: tote bags, aprons, storage bins, zipper pouches, tool rolls, plant-pot covers, placemats, and simple home organizers. Canvas forgives simple shapes, loves straight seams, and makes even basic rectangles feel intentional. That is excellent news for anyone whose sewing machine still feels like it has a secret personality.
Why Canvas Is Perfect for Beginner DIY Sewing Projects
Canvas is a plain-woven fabric known for strength and body. Most home sewing projects use cotton canvas, duck canvas, printed canvas, or waxed canvas. Cotton canvas is washable and beginner-friendly. Duck canvas is tightly woven and tough, making it great for bags and utility projects. Waxed canvas has a rugged, water-resistant finish and develops a handsome worn-in look over time, like your favorite boots after a camping trip.
For beginners, canvas offers three big advantages. First, it does not slide around like silky fabrics that seem personally committed to chaos. Second, it holds shape beautifully, which helps bags, baskets, and organizers stand up instead of collapsing like a sad sandwich. Third, it is strong enough for everyday use, so your finished project will not feel like a “practice item” doomed to live in a drawer.
Basic Supplies for Sewing Canvas at Home
You do not need a professional studio to sew canvas. A reliable home sewing machine can handle many medium-weight canvas projects when paired with the right tools. The magic is not in owning every gadget in the craft aisle. The magic is choosing the right needle, thread, stitch length, and construction method.
Recommended Tools and Materials
Start with medium-weight cotton canvas if you are new. Choose a denim or jeans needle, usually size 90/14 or 100/16 for many projects. For heavier canvas, you may need a larger needle. Use strong all-purpose polyester thread or heavy-duty thread, depending on the project. Polyester thread is popular because it is durable and handles repeated use well.
Instead of regular pins, use sewing clips whenever possible. Clips hold thick layers without bending, and they avoid leaving visible holes in coated or waxed canvas. Keep sharp scissors or a rotary cutter nearby, because cutting canvas with dull blades feels like trying to slice a bagel with a spoon. A seam gauge, ruler, chalk pencil, iron, pressing cloth, and topstitching needle can also make your sewing life much easier.
Canvas Sewing Tips Before You Start
Canvas is friendly, but it has opinions. Treat it well and it will reward you with crisp seams and sturdy results. Rush through it and your machine may begin making noises that sound expensive.
Test Before Sewing the Real Project
Always test stitches on a scrap piece of the same canvas. This helps you check needle size, thread tension, stitch length, and whether your machine can handle multiple layers. A slightly longer stitch often works better on canvas than a tiny stitch, especially on thicker seams. For many medium canvas projects, a stitch length around 3 millimeters is a good starting point. For heavier or waxed canvas, longer stitches may look cleaner and reduce perforation.
Reduce Bulk at the Seams
Canvas layers can become bulky fast. Trim seam allowances, grade layers when needed, and avoid stacking too many folded edges in one place. When sewing over thick intersections, slow down and use the hand wheel if necessary. A hump jumper or folded scrap of fabric behind the presser foot can help the foot stay level while crossing bulky seams.
Press Carefully
Press cotton canvas with steam when appropriate, but test first. Use a pressing cloth to protect printed designs. Do not press waxed canvas directly with a hot iron unless the fabric manufacturer says it is safe. Waxed finishes can melt, shift, or mark, which is charming only if you meant to create “abstract weathered raccoon chic.”
Easy DIY Canvas Sewing Projects for Beginners
The best canvas sewing projects are simple, useful, and satisfying. Below are beginner-friendly ideas that help you practice straight seams, boxed corners, topstitching, lining, straps, and basic finishing techniques.
1. Classic Canvas Tote Bag
A canvas tote bag is the gateway project for many sewists, and for good reason. It is mostly rectangles, straight seams, and handles. The finished bag is useful for groceries, books, beach trips, library visits, craft supplies, and carrying snacks with the seriousness they deserve.
For a basic tote, cut two rectangles for the outer bag and two for the lining. Add cotton webbing or canvas straps. Sew the outer bag, sew the lining, box the corners if you want a flat bottom, then join the lining and outer fabric at the top. Topstitch around the opening for a clean finish. Reinforce each handle with a box-and-X stitch so the bag can survive real life, not just a photoshoot.
2. Canvas Zipper Pouch
A zipper pouch is small, fast, and excellent for building confidence. Use it for makeup, pencils, sewing clips, charging cables, travel toiletries, or the mysterious collection of receipts everyone seems to own. Canvas gives the pouch enough structure to sit nicely on a table.
Choose medium-weight canvas for the exterior and quilting cotton for the lining. A nylon zipper is easier for beginners than a metal zipper. Add a small fabric tab at each zipper end for a polished look. Once you make one pouch, you may accidentally make twelve. This is normal. Do not panic; simply call them gifts.
3. Simple Canvas Apron
A canvas apron is practical for cooking, gardening, painting, pottery, woodworking, or pretending you are about to open a charming neighborhood bakery. The project teaches hemming, straps, pockets, and topstitching without complicated fitting.
Cut one large apron body, fold and hem the edges, then add neck and waist ties. A front pocket is optional but strongly recommended because aprons without pockets feel like pants without pockets: technically wearable, emotionally disappointing. Use twill tape, cotton webbing, or self-fabric straps. Reinforce pocket corners with small triangles or bar tacks.
4. Canvas Storage Basket
Canvas storage baskets are ideal for organizing fabric scraps, toys, yarn, bathroom items, pantry goods, office supplies, or pet accessories. They are also perfect for hiding clutter five minutes before guests arrive, which is basically a domestic superpower.
Use two layers of canvas or one layer of canvas with interfacing if you want extra structure. Sew a simple box shape, add boxed corners, and turn down the top edge like a cuff. Leather handles, cotton webbing handles, or fabric tabs can make the basket look boutique-level. Try making several sizes for shelves and closets.
5. Canvas Tool Roll or Art Supply Roll
A canvas roll is one of the most satisfying projects because it looks impressive but is made from simple stitching lines. It works for paintbrushes, colored pencils, crochet hooks, screwdrivers, makeup brushes, kitchen utensils, or sewing tools.
Start with a large rectangle of canvas. Add a second rectangle or long strip for the pockets. Stitch vertical lines to create compartments. Add a flap at the top to prevent tools from sliding out, then attach ties or a snap closure. This project is excellent for practicing straight, evenly spaced stitching.
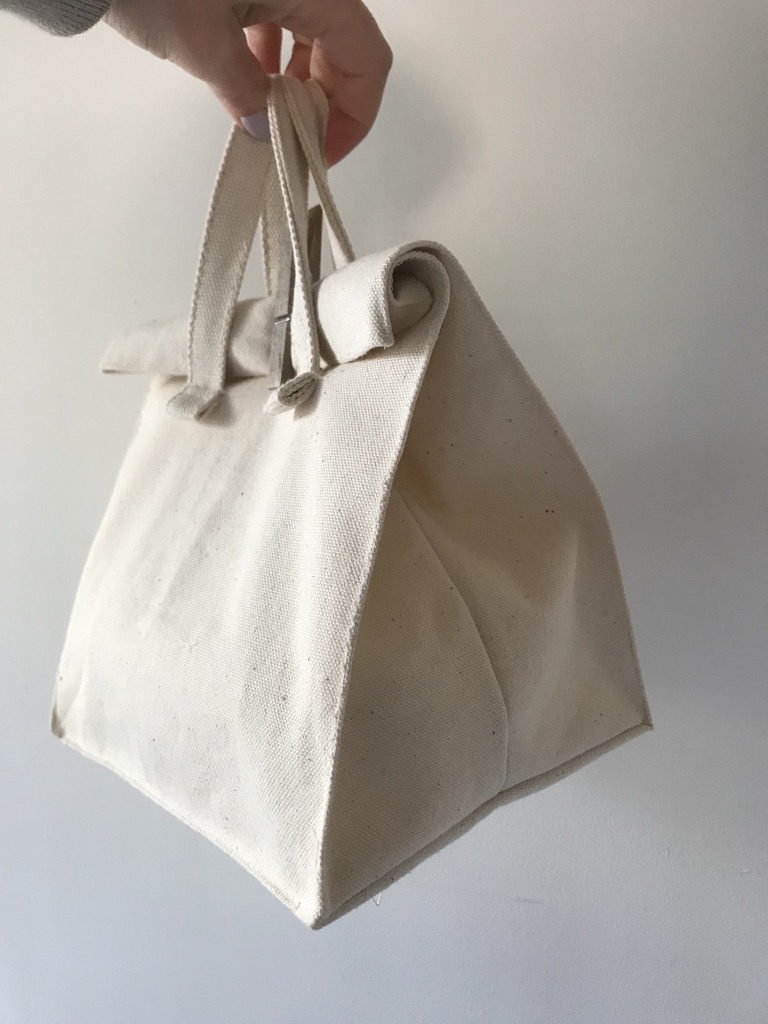
6. Reusable Canvas Lunch Bag
A reusable lunch bag made from canvas is sturdy, washable, and much cuter than a crinkly disposable bag. Use cotton canvas for the outside and a wipeable lining if you want easier cleanup. Add a fold-over top with hook-and-loop tape, snaps, or a simple tie closure.
The shape can be as simple as a tall rectangle with boxed corners. Add a handle if you want it to be lunchbox-style. Bonus points for using fun printed canvas, because sandwiches taste better when carried in fabric with lemons, stripes, or tiny dancing mushrooms. This is not scientifically proven, but morale matters.
7. Canvas Plant Pot Cover
Canvas plant pot covers are quick and decorative. They soften the look of plastic nursery pots and add texture to shelves, windowsills, and desks. Use untreated cotton canvas for indoor plants and add a waterproof saucer inside to prevent moisture problems.
Sew a simple cylinder or boxed pouch shape, then fold down the top edge. Neutral canvas gives a modern farmhouse look, while printed canvas adds color. These covers also make easy handmade gifts when paired with a small plant.
8. Canvas Placemats and Coasters
Canvas placemats are beginner-friendly because they are flat, useful, and easy to customize. Cut rectangles, hem the edges, and topstitch. For a more finished look, sew two canvas pieces right sides together, turn them right side out, press, and topstitch around the edge.
Add simple embroidery, fabric paint, stencils, or contrasting binding. Matching coasters can be made from small squares. This project is great for using remnants, and it helps beginners practice tidy corners without committing to a giant project.
9. Canvas Laptop Sleeve
A padded canvas laptop sleeve is a slightly more advanced beginner project, but still very manageable. Canvas gives the outside durability, while foam, batting, or fusible fleece adds cushioning. A cotton lining keeps the inside smooth.
Measure the laptop carefully and add seam allowance plus ease. Too tight, and the laptop will need a wrestling coach. Too loose, and it will slide around. Add a flap closure with snaps or hook-and-loop tape. Topstitching around the edges gives the sleeve a clean, sturdy finish.
10. Canvas Wall Pocket Organizer
A wall pocket organizer is excellent for entryways, craft rooms, dorm spaces, kids’ rooms, or home offices. Sew pockets onto a large canvas backing, then add grommets, tabs, or a casing for a dowel rod. Use it to hold mail, notebooks, scissors, markers, chargers, or small tools.
This project is flexible because you can choose pocket sizes based on what you need to store. Add labels, contrasting fabric, or decorative stitching. The result is practical wall decor, which is the best kind of decor because it looks nice and does chores.
Best Canvas Weights for Different DIY Projects
Not all canvas behaves the same. Lightweight canvas is easier to sew and works well for pouches, placemats, simple totes, and decorative projects. Medium-weight canvas is a great all-purpose choice for bags, aprons, baskets, and organizers. Heavy canvas is better for utility items, outdoor gear, structured bags, and projects that need serious durability.
If you are new to sewing, start with medium cotton canvas before jumping into very heavy duck canvas or waxed canvas. Heavier fabric can be beautiful, but it may require stronger needles, slower stitching, and more patience. Sewing is supposed to build confidence, not make you negotiate with your machine like it is a tiny mechanical dragon.
How to Make Canvas Projects Look Professional
The difference between “homemade” and “handmade in a very impressive way” often comes down to finishing. Press seams when possible. Topstitch edges. Trim threads. Use matching or intentionally contrasting thread. Reinforce stress points. Keep seam allowances consistent. These small details make simple canvas projects look polished.
Add Lining When It Matters
Lining a canvas bag, pouch, or basket hides raw seams and improves durability. For totes and pouches, quilting cotton is easy to use and comes in endless prints. For wet items or lunch bags, consider a wipeable lining. For heavy-duty bags, another layer of canvas can add strength.
Use Interfacing for Shape
Canvas already has body, but interfacing can add even more structure. Use fusible fleece for soft padding, foam for laptop sleeves, and medium-weight interfacing for bag panels. Always test fusible products on scraps first, especially with coated or printed canvas.
Choose Smart Closures
Beginner-friendly closures include snaps, magnetic snaps, hook-and-loop tape, drawstrings, buttons, and zippers. Zippers may look intimidating, but small canvas pouches are an excellent way to practice. Once you install one successfully, you will feel like you unlocked a new sewing achievement badge.
Common Mistakes to Avoid When Sewing Canvas
The first mistake is using the wrong needle. A needle that is too small can bend, break, skip stitches, or make your machine grumble. The second mistake is forcing thick seams through the machine too quickly. Slow stitching gives you more control and reduces stress on the machine.
Another common mistake is ignoring seam bulk. Trim corners, grade seam allowances, and plan construction so multiple thick layers do not all meet in one spot. Also, avoid over-pinning waxed or coated canvas because holes may remain visible. Use clips instead.
Finally, do not skip testing. A five-minute test can prevent a one-hour seam-ripping session. Seam ripping canvas is not impossible, but it is not exactly a spa treatment.
Creative Ways to Customize Canvas Sewing Projects
Canvas is a blank stage waiting for a little personality. You can paint it with fabric paint, stencil words or patterns, add iron-on patches, embroider simple designs, sew on contrast pockets, or use colorful webbing for straps. Try color-blocking two canvas fabrics for a modern look. Use striped canvas for nautical energy, natural canvas for minimalist style, or bold printed canvas for cheerful chaos.
For gifts, personalize projects with initials, favorite colors, or practical details. A gardener might love a canvas apron with deep pockets. A student might use a zipper pouch for pens and chargers. A home cook might appreciate sturdy placemats or a market tote. Handmade gifts work best when they feel useful, not like an obligation wearing ribbon.
Experience Notes: What I Learned from Sewing Canvas Projects
The first thing you learn from sewing canvas is that confidence grows one straight seam at a time. A tote bag may look simple, but the moment you turn it right side out and see the corners pop into shape, it feels like you have built a small, useful building. Canvas rewards neat construction. It makes beginners feel capable because it holds its shape and gives visible results quickly.
One practical lesson is to prepare before sewing. Cutting accurately matters. Canvas does not hide crooked edges as gracefully as softer fabrics. A rotary cutter and ruler make a big difference, especially for bags, baskets, and placemats. Marking pocket placement before stitching also saves frustration. Nothing humbles a sewist faster than finishing a pocket and realizing it leans like it has had a long day.
Another experience-based tip is to respect the thickness. Canvas handles wear beautifully, but folded canvas can become bulky. When making straps, press them well and consider using cotton webbing if your machine dislikes multiple folded layers. Webbing is strong, clean-looking, and beginner-friendly. For tote handles, I like stitching a rectangle with an X through it because it feels secure and looks intentionally rugged.
Canvas also teaches the value of topstitching. A simple line of topstitching around a bag opening, pouch edge, or apron pocket can make the whole project look sharper. It flattens seams, adds strength, and creates a finished look. The trick is to sew slowly and keep a consistent distance from the edge. This is not a race. There is no Olympic medal for fastest topstitch, although there should be snacks at the finish line.
If you are making your first canvas project, start with a tote, pouch, or basket. These projects are forgiving and useful. Avoid starting with a highly structured backpack or thick waxed canvas duffel unless you enjoy dramatic plot twists. Build skills gradually: first straight seams, then boxed corners, then lining, then zippers, then hardware. Each project adds one new skill without overwhelming you.
The most enjoyable part of sewing canvas is how practical the results are. A finished canvas tote becomes your grocery bag. A pouch becomes your travel organizer. A tool roll finally gathers the paintbrushes that used to roam freely like tiny wooden wildlife. Because canvas projects are sturdy, they become part of everyday routines. That makes the work feel worthwhile.
My favorite approach is to batch small projects. Cut two or three pouches at once, or make a set of matching storage baskets. Once the machine is threaded and the cutting mat is out, repeating a project helps improve accuracy. The second version is usually cleaner than the first, and the third starts looking like something you would proudly give away.
Most of all, canvas sewing teaches that useful does not have to be boring. A simple rectangle can become a market tote. A folded strip can become a handle. A pocket can turn an apron into a workshop assistant. With canvas, beginner sewing feels less like practice and more like making real things for real life.
Conclusion: Start Simple, Sew Strong, Use the Bag Tomorrow
Easy DIY sewing projects made from canvas are perfect for beginners, weekend makers, and practical crafters who want results they can actually use. Canvas is strong, stylish, affordable, and versatile enough for bags, aprons, bins, organizers, pouches, sleeves, and home decor. It gives structure without complicated techniques and makes basic sewing skills feel powerful.
Start with medium-weight cotton canvas, use the right needle, test your stitches, reduce bulky seams, and reinforce stress points. Keep the first project simple, then add new skills one at a time. Before long, your handmade canvas tote will be carrying groceries, your storage basket will be taming clutter, and your zipper pouch will be holding the tiny objects that used to escape into the bottom of every bag you own.
Canvas sewing is practical creativity at its best: sturdy, customizable, beginner-friendly, and just challenging enough to make you proud when the final stitch lands. Also, it gives you an excellent excuse to buy more fabric, which is not a problem. It is a lifestyle with receipts.