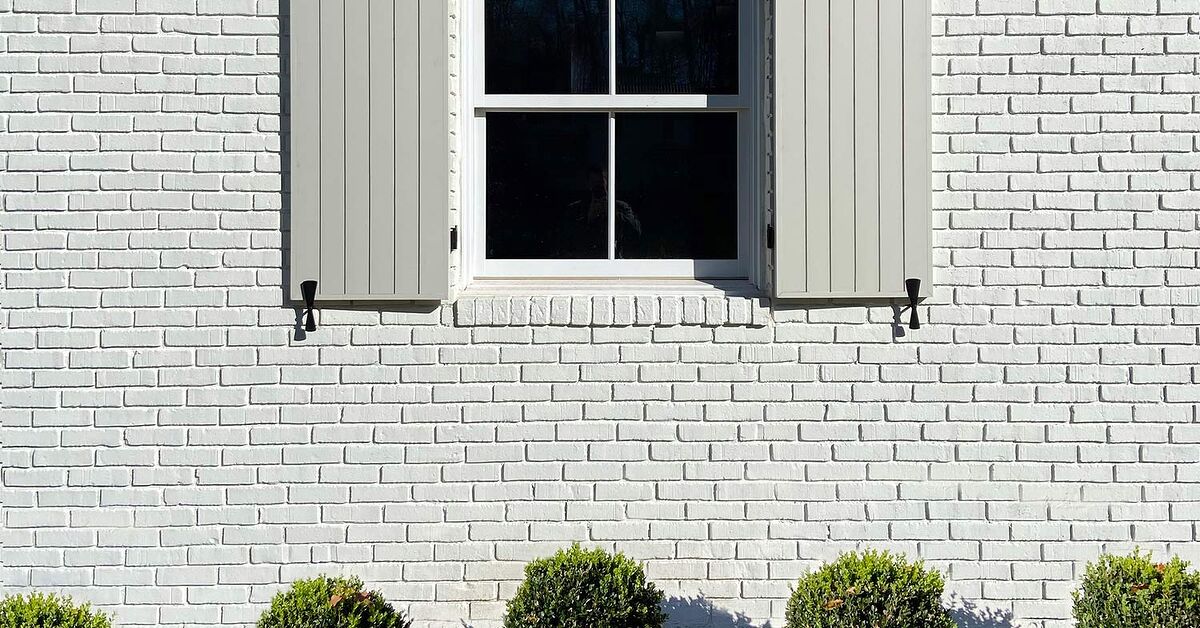
Few exterior upgrades deliver as much personality per board foot as a pair of easy DIY wood shutters. They frame plain windows, add architectural rhythm, and make a house look more finished without requiring a contractor, a trailer full of tools, or an emotional-support spreadsheet.
This project focuses on decorative board-and-batten shutters: vertical boards held together by horizontal battens, with an optional diagonal brace for a classic Z-pattern. The design suits farmhouse, cottage, Craftsman, rustic, and traditional homes. Better yet, the size, spacing, color, and hardware can all be customized.
The process is straightforward: measure the windows, cut exterior-suitable lumber, assemble each shutter on a flat surface, protect every face with an outdoor finish, and fasten the completed panels securely beside the windows. Careful measuring and weatherproofing matter more than fancy joinery, which is excellent news for anyone whose woodworking résumé currently reads, “I assembled a bookshelf and had three screws left over.”
Decorative Shutters vs. Functional Shutters
The instructions below create fixed decorative exterior wood shutters. Functional shutters require additional planning because they must cover the opening, swing freely on suitable hinges, and close securely. In hurricane-prone or high-wind regions, never assume decorative shutters provide storm protection. Opening-protection products should be tested, approved, and installed according to local building requirements.
Choose the Right Shutter Design
Board-and-batten shutters are ideal for beginners. Three or four vertical boards form the body, while two horizontal battens cross the front or back. An optional diagonal board creates a Z-brace. Three boards produce a cleaner, slightly modern look; four narrower boards create a more traditional rhythm.
Front-facing battens emphasize rustic construction. Back-facing battens create a simpler face with uninterrupted vertical boards. Either arrangement can work for fixed decorative shutters when the assembly and mounting points are secure.
Best Wood for Exterior Shutters
Western red cedar, redwood, and cypress are popular because they are naturally suited to outdoor exposure and accept exterior finishes well. Cedar is especially practical for DIY wood shutters because it is relatively light, easy to cut, and attractive under stain.
Pressure-treated lumber can also work, although it may be heavier and wetter. Let it dry as needed before finishing, and use compatible fasteners. Pine and fir are affordable alternatives when thoroughly primed, painted, and maintained. Reject boards with major twists, deep checks, loose knots, or dramatic bows. A crooked board does not become cooperative simply because you compliment it.
Tools and Materials
- Exterior-suitable 1-by lumber and 1-by-4 boards for battens
- Tape measure, pencil, and framing square
- Miter saw, circular saw, or handsaw with a guide
- Drill, bits, clamps, and sandpaper
- Exterior-rated or stainless-steel screws
- Waterproof or exterior-rated wood glue
- Exterior primer and paint, or exterior stain system
- Brush, small roller, rags, and drop cloth
- Appropriate wall anchors or masonry screws
- Eye protection, hearing protection, and a stable ladder
How to Measure for DIY Wood Shutters
Measure Every Window
Measure the visible height of each opening or the height from the top trim to the sill, depending on where the shutters will sit. Do not assume matching windows are identical. Houses settle, trim gets replaced, and previous owners occasionally freestyle.
For a believable traditional appearance, a pair of shutters should look wide enough to cover the window if closed. Each shutter is therefore often about half the opening width. Decorative panels can be narrower where wall space is limited, but extremely skinny shutters may look like architectural bookmarks.
Test the Proportions
Tape together cardboard or kraft paper in the proposed dimensions and place the mockup beside the window. View it from the curb. Moving paper is free; rebuilding four cedar shutters is character development.
Example Cut List
For a decorative shutter approximately 15 inches wide by 48 inches tall, use three vertical boards cut to 48 inches, two battens cut to the finished width, and one optional diagonal brace cut to fit after assembly. Adjust every measurement to the actual window and lumber widths.
| Part | Quantity per shutter | Example size |
|---|---|---|
| Vertical boards | 3 | 48 inches long |
| Horizontal battens | 2 | 15 inches long |
| Diagonal brace | 1 optional | Cut to fit |
How to Build Easy DIY Wood Shutters
Step 1: Arrange and Cut the Boards
Lay the vertical boards on a flat surface and reorder them until the grain, knots, and color look balanced. Put the best faces outward. Mark all boards from the same reference measurement, cut them to length, and label the parts for each window.
Use a square or clamped straightedge to guide cuts. Wear eye and hearing protection, support the offcut, and keep hands away from the blade path. The shutter can be rustic; the cutting technique should not be.
Step 2: Sand Before Assembly
Sand rough faces, sharp corners, and splintered edges. Start with a coarse grit only where necessary, then move to a medium grit for a finish-ready surface. Slightly easing exposed edges helps paint or stain coat them evenly.
Step 3: Space and Square the Boards
Arrange the vertical boards face down if the battens will be attached to the back. Use identical scraps, dowels, or paint stir sticks as spacers. Small gaps define the boards and let water drain rather than lingering in tight seams.
Align the ends with a framing square and compare the total width at the top, middle, and bottom. If those numbers disagree, the shutter is becoming a trapezoid. Persuade it otherwise before adding screws.
Step 4: Position the Battens
Place one batten several inches below the top and the second the same distance above the bottom. Keep the layout consistent across every shutter on the façade. Mark the positions lightly before applying glue.
Step 5: Glue, Clamp, and Screw
Apply exterior-rated waterproof glue where each batten crosses a vertical board. Clamp the assembly and predrill pilot holes, especially near board ends. Drive corrosion-resistant exterior screws through the battens without breaking through the front face. Two fasteners at each board-and-batten intersection create a secure decorative assembly.
Stainless-steel or exterior-coated screws are smart choices for cedar, redwood, treated lumber, coastal locations, and damp climates. Indoor screws may look fine on installation day and then begin their brief career as orange stains.
Step 6: Add an Optional Z-Brace
Lay a 1-by-4 diagonally between the battens and mark the angles directly from the assembly. Cut, test-fit, sand, glue, and screw it in place. Run the diagonals consistently or mirror each pair intentionally.
Step 7: Clean Up the Assembly
Remove glue squeeze-out before it dries because cured glue can block stain. Fill visible screw holes for a smooth painted finish, or leave the heads visible for a rustic design. Complete a final light sanding and remove dust.
Prime, Paint, or Stain the Shutters
Painted Shutters
Prime bare wood with an exterior primer suitable for the species. Cedar and redwood may need a stain-blocking primer beneath light paint. Apply exterior paint according to label instructions, including temperature, drying, and recoat requirements.
Coat all six sides: front, back, both long edges, top, and bottom. Seal end grain, screw holes, and fresh cuts carefully because they absorb moisture readily. A beautiful front with an unfinished back is not weatherproofing; it is optimism wearing a paintbrush.
Stained Shutters
Choose an exterior stain designed for above-ground outdoor wood. Test it on an offcut because species, grain, and sanding change the final color. Apply in the direction of the grain and use the compatible protective system recommended by the manufacturer.
How to Install Exterior Wood Shutters
Hold each finished shutter beside the window and confirm equal height, spacing, and alignment. A helper is useful, particularly on a ladder. Predrill at strong, visually balanced locations within the battens.
Wood Siding or Solid Trim
Fasten into framing, blocking, or substantial wood trim rather than relying on thin siding. Choose exterior screws that achieve secure embedment without reaching hidden wiring, plumbing, or the window assembly.
Brick, Stone, or Masonry
Use the correct masonry bit, anchors, and fasteners for the substrate. When appropriate, anchoring in sound mortar joints can avoid damage to brick faces, but follow fastener instructions and preservation requirements. Do not overtighten and crush the shutter.
Vinyl or Fiber-Cement Siding
Do not depend on siding alone to support solid wood. Locate framing or add suitable blocking. Avoid fastening vinyl so tightly that it cannot expand and contract, and consult the siding manufacturer when the attachment path is uncertain.
Common DIY Shutter Mistakes
- Making shutters too narrow: Undersized panels look pasted on rather than integrated.
- Skipping the mockup: Dimensions that work on paper may feel wrong from the curb.
- Using interior glue or screws: Outdoor moisture quickly exposes unsuitable materials.
- Ignoring wood movement: Small gaps and sensible fastening reduce stress as boards expand and contract.
- Finishing only the front: Unsealed backs and cut ends invite swelling, peeling, and decay.
- Mounting into siding alone: Heavy shutters need structural attachment or approved anchors.
- Calling them storm shutters: Curb appeal is not an impact rating.
Maintenance for Long-Lasting Wood Shutters
Inspect the shutters annually and after severe weather. Look for loose fasteners, cracked joints, peeling finish, exposed end grain, mildew, or water trapped behind the panels. Clean them gently, allow the wood to dry, and touch up damaged finish promptly.
Redirect sprinklers, trim plants that hold moisture against the wood, and maintain drainage space where possible. Recoat paint or stain according to product guidance. South- and west-facing shutters often weather faster because they receive stronger sun.
A Practical Build-Day Experience: What DIYers Usually Learn
The most revealing part of building easy DIY wood shutters is that the construction itself is rarely the difficult part. The real work happens before the first screw goes in. A typical project begins with confident measurements, followed by a walk to the curb, followed by the realization that the proposed shutters look either too skinny, too wide, or oddly short. This is why a cardboard mockup earns its keep immediately. Moving a paper rectangle is free; rebuilding four cedar shutters is character development.
Board selection is the next practical lesson. At the lumber rack, several boards will appear perfectly straight until they are placed together on a flat cart. Then one reveals a twist worthy of a mystery novel. Experienced DIYers sight down each edge, compare pieces side by side, and buy an extra board. The spare covers defects, cutting mistakes, and the surprisingly common event in which a beautiful section of grain lands exactly where a screw hole needs to go.
During assembly, consistent spacers make the project feel professional. Without them, gaps tend to wander. One shutter may begin with a crisp quarter-inch reveal and end with something that could shelter a small lizard. Identical scraps placed at the top, middle, and bottom keep the boards parallel. A framing square confirms the ends are aligned before the battens lock everything together.
Predrilling is another lesson that often arrives one split board too late. Cedar and dry pine can crack near the ends when a screw is driven aggressively. A small pilot hole takes only seconds and greatly reduces drama. Clamps also matter more than expected. They keep the battens from skating across wet glue and hold the shutter flat while the screws are installed.
Finishing usually takes longer than cutting and assembly combined. The front face is satisfying to paint, but the back, edges, screw holes, and end grain are what protect the investment. Setting the shutters on painter’s pyramids or scrap blocks makes it easier to coat the edges without creating fingerprints. Labeling each panel on the hidden back prevents the final installation from becoming a four-piece outdoor puzzle.
Installation day introduces the ladder, which is where enthusiasm should slow down. A helper can hold the shutter, check alignment from the ground, and prevent repeated trips up and down. The first shutter should be treated as the master reference. Once its top, bottom, and window spacing look right, those measurements can be transferred to the remaining panels.
The final experience is surprisingly visual. Small differences that were obvious on the workbench nearly disappear from the street, while proportion errors become more noticeable. A tiny knot or brush mark contributes character; a shutter mounted two inches lower than its partner contributes questions. Step back frequently, compare both sides of the window, and correct alignment before fully tightening the fasteners.
Most DIYers finish the project with two conclusions. First, board-and-batten shutters are genuinely beginner-friendly when the measurements and finish are handled patiently. Second, once one set is installed, every unshuttered window on the house suddenly looks like it has submitted a renovation request.
Conclusion
Easy DIY wood shutters combine simple woodworking with a major visual payoff. Start with accurate measurements, choose straight exterior-suitable lumber, maintain consistent spacing, use corrosion-resistant fasteners, and protect every surface from moisture. Build one test shutter, check it from the curb, and use it as the pattern for the rest.
The project does not demand advanced joinery, but it rewards patience. With careful preparation, secure installation, and a weather-ready finish, homemade board-and-batten shutters can add warmth, depth, and custom character to an otherwise ordinary exterior.