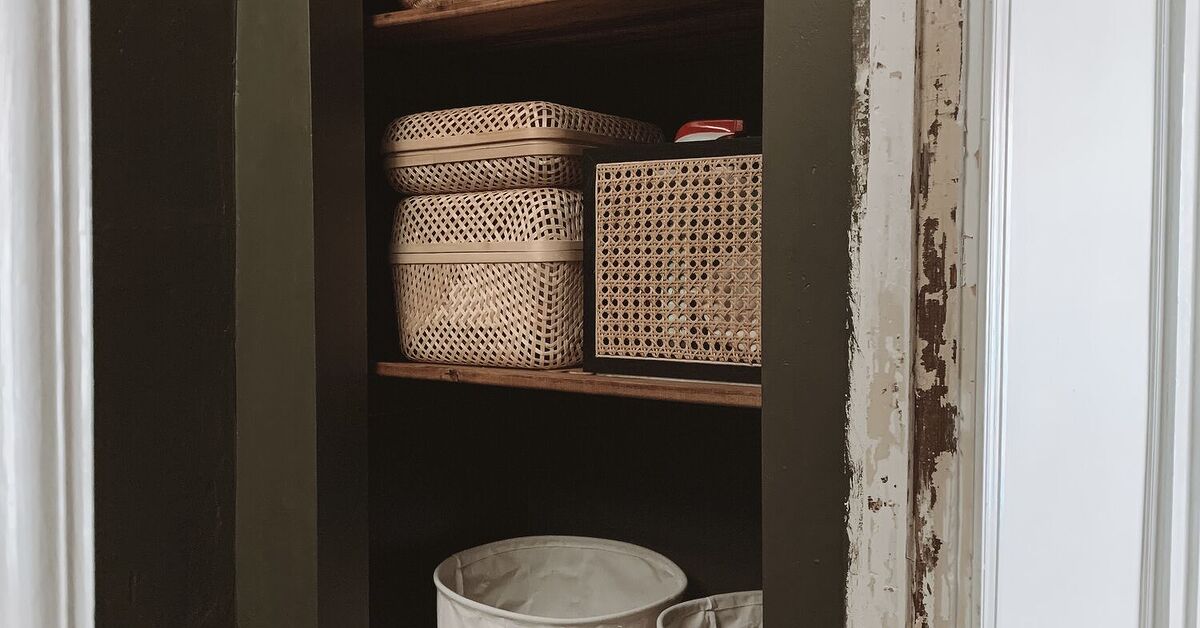
A linen closet should make clean sheets and fluffy towels easy to findnot behave like a fabric avalanche waiting for someone to open the door. Fortunately, you do not need custom cabinetry or a heroic renovation budget to fix it. A few well-planned shelves can turn even a narrow, awkward closet into practical household storage.
This guide explains how to plan, build, and organize easy shelves for a linen closet using beginner-friendly materials. You will learn how to choose between wood, wire, and adjustable shelving, determine useful shelf spacing, install sturdy supports, and avoid the mistakes that turn a simple Saturday project into an accidental drywall-removal seminar.
Why Better Linen Closet Shelves Make Such a Difference
Many linen closets were built with too few shelves spaced too far apart. That arrangement may technically provide storage, but it encourages tall, unstable towers of towels and wastes valuable vertical space. Deep shelves can create another problem: items disappear into the back and are rediscovered years later, usually after someone has already purchased replacements.
Adding shelves creates shorter, more manageable stacks. It also lets you assign separate zones to bath towels, sheet sets, blankets, toiletries, and cleaning supplies. Frequently used linens can stay between waist and eye level, while bulky or seasonal items occupy the upper and lower areas.
The best design is not necessarily the one with the greatest number of shelves. It is the one that fits the things your household actually stores. Before buying lumber or brackets, empty the closet and decide what deserves to return.
Plan the Linen Closet Before Building
Measure the Entire Interior
Measure the closet width at the front, middle, and back. Walls are not always perfectly square, particularly in older homes. Use the smallest measurement when determining shelf length, then subtract approximately 1/8 to 1/4 inch so each shelf can slide into place without requiring an argument with the drywall.
Measure the usable depth from the back wall to the closed door. Account for door trim, hinges, baseboards, outlets, and any plumbing access panels. A typical linen shelf is often about 12 to 16 inches deep. Shallow shelves keep folded items visible, while deeper shelves can accommodate large baskets and comforters. Always let the actual closet and storage containers determine the final depth.
Inventory What You Need to Store
Sort the contents into categories before planning shelf heights. Bath towels may need more vertical clearance than folded pillowcases. Comforters and guest pillows need generous openings, while toiletries perform better in short bins placed on closely spaced shelves.
Measure your tallest baskets and folded stacks. Add a few inches of clearance so you can remove an item without scraping it against the shelf above. Adjustable shelves are especially useful when storage needs may change.
Choose Practical Shelf Spacing
There is no mandatory spacing that works in every linen closet, but these ranges provide a useful starting point:
- 10 to 12 inches: pillowcases, washcloths, hand towels, and small bins
- 12 to 15 inches: folded bath towels and sheet sets
- 16 to 20 inches: baskets, blankets, and bulky bedding
- 18 inches or more near the floor: laundry baskets, paper products, or large storage bags
Place everyday towels and sheets in the easiest-to-reach middle section. Reserve the top shelf for lightweight seasonal bedding, not a dense container that requires weightlifting credentials to retrieve.
Three Easy Linen Closet Shelving Options
1. Wood Shelves Supported by Cleats
Cleat-supported shelves are affordable, strong, and straightforward to customize. A cleat is a narrow strip of wood secured to the back and side walls. The shelf rests on top of these strips, creating support along three edges.
Three-quarter-inch plywood is a dependable choice because it remains relatively stable and can be cut to almost any size. Solid pine shelving is another beginner-friendly option. Medium-density fiberboard can produce a smooth painted finish, but it is heavy and more vulnerable to moisture, so it is not ideal for a humid bathroom closet.
Wood shelves provide a flat surface that will not leave wire impressions in folded towels. They can also be painted to match the closet interior. For long spans, add a front edge strip or center bracket to reduce sagging.
2. Adjustable Track Shelving
Adjustable systems use wall-mounted tracks, vertical standards, and movable brackets. Once the supporting track is installed securely, shelf positions can be changed without drilling another collection of holes.
This system works well for growing families, rental-property upgrades approved by the owner, and closets that store changing combinations of bedding, toiletries, or laundry supplies. Wood, laminate, or wire shelves may be available depending on the system. Follow the manufacturer’s instructions for fastener type, bracket spacing, and load capacity.
3. Ventilated Wire Shelving
Wire shelving is lightweight, economical, and resistant to many moisture-related problems. Air can circulate around towels and bedding, making it a sensible choice for a linen closet near a bathroom. Wire systems are also easy to wipe clean and often come in ready-to-install kits.
The tradeoff is an uneven surface. Small bottles may tip, and soft linens can develop ridged impressions. A washable shelf liner solves much of that problem, but it should not completely block airflow in a damp location.
Tools and Materials for Simple Wood Shelves
| Item | Purpose |
|---|---|
| 3/4-inch plywood or solid shelf boards | Creates a sturdy, flat storage surface |
| 1-by-2 lumber | Forms the back and side support cleats |
| Stud finder | Locates framing behind the wall |
| Tape measure, pencil, and level | Establishes accurate, level shelf positions |
| Drill, screws, and suitable anchors | Secures the cleats or shelf hardware |
| Circular saw, miter saw, or store cutting service | Cuts boards to the required dimensions |
| Sandpaper, primer, and paint | Produces a smooth, washable finish |
| Eye protection and hearing protection | Helps protect you while cutting and drilling |
Inspect the wall before drilling. Linen closets located beside bathrooms may conceal water lines, drains, or electrical cables. Use an appropriate scanner when needed, avoid suspicious areas, and consult a qualified professional if the wall layout is uncertain.
How to Build Easy Shelves for a Linen Closet
Step 1: Empty and Prepare the Closet
Remove everything, including old shelf hardware that will not be reused. Patch unwanted holes, wipe down the walls, and vacuum the corners. This is also the ideal time to paint because painting around finished shelves is possible but deeply annoying.
Allow paint to dry and cure according to its instructions before placing linens against it. Shelves that still feel tacky can transfer marks to fabric.
Step 2: Mark the Shelf Layout
Measure upward from the same reference point, usually the closet floor. Mark each shelf position on the back and side walls. Use a level to extend the marks rather than trusting the floor or ceiling to be perfectly horizontal.
Test the arrangement with painter’s tape. Place representative towels, baskets, or storage bags against the taped layout. This quick rehearsal often reveals that a planned opening is too short or that a shelf conflicts with the door casing.
Step 3: Locate the Wall Studs
Scan each wall and mark the stud centers. Whenever possible, drive shelf-support screws into framing. If a required attachment point does not align with a stud, use an anchor specifically rated for the wall material and anticipated load.
Do not assume every plastic anchor can support a loaded shelf. Fastener capacity varies according to the anchor, drywall thickness, installation quality, and how the load pulls on the wall. Manufacturer instructions should always take priority over generic rules.
Step 4: Cut and Finish the Boards
Cut the cleats and shelves using the measurements taken inside the closet. Dry-fit every shelf before painting. If a shelf refuses to enter even though the dimensions appear correct, the door trim or an out-of-square corner may be the culprit.
Sand cut edges and corners until they are smooth enough not to snag fabric. Apply primer and a durable interior paint, or seal natural wood with an appropriate clear finish. Let all coatings cure before installation.
Step 5: Install the Cleats
Position the back cleat with its upper edge at the marked shelf line. Check it with a level, drill pilot holes, and fasten it securely. Install the side cleats at the same height and confirm that all three supports remain level.
Select screw length according to the cleat thickness, wall finish, and framing. The screw must penetrate the structural material adequately without reaching concealed pipes or cables. When using masonry walls or metal framing, choose fasteners designed for that construction.
Step 6: Fit and Secure the Shelves
Set each shelf on its cleats and check for rocking. Small wall irregularities can be handled with careful trimming or thin shims. Shelves may be screwed down into the cleats to prevent shifting, especially when baskets will be pulled forward repeatedly.
For a long shelf, install an appropriate center bracket or stiffen the front with an attached wood strip. A shelf that looks perfectly straight while empty may develop an unhappy smile after several stacks of towels are added.
Organizing the Finished Linen Closet
Create Storage Zones
Assign each shelf a clear job. Keep bath towels together, place sheets by bed size or bedroom, and separate guest linens from everyday supplies. Shelf dividers help prevent folded stacks from leaning into each other.
Store matching sheets inside one of their pillowcases so the entire set can be grabbed at once. Open baskets work well for washcloths and frequently used toiletries, while lidded bins are better for seasonal items that need dust protection.
Use Height According to Frequency
Place frequently used items between waist and eye level. Lightweight extras can go higher, and heavy or bulky goods should stay low. Avoid hiding daily supplies behind rarely used blankets simply because the containers happen to match.
Leave breathing room around folded linens. Overpacked shelves restrict access and can reduce airflow. Towels and sheets should be completely dry before storage, especially in a closet exposed to bathroom humidity.
Label Without Turning the Closet Into a Warehouse
Simple labels such as “Queen Sheets,” “Guest Towels,” and “First Aid” are enough. Label the shelf edge or the front of each bin. This makes it easier for everyone in the household to return items correctly rather than placing them on the shelf that currently looks least dangerous.
Common Linen Closet Shelf Mistakes
- Building before decluttering: More shelves cannot permanently solve an excess-inventory problem.
- Making every opening identical: Towels, sheets, baskets, and comforters need different amounts of clearance.
- Ignoring the door opening: A shelf can fit inside the closet yet remain impossible to maneuver past the trim.
- Relying on weak drywall anchors: Use studs where possible and rated hardware everywhere else.
- Choosing shelves that are unnecessarily deep: Extra depth often becomes a hiding place rather than useful storage.
- Skipping center support: Long wood shelves may sag under concentrated loads.
- Storing damp linens: Shelving cannot compensate for trapped moisture and poor ventilation.
- Buying baskets first: Plan the shelf layout, then purchase containers that fit it.
Real-World Experience: Lessons From a Weekend Shelf Upgrade
A typical linen closet makeover begins with optimism, a tape measure, and the belief that the walls must surely be square. The first useful lesson is that measuring once is not enough. In one representative small-closet project, the rear width was nearly half an inch narrower than the opening. Shelves cut from the front measurement would have become expensive wooden doorstops. Measuring at several depths prevented the mistake.
The next lesson involved shelf spacing. The original plan called for five evenly spaced shelves because symmetry looked tidy on paper. A quick test with actual linens showed why storage should be designed around objects rather than arithmetic. The bath towels needed a taller opening, while pillowcases occupied barely half of theirs. The revised layout used two 12-inch openings, two approximately 14-inch openings, and a larger upper compartment for comforters. It was less mathematically elegant and far more useful.
Painting before installation also saved time. The shelves were primed and painted in an open workspace, where drips could be corrected without performing closet yoga. Only the screw heads and minor installation marks required touch-ups. Waiting for the finish to cure was important; placing white sheets on merely dry paint can result in sticking or subtle discoloration.
During installation, the side walls offered fewer convenient studs than expected. Instead of scattering random anchors everywhere, the design relied on cleats fastened into available framing, with hardware rated for the wall construction used only where necessary. A center bracket was added beneath the widest shelf. It was inexpensive insurance against sagging and almost invisible behind the towel stacks.
The most surprising improvement came from organization, not carpentry. Matching sheet sets were folded into pillowcases, and shelf dividers kept towels in narrow stacks. Everyday linens moved to the middle shelves, while guest blankets went up high. A basket on the lowest shelf collected washcloths that had previously wandered through the closet like tiny terry-cloth nomads.
After several weeks, two adjustments proved worthwhile. First, one shelf was moved upward to accommodate a taller toiletries bin. This confirmed the value of adjustable systemsor at least testing a fixed layout carefully. Second, several decorative baskets were replaced with clear or open-front containers. The original baskets looked lovely but concealed their contents, causing duplicate purchases.
The broader lesson is that easy linen closet shelves succeed when construction and daily habits support each other. Strong shelves matter, but so do visibility, reachable placement, sensible categories, and a little empty space. A closet should be easy to maintain on an ordinary laundry day, not only during the ten minutes after it has been styled for a photograph.
Conclusion
Easy shelves for a linen closet do not require elaborate cabinetry. Accurate measurements, appropriately supported boards, practical spacing, and a storage plan based on real household needs can transform the space in a weekend. Choose wood for a smooth built-in appearance, wire for ventilation, or adjustable tracks for flexibility. Then organize by category and frequency of use so the closet remains functional long after the tools are put away.