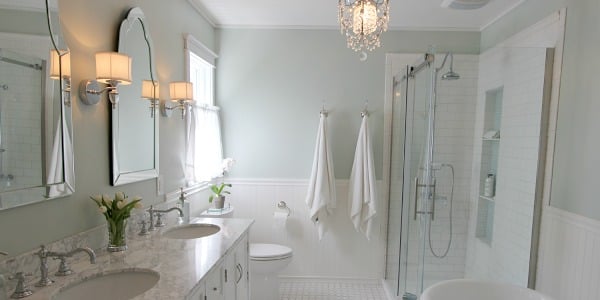
A successful master bathroom remodel shach, survive years of steam, and provide enough storage that the countertop does not become a permanent exhibit of toothpaste, tangled cords, and mysteriously uncapped lotion.
An elegant master bath remodel with built-in shelving solves those problems by treating storage as part of the architecture rather than an accessory added at the last minute. Recessed niches, linen towers, vanity cabinets, and open display shelves can create a clean, custom appearance while using wall space more efficiently.
The key is balance. Too little storage creates clutter. Too much cabinetry can make the room feel like a walk-in pantry with plumbing. The best design combines closed compartments for everyday supplies with carefully placed open shelves for attractive, frequently used items.
Start with a Clear Vision for the Master Bathroom
Before choosing marble tile or falling emotionally in love with a freestanding tub, define what the remodeled bathroom needs to accomplish. Consider who uses the room, how often both people use it simultaneously, which products must remain accessible, and what currently causes frustration.
A couple sharing the bathroom may need separate sink zones, divided drawers, two medicine cabinets, and dedicated shelves for personal products. Someone who prefers long baths may value a recessed shelf beside the tub. A household with bulky towels and backup toiletries may benefit more from a floor-to-ceiling linen cabinet.
Write down the daily routine from morning to night. This simple exercise reveals where storage belongs. Hair tools should be near a safe electrical outlet. Towels should be reachable from the shower. Cleaning supplies should have a ventilated but discreet home. Extra toilet paper should not require a towel-wrapped expedition across the room.
Plan the Layout Before Designing the Shelves
Create Practical Activity Zones
An elegant bathroom usually feels calm because each area has a clear purpose. Divide the room into functional zones for grooming, bathing, showering, dressing, and storage. Built-in shelving should support these zones instead of interrupting them.
For example, a tall linen tower can sit between two vanity stations, giving each person easy access while visually anchoring the wall. Recessed shelves beside a bathtub can hold towels and bath products without blocking the walkway. A shower niche should be positioned where it is easy to reach but not constantly blasted with water.
Protect Comfortable Circulation
Open shelves should never project into a narrow traffic path. Cabinet doors and drawers must open without colliding with the bathroom door, toilet, shower glass, or another drawer. Measure the room with every movable element shown in its open position. A vanity may fit perfectly on paper until its bottom drawer introduces itself to the toilet.
Whenever possible, preserve the existing locations of major plumbing fixtures. Moving a sink a few inches is one thing; relocating a toilet or shower drain can significantly increase labor, demolition, and repair work. Savings from a simpler plumbing plan can be redirected toward better cabinetry, tile, lighting, or countertops.
Choose the Right Types of Built-in Bathroom Shelving
Floor-to-Ceiling Linen Towers
A custom linen tower is one of the most useful additions to a primary bathroom. It takes advantage of vertical space and can combine adjustable shelves, drawers, pullouts, and closed cabinets in one narrow footprint.
Place everyday towels around waist or chest height, backup products on upper shelves, and less glamorous supplies behind lower doors. Adjustable shelving is particularly valuable because storage needs change over time. Today the cabinet may hold folded towels; next year it may need to accommodate a warehouse-sized package of paper goods purchased during an ambitious shopping trip.
For a furniture-like appearance, continue the cabinetry to the ceiling and finish it with simple crown molding or a clean filler panel. This eliminates the dusty, decorative wilderness that often forms above short cabinets.
Recessed Shower Niches
A built-in shower niche keeps bottles off the floor and eliminates bulky hanging caddies. It can be subtle, using the same tile as the shower walls, or decorative, with contrasting mosaic tile, stone, or a metal-edged frame.
Plan the niche before framing and tile installation. Its dimensions should accommodate the products actually used in the household, including tall pump bottles. A divided niche works well when the lower compartment is tall enough for shampoo and conditioner while the upper section holds soap, razors, or smaller containers.
Water management is more important than appearance. The niche must be integrated into the shower’s waterproofing system, and its horizontal surfaces should slope slightly toward the shower so water does not collect against the back wall. This is not the place for creative shortcuts or optimistic caulk.
Vanity Towers and Countertop Cabinets
A countertop tower between two sinks can provide convenient storage while creating visual separation. Use it for skincare products, cosmetics, medications, or grooming equipment. Doors can conceal clutter, while a small open cubby can hold folded washcloths or a decorative tray.
Consider installing an electrical outlet inside a closed cabinet for toothbrushes, shavers, or hair tools, provided the design complies with local electrical requirements. Heat-producing tools need a safe, properly designed compartment and should never be stored while dangerously hot.
If countertop space is limited, recess part of the tower into the wall or begin the cabinet slightly above the counter. The resulting open area can function as a small appliance bay without consuming the entire work surface.
Built-ins Beside the Tub
A freestanding tub looks luxurious, but it often provides nowhere to place a towel, book, or glass of water. Built-in shelves beside or behind the tub solve that problem without requiring a wobbly tray balanced across the rim.
Keep frequently used items on lower shelves and decorative objects higher up. If shelves are close to splashing water, choose moisture-resistant materials and finishes. Avoid placing fragile artwork or a beloved first-edition novel where an enthusiastic bath could end the relationship.
Recessed Shelving Between Wall Studs
Shallow shelves built between wall studs can add storage without reducing usable floor space. They are ideal for small toiletries, rolled washcloths, perfume, candles, or decorative jars.
Not every wall cavity is available. Plumbing, electrical wiring, ductwork, structural framing, and insulation may occupy the space. Have the wall inspected before demolition, particularly when the proposed recess is near a sink, shower valve, or exterior wall.
Select Materials That Can Handle Bathroom Moisture
Bathrooms create humidity, condensation, temperature changes, and occasional splashes. Built-in shelving therefore needs more protection than ordinary living room bookcases.
For painted cabinetry, moisture-resistant plywood is generally a stronger choice than low-grade particleboard. Solid wood can work beautifully when properly constructed and sealed, but natural movement must be considered. In wet areas, tile, stone, solid-surface material, porcelain slabs, or properly waterproofed substrates are often more practical.
Use durable finishes on shelf edges, corners, and joints because these areas receive the most wear. Caulk transitions where different materials meet, and follow the installation requirements for the selected waterproofing and tile systems.
Open wooden shelves should have a high-quality protective finish on every surface, including the underside and back. Finishing only the visible face is the cabinetmaking equivalent of wearing a raincoat with no back panel.
Build an Elegant, Cohesive Color Palette
Elegance does not require covering every surface in expensive stone. A restrained palette usually creates a more timeless result. Warm white, soft taupe, pale gray, muted green, natural oak, walnut, and charcoal can all support a refined master bathroom.
Choose one dominant material, one supporting finish, and one or two accents. For example, large-format ivory porcelain tile can provide the main backdrop, a walnut vanity can add warmth, and brushed nickel hardware can tie the room together. Built-in shelves should repeat at least one existing finish so they appear intentional.
Using the same tile inside a shower niche creates a quiet, seamless look. Contrasting tile turns the niche into a focal point. Both approaches work, but the choice should relate to the overall design. A room with bold flooring may benefit from a simple niche, while a restrained bathroom can handle a small moment of pattern.
Layer the Lighting Around the Storage
Lighting should be planned at the same time as cabinetry and shelving. Otherwise, a beautiful linen tower may cast a shadow over the vanity, or an open shelf may unintentionally block a wall sconce.
Use several layers of light:
- Ambient lighting provides comfortable general illumination.
- Task lighting illuminates faces evenly at the vanity.
- Accent lighting highlights architectural details or display shelves.
- Low-level lighting improves nighttime navigation without waking the entire household.
Integrated LED lighting under floating shelves or inside glass-front cabinets can add a soft hotel-like glow. Select fixtures and controls rated for their intended bathroom locations, particularly near showers, tubs, and other wet areas.
Dimmers make the room more flexible. Bright light is useful for shaving or makeup; softer illumination is far more pleasant during an evening bath when no one wants to feel as though they are being questioned at an airport.
Do Not Overlook Ventilation and Water Efficiency
Proper ventilation protects cabinetry, paint, grout, and indoor air quality. The exhaust fan should be correctly sized for the room and vented outdoors rather than into an attic or enclosed ceiling cavity. Quiet operation also matters because a fan that sounds like a departing helicopter is less likely to be used consistently.
Humidity-sensing controls and timers can help the fan continue running after bathing. Shelves filled with towels and baskets need airflow, so avoid tightly packing every open compartment.
Water-efficient faucets, showerheads, and toilets can reduce consumption without undermining comfort when they are properly selected. Products carrying the EPA WaterSense label are designed to meet efficiency and performance criteria. Pairing efficient fixtures with a practical hot-water layout can also reduce the amount of water wasted while waiting for the shower or faucet to warm up.
Add Safety Without Sacrificing Style
A sophisticated master bathroom can also be comfortable for users of different ages and abilities. A curbless or low-threshold shower, handheld showerhead, built-in bench, lever-style handles, and slip-resistant flooring can improve daily usability.
Even when grab bars are not installed immediately, adding blocking inside the walls during the remodel makes future installation easier and more secure. This preparation is inexpensive before the walls are closed and considerably less entertaining after the finished tile must be opened again.
Keep frequently used items between comfortable knee and shoulder height. Heavy bottles should not be stored above eye level, and shelves near the tub should be reachable without leaning dangerously across a wet surface.
Establish a Realistic Remodeling Budget
Custom built-ins can range from simple recessed shelves to elaborate cabinetry with integrated outlets, lighting, specialty hardware, and furniture-grade finishes. Obtain detailed estimates that separate demolition, framing, waterproofing, plumbing, electrical work, tile installation, cabinetry, countertops, painting, fixtures, and permits.
Reserve a contingency fund for hidden damage, outdated wiring, plumbing surprises, or framing corrections. Bathrooms have a special talent for revealing problems only after demolition has begun and everyone is emotionally committed.
Spend strategically. Waterproofing, plumbing, ventilation, electrical safety, and skilled installation deserve priority. Decorative accessories, towels, and artwork can be upgraded later. It is much easier to replace a soap dispenser than a leaking shower assembly.
Follow the Right Project Sequence
- Document the existing room and take accurate measurements.
- Finalize the floor plan, fixture locations, and storage requirements.
- Select major materials before demolition begins.
- Confirm permit and inspection requirements.
- Complete demolition and inspect the exposed structure.
- Install or adjust framing for niches, cabinets, and blocking.
- Complete rough plumbing, electrical work, and ventilation.
- Install waterproofing systems in wet areas.
- Complete tile, flooring, cabinetry, and countertop work.
- Install fixtures, lighting, hardware, mirrors, and accessories.
- Test every drawer, valve, outlet, light, fan, and drain.
Built-in shelving dimensions should be confirmed after actual framing conditions are visible. Even carefully measured older homes can contain walls that lean, corners that are not square, and framing decisions made by someone who apparently owned only one level and did not trust it.
Style Open Shelves Without Creating Clutter
Open bathroom shelving works best when useful items become part of the design. Fold towels consistently, decant small supplies into matching containers, and use baskets to group less attractive products.
Leave some empty space. Every shelf does not need to be filled edge to edge. Negative space allows the eye to rest and makes the room feel larger. A practical styling formula is to combine one stack of towels, one container, and one decorative object on a shelf rather than displaying the full inventory of a neighborhood pharmacy.
Choose accessories that tolerate humidity. Stone trays, ceramic containers, glass jars, sealed wood objects, and washable baskets are generally easier to maintain than delicate paper, untreated metals, or moisture-sensitive artwork.
Closed storage should hold medications, backup toiletries, cleaning products, personal items, and anything with visually aggressive packaging. Open shelves should feature the things that look good and are used often.
Common Built-in Shelving Mistakes to Avoid
- Designing shelves before inventorying products: Beautiful compartments are useless when the shampoo bottle is two inches too tall.
- Ignoring waterproofing: Tile and grout are not substitutes for a complete water-management system.
- Making shelves too deep: Deep cabinets can turn small toiletries into archaeological discoveries.
- Installing too much open storage: Constantly visible products create visual noise and require more frequent cleaning.
- Forgetting electrical planning: Countertop cabinets and vanity towers may block existing outlets or need new ones.
- Using delicate materials near water: Select finishes according to actual exposure, not showroom lighting.
- Neglecting ventilation: Moisture can damage cabinetry and encourage mildew.
- Skipping adjustable shelves: Fixed compartments limit future flexibility.
Remodeling Experience: What an Elegant Master Bath Project Teaches You
The most useful lesson from remodeling a master bathroom is that glamorous features rarely create the greatest daily improvement. The dramatic tub may receive compliments, but the correctly placed towel shelf is what quietly saves the morning. Good storage improves the room dozens of times per day without demanding attention.
During the planning stage, many homeowners underestimate how many categories of products live in a bathroom. Towels, washcloths, cosmetics, hair tools, grooming equipment, first-aid supplies, cleaning products, spare soap, paper goods, and travel toiletries all compete for space. Measuring these items before designing cabinets produces much better results than estimating from memory.
One practical approach is to place every bathroom item into labeled groups before construction begins. The groups reveal which products need shallow drawers, tall compartments, concealed outlets, open shelves, or secure closed cabinets. This process may feel excessive until the finished room opens with one motion and the hair dryer is exactly where it should be.
Another important experience is learning that built-ins must be coordinated with several trades. A recessed niche affects framing, waterproofing, tile layout, and sometimes plumbing or electrical work. A vanity tower influences countertop fabrication, mirror dimensions, sconces, outlets, and sink placement. When these decisions are made late, compromises multiply quickly.
Tile layout deserves particular attention. A niche that looks perfectly centered on a drawing may produce awkward slivers of tile when actual dimensions are considered. Reviewing elevations with the installer before work begins allows shelves, grout lines, trim pieces, and fixtures to align more intentionally.
The remodeling process also teaches patience. Cabinet finishes may look different under installed lighting than they did on a small showroom sample. Natural stone varies from slab to slab. Hardware that appears understated online may feel oversized in person. Bringing samples into the room and viewing them together reduces expensive surprises.
Living through construction makes dust control and temporary arrangements equally important. Protect nearby rooms, establish where tools and materials will be stored, and plan access to another bathroom. A master bath remodel is much more tolerable when the household is not stepping over tile boxes while searching for a functioning shower at 6:30 a.m.
At the end of the project, test the room as though inspecting someone else’s work. Run the shower, fill and drain the tub, operate the exhaust fan, inspect cabinet alignment, open every drawer, check shelf edges, confirm lighting controls, and look for water collecting on horizontal surfaces. Small adjustments are easier while contractors are still available.
The best finished bathrooms usually feel simple, but that simplicity is carefully engineered. Towels are reachable, cords are hidden, lighting is flattering, and open shelves contain only a few attractive objects. Nothing appears forced, and every cabinet seems to be exactly where it belongs.
That is the real luxury of built-in shelving. It does not merely add storage; it removes dozens of small inconveniences. The bathroom becomes quieter visually, easier to clean, and more pleasant to use. Even on chaotic mornings, the room behaves as though someone has everything under controlwhich, frankly, is a lovely illusion.
Conclusion
An elegant master bath remodel with built-in shelving combines refined design with practical organization. The most successful rooms begin with a careful inventory of daily needs, a logical floor plan, and storage placed near the activities it supports.
Recessed shower niches, linen towers, vanity cabinets, tub-side shelves, and between-stud storage can all make the room more functional without adding visual clutter. Durable materials, effective ventilation, professional waterproofing, layered lighting, and future-friendly safety features protect that beauty over time.
Plan the hidden systems first and decorate second. When the architecture handles the towels, bottles, appliances, and backup supplies, the visible room can remain calm, spacious, and elegant. That is when a remodeled master bath stops feeling like a collection of expensive products and starts feeling like a thoughtfully designed retreat.
Note: This original article was developed from practical remodeling, storage, ventilation, water-efficiency, waterproofing, and accessibility guidance published by reputable U.S. home-improvement and public-interest resources.