Your car’s differential is one of those hardworking parts that rarely gets invited to the maintenance party. Engine oil gets the spotlight. Tires get the dramatic tread-depth inspections. Even windshield washer fluid gets topped off like it is receiving spa service. Meanwhile, the differential quietly handles heavy torque, sharp turns, heat, pressure, and the tiny mechanical drama of your wheels spinning at different speeds.
That is exactly why learning how to check your car’s differential gear oil matters. Differential gear oil, also called differential fluid or diff oil, lubricates the ring gear, pinion gear, bearings, and internal components inside the differential housing. Without the right level and condition of fluid, metal parts can overheat, wear, whine, grind, or eventually fail in a way that makes your wallet stare into the distance.
The good news? Checking differential oil is not mysterious. It is usually a simple inspection through the fill plug, as long as you use safe lifting methods, keep the vehicle level, and follow your owner’s manual for the correct gear oil specification. This guide walks you through 13 practical steps, explains what to look for, and helps you decide when a quick top-off is enoughor when the differential needs a full service.
What Is Differential Gear Oil?
Differential gear oil is a thick lubricant designed for high-pressure gear contact. Unlike engine oil, which works inside your engine, gear oil is built to handle the sliding and crushing forces between heavy drivetrain gears. It reduces friction, carries heat away from gear surfaces, and helps protect metal components from wear.
Most rear-wheel-drive vehicles have a rear differential. Four-wheel-drive and all-wheel-drive vehicles may have front and rear differentials, and sometimes a transfer case as well. Some front-wheel-drive cars do not have a separate serviceable differential because the differential is integrated into the transaxle. In other words, before you crawl under the car like a driveway detective, confirm what your specific vehicle actually has.
Why Checking Differential Fluid Matters
Low or contaminated differential fluid can cause whining, howling, clunking, vibration, chatter while turning, overheating, and premature gear or bearing wear. A small leak around an axle seal or differential cover may not look dramatic at first, but over time it can lower the fluid level enough to create expensive damage.
Checking the fluid level is especially smart if you notice a wet differential housing, a burning gear-oil smell, dark or gritty fluid, new drivetrain noise, or if the vehicle has recently been serviced. It is also worth checking before towing, after off-road driving, or after driving through deep water. Water contamination can turn gear oil cloudy or milky, and that is not a “maybe later” maintenance item.
Tools and Supplies You May Need
Before starting, gather basic hand tools, safety glasses, gloves, wheel chocks, a drain pan, shop towels, the correct socket or wrench for the fill plug, and a hand pump or squeeze bottle if you need to add fluid. You may also need a floor jack and jack stands if access is limited. Never rely on a jack alone to support a vehicle. A jack lifts; jack stands support. That difference is not a technicalityit is the whole safety meeting.
You should also have your owner’s manual or service manual available. The manual tells you the correct gear oil viscosity, such as 75W-90 or 80W-90, the required API rating such as GL-5, and whether limited-slip additive is needed. Guessing with differential fluid is like seasoning soup while blindfolded: bold, but not recommended.
How to Check Your Car’s Differential Gear Oil: 13 Steps
Step 1: Confirm Your Vehicle Has a Serviceable Differential
Start by identifying your drivetrain. Rear-wheel-drive vehicles usually have a visible rear differential, often called the “pumpkin,” mounted between the rear wheels. Four-wheel-drive and all-wheel-drive vehicles may have a front differential too. Some modern vehicles use sealed units or integrated drivetrains that require special procedures. Check your manual before assuming every plug under the vehicle is your new best friend.
Step 2: Park on a Level Surface
Differential fluid level must be checked with the vehicle level. If the car is tilted nose-up, nose-down, or leaning sideways, the fluid reading can be wrong. Park on a flat driveway or garage floor. Set the parking brake and place the transmission in Park for an automatic or in gear for a manual transmission.
Step 3: Let the Vehicle Cool Slightly
Warm gear oil flows more easily, but extremely hot components can burn your hands. If you just finished driving, give the drivetrain time to cool until it is safe to touch nearby parts. You do not need the differential ice-cold; you just need it not auditioning as a waffle iron.
Step 4: Secure the Vehicle
Place wheel chocks around the tires that will remain on the ground. If you need to raise the vehicle, lift it only at approved jacking points and support it with properly rated jack stands. Keep the vehicle level even when raised. If you cannot safely access the differential while keeping the car level, let a professional handle the inspection.
Step 5: Locate the Differential Fill Plug
The fill plug is usually on the side or front-facing area of the differential housing, not at the very bottom. The bottom plug, if present, is often the drain plug. Do not remove the drain plug unless you are doing a fluid change. The fill plug may use a square drive, hex socket, Allen fitting, or standard bolt head.
Step 6: Clean Around the Plug
Before removing anything, wipe dirt and road grime from around the fill plug. This prevents debris from falling into the differential when the plug comes out. Differential gears enjoy clean lubricant, not a crunchy seasoning blend of driveway dust and old mud.
Step 7: Loosen the Fill Plug First
Always confirm the fill plug can be removed before draining or servicing the differential. Even if you are only checking the level, this habit matters. If a fill plug is seized, rounded, or damaged, forcing it can turn a small inspection into a repair project. Use the correct tool and apply steady pressure. If it refuses to move, stop before you strip it.
Step 8: Remove the Fill Plug Carefully
Place a drain pan under the differential before removing the plug. A small amount of oil may drip out if the level is full. Remove the plug slowly, keeping your face away from the opening. Gear oil has a strong smell, and while it is not dangerous to smell briefly in normal use, nobody needs a full theatrical experience.
Step 9: Check the Fluid Level
On many serviceable differentials, the correct oil level is at or just below the lower edge of the fill hole. Insert a clean finger slightly into the opening. If you can touch fluid close to the bottom edge of the hole, the level is usually correct. If your finger comes out dry and the fluid is clearly below the opening, the differential may be low.
Step 10: Inspect Fluid Condition
Healthy gear oil is usually amber, golden, or brown depending on age and type. Used oil can darken, but it should not look thick, sludgy, milky, foamy, or loaded with shiny metal particles. A small amount of fine metallic paste on a magnetic plug can be normal wear, but visible flakes or glitter may indicate internal damage. If the fluid smells burnt, looks contaminated, or contains metal debris, plan on a proper differential service and inspection.
Step 11: Add the Correct Gear Oil if Needed
If the level is low, add only the gear oil specified by your vehicle manufacturer. Use the correct viscosity and rating. Limited-slip differentials may require gear oil with friction modifier or a separate limited-slip additive. Use a hand pump or squeeze bottle to add fluid through the fill hole until it begins to trickle out or reaches the specified level. Do not overfill unless your service manual gives a special procedure.
Step 12: Reinstall the Fill Plug
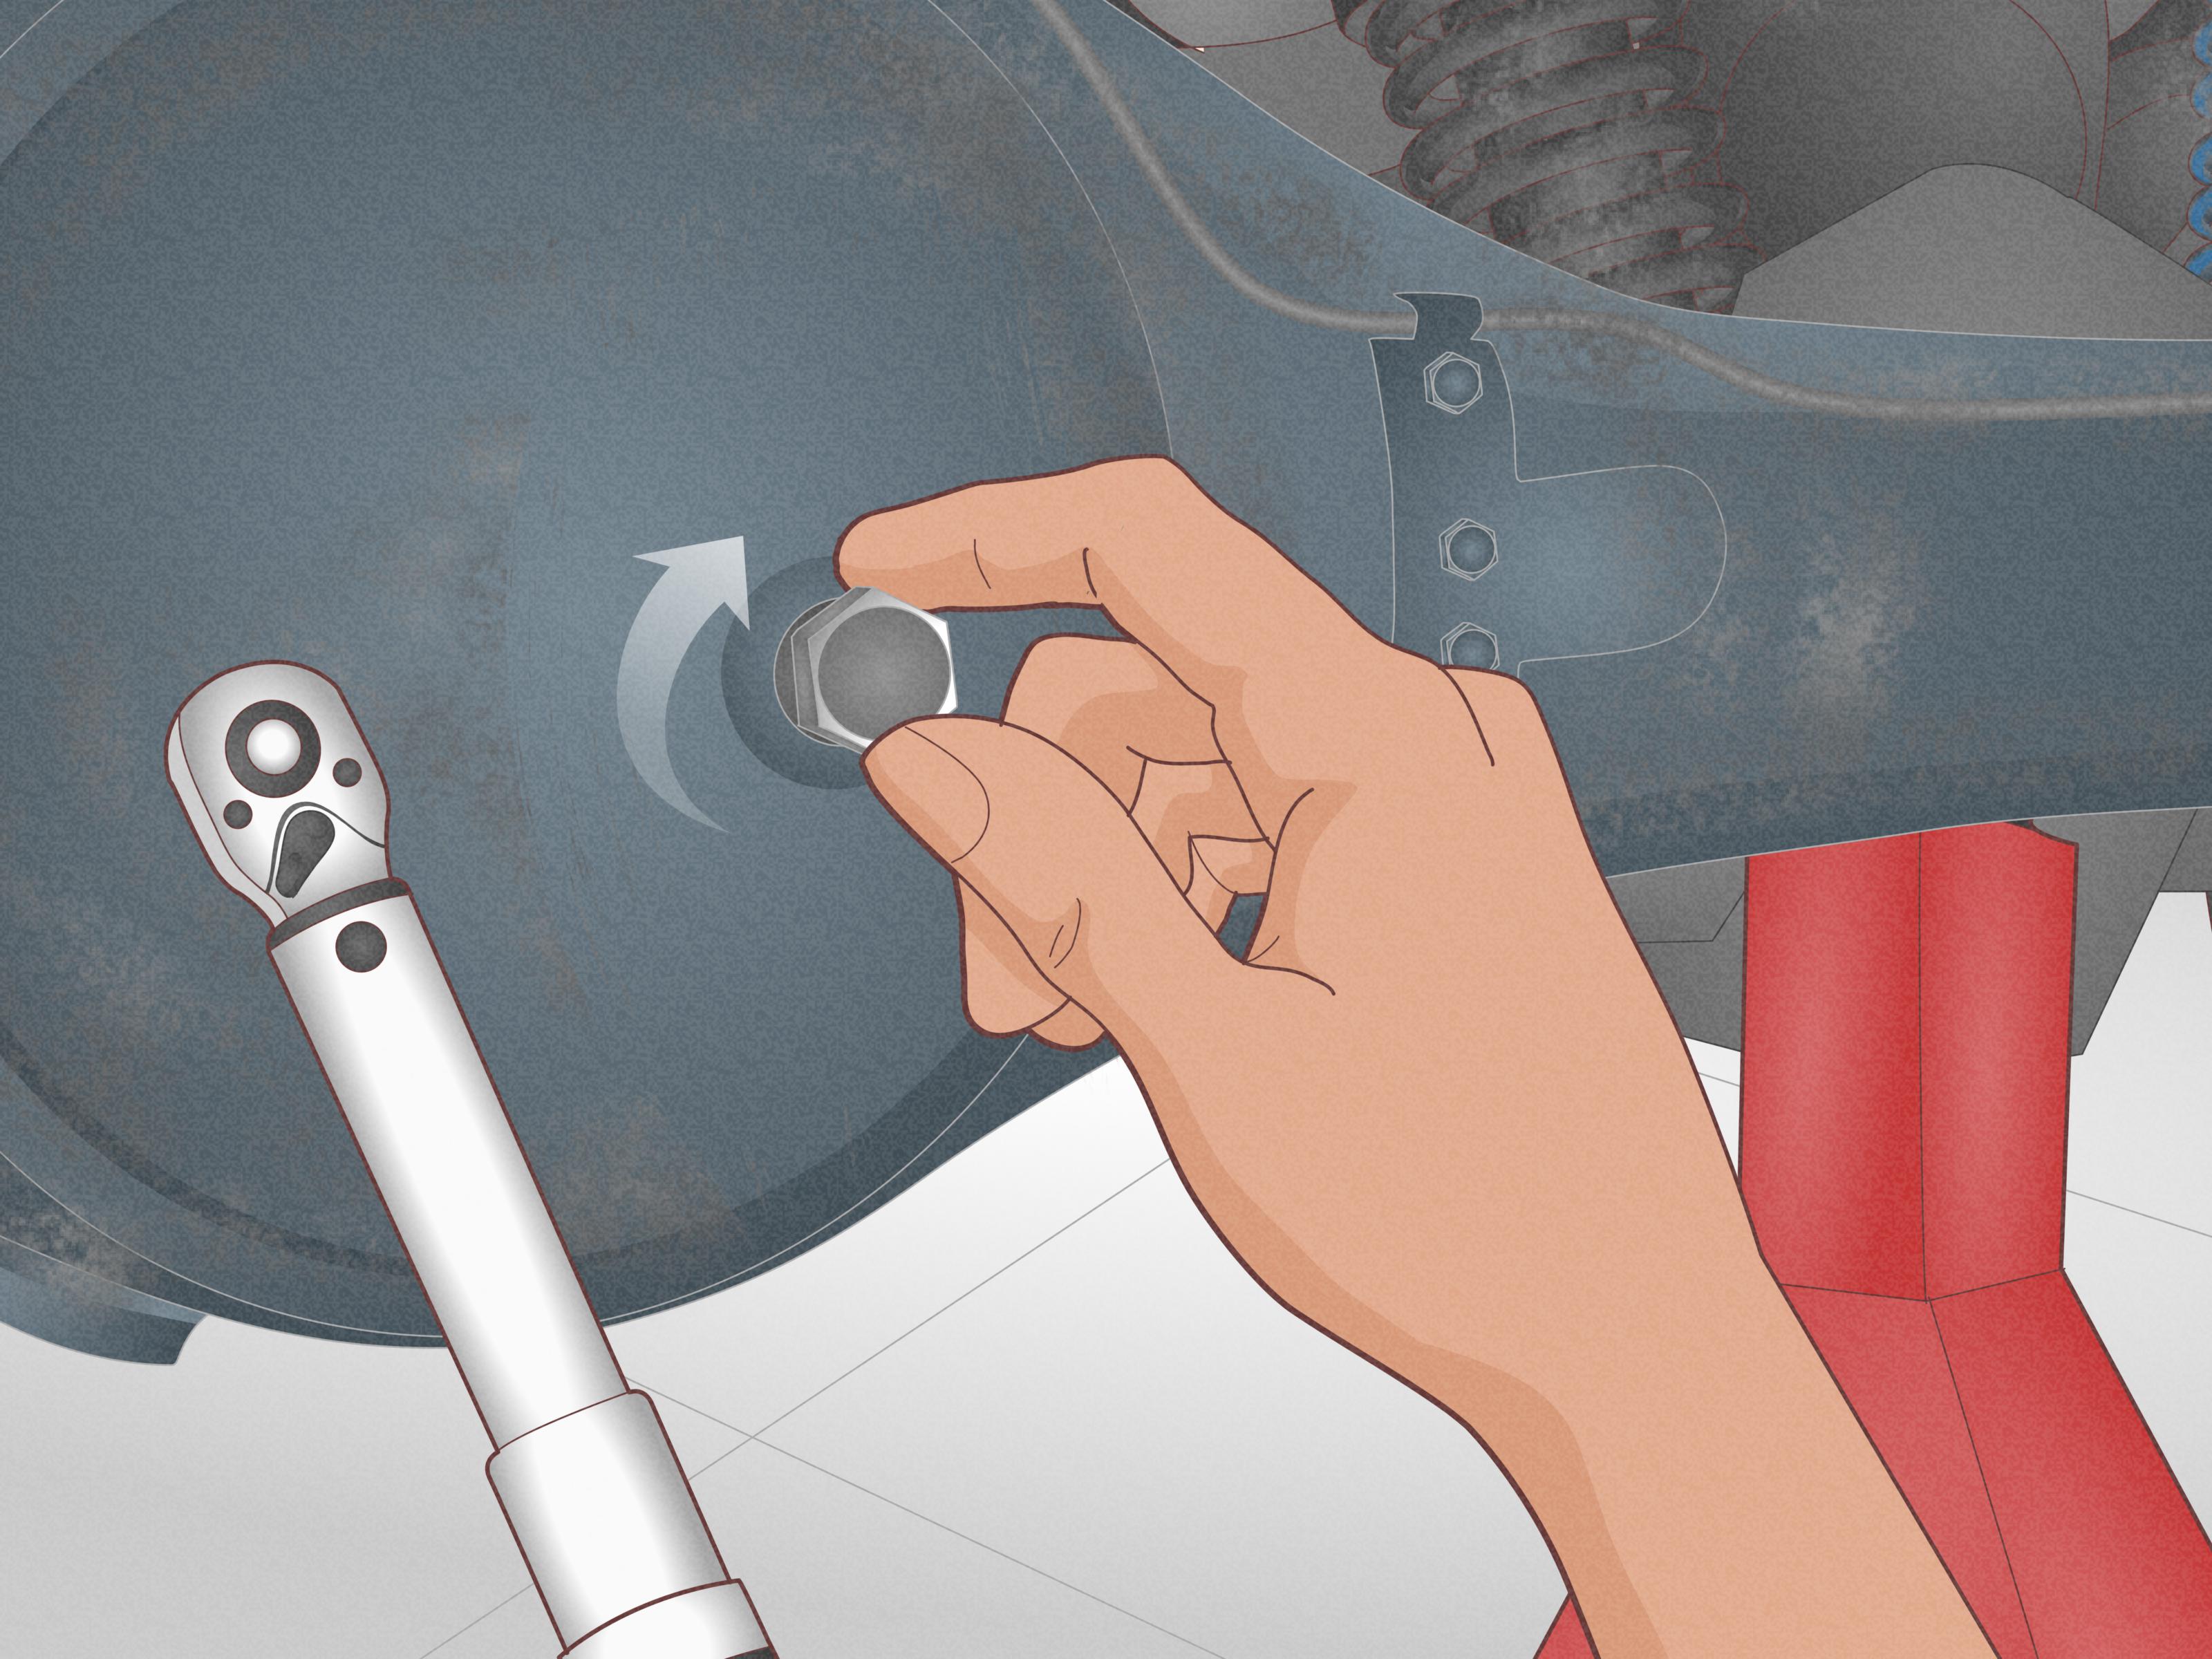
Inspect the plug and sealing washer, if equipped. Replace damaged washers or seals. Thread the plug in by hand first to avoid cross-threading, then tighten it securely. For best results, use the torque specification from your service manual. “Tight enough but not gorilla tight” is a popular driveway measurement, but torque specs exist for a reason.
Step 13: Clean Up and Recheck for Leaks
Wipe the differential housing clean so future leaks are easier to spot. Lower the vehicle safely if it was raised. After driving, inspect the fill plug, cover gasket, pinion seal, and axle seals for fresh oil. If the fluid was low, finding the leak is just as important as topping it off. A refill without fixing the leak is basically giving the differential a tiny beverage and hoping it changes its lifestyle.
How Often Should You Check Differential Gear Oil?
There is no universal interval that fits every car, truck, SUV, and driving style. Many vehicles benefit from differential fluid inspection during routine maintenance, especially around major service intervals. Some sources commonly discuss fluid changes around 30,000 to 50,000 miles, but your owner’s manual is the boss. Severe use can shorten service intervals, including towing, hauling heavy loads, off-roading, repeated short trips, water crossings, aggressive driving, and high heat.
If your vehicle has a known differential leak, check the level more often until the leak is repaired. If you bought a used vehicle and do not know its service history, checking the differential oil is a smart baseline maintenance task.
Common Signs of Low or Bad Differential Fluid
Whining or Howling Noise
A whining or howling sound that changes with vehicle speed may point to differential wear, low fluid, or bearing issues. Noise alone does not diagnose the problem, but it is a strong reason to inspect the fluid level and condition.
Vibration or Chatter While Turning
Limited-slip differentials can chatter or shudder if the wrong gear oil is used or if friction modifier is missing. Vibration under acceleration may also indicate drivetrain wear or fluid problems. If the vehicle suddenly feels rough in turns, do not ignore it.
Visible Leaks
Wet spots around the differential cover, axle seals, or pinion seal deserve attention. Gear oil often has a strong sulfur-like odor and a thick texture. A leak may look small, but differential capacity is limited, so even gradual loss matters.
Burnt, Dark, or Metallic Fluid
Fluid that looks very dark, smells burnt, or contains metal debris may no longer protect the gears properly. In this case, a complete drain and refillor further mechanical inspectionmay be better than a simple top-off.
Choosing the Right Differential Gear Oil
The correct gear oil depends on your axle design, manufacturer specification, climate, and differential type. Common grades include 75W-90, 80W-90, 75W-140, and other viscosities. The API service rating also matters. Many hypoid gear differentials require GL-5 gear oil because it is designed for extreme pressure. However, never choose gear oil based only on what looks popular on the shelf.
Limited-slip differentials are especially picky. Some gear oils include limited-slip friction modifier; others do not. If your differential needs an additive and you skip it, you may get chatter, binding, or poor operation. If your differential does not need an additive, adding one unnecessarily may not improve anything. The right answer is in the manual, not in a parking-lot debate between two people holding oil bottles.
When to Top Off vs. When to Change the Fluid
A top-off can be acceptable when the fluid is clean, the level is only slightly low, and you are addressing the reason it became low. However, if the fluid is contaminated, burnt, milky, gritty, or full of metal particles, topping off is not enough. Old fluid should be replaced so the differential can operate with proper lubrication.
If the differential was run very low, makes noise, or shows metal debris, have it inspected. Gear damage does not heal itself because fresh oil arrived with good intentions.
Safety Mistakes to Avoid
Do not crawl under a vehicle supported only by a jack. Do not check the fluid on a steep driveway. Do not remove the drain plug by mistake. Do not use random oil because it was already in your garage. Do not overtighten the fill plug. And do not ignore leaks after topping off the fluid.
Also avoid mixing up differential fluid with transmission fluid or transfer case fluid. These components may live near each other, but they often require different lubricants. Using the wrong fluid can cause poor lubrication, noise, and damage.
Practical Example: Checking a Rear Differential
Imagine a rear-wheel-drive SUV with a slight oily film on the rear differential cover. The owner parks on level ground, chocks the front wheels, safely raises the rear just enough for access while keeping the vehicle level, and supports it with jack stands. After cleaning the fill plug area, they remove the fill plug and check the level. The oil sits just below the opening, but it looks dark and smells overheated. In this case, the level may be acceptable, but the condition suggests the fluid should be changed soon. The owner also notices fresh oil near the cover gasket, meaning the leak should be repaired rather than ignored.
Extra Experience: Real-World Lessons From Checking Differential Gear Oil
One of the biggest lessons with differential maintenance is that “quiet” does not always mean “healthy.” Many differentials run silently right up until the oil is badly aged or slightly low. Unlike engine oil, differential gear oil does not get a dashboard reminder in many vehicles. There is usually no cheerful light that says, “Hello, your ring gear would appreciate attention.” That means the driver has to be a little proactive.
A useful habit is to inspect the differential whenever you are already under the vehicle for another reason. Tire rotation, brake inspection, oil change, or suspension check? Take thirty seconds to look at the differential housing. A clean, dry housing is reassuring. A wet cover, oily pinion seal, or damp axle tube is a clue. The earlier you notice seepage, the easier it is to prevent low-fluid damage.
Another real-world tip is to remove the fill plug before planning any major service. This sounds small, but it can save a giant headache. If someone drains the differential and then discovers the fill plug is stuck, the vehicle is now empty of oil and not ready to drive. Even when you are only checking fluid, confirming the fill plug can be opened tells you a lot about whether a future drain-and-fill will go smoothly.
Fluid smell also teaches experience, although it should not be your only diagnostic tool. Gear oil naturally has a strong odor, so a strong smell alone does not automatically mean disaster. What matters is the combination: burnt odor, very dark color, gritty feel, metal flakes, low level, and symptoms like whining or vibration. Maintenance decisions are usually made from patterns, not one dramatic clue.
If you drive a truck, SUV, or crossover used for towing, do not treat the differential as a lifetime mystery box. Towing creates extra heat and load. Heat breaks down lubricant faster. Even if the vehicle feels normal, the oil may be working harder than the same oil in a lightly driven commuter car. Off-road vehicles deserve the same attention, especially after water crossings. If water enters the axle through a breather or seal, the fluid can turn cloudy and lose its protective ability.
People often ask whether synthetic gear oil is worth it. In many vehicles, synthetic gear oil offers strong heat resistance and stable viscosity, but the most important rule is still specification first. A high-quality oil with the wrong rating is still the wrong oil. If the manual calls for a specific viscosity, API rating, or limited-slip additive, follow that. The differential is not impressed by marketing labels; it wants the fluid it was designed to use.
For older vehicles, checking differential oil can reveal previous neglect. You may find a rounded fill plug, thick black oil, missing limited-slip additive, or a cover gasket that has been quietly leaking for years. Do not panic. Start with the basics: verify the correct fluid, restore the proper level, repair leaks, and document the service date and mileage. A simple notebook or phone note can prevent future guessing.
Finally, know your limit. Checking differential fluid is manageable for many DIYers, but safety matters more than pride. If the vehicle cannot be lifted level, if the plug is damaged, if the differential is noisy, or if you see metal flakes in the oil, a professional inspection is smart. There is no trophy for turning a simple check into a weekend-long rescue mission involving stripped bolts, emergency rides, and a very judgmental tow truck.
Conclusion
Knowing how to check your car’s differential gear oil is a practical maintenance skill that can help protect your drivetrain from heat, friction, leaks, and expensive wear. The process is straightforward: park level, work safely, locate the fill plug, inspect the level and condition, add only the correct gear oil if needed, and watch for leaks afterward.
The differential may not be glamorous, but it is essential. Treat it well, and it will quietly do its job through turns, hills, highway miles, towing days, rainy commutes, and all the little moments when your wheels need to rotate at different speeds without turning your drivetrain into modern art.