If your gas stove has reached that awkward stage where it still works beautifully but looks like it has survived three spaghetti nights, one pancake rebellion, and a bacon-related incident nobody wants to discuss, this guide is for you. The good news is that deep cleaning a gas stove is not complicated. The even better news is that you do not need a chemistry degree, a hazmat suit, or a tiny pressure washer.
With the right approach, you can cut through grease, lift burnt-on splatters, freshen up the grates, and clean around the burners without damaging the finish or messing up ignition. A deep clean also helps your stove work the way it should. Cleaner burner parts and ports can support better flame performance, easier ignition, and a kitchen that smells more like dinner and less like yesterday’s smoke alarm.
Below, you will learn how to deep clean your gas stove in a few simple steps, what tools to use, what to avoid, and how to keep the mess from staging a comeback.
Why Deep Cleaning a Gas Stove Matters
A quick wipe after dinner is great. A deep clean is better. Gas stoves collect grease, crumbs, sauces, oil splatter, and carbonized food in all the places your sponge pretends not to see. That buildup can make your cooktop look dull, smell funky, and leave burners struggling to light evenly.
Deep cleaning your gas stove helps with more than appearances. It can improve everyday cooking by keeping burner caps seated properly, clearing away gunk around burner ports, and reducing greasy residue that loves to trap smells. In plain English, your stove looks better, works better, and stops auditioning for the role of “mysterious sticky surface” in your kitchen.
What You Need Before You Start
You do not need a cart full of specialty products. Most gas stove cleaning jobs can be handled with basic supplies:
- Dish soap
- Warm water
- Baking soda
- White vinegar
- Microfiber cloths
- A soft sponge or nonabrasive scrub pad
- A soft-bristle brush or old toothbrush
- A wooden skewer, straightened paper clip, or pin for stubborn burner port debris if your manual allows it
- A dry towel
- Rubber gloves, if you enjoy pretending you host a cleaning show
What Not to Use
Skip steel wool, harsh scouring powders, and aggressive oven cleaner unless your manufacturer specifically says they are safe. These can scratch finishes, damage burner parts, or leave residue where it does not belong. Also avoid flooding the igniter or spraying cleaner directly into gas or ignition openings. Your stove likes to be clean, not waterlogged.
Step 1: Make Sure the Stove Is Off and Completely Cool
This sounds obvious, yet it deserves top billing. Before cleaning a gas stove, turn every burner off and let the cooktop cool fully. Not “kind of warm but I am impatient” cool. Actually cool. Cleaning a warm surface can create streaks, fumes, or a surprise steam blast that makes you rethink your life choices.
Step 2: Remove the Grates, Burner Caps, and Any Loose Parts
Lift off the grates, burner caps, and any removable burner heads if your model is designed that way. Place them on a towel or directly in the sink. As you remove parts, pay attention to how they fit together. Burner caps are not freestyle accessories. They need to go back onto the correct burner and sit flat, or you may get uneven flames later.
If you tend to forget where things go, take a quick photo with your phone. Future you will appreciate the favor.
Step 3: Soak the Grates and Caps
Fill your sink or a large tub with hot water and a few drops of dish soap. Let the grates and burner caps soak for about 15 to 30 minutes. This helps loosen grease and dried food so you do not have to scrub like you are sanding a deck.
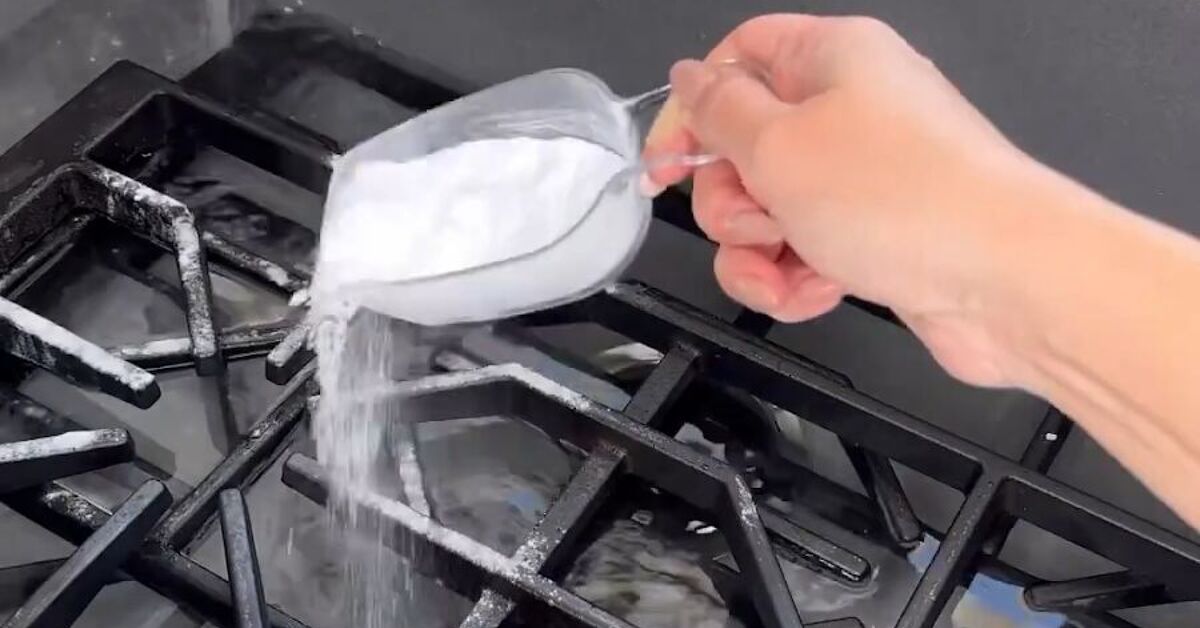
If the mess is especially stubborn, make a baking soda paste with three parts baking soda and one part water. Spread it on baked-on grime and let it sit for 15 to 20 minutes before scrubbing.
A Note About Cast Iron Stove Grates
Not all grates should be treated the same way. Some coated grates can soak just fine. Uncoated cast iron may need gentler treatment and careful drying to help prevent rust. Some brands also allow certain grates or caps in the dishwasher, while others do not. That means your owner’s manual is not being dramatic. It is being useful.
Step 4: Brush Away Loose Crumbs and Debris From the Cooktop
While the removable parts soak, turn your attention to the cooktop surface. Use a dry microfiber cloth, paper towel, or soft brush to remove loose crumbs and debris. This step matters because once crumbs mix with cleaner, they become a soggy paste that behaves like it pays rent.
Get around the burner bases, along the edges, and under the grate supports. You are not aiming for perfection yet. You are just clearing the field.
Step 5: Degrease the Surface
Now it is time for the glossy part of the makeover. Spray the surface lightly with a simple mix of vinegar and water, or wipe it with a cloth dipped in warm, soapy water. Let it sit for a few minutes so grease softens. Then wipe with a microfiber cloth or soft sponge.
For sticky spots and cooked-on splatter, use your baking soda paste. Apply it to problem areas, let it rest for 10 to 15 minutes, and gently scrub with a nonabrasive pad. Repeat as needed. This is the part where your stove starts looking less “post-brunch disaster” and more “functional adult kitchen.”
For Stainless Steel Gas Stoves
If your gas stove has a stainless steel surface, wipe with the grain rather than in circles. It helps reduce streaks and makes the finish look cleaner. A dry microfiber cloth afterward can give it that polished look without making it seem like you overcommitted to a life of constant buffing.
Step 6: Clean Around the Burner Heads Carefully
Use a damp cloth or soft brush to clean around the burner heads and bases. Focus on removing greasy residue and any food that collected near the flame openings. Be careful not to push debris deeper into the ports.
This is also where you want to avoid overdoing the liquid. Too much moisture around the ignition area can interfere with relighting later. Damp is good. Drenched is a choice best left unmade.
Step 7: Clear the Burner Ports if Needed
If you notice clogged burner holes or you have had uneven flames, inspect the burner ports closely. Sometimes tiny bits of food or grease block them. Use a soft brush first. If debris is stubborn and your manual permits it, gently clear individual ports with a straight pin, paper clip, or similar slim tool. Do not enlarge the holes, stab wildly, or improvise with anything chunky and dramatic.
The goal is to remove blockage, not redesign the burner. If a burner still looks damaged or the flame pattern stays odd after cleaning and drying, it may be time for service rather than further poking.
Step 8: Scrub the Soaked Grates and Burner Caps
Return to the sink and scrub the grates and caps with a soft brush or non-scratch scrub pad. Most grime should release more easily after soaking. For greasy corners or carbon buildup, use a little baking soda paste and patient pressure. This is not a race. It is a negotiation.
Pay special attention to the underside of grates, where grease loves to hide like it has diplomatic immunity.
Step 9: Rinse Everything Well
Once the parts are clean, rinse them thoroughly with warm water. You do not want soap, paste, or loosened debris left behind. Residue can bake on later, interfere with flame performance, or leave your burners smelling like a bubble bath during preheat.
Step 10: Dry Every Part Completely
This step is not optional. Dry the grates, burner caps, and burner heads completely with a towel, then let them air dry a bit longer if needed. Moisture left on burner parts can cause clicking, delayed ignition, or uneven flames.
If you have ever cleaned a stove and then heard relentless clicking afterward, there is a good chance trapped moisture was the villain.
Step 11: Reassemble the Stove Correctly
Place burner caps back on the correct bases and make sure they sit flat and centered. Reinstall grates securely. If anything rocks, tilts, or looks slightly off, fix it now. Misaligned caps can lead to weak ignition or flames that shoot sideways like they are expressing creative frustration.
If you took that phone photo earlier, now is its big moment.
Step 12: Test the Burners
Turn on each burner one at a time and check the flame. A healthy gas flame is usually steady and blue. If a flame is uneven, lazy, or yellow, turn it off and check for moisture, debris, or a misaligned cap. Many post-cleaning issues are not disasters. They are reassembly problems in disguise.
How Often Should You Deep Clean a Gas Stove?
For most kitchens, a deep clean every month is a smart target, with light wipe-downs throughout the week. If you cook daily, fry often, or have a household that treats pasta sauce like confetti, you may want to deep clean more often.
Here is a simple rhythm that works for many homes:
- Daily or after cooking: Wipe spills once the stove cools
- Weekly: Clean the surface and grates more thoroughly
- Monthly: Deep clean the full gas stove, including burner parts
Common Mistakes to Avoid When Cleaning a Gas Stove
- Using metal scrubbers: These can scratch the finish and damage coated parts.
- Soaking parts without checking the manual: Some materials and finishes need special care.
- Spraying cleaner into ignition holes: Moisture and chemicals do not belong there.
- Reassembling while parts are wet: Moisture can affect ignition and flame quality.
- Putting caps back incorrectly: Even a slightly crooked cap can cause problems.
- Ignoring buildup for too long: Fresh messes are easier to clean than carbonized mystery crust.
Simple Ways to Keep Your Gas Stove Cleaner Longer
Deep cleaning is great, but maintenance is where the real magic lives. These habits help keep grease and grime from turning into a weekend project:
- Wipe spills as soon as the stove is cool
- Use splatter screens when frying
- Soak grates before grime becomes cement
- Check burner caps after heavy cooking sessions
- Keep a microfiber cloth nearby for quick touch-ups
The best gas stove cleaning routine is the one you will actually do. Five minutes now beats forty-five dramatic minutes later.
Real-Life Experiences and Lessons From Deep Cleaning a Gas Stove
The most useful lesson people learn after deep cleaning a gas stove is that the job usually looks worse than it is. A greasy cooktop can seem like a full emotional event when you first lift the grates and see what is happening underneath. There are crumbs that should not exist, sticky rings around burners, and mystery splatters that somehow reached the back panel. But once the parts are removed and soaking, the whole process becomes much more manageable. The mess goes from “kitchen crisis” to “series of wipeable decisions.”
Another common experience is realizing that the hardest part is not scrubbing. It is waiting. Waiting for the grates to soak. Waiting for the baking soda paste to soften burnt-on spots. Waiting for everything to dry completely before turning the burners back on. People often want instant results, but gas stove cleaning rewards patience. The surfaces clean up faster when grime has time to loosen, and the burners behave better when moisture is not trapped underneath.
Many home cooks also discover that small habits make the next deep clean dramatically easier. Wiping up sauce splatter the same night, even with a lazy half-hearted swipe, can save a lot of effort later. The same goes for brushing crumbs out from under the grates every few days. Once buildup hardens, the stove starts demanding a whole performance. When messes are handled early, the deep clean feels less like a punishment and more like a reset.
There is also the oddly satisfying moment when the burners are reassembled and lit again for the first time. A steady blue flame feels like a tiny standing ovation from the appliance. It is one of those household tasks that gives immediate visual feedback. The surface shines, the greasy film is gone, and the kitchen suddenly feels more put together. Even people who do not enjoy cleaning tend to admit that a freshly cleaned gas stove makes the entire room look better.
One practical lesson that comes up again and again is the importance of remembering how the parts fit together. Burner caps may look interchangeable until they are not. Put one back slightly off-center and the flame tells on you immediately. That is why so many experienced cleaners snap a quick photo before taking the stove apart. It is not overkill. It is strategy.
People also learn that gentle tools win. A soft brush, microfiber cloth, warm water, and dish soap often do more than harsh products used in frustration. Scrubbing aggressively can leave scratches, wear down finishes, or create new problems. In other words, the gas stove usually responds better to calm competence than to cleaning rage.
And finally, there is the universal realization that the stove somehow gets dirty again almost immediately. That is normal. The goal of deep cleaning is not to preserve a museum exhibit. It is to make cooking feel better, smell cleaner, and work more smoothly. A spotless stove is lovely. A regularly maintained one is realistic. And realistic wins in actual kitchens every single time.
Conclusion
If you have been putting off this job because it seems annoying, complicated, or suspiciously likely to end with you crawling around the kitchen muttering at a burner cap, take heart. Deep cleaning a gas stove is one of those tasks that pays off fast. A little soaking, a little scrubbing, and a little restraint around the igniter go a long way.
The key is to work in the right order: cool the stove, remove the parts, soak what can be soaked, degrease the surface, clear debris gently, dry everything thoroughly, and reassemble carefully. Do that, and your gas stove will look sharper, smell fresher, and be a lot nicer to cook on. Not bad for a project that mostly involves dish soap, baking soda, and refusing to let grease win.