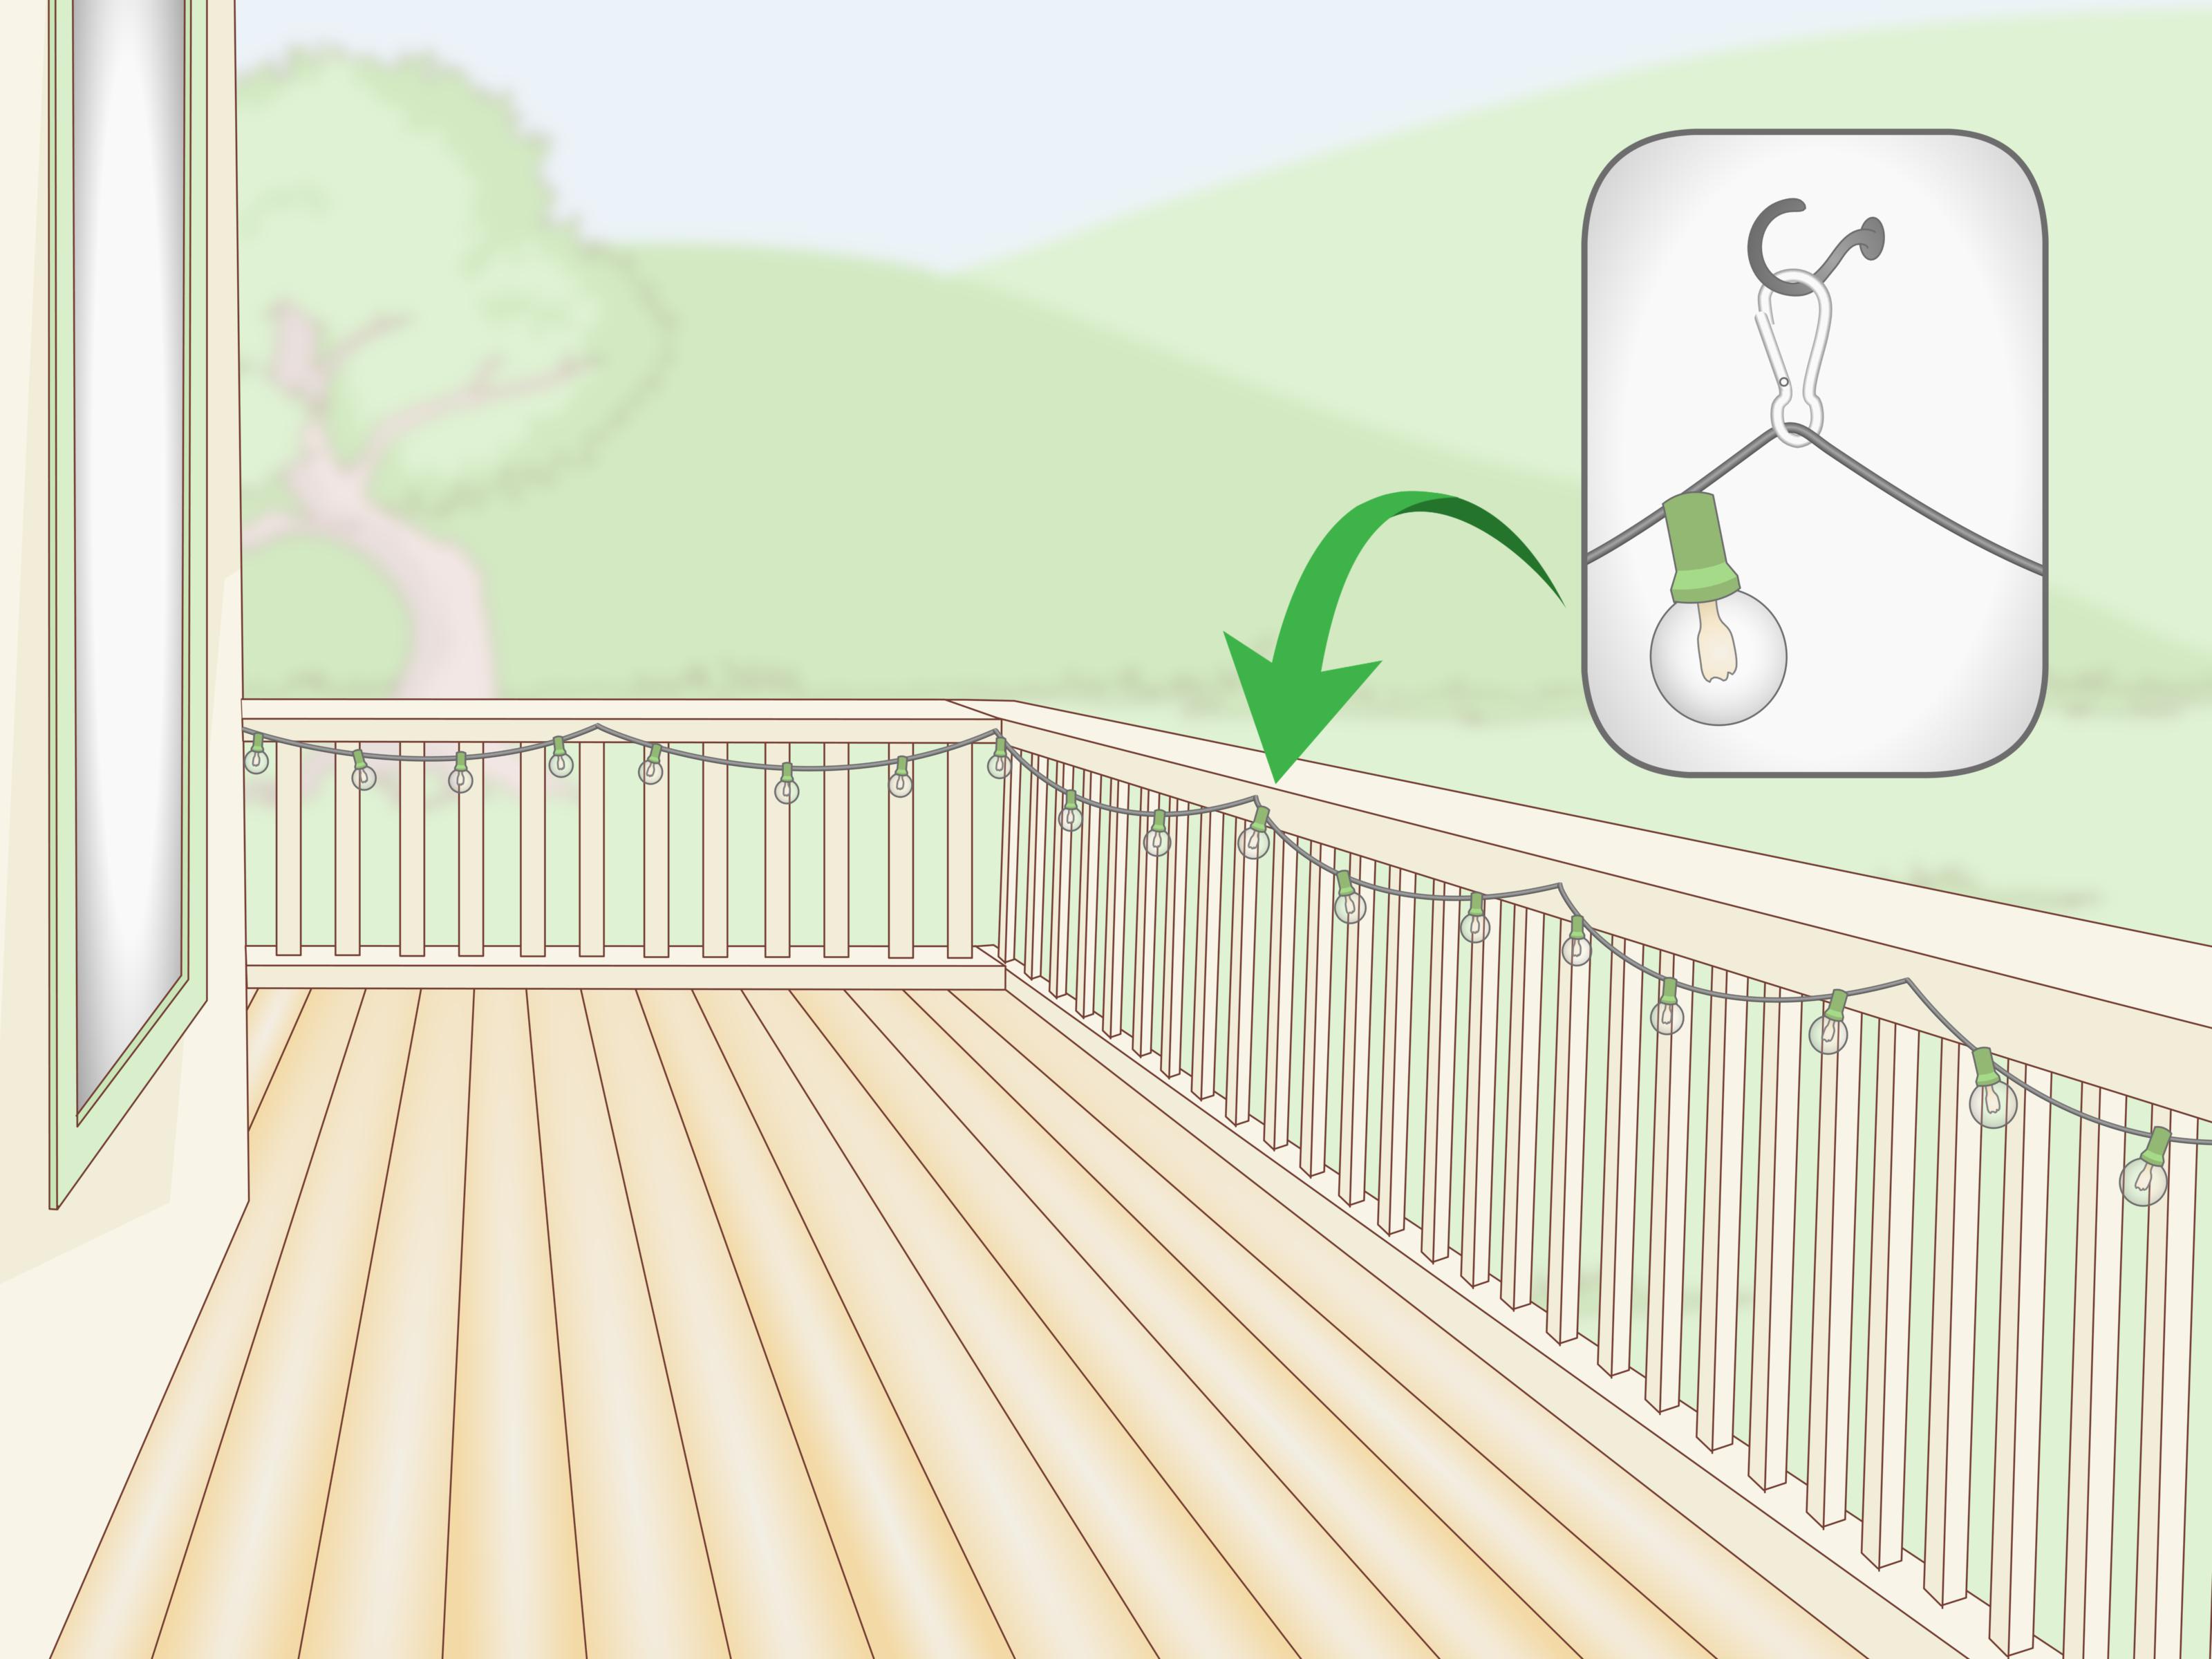
Outdoor string lights are the patio equivalent of a good playlist: they make everything feel more intentional, more relaxed, and slightly more magical than it probably deserves to be. A plain deck can go from “place where the grill lives” to “cozy outdoor lounge” with a few strands of warm bulbs, a safe power plan, and mounting hardware that does not wobble every time a squirrel sneezes.
The trick is not just hanging lights; it is hanging them safely, attractively, and in a way that survives wind, rain, summer cookouts, and that one friend who always leans on the railing while telling a dramatic story. This guide explains how to hang outdoor string lights on a deck using simple tools, smart layouts, and practical installation tips. Whether your deck has a pergola, railing, nearby trees, posts, or absolutely no helpful structure at all, there is a clean solution.
Why Outdoor String Lights Work So Well on a Deck
Deck lighting has two jobs: it should help people see, and it should make the space feel inviting. Harsh floodlights can technically do the first job, but they often make your backyard look like a parking lot interrogation scene. Outdoor string lights create soft, even, ambient light that works beautifully for dinners, late-night conversations, card games, and quiet evenings with a cold drink.
They are also flexible. You can hang string lights overhead for a canopy effect, run them along deck railings, attach them to posts, frame a pergola, or create a zigzag pattern above the seating area. LED string lights are especially popular because they use less energy, stay cooler than many older incandescent bulbs, and are available in warm white, vintage Edison-style, globe, rope, and solar options.
Before You Start: Plan the Layout First
Before grabbing a ladder and declaring yourself the mayor of backyard ambiance, pause and make a plan. A good layout prevents sagging, awkward shadows, overloaded outlets, and the classic mistake of realizing your lights stop three feet before the last hook.
Measure the Deck Area
Use a tape measure to calculate the distance between each mounting point. If you want a relaxed swoop, add extra length for the dip between anchor points. A strand pulled tight looks stiff and puts stress on the cord, sockets, and hardware. A gentle sag looks better and helps reduce tension.
For example, if your deck is 12 feet wide and you plan to string lights from one side to the other, a 14- to 16-foot run may look better than a perfectly tight 12-foot line. For a zigzag design, measure each diagonal run separately, then add a little extra for slack, plug placement, and adjustments.
Choose a Lighting Pattern
The best pattern depends on your deck shape, existing structures, and how much light you want. Here are a few reliable ideas:
- Perimeter lighting: Run lights along the railing or around the edges of the deck for a clean, simple border.
- Zigzag overhead lighting: Hang strands back and forth across the deck to create a lively bistro-style look.
- Canopy lighting: Create a rectangle or fan shape above a dining table or seating zone.
- Pergola lighting: Follow the beams of a pergola for a polished, built-in effect.
- Post-to-post lighting: Install tall posts at deck corners and string lights between them.
If your deck is small, do not overdo it. One or two strands may be enough. If your deck is large, divide the space into zones: dining, lounging, grilling, and stairs. Light the areas where people gather and walk, not every square inch like a stadium.
Pick the Right Outdoor String Lights
Not all string lights belong outside. Indoor lights can look charming for about ten minutes, and then humidity, rain, and temperature changes start doing the cha-cha on the wiring. Always choose lights labeled for outdoor use.
Outdoor-Rated Lights Are Non-Negotiable
Outdoor-rated string lights are built to handle moisture and changing weather better than indoor strands. Look for labels such as “outdoor use,” “wet-rated,” or “damp-rated,” depending on where the lights will hang. Wet-rated lights are generally better for fully exposed areas, while damp-rated lights may be suitable for covered decks where direct rain is limited.
Also check whether the bulbs are shatter-resistant. Acrylic or plastic bulbs are a smart choice for decks where kids, pets, wind, or flying cornhole bags may be involved. Glass bulbs are beautiful, but they are less forgiving when dropped.
LED vs. Incandescent Bulbs
LED outdoor string lights are usually the better choice for most decks. They are energy efficient, long-lasting, and often safer for extended use because they produce less heat. Incandescent bulbs can create a classic warm glow, but they use more electricity and may become hotter during operation.
For ambiance, look for warm white bulbs in the 2200K to 2700K range. This gives the soft, golden look people associate with restaurants, patios, and “I definitely cleaned before guests arrived” energy. For brightness, 50 to 100 lumens per bulb is usually enough for mood lighting. If you need task lighting near a grill or stairs, supplement with step lights, wall sconces, or dedicated fixtures.
Gather the Tools and Supplies
You do not need a contractor’s truck full of equipment to hang outdoor string lights on a deck, but you do need the right basics. Using random nails, mystery cords, or duct tape that “seems strong enough” is how a cute project becomes a future apology.
Recommended Supplies
- Outdoor-rated string lights
- Outdoor-rated extension cord, if needed
- GFCI-protected outdoor outlet or portable GFCI adapter
- Cup hooks, screw eyes, eye bolts, or outdoor light clips
- Deck posts, poles, or mounting brackets
- Guide wire or aircraft cable for long spans
- UV-rated zip ties or stainless-steel twist ties
- Drill and appropriate drill bits
- Tape measure and pencil
- Ladder
- Weatherproof cord cover or outdoor outlet cover when needed
Do Not Use These for Hanging Lights
Avoid staples, nails, or screws that pierce the cord. Do not wrap lights tightly around sharp metal edges. Do not pinch cords under doors, windows, furniture legs, or deck boards. And please do not rely on ordinary indoor tape for an outdoor lighting installation. Tape is not a structural plan; it is a temporary emotional support system.
Safety First: Power, Cords, and Weather
Outdoor lighting is beautiful, but it still involves electricity. That means safety should guide every decision. A deck is exposed to rain, wind, foot traffic, pets, furniture movement, and the occasional spilled lemonade. Your installation should account for all of that.
Use a GFCI-Protected Outlet
Plug outdoor string lights into a GFCI-protected outlet. GFCI protection helps reduce the risk of electric shock, especially in outdoor areas where moisture is common. Many exterior outlets already include GFCI protection, but if yours does not, a portable outdoor GFCI adapter can add an extra layer of protection.
Use Outdoor-Rated Extension Cords
If you need an extension cord, use one designed for outdoor use. Outdoor cords have tougher jackets that better resist moisture, sunlight, and temperature changes. Make sure the cord is rated for the total electrical load of your lights, and avoid connecting multiple extension cords together. Daisy-chaining cords is not clever; it is just asking electricity to write a complaint letter.
Keep Connections Off the Ground
Where plugs connect, keep them elevated and protected from standing water. Use weather-resistant covers where appropriate, and position connections away from puddles, planters, sprinkler spray, and foot traffic. If cords must cross a walking path, reroute them if possible. If not, use a proper outdoor cord cover to reduce tripping hazards.
How to Hang Outdoor String Lights on a Deck
Once you have a plan, lights, hardware, and safe power access, installation is straightforward. Work slowly, test the lights first, and resist the urge to eyeball everything unless your eyes come with a built-in laser level.
Step 1: Test the Lights
Plug in every strand before installation. Replace broken bulbs, check for damaged sockets, and confirm that all strands work. It is much easier to fix a bad bulb on the ground than while balanced on a ladder, questioning your life choices.
Step 2: Mark Your Mounting Points
Use a pencil to mark where each hook, screw eye, or bracket will go. Keep spacing consistent, especially if the lights will run along a railing or pergola beam. If you are creating a zigzag pattern, mark each turn point before drilling.
Step 3: Install Hooks or Eye Bolts
For wooden posts, beams, or railings, pre-drill pilot holes to prevent splitting. Then install cup hooks, screw eyes, or eye bolts. Eye bolts are especially sturdy for overhead installations and long spans. Cup hooks work well for lighter runs and railing installations.
If you are attaching hardware to your house, avoid drilling into siding randomly. Mount into solid framing when possible, and use hardware appropriate for the surface. For brick, stucco, or masonry, use the correct anchors and drill bits. When in doubt, ask a professional; guessing with exterior walls can lead to leaks, cracks, or colorful language.
Step 4: Add Posts If Your Deck Has No Overhead Support
If your deck has no pergola, roofline, or nearby trees, install posts. You can attach tall wood posts to deck railing posts using heavy-duty brackets, or use freestanding planters filled with concrete for temporary support. For permanent installations, check that the posts are stable and compatible with your deck structure.
A common approach is to place one post at each deck corner, then run lights between them in a square or X pattern. For a cleaner look, paint or stain the posts to match the deck railing. Nobody needs to know the posts were added for lights; let them think you planned this outdoor paradise from day one.
Step 5: Use Guide Wire for Long Spans
For spans longer than about 15 to 20 feet, consider using guide wire. A guide wire supports the weight of the lights and reduces stress on the electrical cord. Attach the wire to eye bolts or hooks, tighten it with turnbuckles if needed, and then secure the light strand to the wire using UV-rated zip ties or stainless-steel ties.
This method is especially useful for commercial-style bistro lights with heavier bulbs. It also helps the lights stay neat during wind and weather.
Step 6: Hang the Lights With a Gentle Sag
Start at the power source and work outward. This prevents the final plug from ending up in the middle of nowhere, staring at you like a tiny plastic betrayal. Hang the lights from each hook or clip, allowing a slight droop between points. The sag should look intentional, not like the lights gave up halfway through the evening.
Do not pull the strand tight. A tight line increases tension and may damage sockets, cords, or mounting points. A relaxed curve looks better and performs better.
Step 7: Secure Loose Sections
Use UV-rated zip ties or clips to secure loose areas, especially near plugs, corners, and windy spots. Trim excess zip-tie tails for a cleaner appearance. Make sure the cord is supported by hooks or guide wire, not by the electrical plug connection.
Step 8: Plug In and Adjust
Once everything is mounted, plug in the lights and view the deck from several angles. Check from the yard, from inside the house, and from the seating area. Adjust sag, bulb direction, or spacing as needed. Sometimes a strand that looks perfect from the ladder looks crooked from the patio chair, and the patio chair is where the judgment happens.
Best Places to Mount String Lights on a Deck
Every deck has different opportunities. The best mounting points are sturdy, weather-resistant, and positioned high enough that people can walk underneath comfortably.
Deck Railings
Railings are perfect for perimeter lighting. You can attach lights along the inside of the railing for a cozy glow or under the top rail for a more subtle effect. This works especially well on smaller decks or decks with stairs.
Pergolas and Covered Decks
A pergola is basically a string light playground. Run lights along beams, weave them back and forth, or create a rectangle around the perimeter. Because the structure already exists, installation is easier and usually looks polished.
Posts and Poles
Posts are ideal for open decks. Use tall posts to create height and give the lights room to swoop. For a dining area, position posts around the table. For a lounge area, frame the seating zone.
Trees Near the Deck
Trees can make excellent natural anchors, but use tree-friendly methods. Avoid choking branches with tight wire or hardware. Use adjustable straps or hooks that allow for movement and growth. Also remember that branches sway, so leave enough slack to prevent tension during wind.
Design Tips for a Better-Looking Deck
Function matters, but so does style. Outdoor string lights should look like part of the deck design, not like they were installed during a power outage with one shoe on.
Match the Bulb Style to the Space
Large Edison-style bulbs suit rustic, farmhouse, and bistro-inspired decks. Small globe lights feel festive and casual. Rope lights are great for railings, steps, and edges. Solar fairy lights can add sparkle to planters or privacy screens, but they may not provide enough light for dining.
Use Warm Light for Ambiance
Warm white light is usually the most flattering choice for outdoor entertaining. Cool white light can look too bright or clinical. Unless your goal is “romantic dinner at a dentist’s office,” warm tones are the safer design move.
Layer Your Lighting
String lights are excellent for atmosphere, but they should not be the only source of light if your deck has stairs, cooking areas, or changes in elevation. Add step lights, lanterns, wall-mounted fixtures, or solar path lights to improve visibility and safety.
Maintenance Tips After Installation
Outdoor string lights need occasional attention. Inspect them after storms, before big gatherings, and at the start of each season. Look for loose hooks, cracked bulbs, sagging sections, frayed cords, or moisture inside sockets. Replace damaged strands instead of trying to repair electrical components with tape.
Clean bulbs gently with a dry or slightly damp cloth when they are unplugged and cool. Dust, pollen, and spider webs can reduce brightness and make the lights look neglected. And yes, spiders also appreciate mood lighting, apparently.
If you live in an area with harsh winters, consider removing lightweight or delicate strands during the off-season. Heavy-duty outdoor-rated lights may stay up year-round, but always follow the manufacturer’s instructions.
Common Mistakes to Avoid
Most string light problems are preventable. The biggest mistakes include using indoor lights outdoors, plugging into non-protected outlets, overloading cords, hanging lights too low, skipping guide wire for long spans, and using sharp fasteners that damage insulation.
Another common mistake is ignoring the power source until the end. Always plan from the outlet first. A gorgeous lighting design is less impressive when the plug ends eight feet from electricity, unless you are planning to power it with optimism.
Real-World Experience: What Actually Works Best
After seeing many deck lighting setups, the most successful ones usually have one thing in common: they look simple because the planning was careful. The homeowner measured first, chose a realistic layout, and installed sturdy anchor points before opening the box of lights. The less successful setups often begin with excitement, a ladder, and the sentence, “We’ll figure it out as we go.” That sentence is fun in road trips and dangerous in electrical projects.
One of the easiest deck setups is the four-post canopy. For a medium-size rectangular deck, adding a post at each corner creates a clean frame for lights. The strands can run around the perimeter, across the middle, or in an X shape over a dining table. This design works especially well when the deck is open with no roofline nearby. It gives the space height, defines the outdoor room, and makes the deck feel finished. If the posts match the railing, the whole thing looks intentional rather than improvised.
For narrow decks, railing lighting often works better than overhead lighting. Running string lights under the top rail or along the inside edge keeps the glow low and cozy without making the area feel crowded. This is a smart choice for townhomes, small back decks, and spaces where neighbors are close. It also reduces the chance of tall guests walking into bulbs and pretending it did not hurt.
For decks with pergolas, the best experience usually comes from following the structure instead of fighting it. Lights can trace the outer beams, run parallel across the rafters, or drop slightly between beams for a soft canopy effect. The key is consistency. If the spacing looks deliberate, the final result feels polished. If the spacing changes every few feet, the eye notices even if nobody says anything. Someone will notice. It might be you, at 11:30 p.m., holding a lemonade and silently judging your own hook placement.
Another lesson: always buy a little more length than you think you need. Extra length can be managed with a thoughtful route, but a strand that is too short creates awkward shortcuts. However, do not connect unlimited strands together. Follow the manufacturer’s limit for how many strings can be connected end to end. LED strands often allow more connections than incandescent strands, but the safe number depends on the product.
Timers and smart outdoor plugs are also worth considering. They make the deck easier to enjoy and help prevent lights from staying on all night. A timer is especially useful if you entertain often or use the deck as a daily outdoor living room. Instead of crawling behind a planter to unplug the lights, you can let the system handle it. That is not laziness; that is modern convenience wearing flip-flops.
The final practical experience is this: install the lights for how you actually use the deck, not how a catalog photo says you should use it. If people gather near the table, light the table. If the stairs are dark, prioritize the stairs. If the grill area needs visibility, add task lighting there. The prettiest deck lighting is the kind that makes real evenings easier, safer, and more enjoyable.
Conclusion
Learning how to hang outdoor string lights on a deck is a simple project with a big payoff. Start with outdoor-rated lights, plan the layout, use safe power connections, install sturdy mounting hardware, and allow a gentle sag for a relaxed, polished look. Whether you choose railing lights, a pergola design, posts, trees, or a full overhead canopy, the goal is the same: create a deck that feels comfortable, welcoming, and ready for everyday use.
With the right setup, your deck becomes more than a place to step outside. It becomes a warm outdoor room for dinners, quiet mornings, weekend parties, and those peaceful nights when the lights glow, the chairs are comfortable, and the mosquitoes have hopefully chosen a different address.
Note: Always follow the manufacturer’s instructions for your specific light set, extension cord, and mounting hardware. If you are unsure about outdoor outlets, wiring, GFCI protection, or permanent electrical work, contact a licensed electrician before installing your deck lights.