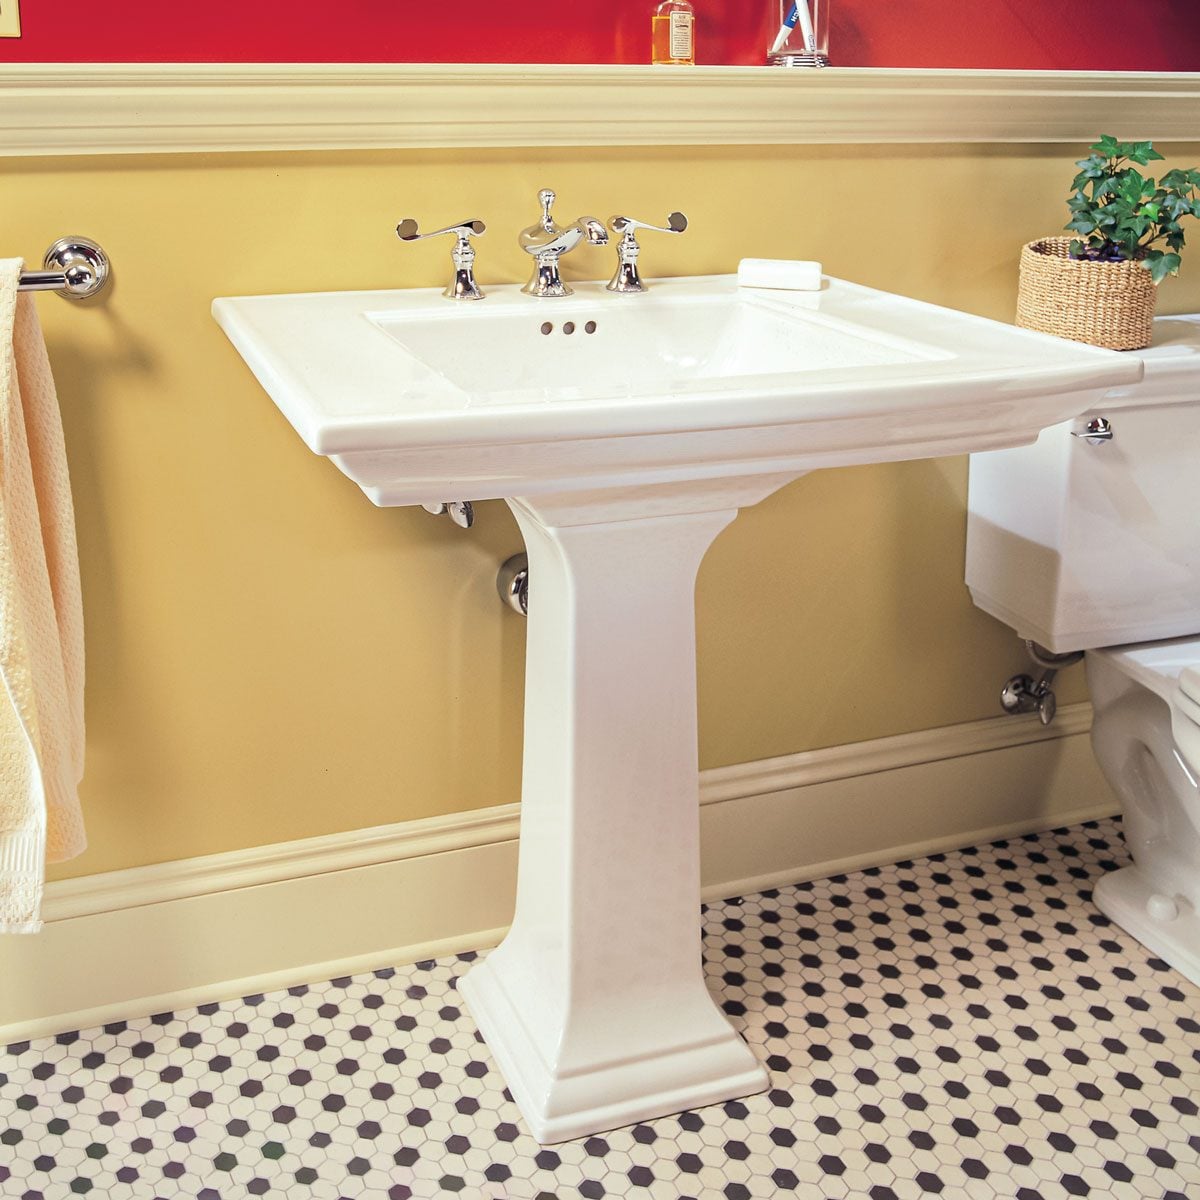
A pedestal sink can make a cramped bathroom feel lighter, cleaner, and surprisingly sophisticated. By replacing a bulky vanity with a graceful basin and slender base, you expose more floor area and give the room room to breathe. It is the bathroom equivalent of trading hiking boots for dress shoesless storage, perhaps, but considerably more elegance.
Installing a pedestal sink is more demanding than simply setting a bowl on a ceramic column. In most designs, the basin must be securely fastened to the wall, while the pedestal provides model-specific support and conceals the plumbing. Accurate measurements, solid wall backing, careful drain alignment, and a patient leak test are what separate a polished installation from a sink that wobbles every time someone reaches for the soap.
Why Choose a Pedestal Sink?
Pedestal sinks are especially useful in powder rooms, guest bathrooms, historic homes, and narrow layouts where a full vanity feels visually heavy. Because the open design reveals more of the wall and floor, even a modest bathroom can appear wider.
The style is also remarkably flexible. A sculpted vitreous-china model looks natural in a traditional bathroom, while a sharp rectangular basin can suit a contemporary space. Pair one with polished nickel for vintage charm, matte black for contrast, or brushed brass when the room needs a little jewelry.
There is one practical trade-off: pedestal sinks provide little or no built-in storage. Plan to compensate with a medicine cabinet, wall-mounted shelves, baskets, recessed niches, or a narrow freestanding cabinet. Otherwise, your hair dryer may begin a new career as bathroom décor.
Before Installing a Pedestal Sink
Check the Rough-In Measurements
Start with the manufacturer’s specification sheet. It should show the overall basin width, finished height, drain location, water-supply locations, mounting-hole positions, and recommended wall reinforcement. Do not assume that a new pedestal sink will match the plumbing left behind by an old vanity.
Measure from the finished floor and the sink centerline. Confirm that the drain stub-out will align with a standard P-trap without a collection of awkward elbows. Check that both supply valves can remain accessible behind or beside the pedestal. Plumbing that disappears beautifully but cannot be reached with a wrench is less elegant during the first repair.
Understand How the Sink Is Supported
A pedestal sink is generally not a freestanding fixture in the way a table is freestanding. The basin is normally anchored to structural framing, blocking, or an approved mounting system in the wall. The pedestal may support part of the load, stabilize the assembly, or primarily conceal plumbing, depending on the model.
Ordinary drywall anchors are rarely an acceptable substitute for proper reinforcement. If the mounting holes do not line up with studs, horizontal wood blocking may need to be installed between the studs. That can mean opening the wall, adding lumber, patching the drywall, and repainting before the sink is mounted.
Inspect the Wall and Floor
The finished wall should be reasonably plumb, and the floor should be level and solid. A badly sloped floor can tilt the pedestal, while an uneven wall can leave a noticeable gap behind the basin. Repair water damage, loose tile, crumbling plaster, and soft flooring before proceeding.
If a vanity was removed, expect some cosmetic work. The old cabinet may have hidden unfinished flooring, missing baseboard, paint outlines, wall holes, or plumbing that was never intended to appear in public.
Tools and Materials You May Need
- Pedestal sink, basin, base, and manufacturer-supplied hardware
- Compatible bathroom faucet and drain assembly
- P-trap and correctly sized drain fittings
- Braided faucet supply lines
- Adjustable wrench, basin wrench, and tongue-and-groove pliers
- Socket set or nut driver
- Drill and bits suitable for wood, tile, or masonry
- Stud finder, tape measure, pencil, and level
- Plumber’s putty or manufacturer-approved sealant
- Bathroom-grade silicone caulk and caulk gun
- Bucket, towels, utility knife, safety glasses, and work gloves
- Wood blocking and wall-patching materials when reinforcement is required
Plumber’s putty is commonly used around certain drain flanges and faucet bases, but it is not compatible with every sink or drain material. Some manufacturers specify silicone, a supplied gasket, or another sealant. Use the product named in the fixture instructions rather than treating putty as universal plumbing mayonnaise.
How to Install a Pedestal Sink Step by Step
1. Shut Off the Water
Close the hot- and cold-water shutoff valves beneath the existing sink. Open the faucet to release pressure and confirm that the valves actually stop the flow. If water continues running, shut off the home’s main supply and replace or repair the faulty valves before moving forward.
Place a bucket beneath the connections. Disconnect the supply lines and P-trap, expecting a small amount of water to spill from the trap. If you are removing a vanity or old sink, cut through the caulk before pulling the fixture away from the wall.
2. Repair the Exposed Surfaces
Remove old fasteners and inspect the wall. Patch holes, replace damaged drywall, repair tile, and finish any exposed section of flooring. It is easier to paint behind the future sink now than to perform detail work while folded around a porcelain pedestal later.
3. Dry-Fit the Pedestal and Basin
Place the pedestal in the intended position and carefully set the basin on it. This is usually a two-person task. Center the assembly on the drain and verify that the faucet will sit at a comfortable height.
Set a level across the basin from side to side and front to back. Use temporary shims if the manufacturer allows them. Mark the basin’s wall-mounting holes, the outline or centerline of the pedestal, and any floor-fastener locations.
Remove the basin and pedestal carefully. Vitreous china is durable in normal use but can crack when struck, twisted, or tightened unevenly.
4. Add Wall Blocking When Necessary
Use a stud finder and exploratory measurements to determine whether structural backing exists behind the mounting marks. When there is no suitable framing, open the wall and install horizontal lumber between the studs at the required height.
Fasten the blocking securely to the framing, not merely to the drywall. Patch and finish the opening before continuing. For tile walls, plan the fastener positions carefully and use the proper drill bit so the surface does not chip or crack.
5. Install the Faucet and Drain on the Basin
Attaching these components before the basin is placed against the wall usually provides far better access. Confirm whether the sink has a single faucet hole, 4-inch centerset holes, or 8-inch widespread holes.
Install the faucet gasket or approved sealant, insert the faucet, and tighten the mounting hardware from below. Keep the faucet centered while tightening. Connect any widespread faucet hoses and attach the supply lines while the underside is still easy to reach.
Assemble the drain according to its instructions. Apply the specified gasket, plumber’s putty, or silicone beneath the upper flange. Tighten the drain body enough to create an even seal, but avoid crushing rubber washers or stressing the basin. Install and adjust the pop-up mechanism if the faucet uses one.
6. Install the Wall Fasteners
Drill pilot holes at the marks using a bit appropriate for the wall finish and structural backing. Install the hanger bolts, bracket, or mounting hardware specified by the sink manufacturer.
Do not substitute random screws from the garage. Fixture hardware must be suitable for the sink’s weight, the wall structure, and the installation method.
7. Position and Secure the Sink
Return the pedestal to its marked position. With a helper, lower the basin onto the pedestal and align it with the wall fasteners. Check the level again before installing washers and nuts.
Tighten the mounting nuts gradually and evenly. Stop when the basin is secure. Overtightening can crack porcelain or distort the installation. If a gap remains because the wall is uneven, do not force the sink flat by applying heroic amounts of wrench pressure.
Secure the pedestal to the floor only when the manufacturer calls for it. Depending on the model and floor material, this may involve a screw, anchor, bracket, or approved adhesive method.
8. Connect the P-Trap
Align the sink tailpiece with the wall drain and assemble the P-trap. Cut tubular drain pieces squarely when adjustment is required. Slip-joint washers should face the correct direction, and the connections should align naturally rather than being pulled sideways into place.
Avoid creating an S-trap or improvising a maze of fittings to overcome a badly placed drain. If the trap cannot align without strain, the drain stub-out may need professional relocation.
Hand-tighten slip nuts first, then snug them gently with pliers when needed. Excessive force can deform washers, crack plastic fittings, and create the leak you were tightening the connection to prevent.
9. Connect the Water-Supply Lines
Attach the hot and cold supply lines to their corresponding shutoff valves. Start each nut by hand to avoid cross-threading, then tighten it according to the connector manufacturer’s instructions.
Most gasketed or compression-style supply connections seal at an internal washer or ferrule rather than at the threads. Do not automatically apply thread tape or pipe compound unless the product instructions specifically require it.
10. Test for Leaks
Remove the faucet aerator before the first flush when recommended. Slowly open the shutoff valves while watching each connection. Run both hot and cold water, operate the stopper, and fill the basin partway.
Release the water and inspect the drain flange, tailpiece, P-trap, supply lines, and shutoff valves. Wipe each joint with a dry paper towel; even a small leak will reveal itself quickly. Flush the faucet to remove construction debris, then reinstall the aerator.
Repeat the test several times. A connection that survives one polite trickle has not yet proven itself against a full basin draining at once.
11. Apply the Finishing Caulk
Once the installation is dry and leak-free, apply a neat bead of bathroom-grade silicone where the back of the basin meets the wall, if recommended. Smooth the bead and remove excess immediately.
Caulk around the pedestal base only when directed by the manufacturer. Some installers leave a discreet opening at the rear so a future leak becomes visible instead of remaining trapped beneath the base.
Common Pedestal Sink Installation Problems
The Basin Wobbles
Recheck the level, wall fasteners, pedestal position, floor condition, and contact points between the basin and base. Do not treat caulk as a structural repair. A persistent wobble may indicate inadequate blocking or incorrect mounting hardware.
The P-Trap Does Not Line Up
Confirm that the pedestal is centered and the tailpiece is vertical. A slightly longer or shorter tailpiece may solve a modest height difference, but major horizontal misalignment usually requires drain modification.
The Drain Leaks Around the Flange
Disassemble the drain and inspect the gasket orientation, sealing surface, drain compatibility, and approved sealant. Adding more force is not always the answer. A crooked drain body or pinched washer can leak even when tightened aggressively.
The Supply Connection Drips
Close the valve and inspect the washer, ferrule, threads, and alignment. Replace damaged connectors rather than attempting to rescue them with layers of tape. Flexible braided supply lines are inexpensive compared with a water-damaged floor.
The Wall Is Not Flat
Small, consistent gaps can often be finished with silicone after the basin is properly supported. Larger gaps may require wall repair or careful shimming approved by the manufacturer. Never bend the basin toward the wall by overtightening its nuts.
Ways to Elevate the Finished Bathroom
Once the pedestal sink installation is complete, use the newly visible space intentionally. A large mirror can amplify light, while a recessed medicine cabinet restores storage without adding bulk. Floating shelves above the toilet or beside the sink can hold towels and everyday supplies.
Keep plumbing finishes coordinated when the trap or shutoff valves remain visible. Decorative escutcheons, polished supply tubes, and a matching P-trap can turn exposed plumbing into part of the design instead of something that appears to have missed the dress code.
Consider a WaterSense-labeled bathroom faucet, which uses no more than 1.5 gallons per minute under the EPA specification. It can reduce water use while maintaining performance. Finish the room with a narrow sconce, textured wallpaper, artwork, or a compact side table that complements the sink without crowding it.
Experience-Based Lessons From a Pedestal Sink Installation
The following composite experience reflects problems that homeowners and installers commonly encounter during pedestal sink projects.
The project began with what appeared to be a simple swap: remove a dated vanity, place a white pedestal sink in the same location, and enjoy a brighter powder room before dinner. The first surprise arrived as soon as the vanity came out. It had concealed an unpainted rectangle, three generations of wall anchors, and flooring that ended several inches inside the old cabinet footprint.
That discovery changed the order of work. Instead of rushing to connect the new sink, the wall was patched and painted, and matching flooring was fitted into the exposed area. Doing this first produced a much cleaner result. It also reinforced an important lesson: a pedestal sink reveals nearly everything a vanity hides.
The second surprise involved the mounting holes. They landed between the wall studs, and there was no blocking behind the drywall. The basin seemed light enough to hang from heavy-duty anchors, but relying on drywall would have created a permanent question mark every time someone leaned against the sink. The wall was opened, horizontal lumber was installed between the studs, and the drywall was repaired. This added work, but it transformed the sink from “probably secure” to structurally dependable.
Dry-fitting the basin and pedestal several times proved equally valuable. On the first attempt, the pedestal looked centered in the room, but the tailpiece missed the wall drain enough to push the P-trap sideways. Moving the entire assembly slightly solved the problem without additional elbows. Marking the centerline on painter’s tape made it easy to return the pieces to the correct position.
Installing the faucet and drain before mounting the basin was another major time-saver. The widespread faucet had several connections beneath the deck, and reaching them after the sink was against the wall would have required the flexibility of a circus performer. With the basin resting safely on padded supports, every nut and hose remained visible.
The first leak test revealed a slow drip beneath the drain flange. Tightening the drain nut did not solve it. After disassembly, the rubber gasket was found slightly twisted. Resetting the gasket and tightening the drain evenly stopped the leak. This was a reminder that plumbing seals depend more on clean alignment than brute force.
The final challenge was cosmetic. A narrow gap appeared between the basin and a slightly uneven wall. Rather than overtightening the mounting nuts, the sink was secured normally and the gap was finished with a thin bead of white bathroom silicone. The finished line looked intentional, and the porcelain remained unstressed.
The completed pedestal sink made the powder room feel noticeably larger. A mirrored medicine cabinet replaced the lost vanity storage, while a narrow shelf held soap and hand towels. The biggest lesson was that the visible installation may take only a few hours, but preparation determines the result. Measuring, repairing, reinforcing, and dry-fitting are not delays; they are the project.
When to Hire a Professional Plumber
Call a licensed plumber when the drain or supply pipes must be relocated, the shutoff valves do not close, old plumbing is corroded, the venting appears incorrect, or local regulations require a permit. Professional help is also sensible when the wall contains masonry, complicated tilework, or unknown electrical and plumbing lines.
A pedestal sink is an achievable project for a skilled do-it-yourselfer, but it is not an ideal first plumbing experiment when major rough-in changes are required. Knowing where a DIY project ends is itself a valuable home-improvement skill.
Conclusion
Learning how to install a pedestal sink involves more than connecting two water lines and hiding a drain behind a pretty column. The best results begin with accurate rough-in measurements, structural wall reinforcement, careful dry-fitting, and strict attention to the manufacturer’s instructions.
Take your time when mounting the basin, avoid overtightening porcelain, and test every connection thoroughly before applying finishing caulk. With the plumbing aligned and the sink securely supported, a pedestal sink can open up a compact bathroom, highlight attractive finishes, and deliver a classic upgrade without the visual weight of a full vanity.