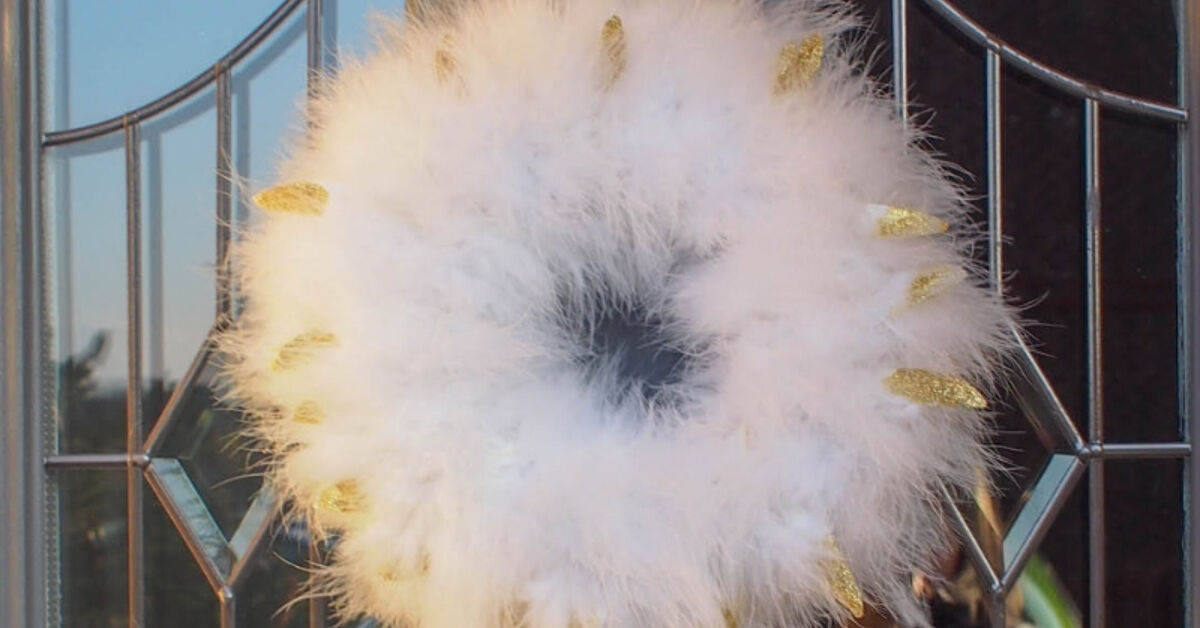
If your front door is looking a little too “plain toast in January,” a winter wreath with glittered feathers is the cozy, frosty, slightly fabulous fix. This DIY winter wreath combines soft feathers, subtle sparkle, wintry greenery, pinecones, ribbon, and a wreath base you can find at almost any craft store. The result feels elegant enough for a holiday party but easy enough for a Saturday afternoon when you are wearing fuzzy socks and pretending the laundry does not exist.
This project is especially lovely because it is not locked into one holiday. A glittered feather wreath can hang from Thanksgiving through New Year’s and even deep into winter if you use a neutral palette. Think white feathers, silver glitter, champagne ribbon, frosted pinecones, eucalyptus, faux berries, and a little shimmer that catches porch light without screaming, “I fell into a craft bin.”
In this guide, you will learn how to make a winter wreath with glittered feathers DIY style, including what supplies to buy, how to glitter feathers without making your home look like a disco snowstorm, how to arrange the design, and how to store it so it survives more than one season.
Why Make a Winter Wreath With Glittered Feathers?
A feather wreath brings a soft, snowy texture that greenery alone cannot always deliver. Evergreen wreaths are classic, of course, but feathers add movement, dimension, and a touch of winter glamour. When glitter is added carefully to the feather tips, the wreath looks frosted rather than flashy.
This type of DIY winter wreath works beautifully for many decorating styles. For farmhouse decor, use natural-toned feathers, burlap ribbon, pinecones, and matte white accents. For modern holiday decor, try white feathers, silver glitter, pearl picks, and a sleek satin ribbon. For a woodland look, mix faux pheasant feathers with cedar sprigs, tiny pinecones, and bronze or champagne glitter.
The best part? You do not need advanced crafting skills. If you can glue, layer, fluff, and occasionally talk sternly to a ribbon, you can make this wreath.
Supplies You Will Need
Before you begin, gather your materials. A little prep saves you from the classic crafting tragedy: one hand covered in glue while the scissors are across the room.
Main Materials
- One 14- to 18-inch wreath form, such as grapevine, foam, straw, or wire
- Faux feathers in white, ivory, gray, silver, champagne, or natural tones
- Fine glitter in silver, white, iridescent, champagne, or pale gold
- Mod Podge, craft glue, or spray adhesive
- Clear acrylic sealer or glitter sealant
- Hot glue gun and glue sticks
- Floral wire or craft wire
- Wire cutters
- Scissors
- Ribbon for hanging or bow-making
Decorative Add-Ons
- Mini pinecones
- Faux evergreen sprigs
- Faux eucalyptus or lamb’s ear
- White berries or pearl picks
- Small ornaments
- Snowflake picks
- Feather boa or marabou trim
- Battery-operated micro fairy lights, optional for indoor use
Choosing the Right Wreath Base
The wreath base sets the tone for the whole project. A grapevine wreath is the most forgiving option because you can tuck feather stems and greenery directly into the twisted vines before gluing. It also adds a rustic, farmhouse-style texture that looks beautiful peeking through the feathers.
A foam wreath form is best if you want a full, fluffy wreath. You can wrap it with ribbon, fabric, or feather boa first, then glue feathers on top. Foam is lightweight, easy to work with, and great for indoor wreaths or covered porches.
A wire wreath frame works well if you plan to use greenery bundles, floral wire, and a more structured layout. It is sturdy, but it needs fuller coverage so the frame does not show. If you are new to wreath making, grapevine or foam will be easier and less bossy.
Best Feathers for a Winter Wreath
For this DIY glittered feather wreath, faux feathers are the easiest and most reliable choice. They are clean, craft-ready, and available in consistent colors. White goose-style feathers, marabou feathers, faux pheasant feathers, and feather picks all work well.
For a snowy look, choose white and ivory feathers with silver glittered tips. For a rustic winter wreath, mix natural brown feathers with champagne glitter and frosted pinecones. For a glam winter wreath, use fluffy white feathers, pearl accents, and iridescent glitter.
Avoid using random feathers found outdoors. Store-bought craft feathers are safer, cleaner, and less likely to cause problems. Plus, no one wants to explain to guests that the front-door decor began with suspicious items collected near a parking lot.
How to Glitter Feathers Without Creating a Sparkle Emergency
Glitter can be magical. It can also become a long-term roommate. The secret is to use fine glitter, apply it only where you want shimmer, and seal it after it dries.
Step 1: Protect Your Work Surface
Lay down parchment paper, wax paper, or a disposable table covering. Place a tray or shallow box underneath your feathers while glittering them. This catches extra glitter and makes cleanup much easier.
Step 2: Brush on Adhesive
Use a small paintbrush to apply a thin layer of Mod Podge or craft glue to the feather tips. For a frosted effect, focus on the outer edges rather than coating the entire feather. Too much glue can flatten delicate feathers, and flat feathers are just sad little craft pancakes.
Step 3: Sprinkle Glitter
Hold the feather over your tray and sprinkle glitter onto the glued area. Tap gently to remove excess glitter. Fine glitter gives the most elegant snowy finish, while chunky glitter creates a bolder holiday look.
Step 4: Let Feathers Dry Completely
Place the feathers flat on parchment paper and let them dry. Do not rush this step. Damp glittered feathers are fragile and can clump if handled too soon.
Step 5: Seal the Glitter
Once dry, lightly spray the feathers with clear acrylic sealer or glitter sealant. Hold the can several inches away and use a gentle coat. This helps reduce glitter shedding and keeps the wreath looking polished.
How to Make Winter Wreath With Glittered Feathers DIY
Now for the fun part: building the wreath. The method below uses a grapevine wreath base, but you can adapt it for foam or wire.
Step 1: Plan Your Color Palette
Choose two or three main colors before you start gluing. A winter wreath looks best when it feels intentional. Try one of these combinations:
- Snowy farmhouse: white feathers, burlap ribbon, pinecones, frosted greenery
- Silver winter: gray feathers, silver glitter, eucalyptus, pearl berries
- Woodland glam: brown feathers, champagne glitter, cedar, bronze ornaments
- Modern neutral: ivory feathers, white berries, satin ribbon, pale gold accents
Step 2: Add a Hanging Loop
Before decorating, attach a loop of floral wire, twine, or ribbon to the back of the wreath. It is much easier to do this now than after the wreath is covered in feathers and personality.
Step 3: Create a Base Layer
If you are using a grapevine wreath, tuck small evergreen sprigs or eucalyptus around the form. Keep the greenery moving in the same direction around the wreath for a professional look. Secure each piece with hot glue or floral wire.
If you are using a foam wreath, wrap the base with ribbon, fabric strips, or a feather boa first. This hides the foam and creates a soft foundation for the feathers.
Step 4: Arrange the Feathers Before Gluing
Place your glittered feathers around the wreath without glue first. This dry layout helps you see the shape, spacing, and balance. Angle the feathers in one direction for a swirling, wind-swept effect. For a fuller wreath, overlap feathers like shingles on a roof.
Keep the glittered tips facing outward so they catch the light. Use larger feathers as the main layer and smaller feathers to fill gaps.
Step 5: Glue the Feathers in Layers
Once you like the arrangement, begin attaching feathers with hot glue. Add glue to the base or stem end of each feather, not the delicate fluffy part. Press gently into the wreath form and hold for a few seconds.
Work in sections. Start with the outer edge, then move inward. Layering creates depth and keeps the wreath from looking thin. If your wreath begins to resemble a molting snow owl, pause, step back, and adjust the direction of the feathers.
Step 6: Add Pinecones and Winter Accents
After the feathers are attached, add small pinecones, faux berries, ornaments, or snowflake picks. Group accents in odd numbers, such as three pinecones or five berry stems, for a natural designer look.
Place heavier elements near the lower left or lower right side if you want an asymmetrical wreath. For a classic round design, space accents evenly around the wreath.
Step 7: Add a Bow or Ribbon Hanger
A ribbon can completely change the mood of your winter feather wreath. Burlap ribbon feels rustic. Velvet ribbon feels rich and cozy. Satin ribbon feels clean and elegant. Plaid ribbon says, “Yes, I probably have hot cocoa plans.”
You can attach a large bow at the bottom, top, or side of the wreath. If your wreath is already full and dramatic, use a simple hanging ribbon instead of a bow.
Step 8: Fluff, Trim, and Inspect
Look at the wreath from a few feet away. Trim any awkward feather stems, tuck in loose greenery, and add extra feathers where the base shows. Check the back for glue strings and remove them. Hot glue strings are the spiderwebs of the craft world, and they love making surprise appearances.
Design Tips for a Professional-Looking Feather Wreath
Use Repetition
Repeat your materials around the wreath so the design feels balanced. For example, if you use silver berries on one side, add a smaller cluster on the opposite side.
Vary the Texture
Feathers are soft, so pair them with structured materials like pinecones, bells, ornaments, or stiff greenery. This contrast keeps the wreath visually interesting.
Keep the Glitter Controlled
Glitter should highlight the feathers, not bury them. A little sparkle on the tips looks wintry and expensive. Too much glitter can make the wreath look like it lost a fight with a craft store aisle.
Use a Focal Point
Create one main focal area with a bow, pinecone cluster, or group of berries. This gives the eye a place to land and makes the wreath feel designed instead of randomly assembled.
Where to Hang Your Winter Feather Wreath
A glittered feather wreath is best displayed indoors or on a covered porch. Feathers can be delicate, and moisture may affect glue, glitter, and shape. Good spots include an interior front door, mantel, mirror, entryway wall, bedroom door, or dining room window.
If you want to hang it outside, choose a protected area away from heavy rain, snow, and direct wind. Use a sturdy wreath hanger or ribbon loop. For glass doors or windows, a strong suction hook or removable adhesive hook may work, as long as it is rated for the wreath’s weight.
How to Store a Glittered Feather Wreath
Storage matters if you want your wreath to last. Before packing it away, dust it gently with a soft brush or cool air from a hair dryer on the lowest setting. Do not wipe glittered feathers with a wet cloth, because moisture can dull the glitter and bend the feathers.
Place the wreath in a wreath storage box, shallow plastic bin, or large cardboard box. Avoid crushing the feathers. If needed, loosely wrap the wreath in tissue paper. Store it in a cool, dry place away from humidity and heat.
Common Mistakes to Avoid
Using Too Much Glue
Hot glue is helpful, but blobs of glue can show between feathers. Use small dots and hide them under overlapping layers.
Skipping the Dry Layout
Always arrange feathers before gluing. Once hot glue sets, changing your mind becomes a tiny wrestling match.
Choosing Heavy Decorations
Feathers are lightweight, so oversized ornaments or heavy pinecones can pull the wreath out of shape. Use small accents unless your base is very sturdy.
Not Sealing the Glitter
Unsealed glitter will shed. A light coat of sealer helps keep sparkle where it belongs: on the wreath, not on your dog, your sweater, or your soup.
Creative Variations to Try
All-White Snow Queen Wreath
Use white feathers, white glitter, pearl picks, and a white satin ribbon. This version looks clean, elegant, and perfect for winter weddings or formal holiday decor.
Rustic Farmhouse Feather Wreath
Use a grapevine base, natural feathers, burlap ribbon, pinecones, and frosted eucalyptus. Add champagne glitter for warmth.
Blue and Silver Winter Wreath
Use gray and white feathers, silver glitter, icy blue ornaments, and silver ribbon. This palette feels crisp and modern.
Boho Winter Feather Wreath
Use pampas-style feathers, dried-look greenery, wooden beads, and soft gold glitter. Keep the shape slightly asymmetrical for a relaxed handmade look.
My Experience Making a Winter Wreath With Glittered Feathers DIY
The first time I made a winter wreath with glittered feathers, I underestimated two things: how many feathers I would need and how committed glitter is to becoming part of your lifestyle. I started with a small pile of white craft feathers and thought, “This looks like enough.” It was not enough. It was enough for maybe one fashionable pigeon. For a full wreath, especially one that looks lush from the street or across a room, you need more feathers than you think. Overlapping is what creates that soft, snowy fullness.
I also learned that glittering every feather from top to bottom is unnecessary. The prettiest result came from brushing adhesive only on the tips and edges, then sprinkling fine iridescent glitter lightly over the surface. When the feathers caught the light, they looked frosted instead of costume-y. That small detail made the wreath feel more high-end, even though the supplies were simple.
Another lesson: the wreath base matters. A grapevine wreath gave me the easiest structure because I could tuck stems into the vines before gluing. That made the design feel more secure and natural. A foam wreath worked too, but it needed to be wrapped first so no foam showed between the feathers. If you are making your first DIY feather wreath, I would choose grapevine. It is forgiving, sturdy, and looks good even if a little bit peeks through.
The best design decision I made was adding texture beyond the feathers. At first, the wreath looked soft but a little flat. Once I added mini pinecones, white berries, and a few sprigs of faux cedar, it suddenly had depth. The pinecones made it feel wintery, the berries added brightness, and the greenery gave the feathers a natural backdrop. The wreath went from “cute craft project” to “I may have paid too much for this at a boutique,” which is exactly the energy I want from a DIY.
For hanging, I preferred a wide velvet ribbon. It made the wreath feel cozy and polished without adding much weight. I tried a large bow, but it competed with the feathers, so I switched to a simple loop. That is a good rule for this project: let the feathers be the star. The accents should support the design, not steal the microphone and start singing holiday karaoke.
Cleanup was easier when I glittered the feathers inside a shallow cardboard box. I could pour the extra glitter back into the container, and the mess stayed mostly contained. I say “mostly” because glitter has dreams, and those dreams involve traveling. Still, sealing the finished feathers helped a lot. After the sealer dried, the wreath shed far less glitter when handled.
My final advice is to step back often. Wreaths look different up close than they do from a normal viewing distance. Every few minutes, hold the wreath up, squint a little, and check the balance. If one side looks too heavy, add small feathers or greenery to the opposite side. If a section looks empty, fill it with shorter feathers angled in the same direction as the rest. This small habit makes the finished wreath look intentional, balanced, and ready for its front-door debut.
Conclusion
Making a winter wreath with glittered feathers DIY style is a simple way to bring soft texture, sparkle, and personality into your seasonal decor. With a sturdy wreath base, faux feathers, fine glitter, winter greenery, and a few well-placed accents, you can create a wreath that looks elegant without being complicated.
The key is balance: soft feathers with structured pinecones, subtle glitter with natural greenery, and a simple color palette that fits your home. Whether you prefer farmhouse charm, snowy elegance, woodland style, or modern winter sparkle, this DIY glittered feather wreath can be customized to match your space.
Most importantly, enjoy the process. Crafting should feel creative, not stressful. If a feather points the wrong way, call it “organic movement.” If glitter lands on your sleeve, call it “seasonal confidence.” By the time your wreath is hanging, your door will look warmer, brighter, and much more ready for winter.
Note: This article is written in original standard American English and synthesizes practical wreath-making, glittering, decorating, hanging, and storage techniques from reputable U.S. craft and home-decor guidance.