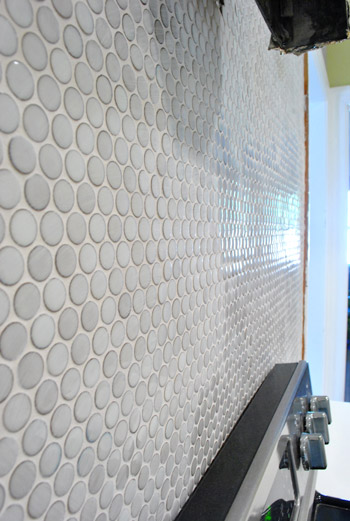
Grout haze is the ghost of a tile job that refuses to leave politely. You finish grouting, step back, admire your shiny new backsplash or bathroom floor, and thensurprise!a cloudy film appears across the tile like someone rubbed it with dusty sunscreen. The good news: grout haze is common, removable, and not a sign that your renovation has been cursed by the Tile Goblin.
The trick is knowing what kind of grout haze you have, what kind of tile you are cleaning, and how aggressive you should be. A light cement haze on glazed ceramic tile is a very different problem from epoxy residue on textured porcelain or acid-sensitive natural stone. Use the wrong cleaner, and you may trade a cloudy floor for etched stone, weakened grout, or a very expensive lesson in chemistry.
This guide explains how to remove grout haze safely, when to use water, vinegar, commercial grout haze remover, or specialty cleaners, and what to avoid if your tile is marble, limestone, travertine, or another natural stone. Put on your gloves, cue the dramatic cleaning montage, and let’s bring that tile back to its “I was expensive and I know it” glow.
What Is Grout Haze?
Grout haze is a thin residue left on the surface of tile after grouting. It usually forms when grout water, fine cement particles, pigments, latex additives, or resin-based residue dry before they are fully wiped away. It may look like white powder, cloudy smears, dull streaks, glossy patches, or stubborn swirls that show up when light hits the tile at an angle. MAPEI notes that grout haze can appear on textured, smooth, and polished tile, and that different grout types require different removal products.
Most homeowners notice grout haze after the surface dries. While the tile may look clean when damp, the residue reappears once the water evaporates. That is because water can temporarily hide the film without actually removing it. Annoying? Yes. Mysterious? Not really. Tile is just very good at drama.
Before You Start: Identify the Tile and Grout
Before reaching for a cleaner, answer two questions: What kind of tile do you have, and what kind of grout was used?
Common Tile Types
Ceramic and porcelain tile are usually the most forgiving. Glazed ceramic and many porcelain tiles can tolerate mild cleaning methods and some grout haze removers, though polished porcelain and specialty finishes still require caution.
Natural stone needs more care. Marble, limestone, travertine, onyx, and some terrazzo surfaces can be etched by acids, including vinegar and many cement grout haze removers. The Natural Stone Institute warns that products containing vinegar, lemon, or other acids can dull or etch calcareous stones, while abrasive powders may scratch some stone surfaces.
Textured tile grabs residue like a sweater grabs pet hair. Even when the tile material is durable, the tiny surface grooves can trap grout particles, making haze removal more time-consuming.
Common Grout Types
Cement-based grout is the traditional sanded or unsanded grout used in many floors, showers, and backsplashes. Cement haze is often removed with buffing, mild acid solutions, or cement grout haze removers on acid-resistant surfaces.
Ready-mixed grout may be acrylic or urethane-based. These residues often need non-cement or specialty cleaners rather than acid. MAPEI explains that ready-mixed grout residues usually require products designed to break down acrylic or urethane materials.
Epoxy grout is durable, stain-resistant, and excellent for demanding areas, but epoxy haze can be stubborn. The longer epoxy residue sits, the harder it becomes to remove. MAPEI and LATICRETE both recommend using products made specifically for epoxy grout haze rather than treating it like ordinary cement haze.
Tools and Supplies You May Need
- Clean microfiber cloths or cheesecloth
- Grout sponge
- Two buckets of clean water
- White nylon scrub pad or soft nylon brush
- Rubber or nitrile gloves
- Protective eyewear
- pH-neutral tile cleaner
- Commercial grout haze remover, matched to your grout type
- Plastic scraper for heavy residue
- Wet/dry vacuum for large floors
- Soft towels for drying
Avoid steel wool, metal brushes, harsh scouring powder, and mystery cleaners from the back of the garage. If the label is faded and the bottle looks like it fought in a chemical war, let it retire.
Step-by-Step: How To Remove Fresh Grout Haze
Step 1: Let the Grout Firm Up
Do not attack fresh grout lines too early. If the grout is still soft, aggressive wiping can pull grout out of the joints. Many installations need an initial waiting period before final haze cleaning, but the correct timing depends on the grout manufacturer’s instructions. As a general rule, light haze is easier to remove within the first day or two than after it has hardened for a week.
Step 2: Dry Buff the Tile
For very light haze, start with the gentlest method: dry buffing. Use clean cheesecloth or a microfiber towel and rub the tile surface in circular motions. This works especially well on smooth ceramic or glazed tile when the residue is powdery rather than sticky.
Check your work from different angles. Grout haze often plays hide-and-seek with overhead lighting, then suddenly appears when sunlight hits the wall. A flashlight held low across the tile can reveal remaining streaks.
Step 3: Use Clean Water and a Damp Sponge
If dry buffing is not enough, wipe the tile with a barely damp grout sponge. Use two buckets: one for rinsing the sponge and one for clean water. Wipe diagonally across grout lines so you do not dig into the joints. Rinse the sponge frequently, wring it well, and change the water often.
The sponge should be damp, not dripping. Too much water can weaken fresh cement grout, spread residue, and create more haze. In other words, this is not the moment to recreate a miniature indoor lake.
Step 4: Try a pH-Neutral Cleaner
If clean water leaves a film behind, use a pH-neutral tile cleaner appropriate for your tile type. This is especially smart for natural stone or delicate finishes. Apply the cleaner according to the label, gently agitate with a soft brush or white nylon pad, rinse well, and dry with a clean towel.
How To Remove Cement-Based Grout Haze
Cement grout haze is usually caused by fine Portland cement particles and mineral residue drying on the tile surface. On acid-resistant ceramic, porcelain, quarry tile, granite, or slate, a cement grout haze remover may be effective. Custom Building Products describes Aqua Mix Cement Grout Haze Remover as an acidic treatment for cementitious grout haze and mortar smears, with instructions to pre-wet the surface, work in small areas, scrub with a white nylon brush, and flush with water immediately after brushing.
Safe Method for Ceramic or Porcelain Tile
- Sweep or vacuum the surface to remove loose grit.
- Pre-wet the tile with clean water if the product directions require it.
- Test the cleaner in a hidden spot.
- Apply the grout haze remover to a small, manageable area.
- Let it dwell only as long as the label allows.
- Scrub gently with a white nylon pad or soft brush.
- Remove the dirty solution with a sponge, mop, towel, or wet vacuum.
- Rinse thoroughly with clean water.
- Dry the surface and inspect it under angled light.
MAPEI’s UltraCare Cement Grout Haze Remover instructions emphasize testing first, wearing chemical-resistant gloves and protective lenses, working in small areas, allowing a 10- to 15-minute dwell time, keeping the product wet on the surface, agitating with a soft brush or white scrub pad, and rinsing well.
Can You Use Vinegar for Grout Haze?
Diluted white vinegar is a popular DIY option for light cement haze on ceramic or porcelain tile. Because vinegar is acidic, it can help dissolve mineral residue. However, it should be used cautiously and only on acid-safe surfaces. MAPEI states that occasional vinegar use on porcelain or ceramic tile with cement-based grout should not generally cause damage, but frequent use can discolor or weaken grout and vinegar can etch natural stone such as marble, travertine, and limestone.
If you use vinegar, keep it mild: try one part white vinegar to three or four parts warm water. Apply it with a cloth or sponge, let it sit briefly, scrub gently, rinse thoroughly, and dry. Do not pour vinegar directly over fresh grout joints, and do not use vinegar on natural stone. Vinegar is useful, but it is not a magic potion. It is more like a helpful intern with boundaries.
How To Remove Grout Haze From Natural Stone
Natural stone deserves the VIP treatment. Acidic cleaners can etch stone, leaving dull spots that are often worse than the haze itself. American Olean’s natural stone care guidance says stone cleaners should be pH-neutral and should not contain acid or bleach; even light vinegar solutions may etch and damage many varieties of natural stone.
Stone-Safe Approach
- Dry buff first with a microfiber cloth.
- Use a pH-neutral stone cleaner approved for your stone type.
- Scrub gently with a soft white pad or stone-safe brush.
- Rinse with clean water.
- Dry immediately with a soft towel.
- If haze remains, contact the grout or stone manufacturer before using stronger products.
For polished marble, limestone, travertine, or onyx, do not experiment with vinegar, lemon juice, sulfamic acid, muriatic acid, toilet bowl cleaner, or abrasive powders. The internet may suggest “just a splash of vinegar,” but the internet is not paying for your stone restoration bill.
How To Remove Epoxy Grout Haze
Epoxy grout haze is not the same as cement haze. It is often sticky, shiny, gummy, or film-like. Because epoxy grout is designed to resist chemicals and stains, dried epoxy residue can cling stubbornly to tile. LATICRETE describes STONETECH Epoxy Grout Haze & Coating Stripper as a water-based gel that can dissolve epoxy grout haze and other coatings from vertical and horizontal surfaces, while MAPEI recommends epoxy-specific removers for epoxy haze.
Epoxy Haze Removal Steps
- Confirm that the residue is epoxy grout haze, not cement haze.
- Choose an epoxy grout haze remover approved for your tile.
- Test in a hidden area.
- Apply the product with a brush, mop, or paint pad as directed.
- Keep the product from drying on the surface.
- Agitate gently with a white nylon pad.
- Use a plastic scraper for heavy deposits if the label allows it.
- Remove residue with towels, a sponge, mop, or wet vacuum.
- Rinse several times and dry.
Do not use cement haze remover on epoxy haze unless the product specifically says it works for that purpose. Acid may fizz impressively on cement residue, but epoxy will look at it and say, “Cute.”
How To Remove Old Grout Haze
Old grout haze is tougher because residue has had more time to bond to the tile. Start gently, then increase strength only as needed. First, dry buff and clean with water. Next, try a pH-neutral cleaner. If the haze is cement-based and the tile is acid-resistant, use a cement grout haze remover. If the haze is epoxy or urethane-based, use a non-cement or epoxy haze remover.
For old haze on textured porcelain, work in small sections and allow the cleaner to dwell according to the manufacturer’s instructions. Use a white nylon brush to reach into surface texture. Rinse repeatedly because leftover cleaner can dry into a new film. That is the cleaning equivalent of washing dishes and leaving soap on the plates.
Common Mistakes To Avoid
Using Acid on the Wrong Tile
The biggest mistake is using vinegar or acidic grout haze remover on marble, limestone, travertine, or other acid-sensitive stone. Always confirm compatibility first.
Scrubbing With Metal Tools
Steel wool, wire brushes, and metal scrapers can scratch tile and leave metal marks. Use white nylon pads, soft brushes, or plastic scrapers instead.
Letting Cleaner Dry on the Tile
Many grout haze removers must stay wet during dwell time and then be rinsed thoroughly. Letting cleaner dry can leave streaks or residue, forcing you to clean the cleaner. Nobody wants that plot twist.
Working Too Large an Area
Large areas dry before you can scrub and rinse them. Work in sections small enough to control, especially on floors, textured tile, or warm rooms.
Skipping the Test Spot
Always test in an inconspicuous area. A hidden corner can save your entire floor from an unfortunate chemistry experiment.
How To Prevent Grout Haze Next Time
The best way to remove grout haze is to prevent most of it during installation. Use clean water, rinse sponges frequently, and wipe diagonally across the joints. Do not overwet the grout. After the initial cleanup, buff the tile with a dry microfiber cloth or cheesecloth once the surface haze appears. For textured tile, consider using a grout release before grouting if recommended by the tile manufacturer.
Also, follow the grout manufacturer’s cleanup window. Epoxy and ready-mixed grouts can have specific timing requirements, and waiting too long can turn a simple wipe-down into a Saturday-long arm workout. Your biceps may appreciate it, but your patience will not.
When To Call a Professional
Call a tile or stone restoration professional if the tile is expensive natural stone, the haze is widespread and old, the surface looks etched or scratched, or you are unsure what grout was used. Professional cleaners can identify residue, choose compatible products, and use equipment such as low-speed scrubbers or wet vacuums without damaging the installation.
You should also get help if your grout is crumbling, powdery, cracked, or washing out. That may indicate an installation issue rather than ordinary haze. Removing haze will not fix grout that failed to cure properly.
Real-World Experience: What Actually Works Best
In real tile projects, grout haze removal is less about one miracle product and more about patience, timing, and not panicking. The first thing many DIYers learn is that grout haze often looks worse the next morning. The tile dries, sunlight comes through the window, and suddenly the backsplash has the soft-focus glow of an 1980s soap opera. That does not mean the job is ruined. It usually means the final buffing step was rushed or skipped.
For light haze on ceramic subway tile, the most reliable approach is usually simple: dry buff first, then wipe with a barely damp microfiber cloth, then buff again. It feels too easy, which is why people often skip straight to stronger cleaners. But many fresh haze problems are just a thin layer of powder. A clean cloth and some elbow grease can do more than a bottle full of dramatic warnings.
Porcelain floor tile can be trickier, especially when it has a matte or textured surface. The tiny pores and ridges hold residue, so a flat wipe may clean the high points while leaving haze in the low spots. In that situation, a white nylon scrub pad or soft nylon brush makes a big difference. The key is to scrub gently in small circles, rinse often, and remove dirty water completely. If you mop dirty solution across the floor, you are not cleaning; you are relocating the haze to a more scenic neighborhood.
One practical lesson: clean water matters more than people think. A bucket becomes grout soup quickly. Once that happens, every sponge pass spreads fine cement particles back onto the tile. Using two bucketsone for rinsing and one for clean watermay feel fussy, but it saves time. Change the water whenever it looks cloudy. Your future self, standing in better lighting, will thank you.
Another experience-based tip is to inspect the tile from multiple angles before declaring victory. Overhead bathroom lighting can hide haze. Low-angle light from a flashlight or window exposes it. Professional cleaners often use this trick because grout haze is sneaky; it waits until your guests arrive to reveal itself.
For cement haze that does not respond to buffing and water, a commercial cement grout haze remover is often worth it. It is more predictable than homemade mixtures, and the label tells you where it can and cannot be used. That said, stronger is not always better. Start with the mildest dilution allowed by the product directions, especially on colored grout or tile with a special finish. Rinse thoroughly, then dry the tile. Many “the cleaner didn’t work” complaints are actually “the cleaner was not fully rinsed” situations.
Natural stone is where experience teaches humility. Vinegar may work beautifully on a basic ceramic tile backsplash and be disastrous on marble. Etching can look like haze, but it is actually surface damage. Once stone is etched, cleaning will not restore the original polish; it may need professional honing or polishing. So if the surface is marble, limestone, travertine, or another calcium-based stone, use stone-safe cleaners and slow down. This is not the place for heroic improvisation.
Epoxy haze is another category where timing matters. When cleaned during the manufacturer’s window, epoxy residue can be manageable. When left for days, it becomes stubborn and may require epoxy-specific remover, extended dwell time, repeated applications, and careful scraping with plastic tools. The practical rule is simple: if epoxy grout is involved, read the cleanup instructions before opening the grout container, not after the tile looks like it was glazed with clear glue.
Finally, the best “secret” is not glamorous: work small, rinse well, dry completely, and test first. Grout haze removal rewards boring discipline. It is not a race. It is a slow rescue mission for your tile’s shine. And when the haze finally disappears, the room looks cleaner, brighter, and more expensivewithout needing to remodel the remodel.
Conclusion
Learning how to remove grout haze starts with one smart decision: identify the surface before choosing the cleaner. Fresh haze on ceramic or porcelain tile may only need dry buffing, clean water, and a microfiber cloth. Stubborn cement haze may require a cement grout haze remover on acid-resistant surfaces. Ready-mixed and epoxy grout haze usually need specialty products made for those residues. Natural stone requires extra caution, pH-neutral cleaners, and absolutely no casual vinegar experiments.
The safest process is simple: test first, work in small areas, use non-abrasive tools, keep cleaners from drying on the surface, rinse thoroughly, and dry the tile before judging the result. Done correctly, grout haze removal can turn a cloudy tile job into the clean, crisp finish you imagined when you started the projectminus the dramatic sighing at the floor.
Note: This article is for general homeowner education. Always follow the tile and grout manufacturer’s instructions, read cleaner labels carefully, wear eye and skin protection, ventilate the area, and test products in hidden spots before cleaning the full surface.