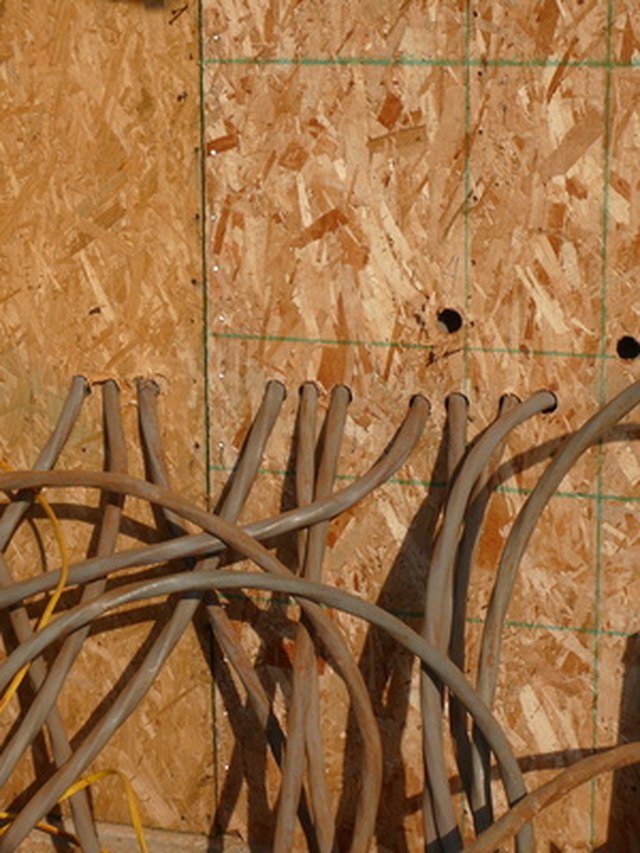
Underground electrical wire has a peaceful job description: stay buried, stay dry enough to function, and deliver power without attracting attention. Unfortunately, shovels, tree roots, settling soil, rodents, corrosion, and ambitious landscaping projects occasionally rewrite that job description.
Repairing a damaged underground cable is not the same as twisting two wires together in a dry indoor junction box. Soil is considered a wet environment, even when it looks dusty enough to grow tumbleweeds. A proper repair therefore requires a splice system specifically listed for underground or direct-burial usenot ordinary wire nuts wrapped in a heroic amount of electrical tape.
This guide explains how to splice underground electrical wires safely, how to choose the right direct-burial splice kit, and when the job belongs in the hands of a licensed electrician. Electrical codes and permit requirements vary, so confirm the rules with your local authority having jurisdiction before beginning.
Can Underground Electrical Wire Be Spliced?
Yes, certain underground cables may be spliced, provided the connection is made with a device identified for direct burial and installed according to its listing and manufacturer instructions. Depending on the wiring method and local code, an approved underground splice may not need to be placed inside a conventional junction box.
That does not mean every waterproof-looking connector belongs underground. “Water-resistant,” “weather-resistant,” “submersible,” “wet-location rated,” and “direct-burial rated” are not automatically interchangeable descriptions. The splice kit must be approved for the actual installation and compatible with the cable, voltage, conductor material, and wire size.
Underground Is a Wet Location
Moisture eventually finds its way into underground raceways and around buried cables. Condensation alone can put water inside conduit, even when every fitting appears tight. For that reason, wiring and connectors installed underground must be suitable for wet conditions.
This is also why standard indoor NM-B cableoften called Romexis generally not suitable underground, including inside buried conduit. Type UF-B cable, by contrast, is manufactured for underground applications and can be approved for direct burial when installed correctly. Individual conductors installed in underground conduit also need the appropriate wet-location rating.
When Should You Repair the Cable Instead of Splicing It?
A splice is appropriate when the cable is otherwise in good condition and the damage is confined to a small, identifiable area. Replacing the entire cable may be the safer choice when:
- The cable jacket is deteriorated in several places.
- Water has traveled extensively inside the cable.
- The conductor is badly corroded or blackened.
- The existing cable is not approved for underground use.
- The circuit is repeatedly tripping after visible damage is removed.
- The conductor size, material, or circuit purpose cannot be identified.
- The cable supplies a major feeder, pool, hot tub, well, or other specialized equipment.
One splice repairs one damaged point. It does not turn fifty feet of questionable cable into a dependable electrical system. Electrical tape is useful, but it has never earned a medical degree and cannot cure terminal cable illness.
What Type of Underground Splice Kit Do You Need?
Manufacturers offer several styles of direct-burial wire connectors. The correct choice depends on the cable and installation.
Heat-Shrink UF Cable Splice Kits
These kits are commonly used to join flat UF-B cable. They usually include a multi-conductor connector block or individual connectors and a heavy-wall, adhesive-lined heat-shrink sleeve. When heated correctly, the tubing shrinks around the cable jacket, while melted adhesive seals the ends against moisture.
Commercially available UF splice kits may support ranges such as 14 through 8 AWG and voltages up to 600 volts, but specifications vary. Always use the exact wire-size range and conductor configuration printed on the product.
Gel- or Silicone-Filled Connectors
Some direct-burial connectors are prefilled with silicone sealant or moisture-resistant gel. These are common in landscape lighting, irrigation controls, and other approved applications. A connector designed for low-voltage landscape wire must not be assumed suitable for a 120-volt branch circuit.
Match the product’s voltage rating, wire combination, conductor material, and intended application. The phrase “underground connector” on the package is the beginning of the investigation, not the entire investigation.
Resin-Filled and Molded Splice Systems
Resin-filled kits encapsulate the connection inside a protective compound. Molded rubber or EPDM covers are also available for certain conductors and larger cables. These systems can provide excellent moisture protection, but they must be assembled precisely and allowed to cure when required.
Larger aluminum or copper feeders need connectors specifically rated for their conductor materials. Aluminum-to-copper connections require an AL/CU-rated system and the preparation, inhibitor, compression tool, die, and torque specified by the manufacturer.
Tools and Materials
A typical UF-B repair may require:
- A listed direct-burial splice kit compatible with the cable
- A properly rated voltage tester or multimeter
- Wire cutters and cable-stripping tools
- A torque screwdriver or torque wrench when specified
- A manufacturer-approved crimping tool if using crimp connectors
- A heat gun or other heat source permitted by the splice instructions
- Clean cloths and approved cable-cleaning material
- Insulated hand tools
- Shovel, hand trowel, and protective gloves
- Matching replacement cable if a damaged section must be removed
- Warning tape or cable markers where required
Do not substitute pliers for a specified crimping tool or estimate connector torque based on how determined your wrist feels that morning. Electrical terminations depend on measured mechanical pressure.
How to Splice Underground Electrical Wires Step by Step
1. Call 811 Before Digging
Before excavating, request utility marking through the 811 service and follow your state’s required waiting period and excavation rules. Utility marking generally covers utility-owned lines, not every private cable after the meter. Private landscape lighting, well wiring, detached-garage feeders, and other owner-installed lines may require a private locating service.
Do not assume an existing cable travels in a straight line. Underground wiring sometimes takes scenic routes around patios, foundations, trees, and evidence of previous homeowners’ creativity.
2. Turn Off and Secure the Power
Switch off the circuit breaker or disconnect supplying the cable. Prevent anyone from turning it back on while work is underway. In a professional setting, follow the required lockout and tagout procedure.
Treat the conductors as energized until testing proves otherwise. OSHA guidance prioritizes de-energizing electrical parts before work begins unless doing so is infeasible or creates a greater hazard.
3. Verify the Absence of Voltage
Use a properly rated tester on a known live source to confirm the tester works. Test every conductor in the damaged cable, including conductor-to-ground and conductor-to-conductor combinations. Then check the tester again on a known live source. This “live-dead-live” process helps reveal a failed tester instead of allowing it to provide false confidence.
A noncontact tester can be a useful preliminary tool, but it should not be the only method used to establish that conductors are de-energized.
4. Expose Enough Cable to Work Safely
Excavate carefully with hand tools near the cable. Expose enough undamaged cable on both sides to inspect the jacket and assemble the splice without sharp bends or mechanical tension.
Keep mud and standing water away from the connection area. A sheet of plywood, clean plastic, or another dry work surface can keep parts organized. Tiny connector screws have an unexplained attraction to wet soil.
5. Identify the Cable and Circuit
Read the cable markings before selecting the splice kit. Confirm:
- Cable type, such as UF-B
- Number and size of conductors
- Copper or aluminum construction
- Solid or stranded conductors
- Circuit voltage and breaker rating
- Whether the cable is direct-buried or inside conduit
Use replacement cable of the same approved type and conductor size. Never reduce conductor size within the repaired section simply because a smaller scrap was conveniently nearby.
6. Remove All Damaged Material
Cut back the cable until the insulation, jacket, and conductors are clean and undamaged. Copper that is deeply corroded, pitted, overheated, or darkened should not be left inside the splice.
If removing the damaged section leaves insufficient length for one connection, install a matching piece of cable with two listed splice kits. Do not pull the original cable tight to gain another inch. Tension can weaken the repair and encourage water to enter around the seal.
7. Position the Sealing Components First
For a heat-shrink kit, slide the outer sleeve onto one cable before joining the conductors. This is the electrical equivalent of putting pasta in the pot before draining the water: forgetting the sequence produces an avoidable second attempt.
Keep the sleeve far enough from the connection that it does not begin shrinking prematurely.
8. Strip the Cable Exactly as Directed
Follow the splice-kit instructions for jacket removal and conductor strip length. Avoid nicking the conductor or cutting into insulation that must remain under the final seal.
Do not assume every kit uses the same dimensions. Heat-shrink systems depend on the sleeve overlapping sound cable jacket by the amount specified by the manufacturer.
9. Join Each Conductor
Connect matching conductors: ungrounded conductor to ungrounded conductor, neutral to neutral, and equipment-grounding conductor to equipment-grounding conductor. Maintain the original identification throughout the repair.
Insert each conductor fully into its connector. Tighten set screws to the listed torque or make crimps using the specified tool and die. Give each conductor a controlled pull test before sealing the assembly.
Connectors and equipment must be installed according to their listings and instructions. A connector that is overtightened, undertightened, or crimped with the wrong tool may appear secure while developing excessive resistance under load.
10. Seal the Splice
Center the heat-shrink sleeve over the completed connection. Apply heat evenly and move gradually around the tubing rather than concentrating heat in one spot. Shrink from the center toward the ends unless the product instructions specify another method.
A properly completed adhesive-lined sleeve generally shows a consistent seal and a small amount of adhesive at the ends. Avoid scorching the cable jacket, overheating the connectors, or leaving channels where water can enter. Product instructions take priority over any general technique described here.
For gel-, silicone-, molded-cover, or resin-based systems, follow the product’s filling, positioning, closure, and curing instructions. Do not energize the circuit before a curing compound has reached the required condition.
11. Inspect and Test the Repair
Before restoring power, inspect the splice for:
- Complete conductor insertion
- Correct conductor identification
- Continuous grounding connection
- Uniform sealing around the cable jacket
- No exposed copper or damaged insulation
- No sharp bends or mechanical strain
When appropriate, test conductor continuity and verify that there are no unintended conductor-to-ground or conductor-to-conductor connections. Insulation-resistance testing may be useful on some circuits, but it should be performed by someone who understands the equipment and has disconnected devices that could be damaged by the test voltage.
12. Restore Power and Test the Circuit
Restore power and test the connected load. Confirm correct voltage under load and investigate excessive voltage drop, intermittent operation, breaker trips, unusual heat, or GFCI trips.
Outdoor outlets and many outdoor circuit applications require GFCI protection under applicable electrical codes. Test the GFCI using its built-in test function and confirm that the circuit disconnects properly. A GFCI improves protection against ground-fault shock, but it does not make a poorly sealed splice acceptable.
13. Document and Rebury the Splice
Photograph the repair and record measurements from permanent landmarks before covering it. This information can save hours of archaeological exploration during a future repair.
Place clean soil around the splice without rocks, construction debris, or sharp objects pressing against it. Restore the required burial cover and any protective boards, sleeves, conduit, or warning tape required by local code. Minimum cover depends on the wiring method, circuit characteristics, surface conditions, and local amendments, so consult the applicable code table rather than relying on a universal depth.
Common Underground Wire-Splicing Mistakes
Using Ordinary Wire Nuts and Electrical Tape
Standard indoor connectors and vinyl tape are not a direct-burial splice system. Tape can loosen, allow moisture migration, and conceal corrosion until the circuit begins trippingor stops working during the least convenient weekend of the year.
Using General-Purpose Heat-Shrink Tubing
Thin-wall hobby heat shrink may make a connection look polished without providing the mechanical strength, adhesive seal, or direct-burial listing the application requires.
Installing the Wrong Connector
A connector must match conductor size, material, strand class, voltage, cable shape, and environmental rating. A copper-only connector should not be used on aluminum conductors. A landscape-lighting connector should not be promoted to household branch-circuit duty without the necessary rating.
Ignoring the Manufacturer’s Torque Value
Loose terminations create resistance and heat. Excessive torque can damage the conductor or connector. “Very tight” is not an electrical unit of measurement.
Sealing Moisture Inside the Splice
The cable and connector area should be clean and dry before sealing. Encapsulating muddy water inside expensive heat shrink simply creates a beautifully packaged future problem.
Leaving the Cable Under Tension
The repaired cable should rest naturally in the trench. Soil movement, frost, and settling can pull on a splice that was already stretched during installation.
Repairing the Symptom but Not the Cause
Determine why the cable failed. If a shovel hit it, add protection and document the route. If roots crushed it, consider rerouting. If water entered through an unsuitable cable type, replacement may be more sensible than another localized repair.
When to Call a Licensed Electrician
Professional assistance is strongly recommended when:
- The cable may still be energized or cannot be positively identified.
- The circuit is utility-owned or located before the service disconnect.
- The repair involves aluminum conductors or large feeders.
- The cable supplies a pool, spa, marina, well pump, or critical equipment.
- The circuit requires load calculations or conductor upsizing.
- The insulation is burned or multiple sections are damaged.
- The breaker trips after the visible fault has been removed.
- Permits, inspections, or code requirements are unclear.
Electrical Safety Foundation International guidance emphasizes turning off the circuit before work and recognizing when a project exceeds the homeowner’s skill level. Calling an electrician is not surrender. It is simply outsourcing the part of the project that can start a fire without sending a calendar invitation.
Practical Experience: Lessons From Typical Underground Wire Repairs
The following experience-based lessons are composite examples drawn from common repair patterns rather than claims about one specific jobsite.
The Damage Is Often Larger Than the First Cut
A common scenario begins with a clean shovel mark through one side of a UF cable. The visible cut may look small, but once the jacket is opened, moisture or impact damage can extend several inches in both directions. The best repair is made only after cutting back to bright, undamaged conductor and intact insulation.
Trying to save an extra inch of questionable cable rarely saves time. It usually means repeating the excavation when corrosion reaches the connection later. Experienced installers expose a generous working area, inspect carefully, and remove everything that looks compromised.
Preparation Usually Takes Longer Than the Connection
The mechanical connection may require only a few minutes. The real work is identifying the circuit, marking utilities, shutting down power, exposing the cable, cleaning the area, selecting the correct kit, and arranging enough slack to build the splice properly.
Rushing the preparation creates the classic problems: the heat-shrink sleeve is forgotten, strip lengths are inconsistent, mud contaminates the seal, or the cable is too short to reach the connector without tension. A clean workspace and a dry towel can contribute more to reliability than an impressive toolbox.
Too Much Heat Can Be as Bad as Too Little
When heat-shrink tubing is used, beginners often hold the heat source in one place while waiting for visible movement. That can scorch the jacket before the rest of the sleeve begins shrinking. Moving the heat evenly around the splice produces a more uniform seal.
Insufficient heat creates a different problem: the tubing looks smaller but the adhesive has not flowed completely, leaving pathways for moisture. Following the kit instructions and observing the full circumference of the sleeve are more reliable than judging only the side facing upward.
Moisture Problems Can Hide for Months
A poorly sealed splice may work perfectly on installation day. The circuit may even pass a quick voltage check. Failure often appears later after rain, irrigation, snowmelt, or seasonal soil movement. Symptoms can include nuisance GFCI trips, dim lighting, intermittent equipment operation, or voltage that looks normal with no load but collapses when a motor starts.
This delay explains why a working circuit is not proof of a waterproof repair. Mechanical security, correct materials, complete sealing, and load testing all matter.
One Splice Is Not Always the Best Solution
When a cable has little slack, installers are sometimes tempted to stretch both ends into one connector. A better repair may be to remove a longer damaged section, add a matching cable segment, and make two relaxed splices. Two correctly assembled, listed splices are generally preferable to one connection placed under constant mechanical stress.
In other situations, replacing the entire cable is the more economical long-term decision. Multiple old repairs, unexplained insulation damage, an obsolete wiring method, or the wrong cable type suggest that another patch will only postpone the inevitable.
Documentation Is a Gift to the Future
After testing the repair, take photographs showing the splice, cable markings, trench route, and nearby landmarks. Record approximate depth and measurements from fixed objects such as a building corner or fence post.
Years later, landscaping may erase every visual clue. A simple record can prevent someone from searching for the splice with the same shovel that created the original problem. That is practical electrical experience in its purest form: make today’s repair reliable, and make tomorrow’s repair unnecessaryor at least easier to find.
Conclusion
Learning how to splice underground electrical wires begins with understanding that the splice must survive more than electricity. It must also withstand moisture, soil pressure, temperature changes, corrosion, and movement without becoming a shock or fire hazard.
Start by de-energizing and testing the circuit. Identify the cable, remove all damaged material, and use a listed direct-burial splice kit that matches the conductor size, material, voltage, and application. Follow every stripping, torque, crimping, sealing, and curing instruction supplied with the product. Test the completed circuit before carefully restoring the required burial cover.
Most importantly, know where a reasonable DIY repair ends. Service conductors, large feeders, unidentified cables, aluminum wiring, pool equipment, and persistent electrical faults require professional evaluation. Underground wire should return to its original career after the repair: quietly delivering power and staying out of the news.
Research note: This guide synthesizes U.S. electrical-safety, wiring-method, cable-marking, GFCI, and direct-burial splice guidance from NFPA, OSHA, ESFI, UL Solutions, Southwire, 3M, IDEAL Electrical, Gardner Bender, Hubbell, Leviton, EC&M, Lowe’s, and The Home Depot. Always follow the instructions packaged with the selected product and the electrical code adopted in your jurisdiction.