Want to know whether your seeds are alive, awake, and ready to partybefore you commit precious pots, soil, and
emotional energy? Enter the paper towel method: a low-drama, high-reward way to sprout seeds where you can
actually see what’s going on. It’s like a reality show for seeds, minus the confessionals.
This guide walks you through a reliable, beginner-friendly process (plus a few “learned it the hard way” tips) to
germinate seeds on a paper towel, then transplant them safely into soilwithout tearing roots, inviting mold to
move in rent-free, or accidentally turning your zip-top bag into a swamp.
Why the paper towel method works (and when it’s worth doing)
Seeds need three basic things to germinate: moisture (to activate the embryo),
warmth (to speed up biological processes), and oxygen (roots breathe too).
A damp paper towel inside a bag or container creates a mini “greenhouse” that stays consistently moist and warm.
And because you’re not guessing what’s happening under soil, it’s especially useful when:
- You’re using older seeds and want to test viability first.
- You’re germinating slow or picky seeds (like peppers) and want more control.
- You want faster feedback so you can re-seed quickly if nothing sprouts.
- You’re teaching kids (or your future self) how germination actually looks.
Quick reality check: not every seed loves being handled mid-germination. Some gardeners prefer sowing directly in
seed-starting mix to avoid transplant shock. The paper towel method is best when you’ll transplant promptly
and handle sprouts gently.
What you’ll need
- Seeds (vegetables, herbs, flowersmost work fine)
- Paper towels (plain white, unscented; thicker is better)
- Clean water (tap is usually fine)
- Zip-top bag or a lidded container
- Permanent marker (labels save relationshipsespecially with yourself)
- Tweezers (optional, but fantastic for tiny sprouts)
- Seed-starting mix + small pots/cell trays (for transplanting)
How to sprout seeds on a paper towel (9 steps)
Step 1: Choose seeds that make sense for this method
Most common garden seeds germinate well on paper towels: tomatoes, peppers, cucumbers, squash, melons,
brassicas (broccoli, kale), beans, sunflowers, and many flowers. Tiny dust-like seeds can work too, but they’re
harder to space and transplant without accidentally sneezing them into another dimension.
If your seed packet says “needs light to germinate,” the paper towel method still can workjust keep the towel
in a bright spot (not direct hot sun) and don’t bury the seed later.
Step 2: Prep a clean setup (because mold loves chaos)
Wash your hands. Use a clean plate or counter space. If you’re reusing a container, rinse it well.
Mold usually shows up when things are too wet, too warm, and too airlessbasically a seed sauna.
You’re aiming for “cozy spring morning,” not “tropical swamp.”
Step 3: Moisten the paper towel correctly
Wet the towel, then wring it out so it’s evenly damp but not dripping.
If water runs when you tilt it, it’s too wet. Oversaturation reduces oxygen and encourages fungi.
If your towel falls apart when wet, double it up.
Step 4: Place seeds with space to breathe
Lay the damp towel flat and place seeds on one half, leaving space between them. Spacing matters more than you’d
think: roots tangle fast, and tangled roots are how “easy project” becomes “tiny botanical surgery.”
If you’re testing viability, use an easy number like 10 seeds so your germination percentage is quick math.
(Seven sprouted? That’s ~70%. Your calculator can go back to bed.)
Step 5: Fold (or roll) the towel to keep seeds in contact
Fold the towel over the seeds so they’re sandwiched between damp layers. For longer towels, you can roll it
looselynot tight. Tight rolls can restrict oxygen and make roots grow through layers like
they’re trying to escape.
Step 6: Slide it into a bag or container and label it like a responsible adult
Put the folded towel into a zip-top bag or lidded container. Label with the seed type and date.
If you’re sprouting multiple varieties, label each bagbecause “mystery plant roulette” is only fun until you
realize you started hot peppers instead of sweet ones.
Seal the bag most of the way to hold humidity. Many gardeners also leave a small gap or open it briefly once a
day for fresh airespecially if you’re germinating slower seeds or you’ve battled mold before.
Step 7: Keep it warm (not cooked)
Place the bag somewhere warm with a steady temperature. Around 70°F works for many seeds, while
heat-lovers like peppers often prefer warmer conditions. Good spots include the top of the refrigerator, near (not on)
a heat source, or on a seedling heat mat set to a gentle range.
Avoid direct sun on the bag; it can overheat quickly and turn your setup into a seed slow-cooker.
Step 8: Check daily and manage moisture like a pro
Peek once a day. The towel should stay damp; if it’s drying, mist lightly or add a few drops of water and spread
moisture by gently pressing the towel. If you see standing water, blot it or wring the towel againtoo wet is a
fast track to mold and low oxygen.
What you’re looking for: a tiny white root called the radicle. That’s your “go time” signal.
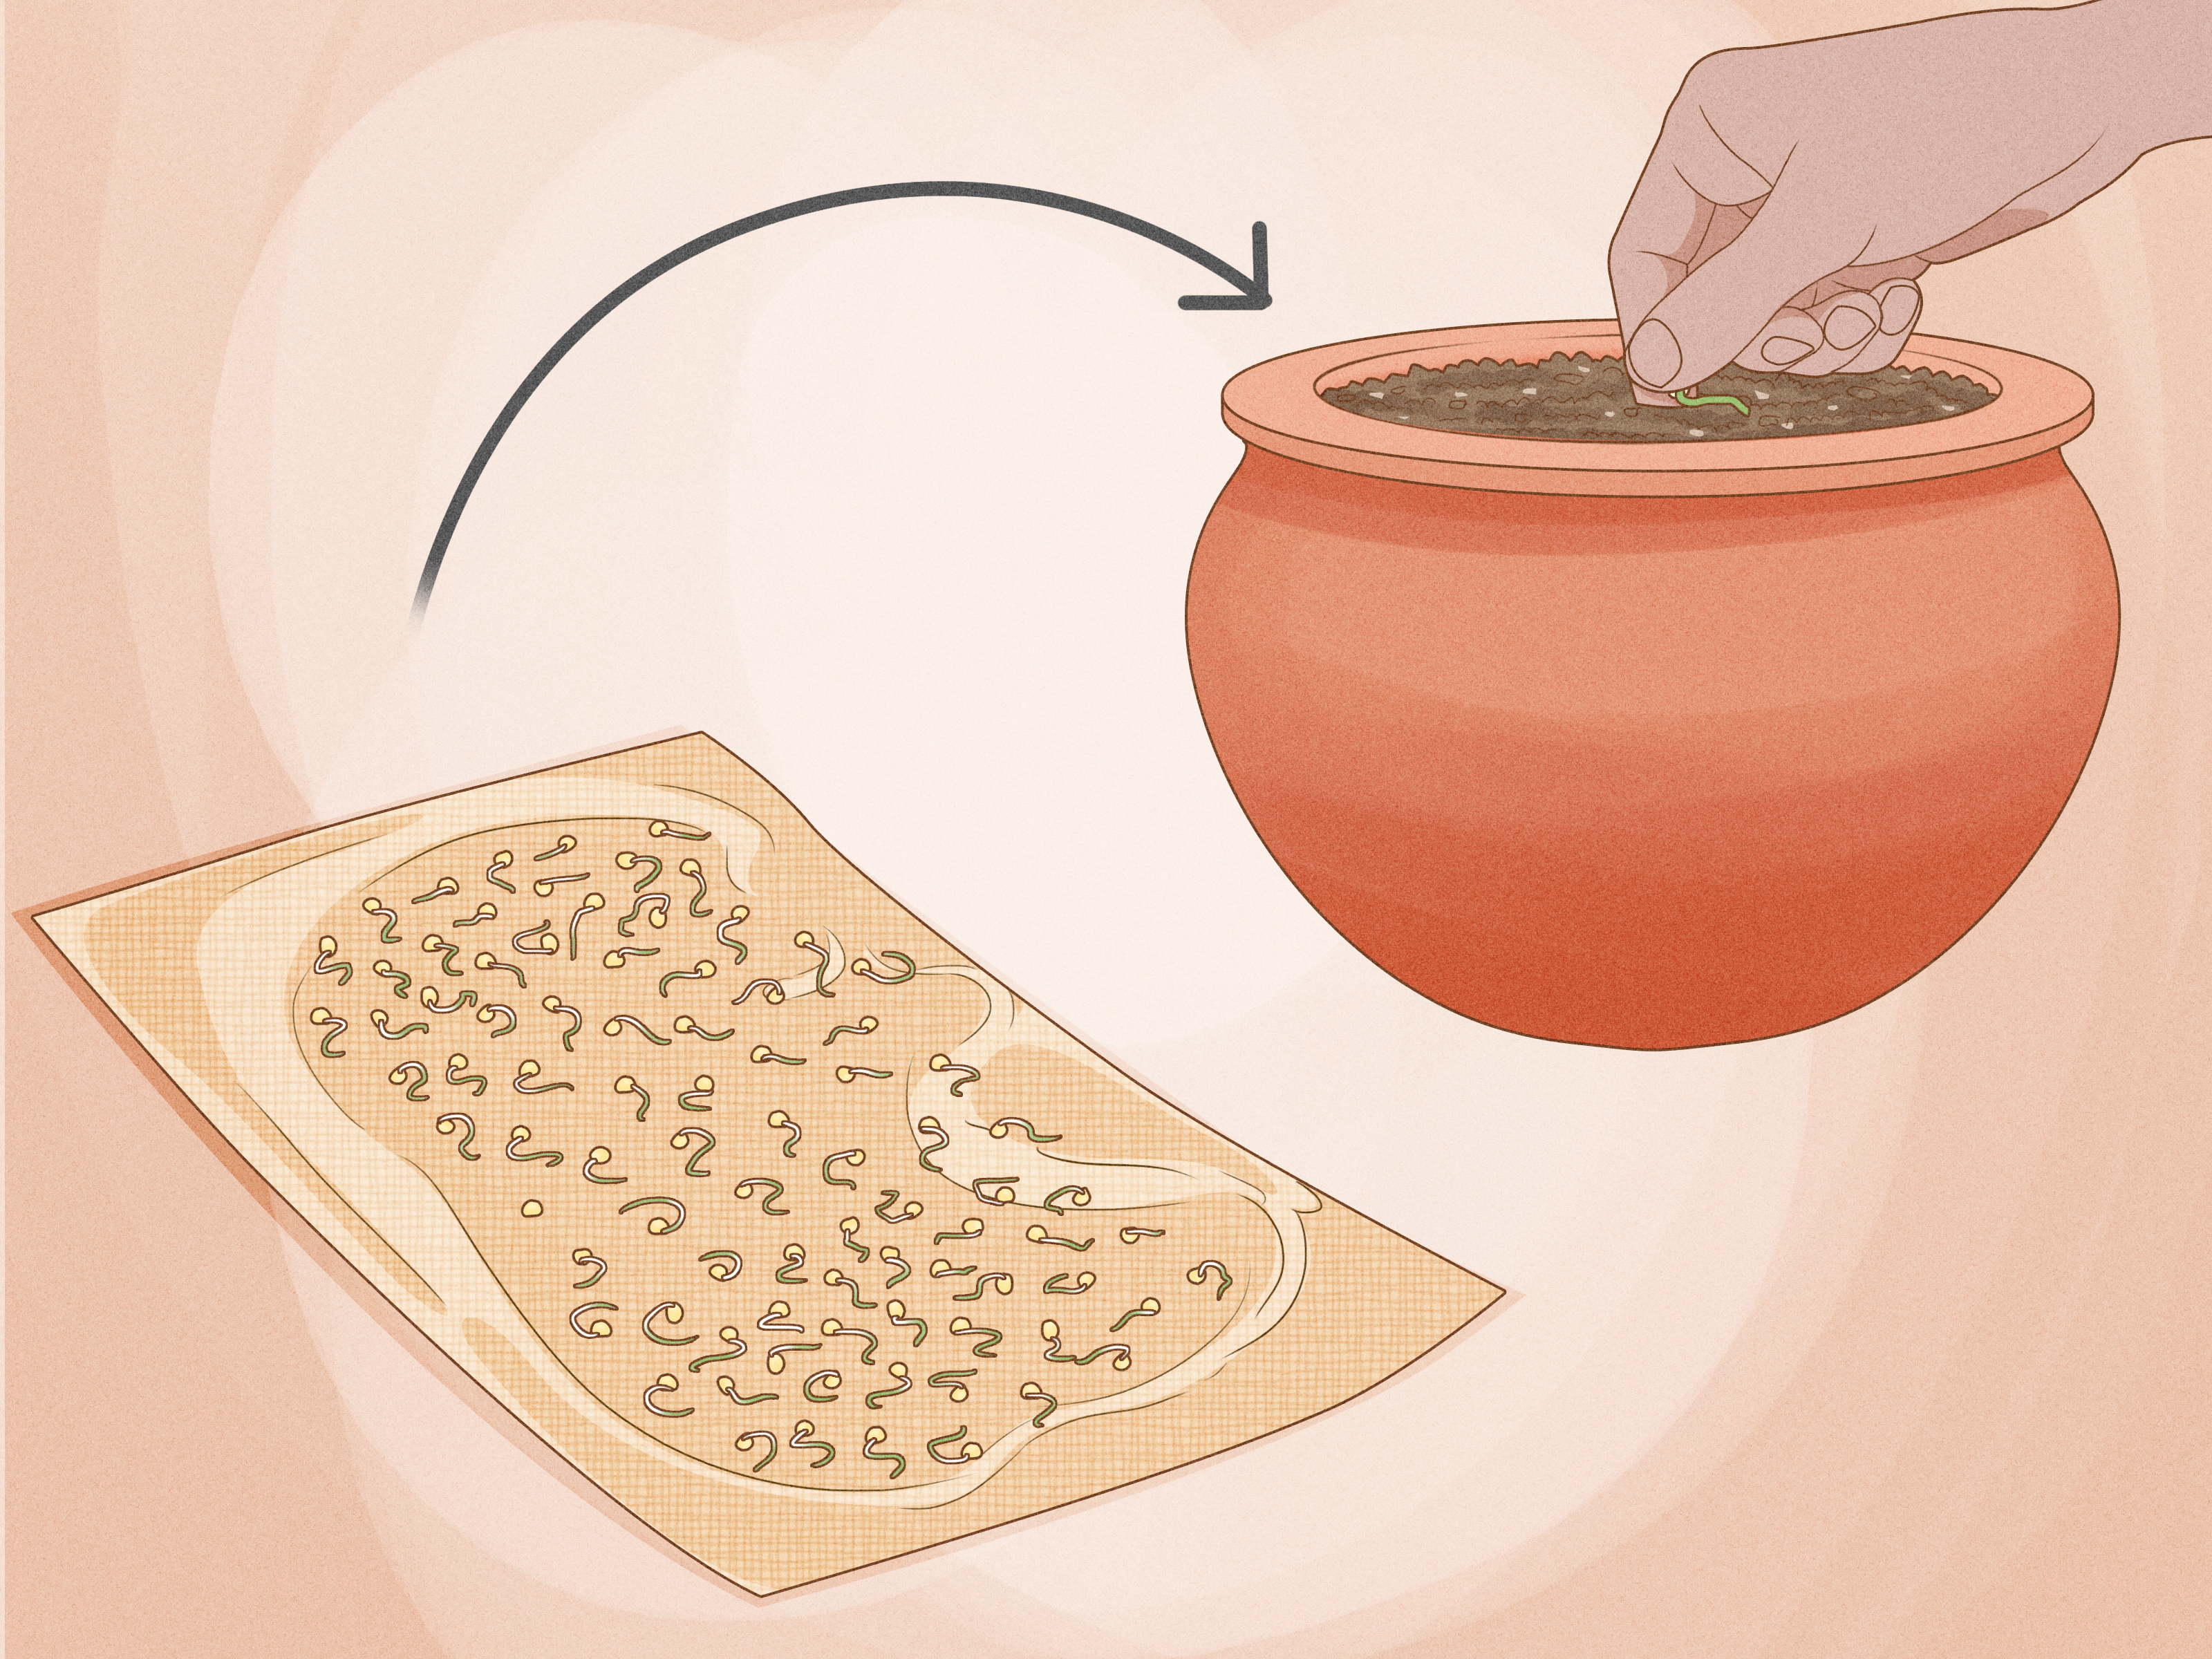
Step 9: Transplant at the right moment (the “don’t wait too long” rule)
As soon as the root is visibleoften around 1/4 to 1 inch, depending on the seedtransplant into
seed-starting mix. Waiting too long increases tangling, breakage, and stress.
- Fill pots/cells with moist seed-starting mix (not soaking wet).
- Poke a small hole (a pencil works nicely).
- Using tweezers, lift the sprout by the seed coat or seed leavesavoid grabbing the root.
- Place root-down into the hole, cover gently, and firm the mix lightly.
- Water softly and place under bright light (grow light or a very bright window).
Timing: how long does sprouting take?
Germination time depends on seed type, freshness, and temperature. Some seeds pop in 1–3 days (brassicas, many
cucurbits), while others can take a week or more (peppers) and some may take much longer. Seed packets usually list
“days to germination,” which is your best baseline.
Common mistakes (and how to avoid them)
Mistake: The towel is soaked
Fix: wring it out. Damp is good; dripping is not. Seeds can drown when oxygen is displaced by water.
Mistake: Mold shows up
First: don’t panic. A little surface fuzz can be manageable, but it’s a sign conditions are too wet and/or too
stagnant. Fixes:
- Use a fresh towel and re-seat the seeds with better spacing.
- Reduce moisture (no standing water).
- Let the bag breathe: open briefly daily or leave a tiny gap.
- Keep warmth steady but not excessive; very warm + very wet = mold’s favorite playlist.
- If you’re seed-starting indoors later in soil, good airflow helps prevent mold and damping-off issues.
Mistake: Roots grow into the towel and tear
Fix: transplant sooner. If a root has threaded into the towel, don’t yank it. Tear the towel around the root and
plant the small piece with the sprout; paper breaks down in soil. For slower seeds, some gardeners use a coffee filter
layer because roots are less likely to embed.
Mistake: Nothing sprouts
Troubleshoot in this order:
- Temperature: too cold slows everything down.
- Moisture: towel dried out even once? Some seeds won’t forgive you.
- Seed age: older seeds can have low viabilitydo a larger test and adjust how many you sow.
- Dormancy needs: some seeds require cold stratification or scarification before they’ll germinate.
Seeds that benefit most from the paper towel method
- Old seeds: quick viability check before you waste trays and time.
- Peppers and eggplant: often slower, sensitive to temperature.
- Melons, squash, cucumbers: fast sproutersgreat for quick wins.
- Beans and peas: easy to see and handle, great for learning.
Mini FAQ
Can I sprout seeds on a paper towel without a plastic bag?
Yesuse a lidded container, or place the towel on a plate and cover it with plastic wrap. The goal is stable
humidity so the towel doesn’t dry out.
Should the bag be in the dark?
Many seeds germinate fine without light. Some prefer light to germinate, so check your packet.
A safe approach is warm + bright indirect light (not baking sun).
Can I plant the sprouted seeds right into the garden?
You can, but it’s riskier. Outdoors adds temperature swings, pests, and drying winds.
If you do it, plant immediately, keep soil consistently moist, and protect from harsh conditions.
Extra: real-world “experience” notes (the stuff nobody tells you until you’ve learned it)
Here’s what tends to happen when you actually do the paper towel method in a normal home, with normal distractions,
like laundry, work, and the sudden urge to reorganize your spice rack the moment you’re supposed to be checking seeds.
First, day one is almost always boring. You’ll stare at the bag like it owes you money, then remember seeds don’t
germinate faster because you’re emotionally invested. Day two or three is where the magic startsespecially with
cucumbers, squash, and brassicas. You’ll see a tiny white nub and think, “That’s it?” Yes. That’s it. That nub is the
beginning of a root, and it’s basically the seed saying, “I’m committing.”
The biggest surprise for beginners is how quickly things go from “just sprouted” to “roots everywhere.” A seed that
looked perfectly manageable in the morning can have a root doing gymnastics through the towel by the next day. That’s
why daily checks matter: the paper towel method rewards attentiveness and punishes procrastination. If you’re the type
who says, “I’ll do it tomorrow,” your future self may be peeling a delicate root off a paper towel like it’s a sticker
that absolutely refuses to come off in one piece.
Another real-life thing: temperature consistency beats “hotter is better.” People get excited and put bags on heating
mats, near heaters, or in sunny windows. Then the bag overheats for a couple hours and the towel dries at the edges.
Seeds hate that roller coaster. A steady warm spotlike the top of the fridgeoften works better than a “creative”
setup that swings from chilly nights to tropical afternoons.
And yes, mold happens sometimes, even when you’re doing “everything right.” Usually it’s because the towel is too wet,
the bag is sealed too tightly, or the seeds take long enough that microorganisms have time to throw a party. The fix is
rarely dramatic: back off the water, add a little airflow, and don’t crowd the seeds. Think of it like hosting guests:
if you pack everyone into a tiny steamy room with no windows, things get weird. Give your seeds a little personal
space and they behave.
Finally, transplanting feels intimidating until you do it once. The trick is not to treat sprouts like fragile glass
treat them like tiny athletes with one rule: never grab the root. Grab the seed coat or the seed leaves,
make a nice hole, and let gravity do the work. If a piece of towel clings to the root, don’t fight it. Plant it with
the towel bit attached and move on with your life. In a week, you’ll have seedlings. In a month, you’ll have plants.
In two months, you’ll be giving away extra basil to neighbors like you’re running a leafy-green empire. All because of
a damp paper towel and a little patience.