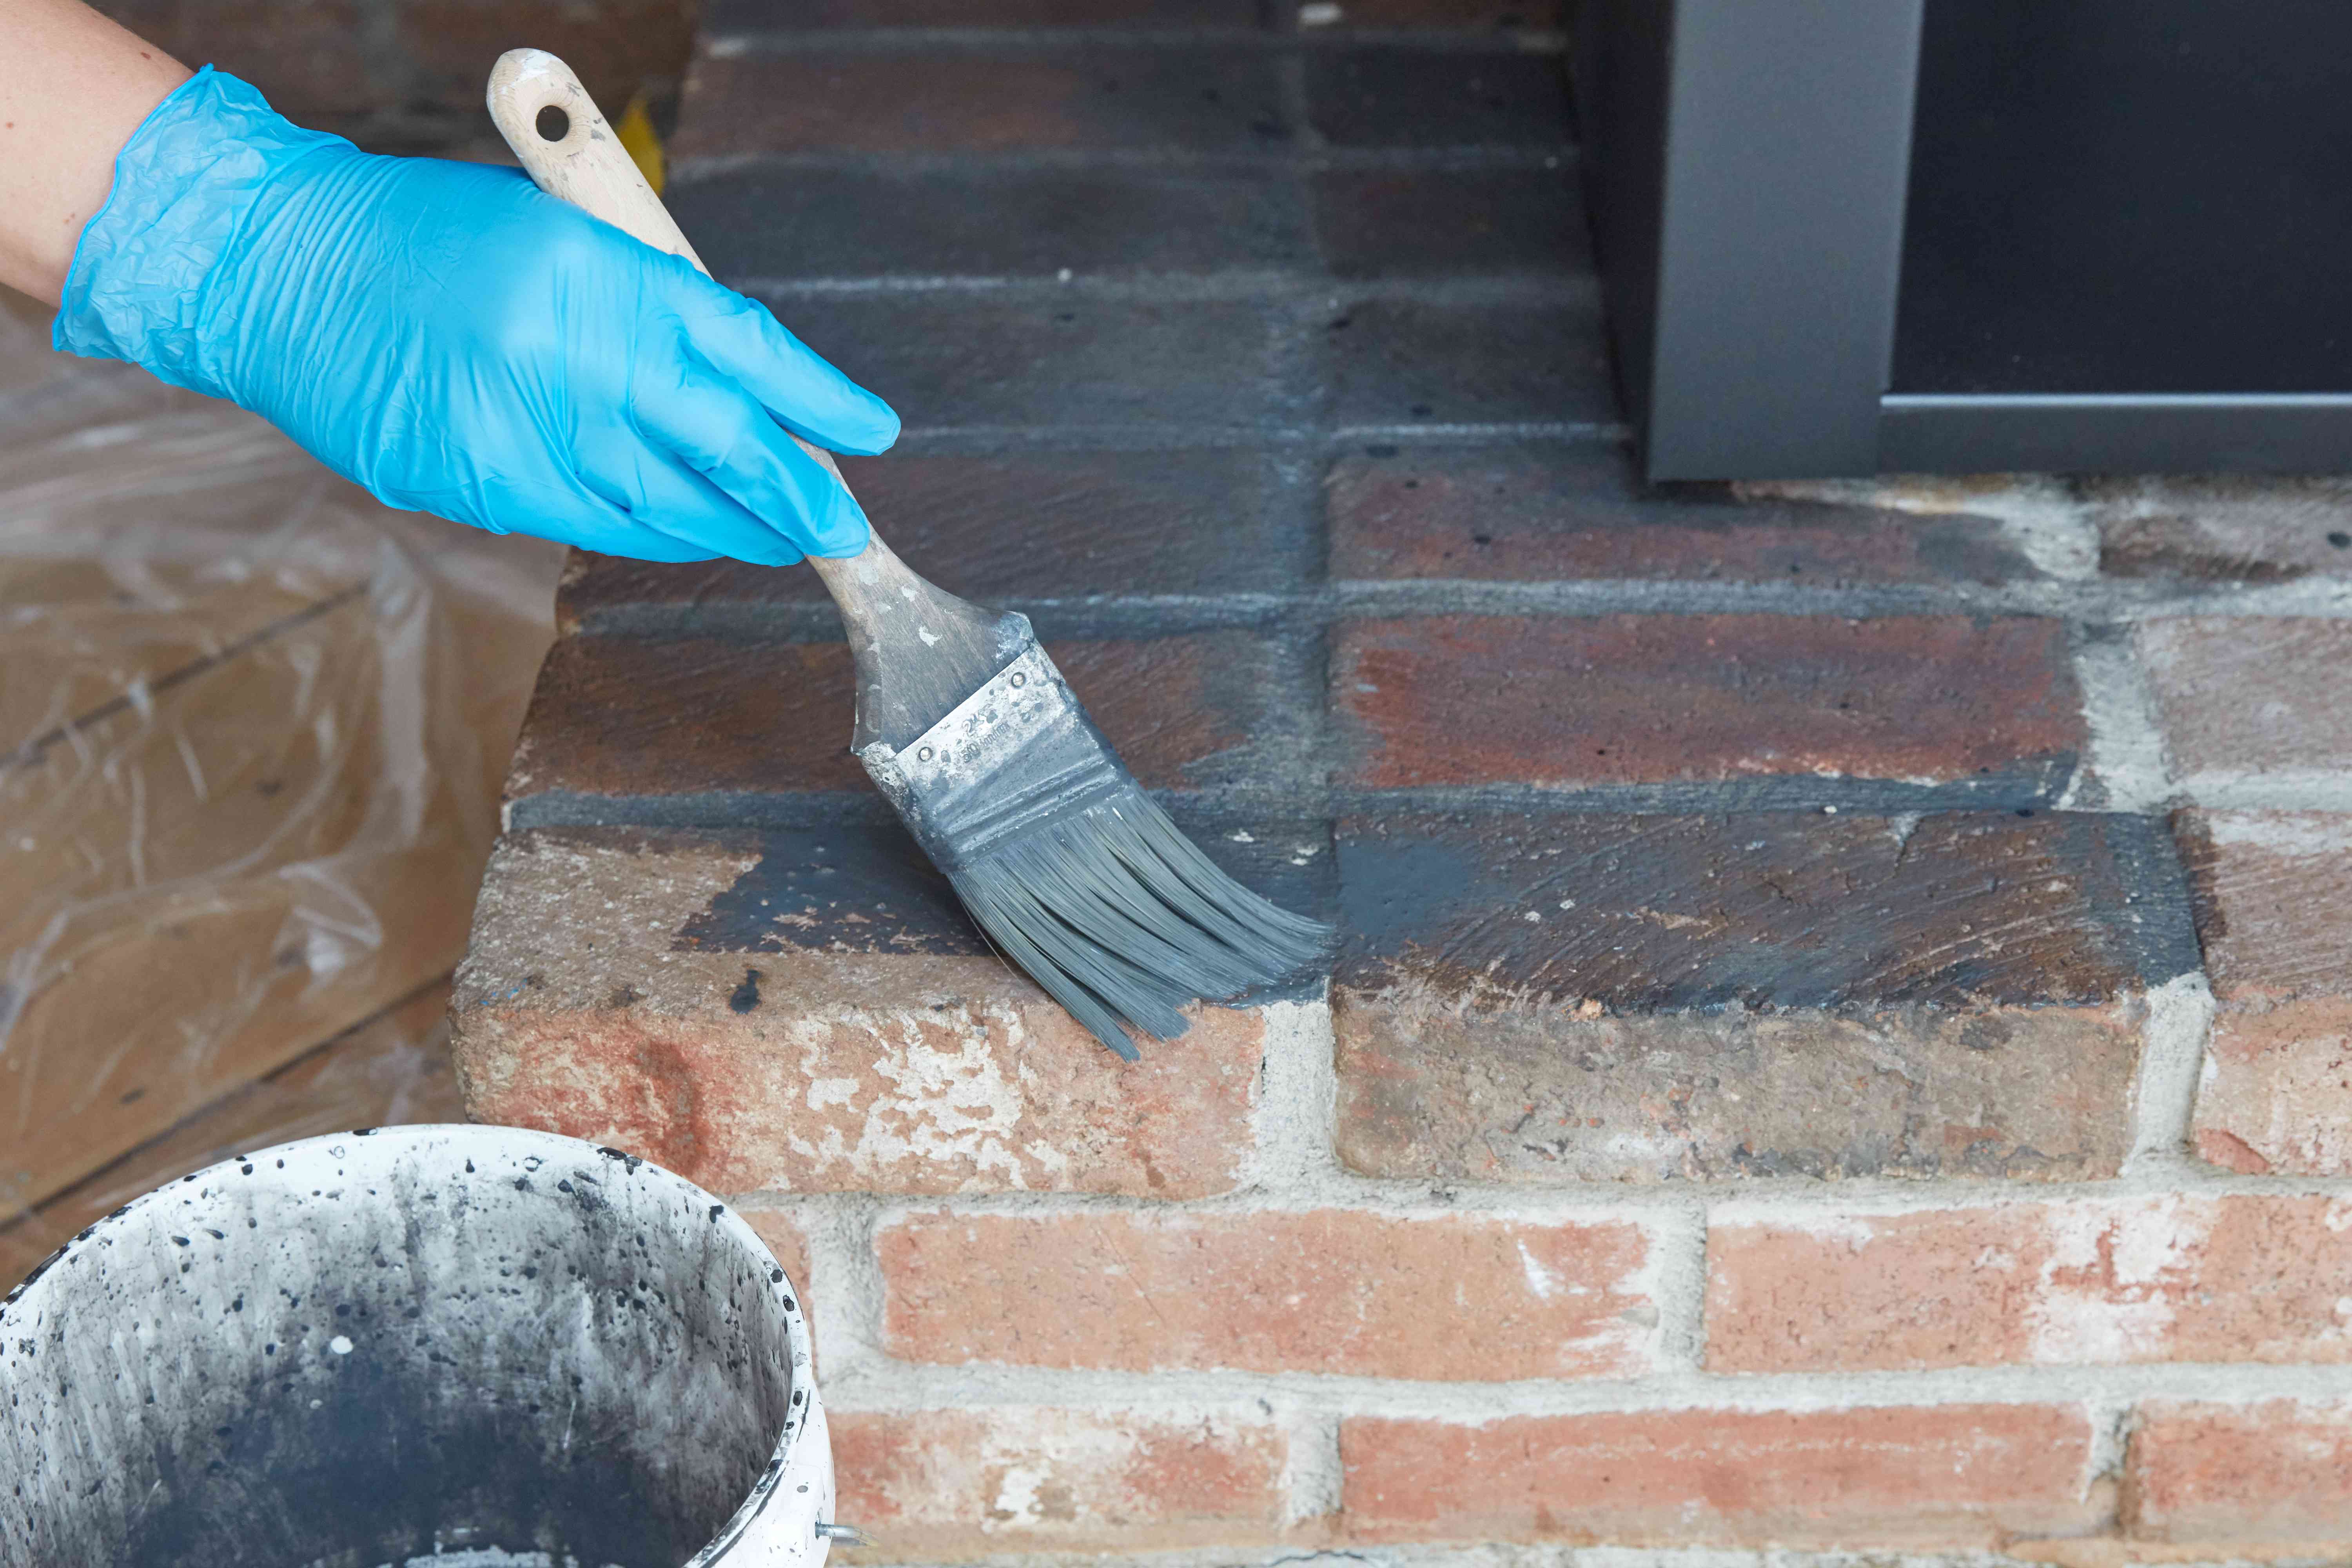
Brick has a personality problem. One decade it looks timeless and handsome; the next, it looks like it has been emotionally neglected since 1987. The good news? You do not have to paint it into a flat, plastic-looking disguise. Learning how to stain brick gives your fireplace, exterior wall, patio accent, or tired brick façade a new color while keeping the natural texture that makes brick, well, brick.
Brick stain is different from paint. Paint sits on top of the surface like a raincoat. Stain soaks into the pores and changes the color from within, which helps preserve the texture, depth, and character of the masonry. That is why brick staining is often the better choice when you want a refreshed look without hiding every ridge, pit, and charming little imperfection.
This guide explains how to stain brick step by step, how to choose the right stain, what tools you need, what mistakes to avoid, and how to get a finish that looks intentional instead of “I had a free Saturday and too much confidence.”
What Is Brick Stain?
Brick stain is a masonry coloring product designed to penetrate porous brick rather than form a thick coating on top. Most brick stains are water-based or mineral-based, and many are formulated to bond with the masonry. The result is a color change that still lets the original texture show through.
Unlike regular house paint, brick stain does not usually create a heavy film. That matters because brick is porous. Moisture naturally moves in and out of masonry, especially on exterior walls. A coating that traps moisture can contribute to peeling, bubbling, spalling, or premature deterioration. Stain is not magic, but it is typically friendlier to brick’s natural behavior than a sealed-on layer of paint.
Brick Stain vs. Brick Paint: Which Is Better?
If your goal is to completely hide the original brick color, paint may seem tempting. It gives instant coverage and can make red brick white, black, gray, or any trendy shade that looks great on a mood board. However, paint also changes the surface dramatically. It covers the mortar and brick evenly, which can make the wall look flatter and less natural.
Brick stain is better when you want the masonry to keep its texture and variation. It can deepen faded brick, tone down orange or red hues, blend repairs, or modernize an old fireplace. Stain is also less likely to peel because it is absorbed rather than sitting on top. The trade-off is that stain is partly influenced by the original brick color. If you are trying to turn very dark brick into a pale cream, stain may not get you there. Going from lighter to darker is usually easier than going from dark to light.
Choose stain if you want:
- A natural masonry look
- Visible texture and color variation
- A breathable finish
- Less risk of peeling or flaking
- A long-lasting color update for porous brick
Consider paint if you want:
- Full, opaque coverage
- A dramatic white, black, or high-contrast finish
- To cover patched, mismatched, or damaged masonry
- A uniform look where brick variation does not matter
Before You Start: Make Sure Your Brick Can Be Stained
The number one rule of staining brick is simple: the brick must absorb water. If it cannot absorb water, it probably cannot absorb stain. This is where many DIY dreams trip over their own drop cloth.
To test your brick, sprinkle or spray a little clean water on the surface. If the water darkens the brick and soaks in, the brick is likely a good candidate for staining. If the water beads up and rolls off, the brick may be sealed, painted, glazed, or too dense to accept stain properly.
Previously sealed brick may need a masonry-safe sealer remover before staining. Painted brick is a different situation. Since paint blocks the pores, stain will not penetrate unless the paint is removed completely, which can be labor-intensive and risky on older or historic masonry. When in doubt, test a hidden area first or talk with a masonry professional.
Tools and Materials You Will Need
Staining brick is not complicated, but it is picky. The right tools make the project cleaner, smoother, and much less likely to end with your driveway looking like modern art.
Basic supplies:
- Brick stain or masonry stain
- Clean buckets
- Stir stick or drill mixer
- Nylon-bristle scrub brush
- Mild detergent or masonry cleaner
- Painter’s tape
- Drop cloths or plastic sheeting
- Protective gloves
- Safety glasses
- Paintbrushes in several sizes
- Sponge, rag, or small detail brush
- Pump sprayer, if recommended by the stain manufacturer
- Water for rinsing and testing absorption
For a fireplace or small interior wall, brushes usually give the best control. For a large exterior area, a sprayer may speed things up, but brushing or back-brushing helps work the stain into the brick and avoid blotchy spots.
How to Choose the Right Brick Stain
Do not grab the first can labeled “stain” and hope for the best. Wood stain is for wood. Deck stain is for decks. Concrete stain may work on some masonry products, but not every concrete coating is appropriate for vertical brick. Look for a product specifically labeled for brick, masonry, or porous mineral surfaces.
Water-based masonry stains are popular because they are easier to clean up, lower in odor, and designed to penetrate brick. Mineral-based stains are often used for long-term color changes because they bond with the surface. Some products are translucent, meaning the original brick variation remains visible. Others are more opaque and create a stronger color shift.
When picking a color, remember:
- The original brick color affects the final result.
- Mortar may absorb stain differently than brick.
- Rough brick can look darker because it holds more product.
- Sunlight changes how the color appears throughout the day.
- Wet stain may look darker than dry stain.
Always test before committing. Try the stain on a spare brick, a hidden corner, the side of a chimney, or a lower area behind landscaping. Let it dry fully before judging the color. Brick stain can mellow as it cures, so do not panic in the first five minutes unless you accidentally chose “haunted eggplant.”
How to Stain Brick Step by Step
Step 1: Inspect the Brick
Start by checking the surface carefully. Look for cracks, loose mortar, crumbling brick, white powdery efflorescence, mildew, soot, grease, and old coatings. Staining over problems does not solve them; it only gives them a costume.
If the brick is spalling, flaking, or badly damaged, repair it before staining. If mortar joints are loose, repoint them first and allow the repairs to cure. If you are staining exterior brick, make sure water is not entering through failed flashing, bad gutters, or cracked joints. Stain is decorative; it is not a substitute for masonry repair.
Step 2: Test for Absorption
Perform the water test. Spray or splash water on several areas, not just one. Exterior walls can vary from shaded to sun-baked sections, and older brick may absorb unevenly. If water soaks in consistently, you can move forward. If it beads, investigate whether the brick has been sealed.
Step 3: Clean the Surface Thoroughly
Brick must be clean before staining. Dirt, soot, algae, oil, and efflorescence can block absorption and create uneven color. For interior brick, mix warm water with mild detergent and scrub with a nylon brush. Avoid wire brushes on softer brick because metal can scratch the surface or leave particles that rust later.
For exterior brick, you can use a garden hose, scrub brush, or pressure washer with caution. Keep the pressure low enough to avoid damaging mortar. The goal is to clean the surface, not excavate it. If you use a cleaner, rinse thoroughly so no residue remains.
Efflorescence, the white powdery salt deposit that sometimes appears on masonry, should be removed before staining. Dry brushing may work for light deposits. Stubborn deposits may require a masonry cleaner designed for efflorescence. Avoid random acid experiments. Brick is not a chemistry lab, and your future self would like a word.
Step 4: Let the Brick Dry Completely
After cleaning, let the brick dry fully. This may take a day or longer depending on weather, humidity, airflow, and how much water the masonry absorbed. Staining damp brick can dilute the product, cause uneven color, or prevent proper penetration.
For exterior projects, choose a stretch of mild, dry weather. Avoid staining in direct blazing sun, heavy wind, rain, freezing temperatures, or extreme heat. Always follow the temperature and humidity range listed on the stain label.
Step 5: Protect Surrounding Areas
Use painter’s tape and drop cloths to protect trim, floors, windows, doors, landscaping, hearths, mantels, and anything else that should not become “coordinating masonry brown.” Stain can be thin and splashy, especially if applied with a sprayer. Take your time here. Good masking is cheaper than regret.
Step 6: Mix the Stain Well
Stain pigments can settle. Stir thoroughly before and during application. If you are using more than one container, combine them in a larger bucket to ensure consistent color. This is called boxing the stain, and it helps prevent one section of the wall from looking slightly different than another.
Some brick stains come as a concentrate that must be mixed with water or a fixing agent. Follow the product directions exactly. Guessing is fun for trivia night, not for permanent masonry color.
Step 7: Apply a Test Patch
Before staining the entire surface, apply the product to a small test patch. Let it dry completely. View it in morning light, afternoon light, and indoor lighting if applicable. Check both the brick and mortar. If the stain looks too intense, you may need to dilute it if the manufacturer allows. If it is too weak, a second coat may help.
Step 8: Apply the Stain
Use a brush, sponge, or sprayer according to the product instructions. Work in small sections so you can maintain a wet edge and control blending. For natural-looking results, apply thin coats rather than one heavy coat. Brick stain is meant to soak in, not sit on top in glossy puddles.
If using a brush, dip lightly and drain excess stain before touching the brick. Work it into the face of the brick and pay attention to edges, corners, and textured areas. If you want the mortar to remain its original color, use a smaller brush and stain each brick individually. Yes, this takes longer. Yes, your hand may question your life choices. But the finished look can be dramatically more professional.
If using a sprayer, apply evenly and back-brush to prevent runs. Watch for overspray. Keep a rag handy to blot drips before they dry.
Step 9: Blend for a Natural Finish
Real brick has variation. If every brick becomes the exact same color, the surface can look artificial. For a more natural effect, vary the pressure, use more than one compatible stain tone, or lightly feather the edges between sections. Some homeowners stain only the brightest orange bricks to tone down a wall while leaving the deeper reds and browns alone.
On fireplaces, consider staining a few random bricks darker or lighter to create depth. On exterior walls, step back often. What looks subtle from six inches away may look dramatic from the sidewalk.
Step 10: Let It Cure
Dry time depends on the product, weather, and brick porosity. Some stains feel dry quickly, while others need longer to cure. Keep the surface protected from rain, splashes, soot, and heavy contact until the manufacturer’s recommended cure time has passed.
Common Brick Staining Mistakes to Avoid
Staining sealed or painted brick
If the brick cannot absorb the stain, the finish will fail or look blotchy. Always do the water test first.
Skipping the cleaning step
Dirt and soot interfere with absorption. Clean brick gives stain a fighting chance.
Using the wrong stain
Choose a masonry stain intended for brick. Wood stain, deck stain, or random craft dye is not the move.
Applying too much product
Heavy coats can puddle, streak, or dry unevenly. Thin, controlled coats usually look better.
Ignoring the mortar
Mortar can change color too. Decide whether you want to stain it, avoid it, or use a separate tint.
Expecting stain to repair damage
Stain improves color. It does not fix crumbling brick, bad mortar, leaks, or structural problems.
Can You Stain a Brick Fireplace?
Yes, a brick fireplace is one of the best DIY candidates for staining. It is usually smaller than an exterior wall, easier to control, and protected from weather. The process is the same: test absorption, clean thoroughly, let it dry, protect surrounding surfaces, test the color, and apply thin coats.
Fireplaces often collect soot, so cleaning matters. Use a gentle cleaner first and avoid harsh residues that may affect stain absorption. Make sure the fireplace is completely cool before working. If you use the fireplace often, choose a stain suitable for interior masonry and follow all heat-related product guidance.
Can You Stain Exterior Brick?
Yes, exterior brick can be stained if it is porous, clean, dry, and in good condition. Exterior staining is often used to update an entire house, blend additions, refresh faded brick, or reduce color contrast. Weather planning is the big difference. You need dry conditions before, during, and after application.
Exterior brick also deserves a bigger test area. Sun, shade, landscaping, roof color, and trim color all affect how the stain reads. A warm brown that looks elegant on the sample card may look surprisingly purple next to cool gray siding. Test first. Your curb appeal will thank you.
How Long Does Brick Stain Last?
A quality brick stain can last many years when applied to properly prepared masonry. Because stain penetrates the surface, it is not prone to peeling the way paint can be. However, longevity depends on the product, exposure, brick condition, climate, and maintenance. Exterior surfaces exposed to intense sun, driving rain, freeze-thaw cycles, or heavy pollution may weather faster.
To extend the life of stained brick, keep gutters working, fix leaks promptly, clean the surface gently, and avoid trapping moisture. Do not apply random sealers unless the stain manufacturer recommends them. Some sealers can change the appearance or reduce breathability.
My Experience-Based Tips for Staining Brick
The biggest lesson with brick staining is that brick always has the final vote. You can pick a color, buy the proper stain, prepare like a responsible adult, and still discover that one section of brick absorbs like a sponge while another behaves like it is wearing invisible armor. That is why testing is not optional. It is the difference between a custom finish and a wall that looks surprised.
On small projects, especially fireplaces, I like to start with the least aggressive color change possible. Many homeowners think they want a dramatic transformation, but once the first coat goes on, they realize the brick only needed a gentle tone adjustment. A diluted or translucent stain can calm bright orange brick, warm up pale brick, or soften harsh contrast without making the surface look brand new. Brick usually looks best when it still looks like brick.
Another useful trick is to study the wall before staining. Not every brick needs the same treatment. If you have a wall with five or six loud orange bricks stealing the show, stain those first and step back. Sometimes correcting the “problem children” is enough. This selective method is especially helpful when matching a repair, blending an addition, or making a fireplace look less busy.
Brush control matters more than speed. A loaded brush can flood the brick and run into the mortar joints. A lightly drained brush gives you more control and a softer finish. For individual brick staining, keep one small detail brush for edges and one wider brush for the brick face. Work slowly enough that you can feather the edges before the stain dries.
Lighting is another sneaky factor. A stain color that looks rich and handsome at noon may look darker and moodier at night. For exterior brick, check the test patch at different times of day. For fireplaces, look at it with lamps on, overhead lights on, and natural light coming through the room. Brick texture creates shadows, and shadows change color perception.
If you are staining an exterior wall, do not underestimate the weather. A sunny, breezy day sounds ideal until the stain dries too fast and leaves lap marks. A cloudy, mild day is often easier to manage. Avoid rushing right before rain. Water can interfere with curing and create streaks.
Finally, accept that staining brick is part science and part art. The science is preparation: clean, dry, absorbent masonry, correct product, correct weather, correct application. The art is knowing when to stop. A second coat may deepen the color beautifully, or it may erase the natural variation you liked in the first place. Step back often. Take photos. Look from across the room or the street. Brick staining rewards patience, not panic.
Conclusion
Staining brick is one of the smartest ways to update masonry without burying its natural character under a thick coat of paint. The key is preparation: test for absorption, clean thoroughly, repair damage, let the brick dry, protect surrounding areas, and apply the right masonry stain in thin, controlled layers.
Whether you are refreshing a dated fireplace, blending new brick with old brick, or giving an exterior wall a more modern tone, brick stain can create a durable, natural-looking transformation. Treat the process with patience, test before you commit, and remember that brick has texture, variation, and attitude. Work with it, not against it, and the result can look less like a weekend experiment and more like a design decision you meant to make all along.