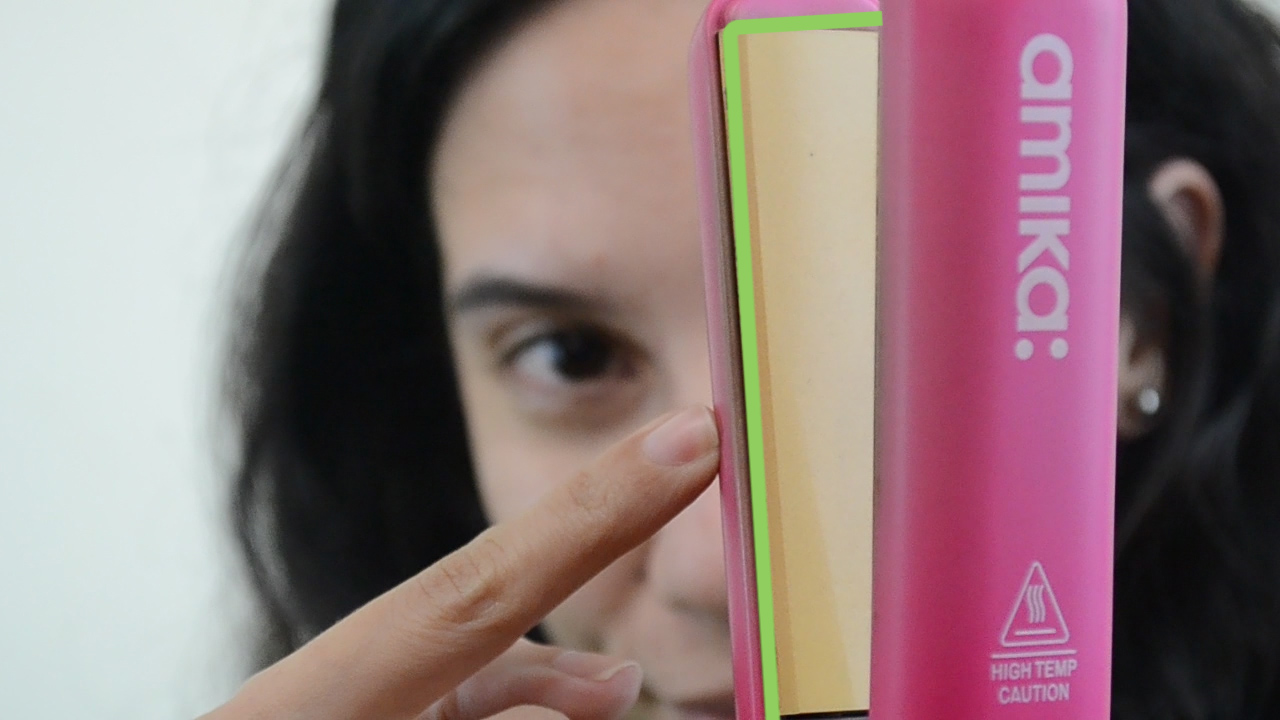
Thick hair is beautiful, dramatic, and full of personality. It also has a talent for acting like it has signed a contract with humidity, gravity, and every tiny breeze in the room. Straightening thick hair can feel like trying to iron a velvet curtain while it argues back. The good news? With the right prep, tools, heat control, and finishing tricks, you can get smooth, shiny, straight hair without turning your bathroom into a smoke machine.
This guide walks you through how to straighten thick hair in 12 practical steps. It focuses on reducing frizz, preventing heat damage, protecting your strands, and helping your style last longer. Whether your hair is thick and wavy, thick and curly, coarse, dense, long, layered, or simply “a lot,” the goal is the same: sleek hair that still looks healthy, soft, and alive.
Why Thick Hair Needs a Different Straightening Routine
Thick hair usually needs more time, more sectioning, and more moisture control than fine hair. The challenge is not only getting the hair straight; it is getting heat evenly through each section without repeatedly clamping the same strands. Too much heat can leave hair dry, brittle, dull, and prone to split ends. Too little heat, or poor technique, can leave you with puffy roots, frizzy ends, and that mysterious back section that somehow remains wavy no matter what you do.
The secret is patience. Thick hair rewards the person who prepares properly. Think of it like cooking a great meal: if you skip the prep and throw everything into a pan at once, chaos happens. If you work in sections, use the right temperature, and finish correctly, your hair can look like you just left the salon instead of like you wrestled a blow dryer and lost.
How to Straighten Thick Hair: 12 Steps
Step 1: Start With Clean, Conditioned Hair
Straightening thick hair works best when your hair is clean, hydrated, and free from heavy buildup. Use a smoothing or moisturizing shampoo if your hair tends to frizz. Follow with a rich conditioner from mid-lengths to ends. Thick hair often needs more slip, especially if it is coarse, curly, color-treated, or dry.
Avoid applying heavy conditioner directly to your roots unless your scalp is very dry. Too much product at the crown can make straightened hair look flat or greasy by lunchtime. The goal is clean roots, smooth lengths, and ends that do not look like they have been through a desert adventure.
Step 2: Deep Condition When Your Hair Feels Dry
If your thick hair feels rough, tangled, or straw-like, add a deep-conditioning treatment before straightening day. A weekly mask can help improve softness and manageability. This matters because dry hair is more likely to expand, frizz, and resist a sleek finish.
Look for ingredients such as glycerin, fatty alcohols, oils, butters, proteins, or bond-supporting formulas depending on your hair’s needs. Moisture helps the hair feel flexible; protein can help strengthen hair that has been weakened by color, bleach, or frequent hot tools. Balance is key. Hair should feel soft and strong, not coated like a candle.
Step 3: Detangle Gently Before Heat Styling
Thick hair can hide tangles the way a couch hides lost coins. Detangle before blow-drying or flat ironing so your tools can glide smoothly. Use a wide-tooth comb, a flexible detangling brush, or your fingers. Start at the ends and work upward toward the roots.
Do not rip through knots. Rough brushing can cause breakage, especially when hair is wet and more fragile. Add a leave-in conditioner or detangling spray if needed. The smoother your hair is before heat touches it, the fewer passes you will need with your flat iron.
Step 4: Remove Excess Water Without Rough Towel-Drying
After washing, gently squeeze water out of your hair with a microfiber towel or soft cotton T-shirt. Traditional towel-rubbing can lift the hair cuticle, create frizz, and make thick hair look bigger before you even begin styling.
Instead of scrubbing, blot and squeeze. This simple change can make a surprisingly big difference. Thick hair already has enough volume. It does not need a towel giving it a motivational speech.
Step 5: Apply Heat Protectant Correctly
Heat protectant is not optional when straightening thick hair. It creates a protective layer that helps reduce damage from blow dryers and flat irons. Choose a spray, cream, serum, or lotion designed for heat styling. For thick hair, a cream or serum can add extra smoothing power, while a lightweight spray may work better near the roots.
Apply the product evenly from mid-lengths to ends, then lightly through the top layers if needed. Comb it through so every section gets coverage. Let the product absorb before using hot tools. If your hair is sizzling, steaming heavily, or smelling burnt, stop. Your hair should be dry before flat ironing, not auditioning as a tea kettle.
Step 6: Blow-Dry First for a Smoother Finish
For thick hair, blow-drying before flat ironing usually creates a better result than letting hair air-dry into its natural shape and then trying to flatten it later. Use a dryer with a nozzle attachment and direct airflow downward from roots to ends. This helps smooth the cuticle and reduce frizz.
Work in sections with a paddle brush, round brush, or blow-dry brush. Keep the dryer moving rather than holding it in one spot. If your hair is very curly or textured, stretch it gently with tension while blow-drying. You do not need to get it perfectly straight at this stage, but the smoother it is before flat ironing, the easier the next steps will be.
Step 7: Make Sure Hair Is Completely Dry Before Flat Ironing
This step is serious. Unless you are using a tool specifically designed for wet-to-dry styling, never flat iron damp hair. Wet hair exposed to high direct heat can weaken quickly and may become brittle or damaged. If you hear crackling, see steam, or smell burning, your hair is telling you, very dramatically, to stop.
Before using your straightener, touch the roots, the underneath layers, and the back of your head. Thick hair can feel dry on top while hiding damp spots inside. Give those hidden areas extra drying time. Your future ends will thank you.
Step 8: Choose the Right Flat Iron for Thick Hair
A quality flat iron makes straightening thick hair faster and safer. Look for adjustable temperature settings, smooth plates, and even heat distribution. Ceramic plates are popular because they heat evenly and glide well. Titanium plates can work well for coarse, resistant, or very thick hair because they transfer heat efficiently, but they can also get very hot, so temperature control is essential.
Plate width matters too. A one-inch iron is versatile and good for roots, bangs, short layers, and styling curls or bends. A wider plate can speed up straightening for long, thick hair. However, do not choose a huge iron if it makes it hard to reach the roots or control small sections.
Step 9: Use the Lowest Effective Heat Setting
Thick hair often needs more heat than fine hair, but that does not mean you should automatically use the highest setting. Start lower and increase only if needed. Healthy, thick, coarse, or wavy hair may require a medium-high temperature, while color-treated, bleached, damaged, or fragile hair should stay lower.
The best temperature is the lowest one that straightens a small section in one slow pass. If you need five passes, the section may be too thick, your hair may not be dry enough, or the heat may be too low. If your hair smells burnt, feels rough afterward, or loses shine, the heat may be too high. Your flat iron is a styling tool, not a panini press.
Step 10: Divide Hair Into Small, Clean Sections
Sectioning is the step that separates a sleek style from a “good enough from the front” style. Thick hair should be divided into layers: bottom, middle, crown, and top. Clip away everything you are not working on. Then straighten small sections, usually about one inch wide or less, depending on your density.
Small sections allow heat to pass evenly through the hair. Large chunks may look straight on the outside while staying wavy underneath. That leads to repeated passes, more heat exposure, and frustration. Clean sections may take longer at first, but they save time in the end because each pass actually works.
Step 11: Use Tension and a Slow, Smooth Pass
Hold each section taut with a comb or brush, then glide the flat iron from roots to ends in one steady motion. Many stylists use the comb-chase method: place a fine-tooth comb or heat-safe brush in front of the flat iron and move both down the section together. This smooths the hair before the plates touch it and can reduce the need for repeated passes.
Do not clamp too hard. Do not stop halfway. Do not repeatedly tap the iron over the same spot. Keep the tool moving smoothly. For stubborn roots, use smaller sections and angle the iron carefully rather than turning up the heat immediately. For ends, use a gentle bevel inward or outward so the finished look appears polished instead of stiff.
Step 12: Finish With Lightweight Shine and Humidity Control
Once your hair is straight, let it cool before touching it too much. Cooling helps set the style. Then apply a small amount of lightweight serum, oil, or anti-frizz finishing product from mid-lengths to ends. Avoid overloading the roots, unless you want your fresh blowout to look like it has already survived three gym classes.
If you live in a humid climate, use an anti-humidity spray or light finishing spray. Thick hair can puff up when moisture enters the hair shaft, so the final barrier matters. At night, wrap your hair, use a loose low ponytail, or sleep on a silk or satin pillowcase to help maintain smoothness.
Common Mistakes to Avoid When Straightening Thick Hair
Using Too Much Heat Too Often
Daily flat ironing can dry out thick hair over time, especially if your hair is color-treated or already damaged. Try to stretch your style for several days and use heatless touch-ups when possible. Dry shampoo at the roots and a silk scarf at night can extend your straight style without more hot-tool drama.
Straightening Dirty or Product-Heavy Hair
Heavy oils, gels, and sprays can make the flat iron drag or create uneven results. Some products may even smoke when exposed to heat. Start with clean hair and use products designed for thermal styling.
Skipping the Back Sections
The back of thick hair is where frizz likes to hold secret meetings. Use a hand mirror or section carefully so you do not miss hidden waves near the nape or crown.
Going Over the Same Piece Again and Again
If a section will not straighten, do not punish it with ten passes. Recheck your section size, tension, dryness, and temperature. Usually, the problem is technique, not stubborn hair with a personal vendetta.
Best Products for Straightening Thick Hair
You do not need a bathroom shelf that looks like a beauty supply store exploded, but a few smart products help. A smoothing shampoo and conditioner prepare the hair. A leave-in conditioner adds slip. A heat protectant shields strands during blow-drying and flat ironing. A lightweight serum or oil adds shine after styling. An anti-humidity spray helps keep the finished look sleek.
For thick hair that is coarse or curly, creams and serums often work better than very light sprays alone. For thick hair that gets oily quickly, use richer products only on the lower half of the hair. The rule is simple: smooth the parts that need control, but do not bury your roots under a product blanket.
How to Make Straightened Thick Hair Last Longer
After spending time straightening thick hair, you want the results to last longer than one dramatic walk to the mailbox. Avoid steam from hot showers by wrapping your hair or using a shower cap. Sleep on silk or satin to reduce friction. Keep your hair dry in humid weather when possible. Use a light oil or serum only on the ends if they start looking dry.
If your roots get oily, apply dry shampoo before bed rather than waiting until morning. This gives the product time to absorb oil while you sleep. If your ends start bending, use a low-heat pass only where needed, not all over your head. Strategic touch-ups are better than restyling everything from scratch.
Experience Notes: What Straightening Thick Hair Really Feels Like
If you have thick hair, you probably know that straightening it is not just a beauty routine. It is an event. There is the planning stage, the wash stage, the “why is my arm tired already?” stage, and the final stage where you stare at the mirror wondering why one tiny section near your ear has chosen rebellion.
In real life, the biggest difference usually comes from sectioning. Many people with thick hair try to straighten pieces that are too large because they want to finish faster. Unfortunately, big sections often make the process slower. The top layer may look smooth, but the inside remains puffy. Then you keep going over the same hair, the ends dry out, and the style still does not look sleek. Smaller sections feel annoying at first, but they are the shortcut disguised as extra work.
Another common experience is realizing that blow-drying matters more than expected. If thick hair dries in a frizzy, uneven shape, the flat iron has to do all the work. But if the blow-dry stretches and smooths the hair first, flat ironing becomes easier and faster. A nozzle attachment, downward airflow, and a good brush can turn the whole routine from a battle into a process.
Product amount is another learning curve. Too little heat protectant can leave hair vulnerable. Too much cream or oil can make straightened hair heavy, greasy, or smoky under heat. The sweet spot is enough product to coat and protect the hair without making it feel sticky. For many people, that means using a cream or leave-in on damp hair, a heat protectant before drying or ironing, and a tiny amount of serum at the end.
Humidity is the final boss. You can do everything right, step outside, and suddenly your hair begins expanding like it remembered an important appointment with the atmosphere. Anti-humidity finishing sprays, silk pillowcases, wrapping at night, and avoiding steam can help, but perfection is not always realistic. Sometimes the win is not poker-straight hair for five days; it is smooth, healthy-looking hair that holds its shape better than it used to.
The best experience-based advice is to treat straightening as a routine, not a rescue mission. Healthy thick hair straightens better. Moisturized ends behave better. Clean sections look better. Lower, controlled heat is kinder than panic heat. And yes, your arms may still get tired. That is why clips, patience, and maybe a good playlist are essential styling tools.
Conclusion
Learning how to straighten thick hair is mostly about preparation, protection, and patience. Start with clean, conditioned hair. Detangle gently, apply heat protectant, blow-dry with control, and flat iron only when your hair is fully dry. Use small sections, steady tension, and the lowest effective heat setting. Finish with lightweight shine and humidity protection so your sleek style lasts longer.
Thick hair may take more time, but it also gives big, beautiful results when styled well. The goal is not to force your hair into submission. The goal is to work with its density, protect its health, and create a smooth finish that still moves naturally. Your hair can be sleek without being fried, polished without being stiff, and straight without losing its personality.
Note: This article is for general hair-care education. If you notice unusual shedding, scalp pain, breakage, or sudden hair loss, consult a board-certified dermatologist or licensed hair-care professional.