A custom beer tap handle is one of those small woodworking projects that somehow feels bigger than it is. It is part spindle turning, part hardware installation, part personality contest, and part “please let this thing screw on straight after I spent two hours sanding it.” Whether you are building handles for an adult home bar, a kegerator, a restaurant draft line, a cold brew coffee tap, kombucha station, or soda setup, a lathe-turned handle lets you create something that looks polished instead of something that screams, “I found this in a drawer next to the Allen wrenches.”
The good news: turning custom tap handles is beginner-friendly if you already understand basic lathe safety and spindle turning. The better news: the project does not require a huge blank, fancy joinery, or a heroic amount of lumber. The “measure twice, drill straight, and do not rush the finish” news: tap handles need accurate threaded hardware, balanced proportions, and a finish durable enough to survive regular handling.
This guide walks through how to turn custom beer tap handles on a lathe from blank selection to final polish, with practical details about sizing, design, inserts, ferrules, sanding, finishing, and real shop lessons learned the dusty way.
What Is a Custom Beer Tap Handle?
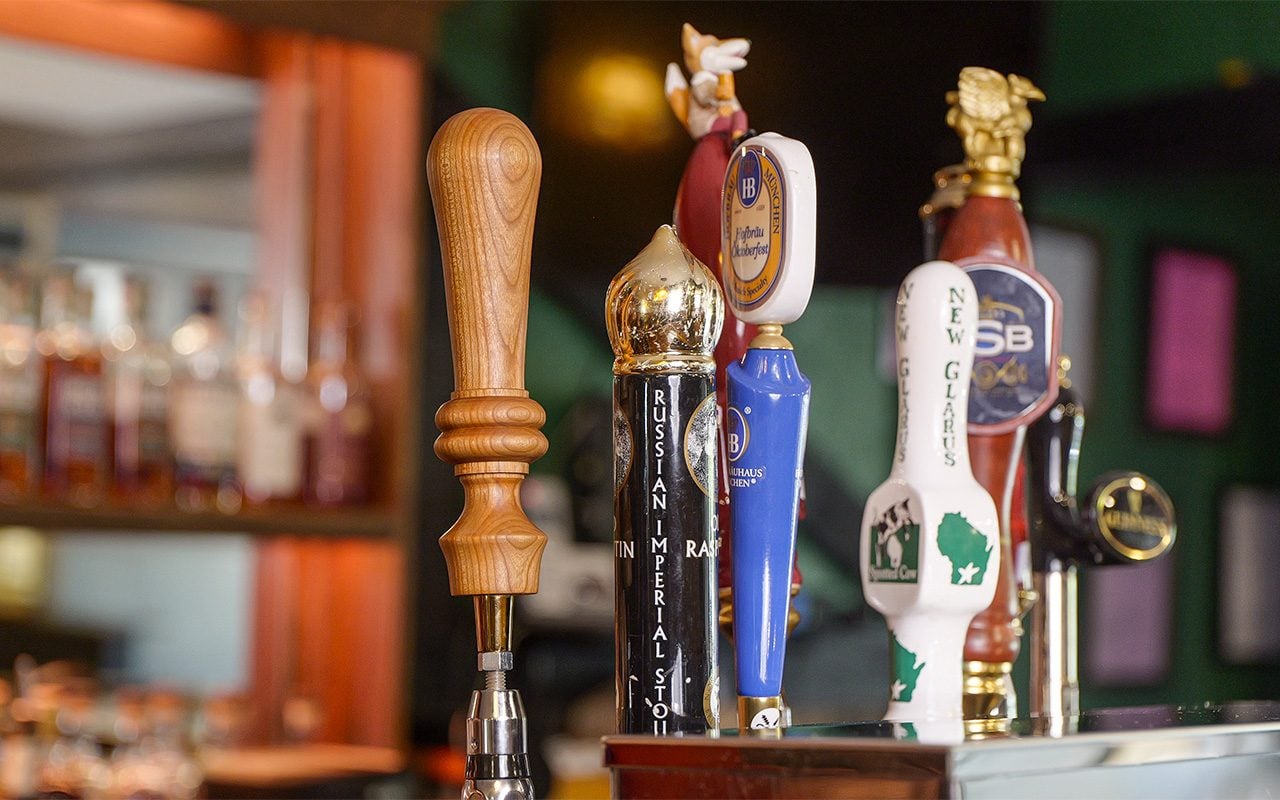
A beer tap handle is the grip that threads onto a draft faucet lever. It gives users a comfortable way to open and close the tap, but it also acts as a label, a design feature, and sometimes a tiny wooden billboard with delusions of grandeur. Standard tap handles in the United States commonly use a 3/8-inch-16 thread, which is why most DIY handle hardware, ferrules, and inserts are made around that size.
A custom turned tap handle is typically made from wood, resin, acrylic, laminated blanks, or a combination of materials. For woodturners, the classic method is to mount a rectangular blank between centers, turn it into a balanced spindle shape, drill the base for threaded hardware, and finish it with a durable coating.
Tools and Materials You Will Need
Basic Tools
You do not need a professional production shop to make a great tap handle, but you do need the right essentials. A wood lathe, drive center, live center, spindle roughing gouge, spindle gouge, parting tool, calipers, drill press, clamps, sandpaper, and finishing supplies will cover most of the job. A chuck can be helpful, especially for drilling or refining the bottom, but many handles can be turned safely between centers.
Hardware
For the base, choose either a 3/8-inch-16 threaded insert or a tap handle ferrule. Inserts are installed directly into the wood. Ferrules are metal collars that give the handle a professional base and often make installation more forgiving. A ferrule can also protect the bottom of the handle from wear, which is helpful if the handle will see daily use.
Wood Blank
Good hardwood choices include maple, walnut, cherry, oak, ash, and mahogany. Maple gives a clean modern look, walnut feels rich and upscale, cherry warms beautifully with age, and oak brings bold grain that does not whisperit introduces itself with a microphone. Avoid cracked, punky, or unstable wood. Tap handles are handled often, so structural integrity matters.
Planning the Shape Before You Turn
Before the blank touches the lathe, decide what style you want. A tap handle can be simple and cylindrical, tapered like a baseball bat, rounded like a tool handle, or sculpted with beads, coves, burn lines, and decorative grooves. A good handle should look attractive but also feel natural in the hand.
Most custom tap handles fall somewhere between 6 and 12 inches tall. Shorter handles are subtle and practical for tight spaces. Taller handles stand out on a bar but can feel top-heavy if the base is too narrow. A beginner-friendly size is around 8 inches long with a finished diameter of about 1 to 1 1/2 inches at the widest point.
Sketch the profile on paper or directly on the blank. Mark the top, base, thickest point, and any decorative details. This little planning step prevents the classic beginner mistake: turning confidently for 20 minutes and then realizing your “elegant taper” has become a wooden carrot.
Step-by-Step: How to Turn Custom Beer Tap Handles on a Lathe
Step 1: Cut and Prepare the Blank
Cut your blank slightly longer than the final handle length. Extra length gives you room for waste at both ends, especially where the centers contact the wood. Square the blank as accurately as possible. A straight, square blank spins more predictably and helps you create a centered handle.
Mark diagonal lines across each end to find the center. Use an awl or center punch to create a small dimple where the drive center and live center will seat. If the blank has attractive grain, choose the orientation before mounting it. Grain direction can make the finished handle look intentional instead of accidental.
Step 2: Mount the Blank Safely
Mount the blank between centers with the grain running parallel to the lathe bed. Bring the tailstock up securely, lock it, and tighten the live center enough to hold the blank firmly without crushing the wood. Rotate the blank by hand before turning on the lathe to make sure it clears the tool rest.
Keep the tool rest close to the workpiece without touching it. Wear a face shield and dust protection, tie back long hair, remove loose jewelry, and keep sleeves out of the danger zone. A lathe is not impressed by confidence. It prefers preparation.
Step 3: Rough the Blank Round
Start at a moderate speed appropriate for the blank size and balance. Use a spindle roughing gouge to turn the square blank into a cylinder. Take light cuts at first. Once the blank is round and balanced, the turning will feel smoother and more controlled.
Work from high points toward lower areas, and keep the bevel supported. If the tool chatters, check your speed, tool rest position, tool sharpness, and cut depth. Sharp tools make cleaner cuts and reduce sanding time. Dull tools make the project feel like punishment with wood chips.
Step 4: Mark Key Dimensions
With the blank round, use a pencil to mark the top, bottom, widest point, narrowest point, and decorative details while the lathe is spinning slowly. Calipers are useful if you want multiple handles to match. For a set of tap handles, make a story stick with all important measurements marked on a scrap piece of wood.
Leave enough material at the bottom for the threaded insert or ferrule. The base should be strong, straight, and wide enough to support the hardware. A delicate thin base may look stylish, but it can split when the insert is installed or when the handle is tightened.
Step 5: Shape the Profile
Use a spindle gouge for curves, coves, beads, and transitions. Use a skew chisel if you are comfortable with it and want glassy planing cuts. For beginners, a spindle gouge and light scraping cuts can still produce a clean result.
A good tap handle shape often has three visual zones: a sturdy base, a comfortable grip area, and a finished top. The base may be slightly flared or straight. The grip can taper inward, swell gently, or feature grooves for the fingers. The top can be rounded, domed, squared off, or left with a small flat area for a logo medallion.
Avoid making deep narrow grooves that are hard to sand and likely to collect grime. Tap handles live near moisture, hands, and the occasional splash. Clean, durable details usually outperform fussy details.
Step 6: Drill for the Threaded Insert or Ferrule
The bottom hole must be centered and straight. This is where many beautiful handles go to become “decorative paperweights.” The safest and most accurate method is to drill on a drill press using a properly sized bit for your insert or ferrule. Check the hardware manufacturer’s recommendation for the required hole diameter.
If you are using a threaded insert, drill deep enough for the insert plus a little clearance. If you are using a ferrule, drill the recess so the ferrule seats cleanly and squarely against the bottom. Some makers prefer to drill the blank before turning because the square blank is easier to hold accurately on the drill press. Others drill after turning using a chuck or jig. Either method can work; the goal is the same: straight, centered, and snug.
Step 7: Test-Fit the Hardware
Before applying finish, test-fit the insert or ferrule. Thread it in carefully and check alignment. The handle should sit straight when screwed onto a standard draft faucet or test bolt. If the hardware leans, the finished handle will lean too, and no amount of polishing will make it look less suspicious.
For threaded inserts, use epoxy if the fit needs reinforcement, especially in softer woods. For ferrules, many makers use epoxy to secure the metal collar. Wipe away squeeze-out immediately so it does not harden into a shiny little regret.
Step 8: Sand Smoothly
Sand through the grits in order. A common progression is 120, 150, 180, 220, 320, and sometimes 400 grit depending on the wood and finish. Do not skip grits unless you enjoy discovering scratches only after the finish goes on, which is a special kind of woodworking comedy.
Sand with the lathe running at a low speed, then stop the lathe and sand with the grain by hand. That final with-the-grain sanding helps remove circular scratches. Be careful around grooves and small beads. Folded sandpaper, abrasive cord, or small sanding pads can help clean detailed areas.
Step 9: Apply a Durable Finish
A tap handle needs a finish that resists handling, moisture, and casual abuse. Good options include wipe-on polyurethane, lacquer, spar urethane, hardwax oil, or a clear epoxy coating. For a natural look, oil-based finishes can deepen the grain beautifully, but they may need more maintenance than film finishes.
If the handle will be used in a busy adult bar or commercial environment, a tougher film finish is usually smarter. Apply multiple thin coats instead of one thick coat. Thick finish tends to run, drip, and collect at the bottom like it is planning an escape.
Step 10: Add Custom Details
This is where the handle becomes personal. You can add laser engraving, woodburned lettering, inlaid coins, metal badges, painted stripes, resin accents, or a small chalkboard label. For multiple taps, use different woods or shapes so each line is easy to identify.
Keep the design readable. A tap handle is viewed from a distance, often in imperfect lighting. Strong silhouettes, bold labels, and clean contrast work better than tiny lettering. If you are adding a logo, test the layout on paper first. The top third of the handle is often the best visual location.
Design Ideas for Custom Tap Handles
The Classic Barrel Shape
A barrel-shaped handle is comfortable, timeless, and forgiving. Turn a gentle swell in the middle, taper toward the ends, and add a small bead near the base. Walnut or cherry looks especially good in this style.
The Modern Minimalist Handle
For a clean modern look, turn a simple cylinder with a slight taper and rounded edges. Maple, ash, or white oak works well. Finish it satin-smooth and add a small engraved label or metal band.
The Pub-Style Tall Handle
A taller pub-style handle gives you room for branding or decorative shaping. Keep the lower third sturdy and avoid making the top too heavy. Balance matters because an oversized handle can stress the faucet lever over time.
The Laminated Wood Handle
Glue contrasting strips of hardwood into a blank before turning. Maple and walnut, cherry and ash, or oak and mahogany can create dramatic lines. Let the glue cure fully before mounting the blank. Rushing glue-up is how you create a spinning wooden sandwich, and nobody ordered that.
Common Mistakes to Avoid
Drilling Off-Center
The handle may look perfect on the lathe, but if the threaded hole is crooked, it will mount crooked. Use a drill press, a jig, or careful chuck alignment. This is the most important accuracy step in the project.
Making the Base Too Thin
The base must support the insert or ferrule. Leave enough diameter and wall thickness around the hardware. Thin bases can crack during installation or later during use.
Over-Sanding Details
Crisp beads and grooves can disappear quickly under aggressive sanding. Turn cleanly, sand lightly, and preserve the profile. Sandpaper is a finishing tool, not a design eraser.
Using the Wrong Finish
Decorative handles still need practical protection. A finish that feels great on a display piece may not hold up to moisture and repeated handling. Choose durability when the handle will be used often.
How to Make a Matching Set
If you are turning several custom tap handles, consistency is the challenge. Start by cutting all blanks to the same size. Use a story stick, calipers, and pencil marks to repeat the same profile. Turn one master handle first, then use it as a reference for the rest.
Matching does not mean identical in every microscopic detail. Handmade work should have life. The goal is for the set to look intentional when mounted together. A slight variation in grain or curve is charming; a half-inch difference in height may look like one handle skipped breakfast.
Maintenance Tips
Clean finished wooden handles with a damp cloth and mild soap when needed. Avoid soaking them. Do not put them in a dishwasher unless your secret goal is to create firewood with hardware. If the finish dulls over time, lightly scuff and recoat according to the finish type.
Check the threaded hardware occasionally. If the insert loosens, remove the handle, clean the area, and reinstall with epoxy if appropriate. A little maintenance keeps the handle sturdy and attractive for years.
Shop Experience: Lessons Learned While Turning Custom Beer Tap Handles
The first lesson from turning tap handles is simple: the bottom matters more than your ego wants to admit. Many beginners focus on the visible shape, the dramatic curve, or the glossy finish, then treat the threaded insert like an afterthought. The handle may look gorgeous in your hand, but the moment it threads onto the faucet at a five-degree lean, that beautiful curve suddenly looks like it is trying to sneak out of the room. Always plan the hardware before you start shaping. Know the insert length, hole size, base diameter, and final mounting depth.
Another useful experience is to make the first handle slightly thicker than you think it should be. Wood disappears quickly on the lathe. One confident pass with a sharp gouge can change a bold pub handle into a delicate wand. Thin handles are not always bad, but tap handles benefit from a little visual weight. They should feel like they belong on the faucet, not like they came from a drawer full of spare craft dowels.
Grain selection also makes a bigger difference than expected. Straight-grained maple creates a clean, modern handle that lets the shape do the talking. Walnut adds instant richness even with a simple profile. Oak can look fantastic, but its open grain may need extra finishing attention if you want a glassy surface. Laminated blanks are fun, but glue lines must be solid. If you see gaps before turning, do not assume the lathe will magically fix them. The lathe is many things; a marriage counselor for bad glue-ups is not one of them.
When making a set, turn the plainest handle first. It becomes your test piece for proportions, drilling, sanding, and finish. Once you know the design works, move on to the nicer blanks. This saves heartbreak. Nobody wants to learn that the ferrule hole is too shallow on the most expensive piece of curly maple in the shop.
Sanding is where patience pays rent. A tap handle is touched often, so rough spots are noticeable. Sand with the lathe running slowly, then stop and sand along the grain. The second step may feel unnecessary until the finish reveals circular scratches. Then it feels very necessary, usually accompanied by a long sigh.
Finish testing is equally important. Different woods react differently to oil, polyurethane, lacquer, and hardwax finishes. Test on a cutoff from the same blank when possible. A finish that looks warm and rich on walnut may make maple look slightly yellow. A glossy finish can look professional, but satin often hides fingerprints better. For handles used in busy spaces, durability should win over romance. The handle has a job to do.
Finally, remember that custom tap handles are small, practical sculptures. They do not need to be complicated to be impressive. Clean curves, straight hardware, smooth sanding, and a durable finish will beat an over-designed handle almost every time. The best compliment is when someone reaches for the handle, pauses, and says, “Wait, you made this?” That is when all the dust, measuring, and careful drilling feel worth it.
Conclusion
Learning how to turn custom beer tap handles on a lathe is a satisfying project because it combines useful hardware with creative woodworking. The process is approachable: choose a stable blank, plan the shape, turn it safely, drill accurately, install the correct threaded hardware, sand thoroughly, and apply a finish that can handle real use.
The biggest secrets are not really secrets at all. Keep the base strong. Drill straight. Use sharp tools. Sand with patience. Make the design comfortable in the hand. Whether your finished handle is rustic walnut, sleek maple, laminated hardwood, or engraved with a custom badge, the result can add personality to an adult bar, cold brew station, kombucha tap, soda dispenser, or decorative draft setup.
A custom tap handle is small enough to finish in a focused shop session, but detailed enough to teach good turning habits. And unlike some woodworking projects, it will not require you to explain to your family why there is suddenly a seven-foot cabinet frame occupying the garage. That alone deserves a toastwith whatever legal, age-appropriate beverage belongs in your glass.
Note: This article is intended as a woodworking guide for lawful, responsible adult-owned draft systems and non-alcoholic draft uses such as cold brew, kombucha, and soda. Always follow lathe safety practices, use proper protective equipment, and work with trained supervision when needed.