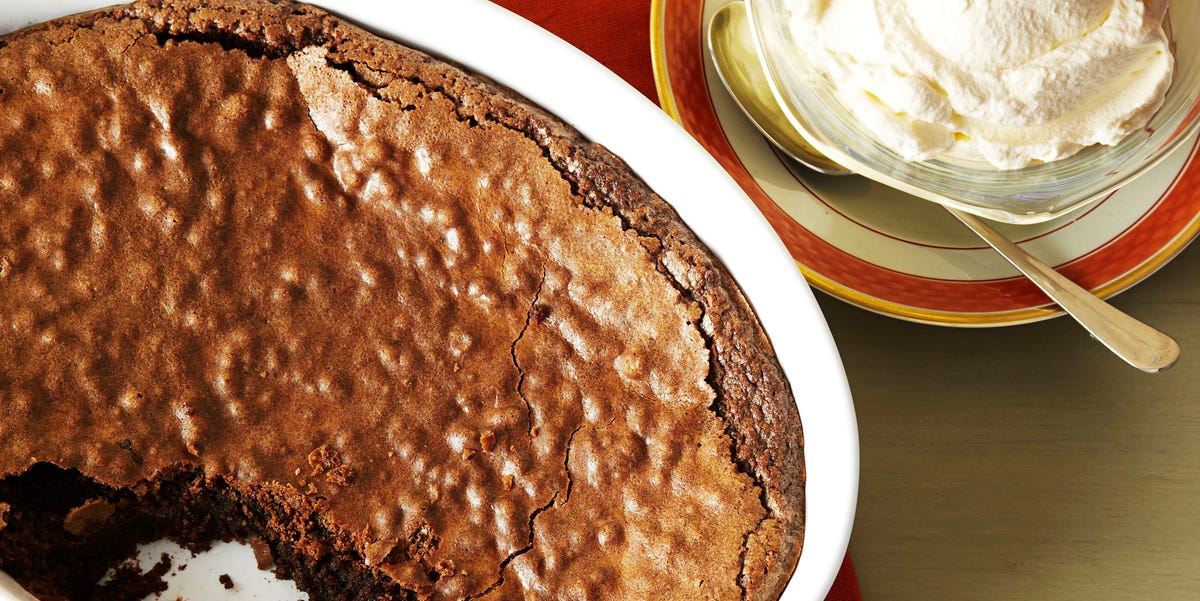
There are chocolate desserts, and then there are chocolate desserts that make everyone at the table suddenly stop talking. Ina Garten’s baked chocolate pudding belongs firmly in the second category. It has a delicate, crackly brownie crust, a fudgy layer beneath it, and a warm, spoonable center that behaves like chocolate lava with excellent manners.
Also known as Ina Garten’s brownie pudding, this beginner-friendly dessert originally appeared in her 2008 cookbook, Barefoot Contessa Back to Basics. It later gained renewed attention when home bakers rediscovered its unusual combination of familiar brownie ingredients and a gentle water-bath baking method. The original recipe serves six and is designed to land somewhere between a brownie, a pudding, and a molten chocolate cake.
The ingredient list is reassuringly short, but the method contains a few details that matter. Whipping the eggs long enough, cooling the melted butter, measuring the flour carefully, and resisting the urge to bake the center until firm are what transform an ordinary pan of chocolate batter into this gloriously gooey dessert.
What Is Ina Garten’s Baked Chocolate Pudding?
Despite its name, this is not a traditional stovetop pudding thickened with cornstarch. It is closer to an underbaked flourless-style cake, although it contains a modest amount of all-purpose flour. The outside sets and develops a thin, crisp crust while the middle remains soft and molten.
The dessert is made from butter, eggs, sugar, cocoa powder, flour, vanilla, and an optional splash of framboise raspberry liqueur. There is no baking powder or baking soda. Instead, its lift and delicate upper crust come largely from beating the eggs and sugar until they become thick, pale, and aerated.
The recipe is baked at a relatively gentle 325°F in a hot water bath. That surrounding water moderates the heat reaching the baking dish, helping the edges set without turning the center into a standard chocolate cake. The result is intentionally underdone in the middle, not the victim of a baking emergency.
Recipe at a Glance
- Prep time: About 20 minutes
- Baking time: About 1 hour
- Cooling time: 15 to 30 minutes
- Yield: 6 generous servings
- Oven temperature: 325°F
- Difficulty: Beginner-friendly
- Best served: Warm with vanilla ice cream
Ingredients for Ina Garten’s Baked Chocolate Pudding
- 1/2 pound unsalted butter, equal to 2 sticks, plus more for greasing
- 4 extra-large eggs, brought to room temperature
- 2 cups granulated sugar
- 3/4 cup high-quality unsweetened cocoa powder
- 1/2 cup all-purpose flour
- Seeds scraped from 1 vanilla bean
- 1 tablespoon framboise raspberry liqueur, optional
- Vanilla ice cream, for serving
These quantities follow the original Barefoot Contessa recipe, which calls for a two-quart oval baking dish measuring approximately 9 by 12 by 2 inches.
Choosing the Best Cocoa Powder
Because cocoa supplies nearly all the chocolate flavor, this is not the moment for the dusty container that has been hiding behind the cinnamon since three apartments ago. Choose an unsweetened cocoa powder that tastes rich rather than chalky.
Dutch-process cocoa generally produces a darker color and smoother, deeper chocolate flavor. Natural cocoa may taste slightly brighter or fruitier. In recipes containing baking soda, cocoa acidity affects leavening, but this pudding contains no chemical leavener, so the choice is primarily about flavor and appearance.
Why the Egg Size Matters
Ina Garten’s original recipe specifies extra-large eggs. Four extra-large eggs provide more liquid than four standard large eggs, and that difference can influence how soft the finished center remains. For the closest result, use extra-large eggs or weigh approximately 220 to 225 grams of beaten egg without the shells.
Vanilla Bean Alternatives
A whole vanilla bean adds a fragrant, rounded background flavor, but it is not mandatory. One tablespoon of vanilla bean paste is an easy substitute. Two teaspoons of pure vanilla extract will also work, although the flavor may be slightly less floral.
The optional framboise adds a gentle raspberry note that complements cocoa without turning the pudding into a fruit dessert. Cassis, Chambord, Kahlúa, or a small amount of strong coffee can create a different flavor direction. Leaving the liqueur out is perfectly acceptable for a pure chocolate version. Testers have successfully made several of these substitutions.
How to Make Ina Garten’s Baked Chocolate Pudding
1. Prepare the Oven and Baking Dish
Position a rack near the center of the oven and preheat it to 325°F. Lightly butter the inside of a two-quart oval or rectangular baking dish.
Choose a larger roasting pan or deep baking pan that can comfortably hold the smaller dish. There should be enough room around it for hot water to circulate.
2. Melt and Cool the Butter
Melt the two sticks of unsalted butter over low heat or in short microwave intervals. Set it aside until it is lukewarm rather than hot.
This cooling step is important. Hot butter can collapse some of the air whipped into the eggs or create greasy streaks in the batter. It should remain fully liquid but should not feel hot when you touch the outside of the bowl.
3. Beat the Eggs and Sugar Thoroughly
Place the room-temperature eggs and sugar in the bowl of a stand mixer fitted with the paddle attachment. Beat on medium-high speed for 5 to 10 minutes.
Do not rush this stage. The mixture should become very thick, noticeably lighter in color, and voluminous enough to fall from the paddle in a broad ribbon. Extended mixing incorporates air and begins dissolving the sugar, helping create the pudding’s thin, crackly top and delicate internal structure. Recipe testers consistently identify this step as essential to the final texture.
4. Sift the Dry Ingredients
While the eggs are mixing, sift the cocoa powder and flour together. Sifting breaks up stubborn cocoa lumps and makes it easier to incorporate the dry ingredients without aggressively mixing the batter.
For accurate flour measurement, spoon the flour loosely into the measuring cup and level it with a straight edge. Scooping directly from the bag can compact the flour, creating a heavier, more cake-like pudding. A kitchen scale offers even greater consistency.
5. Combine Without Overmixing
Reduce the mixer speed to low. Add the vanilla seeds and optional framboise, followed by the sifted cocoa and flour. Mix only until the dry streaks disappear.
Slowly pour in the cooled melted butter while the mixer continues running on low. Stop mixing as soon as the batter is uniform. Overmixing after the flour enters can reduce the aeration and encourage excess gluten development.
6. Assemble the Water Bath
Pour the batter into the buttered baking dish and smooth the surface. Place that dish inside the larger roasting pan.
For safer handling, put the roasting pan on the extended oven rack before adding the water. Carefully pour very hot water into the larger pan until it reaches roughly halfway up the outside of the pudding dish. Avoid splashing water into the chocolate batter.
A water bath, also called a bain-marie, buffers delicate desserts from harsh oven heat. It encourages gentle, even cooking and creates a humid environment, allowing the perimeter to set while protecting the soft center.
7. Bake Until the Edges Set
Bake for approximately one hour. The official recipe calls for exactly 60 minutes, but ovens and baking dishes vary, so begin observing the pudding near the 55-minute mark.
The top should look set and lightly crackled. A tester inserted about two inches from the edge should emerge mostly clean, while the center should remain visibly soft and underbaked. Do not test directly in the middle and then panic when the tester returns coated in chocolate. That gooey center is the assignment.
8. Cool Briefly and Serve
Carefully remove the smaller baking dish from the water bath and place it on a heat-safe surface or wire rack. Let it cool for 15 to 30 minutes.
During this rest, the outer layers become easier to scoop while the center remains warm and fluid. Serve portions in shallow bowls with vanilla ice cream.
Why This Chocolate Pudding Recipe Works
Whipped Eggs Create the Structure
Traditional brownies often obtain structure from flour and whole eggs mixed briefly into a dense batter. Here, beating the eggs and sugar for several minutes traps tiny bubbles throughout the mixture. Those bubbles expand in the oven, supporting the fragile crust even though the center remains soft.
A Small Amount of Flour Prevents Total Chaos
Only half a cup of flour is used for a dessert serving six people. That amount is enough to help the outside hold together but not enough to convert the interior into a firm cake. Accurate measuring is especially important because adding even a few extra tablespoons can noticeably change the texture.
The Water Bath Controls the Heat
Direct oven heat can quickly set the edges of an egg-rich batter before the middle has warmed evenly. The water bath slows that process. It does not make the dessert completely uniform; instead, it helps create the intentional transition from crisp top to fudgy layer to molten center.
The Center Is Supposed to Look Underdone
The most common mistake is continuing to bake until the center appears firm. At that point, the pudding may still taste good, but it will resemble a rich brownie cake rather than the intended hybrid dessert. Ina’s original directions explicitly describe the middle as appearing very underbaked.
Common Mistakes and How to Avoid Them
Using Cold Eggs
Cold eggs generally take longer to aerate. To warm them quickly, place the uncracked eggs in a bowl of warm tap water for several minutes, dry them, and then proceed. Room-temperature eggs incorporate more smoothly with the sugar and butter.
Adding Butter While It Is Hot
Give the melted butter enough time to cool. Butter that is still steaming can weaken the whipped mixture and produce a flatter, oilier result.
Skipping the Sifting Step
Cocoa powder tends to form tiny dry pockets that can survive casual mixing. Sifting creates a smoother batter without requiring vigorous stirring.
Overmixing the Batter
Once the flour and cocoa have been added, use low speed and stop promptly. The goal is incorporation, not another five-minute workout for the stand mixer.
Filling the Water Bath Before Moving It
A roasting pan containing hot water and chocolate batter is heavy, awkward, and eager to slosh onto your oven mitts. Place the nested pans in the oven first, then pour the water into one corner of the outer pan.
Overbaking the Center
The outer two inches provide the best doneness cue. When that area is mostly set and the middle still moves softly, the dessert is ready.
Optional Adjustments and Flavor Variations
- Add salt: The original ingredient list contains no salt. Adding 1/4 teaspoon of kosher salt can sharpen the cocoa flavor and offset the sweetness, an adjustment recommended by multiple recipe testers.
- Use espresso powder: Add 1/2 to 1 teaspoon for a darker, more complex chocolate flavor without making the dessert taste strongly of coffee.
- Try orange: Add a small amount of finely grated orange zest for a chocolate-orange variation.
- Make individual portions: Divide the batter among buttered ramekins and reduce the baking time. Begin checking early because smaller portions set much faster.
- Add berries: Serve with fresh raspberries or strawberries rather than folding wet fruit into the batter.
- Reduce perceived sweetness: Choose a dark, robust cocoa, add a pinch of salt, and serve modest portions with unsweetened whipped cream or tart berries.
What to Serve With Baked Chocolate Pudding
Vanilla ice cream is the classic partner because it adds temperature contrast and softens the dessert’s concentrated sweetness. The combination of hot pudding, cold ice cream, crisp crust, and creamy melt is a major reason testers describe the finished dessert as more exciting than an ordinary brownie.
Other excellent toppings include lightly sweetened whipped cream, crème fraîche, fresh raspberries, sliced strawberries, toasted hazelnuts, or a small spoonful of raspberry sauce. A dusting of powdered sugar looks attractive, although this dessert is not exactly suffering from a sugar shortage.
For drinks, serve it with espresso, strong black coffee, cold milk, ruby port, or a raspberry-forward dessert wine.
Can You Make It Ahead?
The pudding is at its most dramatic when served warm, after a short cooling period. You can mix the dry ingredients and prepare the baking dishes earlier in the day, but the egg mixture should be whipped and baked close to serving time for the best aeration and crust.
If necessary, bake the pudding several hours ahead and let it cool completely. Rewarm individual portions gently in the microwave for 10 to 20 seconds. Reheating the entire dish may continue cooking the soft center, so brief individual warming is safer.
Cover leftovers and refrigerate them. Chilled pudding becomes denser and fudgier, almost like a flour-light brownie truffle. It will not have the same flowing center, but it remains highly capable of disappearing directly from the refrigerator at midnight.
The Real Baking Experience: What to Expect
Making Ina Garten’s baked chocolate pudding feels surprisingly calm for a dessert with such a theatrical result. The opening steps resemble ordinary brownie preparation: melt butter, measure cocoa, crack eggs, and wonder whether two cups of sugar constitutes a dessert or a personality trait. The first major difference appears when the eggs and sugar begin beating.
At first, the mixture looks loose and granular. After several minutes, it becomes pale, thick, and glossy. This transformation is easy to underestimate when reading the recipe, but it is one of the most satisfying parts of the process. The batter increases in volume and leaves visible ribbons when it falls from the paddle. That visual cue is more useful than blindly following a timer because egg temperature, mixer power, and bowl shape can all influence the speed of aeration.
The batter becomes very fluid after the melted butter is added. Bakers accustomed to thick brownie batter may briefly suspect that something has gone wrong. It has not. The mixture should pour easily into the baking dish, settling into a smooth, shiny layer without much encouragement.
Setting up the water bath is the least glamorous part. It requires a larger pan, very hot water, and enough concentration not to baptize the chocolate batter. Once assembled, however, the oven does most of the work. The dessert rises only modestly, but the top gradually loses its wet shine and develops a fragile crust.
The most psychologically difficult moment arrives at the end of the baking time. The perimeter looks finished, while the center still appears loose. Every conventional cake instinct may tell you to add another 15 minutes. Ignore that instinct. Reviewers and recipe testers repeatedly emphasize that the contrast between the set exterior and molten interior is the entire point of the dish.
After the pudding leaves the oven, the aroma is intense: warm butter, cocoa, vanilla, and caramelized sugar. The surface may crack as it cools, which is desirable rather than defective. A large serving spoon breaks through that delicate crust and reveals several distinct textures underneath. The upper portion is chewy and brownie-like. Deeper down, it becomes softer, darker, and increasingly spoonable.
The first serving is rarely photogenic. The pudding slumps, the center flows, and the ice cream immediately begins melting into the chocolate. Fortunately, this dessert was designed to be eaten, not entered in an architectural competition. A shallow bowl captures the molten portion better than a flat dessert plate.
The flavor is intensely sweet and rich, so smaller servings are usually more satisfying than enormous ones. Salt, tart berries, coffee, or cool vanilla ice cream provide useful contrast. Several professional testers have noted the sweetness while still praising the layered texture and dramatic presentation.
For entertaining, the recipe offers an excellent effort-to-applause ratio. It uses familiar pantry ingredients, requires no frosting or decorative piping, and emerges from the oven looking rustic rather than fussy. Guests can watch the pudding being spooned into bowls, which turns serving into part of the experience. Add ice cream, pass the spoons, and allow the table to become suspiciously quiet.
Final Thoughts
Ina Garten’s baked chocolate pudding recipe succeeds because it does not force you to choose between a brownie and a molten cake. It gives you a little of both, plus a crisp top that makes each spoonful more interesting.
The key is precision in a few strategic places: use the correct egg quantity, beat the eggs and sugar until genuinely thick, sift the cocoa and flour, cool the butter, mix gently, bake in a hot water bath, and remove the dessert while the center still looks underdone. Follow those cues and the result should be rich, warm, dramatic, and unapologetically chocolatey.
Note: This guide follows the proportions and central technique of Ina Garten’s published recipe while adding practical preparation, substitution, serving, and troubleshooting guidance. Oven temperatures and baking-dish materials can affect the final timing.