If your 1960s cabinets are still hanging in there like the cool aunt who refuses to age, good news: you probably do not need to rip them out to make them look amazing. Many cabinets from that era have solid bones, simple lines, and enough vintage personality to deserve a second act. What they often lack is detail. That is where trim comes in.
Adding trim to 1960s cabinets is one of those rare home projects that can make a kitchen look more custom, more intentional, and more expensive without requiring a full remodel. A few slim molding pieces, some careful measuring, and the right finish can shift tired cabinets from “grandma’s utility room” to “retro-chic with excellent taste.” It is basically a glow-up for woodwork.
The trick is not to overdo it. Midcentury and late-1960s cabinetry usually looked best with clean lines, flat fronts, warm wood tones, and understated hardware. So the goal is not to bury those cabinets under fussy trim that looks like it wandered in from a Victorian mansion. The goal is to add structure, definition, and charm while keeping the spirit of the era alive.
Why Trim Works So Well on 1960s Cabinets
Many 1960s kitchens featured flat-front or minimally detailed cabinetry, especially in ranch homes and midcentury-inspired interiors. That makes them perfect candidates for an update with trim. When you add narrow square-edge molding, small applied frames, or subtle beading, you create shadow lines and visual depth without changing the whole cabinet box.
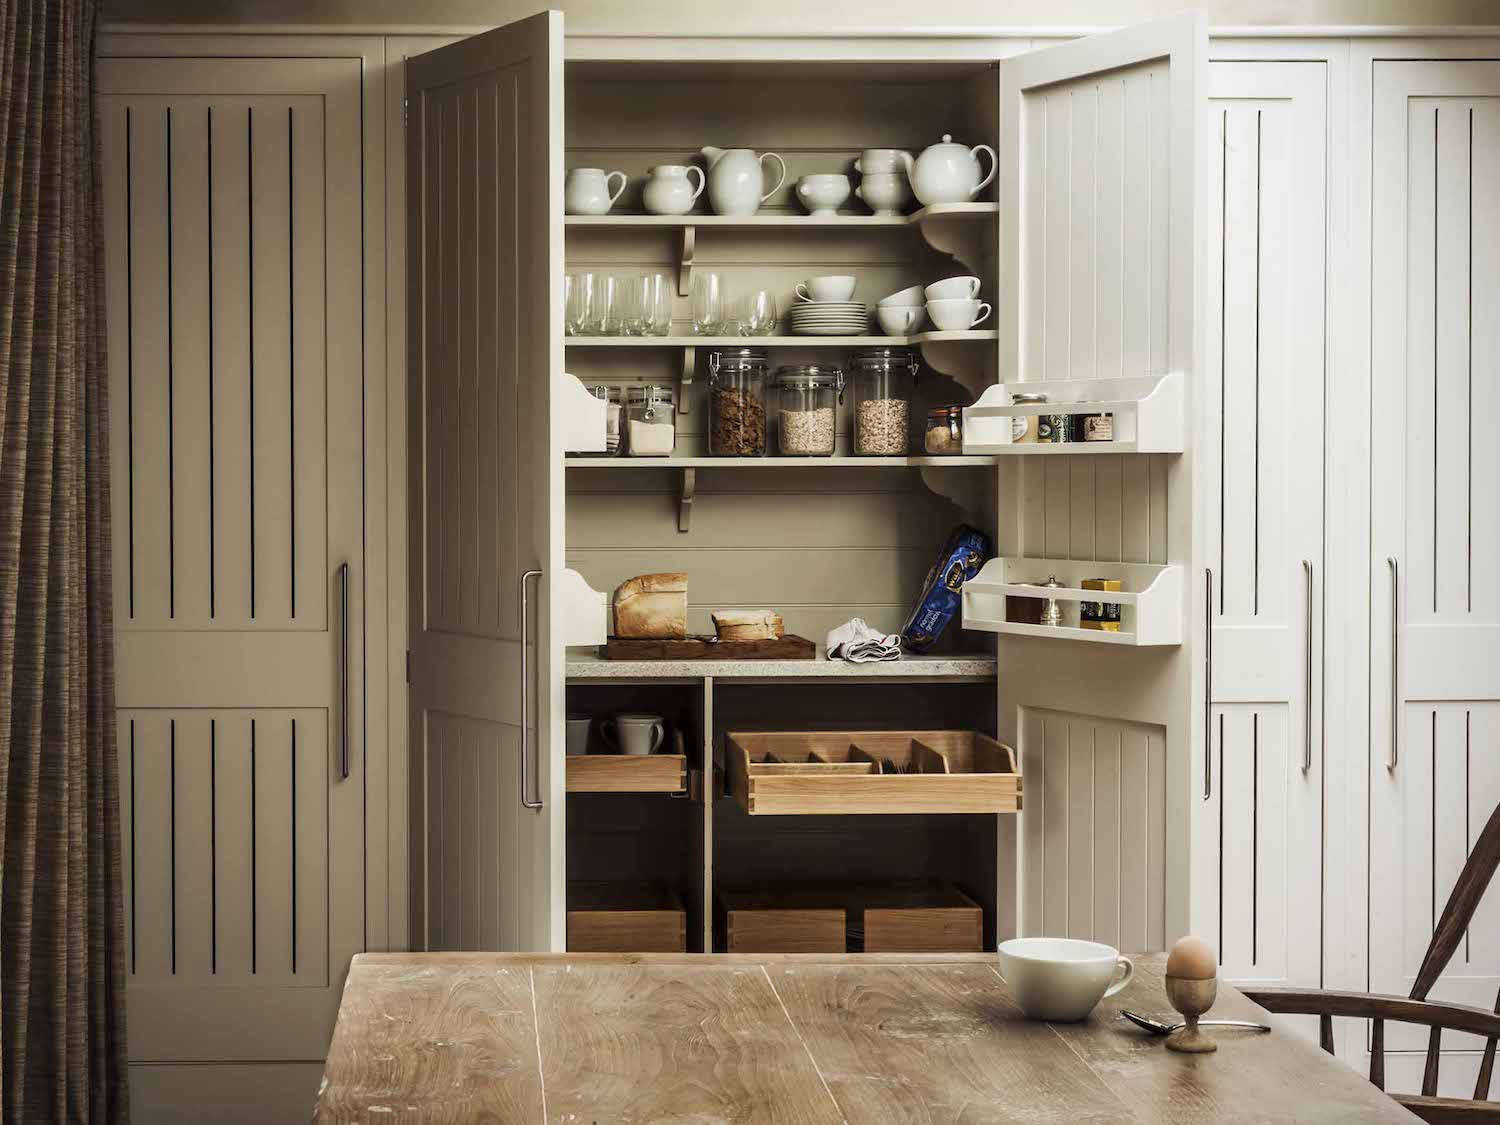
This is especially effective if your cabinet doors feel a little too plain but are still structurally sound. Trim can help flat doors mimic a slimmer Shaker profile, create a custom built-in look, or highlight the geometry that already suits retro design. In other words, trim gives you “designer kitchen energy” without requiring demolition, a second mortgage, or emotional support pizza.
Before You Start: Check What Your Cabinets Are Made Of
Before you buy trim, figure out the cabinet material. This matters more than people think. If you are working with solid wood or wood veneer over stable doors, adding trim is usually straightforward. If the cabinets are laminate, melamine, particleboard, or damaged veneer, you need to be more careful with sanding, priming, and adhesive selection.
Give each door a close inspection. Look for peeling laminate, swollen edges, loose joints, cracked veneer, or warping. A flat, stable door is a strong candidate for applied molding. A bowed or damaged door is not. Trim will not magically fix structural problems. It may actually make them more obvious, which is a rude surprise after you have already painted everything.
Good Candidates for Trim
- Flat cabinet doors that feel too plain
- Inset-panel doors that need a decorative edge
- Solid wood doors with minor cosmetic wear
- Old cabinet boxes that need a finished look around exposed sides or tops
Cabinets That Need Repair First
- Laminate that is peeling or bubbling
- Doors with water damage or swelling
- Loose hinges and sagging frames
- Cracked corners or failing glue joints
The Best Trim Styles for a Modern Retro Look
If the phrase “modern retro charm” had a cabinet mood board, it would include slim profiles, warm woods, subtle geometry, and a little restraint. For 1960s cabinets, the best trim choices are usually simple rather than ornate.
1. Skinny Square-Edge Molding
This is the easiest and safest option. A narrow frame applied around the perimeter of a flat door creates a clean, Shaker-adjacent look without feeling too traditional. It works especially well if you want to paint the cabinets in a muted cream, olive, smoky blue, warm white, or earthy greige.
2. Thin Beaded Trim
If your door already has an inset panel, thin beading along the inner edge adds dimension without changing the door’s overall style. This is a nice way to keep the original shape but make it look more intentional and refined.
3. Walnut or Wood-Tone Slat Details
For a more authentic midcentury vibe, consider slim walnut-toned strips or vertical slat accents on selected doors, not every single surface. Used sparingly, this nods to the era’s love of warm wood grain and linear detail.
4. Crown or Light Rail Trim on Upper Cabinets
If your upper cabinets stop awkwardly below the ceiling, adding simple crown, cove, or light-rail molding can make the whole kitchen look more finished. This is one of the quickest ways to make stocky old cabinets feel built in.
Tools and Materials You Will Probably Need
- Measuring tape
- Pencil and painter’s tape for labeling
- Miter saw or miter box
- Wood trim or molding
- Construction adhesive or wood glue
- Brad nailer or finish nails, if appropriate
- Wood filler
- Caulk for tiny seams only
- Degreaser or strong cleaner
- 120-grit and 220-grit sandpaper
- Bonding primer
- Cabinet paint or stain and clear topcoat, depending on finish
- New hardware if you want the full makeover effect
Step-by-Step: How to Add Trim to 1960s Cabinets
Step 1: Remove the Doors, Drawers, and Hardware
Take everything off and label it. Every hinge, every screw, every drawer front. This may seem excessive until you are holding a mystery hinge at 10:47 p.m. and wondering which door it belongs to. Use painter’s tape and a simple numbering system so reassembly does not become a personality test.
Step 2: Clean Like You Mean It
Old cabinets collect grease, wax, dust, and cooking residue. If you skip cleaning, your trim, primer, or paint may not bond well. Scrub the doors and face frames thoroughly, especially around handles and edges. Let everything dry completely before moving on.
Step 3: Lightly Sand the Surface
You are not trying to strip the doors to bare material. You just want to scuff the surface so primer, glue, or finish can grip better. A light sanding is usually enough. Pay close attention to glossy coatings, especially on laminate or previously painted doors. Wipe away every bit of dust afterward.
Step 4: Plan Your Trim Layout First
This is where patience saves the day. Lay out the trim pieces on one door before cutting everything. Use equal spacing around the edges and make sure the proportions suit the door size. On many cabinet doors, a narrow reveal around the outside edge looks balanced and modern. Too wide, and the trim starts looking bulky. Too close to the edge, and it looks accidental.
For a retro-modern feel, stick with slim rails and stiles. Let the door breathe. Your cabinets are not auditioning for a castle renovation show.
Step 5: Cut the Trim Carefully
Measure each piece twice and cut once. Then measure again if your coffee has worn off. Mitered corners give the cleanest picture-frame effect, but straight butt joints can also work for very simple, minimalist designs. Dry-fit every piece before attaching anything.
If you are new to trim work, cut the pieces slightly long and sneak up on the final fit with small adjustments. That is much less painful than discovering you have created decorative firewood.
Step 6: Attach the Trim
For slim decorative molding on door faces, wood glue or a strong construction adhesive is often enough, especially if the trim is lightweight. On solid wood doors or larger trim pieces, a brad nailer can add extra holding power. If you do use nails, keep them tiny and place them carefully so filling is easy later.
Press each piece firmly into place and make sure the corners stay tight. Wipe away excess glue right away. Dried glue has a magical ability to reveal itself only after primer goes on, which is one of DIY’s less lovable traditions.
Step 7: Fill, Caulk, and Sand Again
Fill nail holes and tiny corner imperfections with wood filler. After it dries, sand lightly so the surface feels seamless. Use caulk sparingly along hairline gaps if you are painting. Do not over-caulk decorative profiles, or you will soften the crisp detail you just worked so hard to create.
Step 8: Prime the Entire Surface
Once the trim is attached and the surface is smooth, apply primer. This is the stage that helps old finishes and new materials act like one team instead of feuding relatives. A bonding primer is especially helpful on glossy, previously finished, or laminate surfaces.
Use a brush for corners and profiles, and a small roller for flatter sections. After the primer dries, do a very light sanding with fine paper to knock down drips, fuzz, or raised grain.
Step 9: Paint or Stain for the Look You Want
If you want a crisp updated kitchen, choose a durable cabinet paint in satin, semi-gloss, or another furniture-friendly finish. If the goal is stronger midcentury character, a wood-tone finish can be gorgeous, especially in walnut-inspired hues. Painted cabinets feel fresh and bright; wood tones feel authentic and cozy. Neither is wrong. Your kitchen is allowed to have a personality.
Apply thin coats, let them dry fully, and sand lightly between coats if needed. The smoothest results come from patience, not from trying to finish the whole job in one caffeine-fueled sprint.
Step 10: Upgrade the Hardware
The right pull or knob can make the trim look intentional instead of improvised. For 1960s cabinets, try round metal knobs, simple bar pulls, lipped edge pulls, or understated brushed brass. If you want a stronger retro wink, look for hardware with a gently rounded profile instead of something ultra-industrial.
How to Keep the 1960s Spirit Without Making the Kitchen Feel Dated
The best cabinet updates respect what was good about the original style. Midcentury and 1960s-inspired kitchens often look best when they lean into clean lines, warm woods, and playful but controlled color. That means your trim should support the cabinet shape, not fight it.
Try one of these combinations:
- Warm white paint + slim square trim + walnut accents for a balanced modern-retro mix
- Muted sage or olive + brass hardware for vintage charm with grown-up polish
- Natural wood finish + minimal trim + black pulls for a cleaner midcentury look
- Soft blue-gray + narrow inside beading for subtle depth without fussiness
If your kitchen already has terrazzo, geometric tile, a boomerang countertop pattern, or original wood floors, even better. The cabinets do not need to shout. They just need to look like they belong in the same conversation.
Common Mistakes to Avoid
Using Trim That Is Too Ornate
Heavy colonial molding and highly carved profiles usually clash with 1960s cabinetry. Keep the profile simple and scaled to the door.
Ignoring Door Weight
Large or thick trim can add weight, especially on older hinges. If a door already sags, fix that first and avoid adding chunky pieces.
Skipping Surface Prep
Trim only looks custom if it stays put and the finish stays smooth. Cleaning, sanding, and priming are not glamorous, but they are what make the difference between “professionally refreshed” and “mysteriously peeling by Thanksgiving.”
Adding Trim to Every Surface
Restraint creates style. Overdoing trim can make a once-clean retro kitchen feel visually busy. Sometimes the best move is to add trim only to doors, only to uppers, or only to the island or pantry run.
Is This Project Worth It?
In many cases, absolutely. If your cabinet boxes are in good shape and the layout still works, adding trim can be one of the smartest cosmetic upgrades in the room. It is less expensive than replacing cabinetry, less disruptive than a full remodel, and more visually dramatic than just swapping hardware.
It is also one of the few projects that can shift your kitchen style in a very specific direction. Done right, it can make plain cabinets look custom, make old cabinets feel loved again, and help your kitchen land in that sweet spot between nostalgic and current.
What the Experience Is Really Like: A Longer, Real-World Take
Here is the part that glossy before-and-after photos rarely mention: adding trim to 1960s cabinets is not hard in the dramatic, “call a structural engineer” sense, but it is very much a project of small decisions. You start out thinking, “I will just add some trim this weekend,” and then suddenly you are standing in the garage comparing three molding profiles like a very emotionally invested museum curator.
The first surprise is how much better old cabinets can look once you slow down and really study them. A lot of 1960s cabinetry is plain, yes, but plain is not the same thing as hopeless. In fact, the simplicity is what makes it such a strong canvas. Once the doors are off and the grease is gone, you can finally see the potential. The lines are often cleaner than expected. The proportions are usually better than a lot of cheap new cabinets. And sometimes the wood underneath has more character than anything currently sitting under fluorescent lights in a big-box showroom.
The second surprise is that the trim itself is only half the transformation. The other half is confidence. The minute the first door gets its frame of slim molding, the whole project starts making sense. Suddenly the cabinets no longer look tired; they look intentional. They start reading as vintage rather than old, which is a magical distinction in home design. “Old” sounds like a problem. “Vintage” sounds like you did it on purpose.
There is also something deeply satisfying about making careful, visible improvements to something that has been ignored for decades. You notice details you never cared about before: how the hardware lines up, how light hits the door edges in the afternoon, how a small shadow line can make a flat door feel architectural. It is nerdy, sure, but in the best possible way.
And yes, there are mildly ridiculous moments. You will probably get wood filler on your hands. You may question whether a piece is truly square for an amount of time that alarms everyone around you. One corner joint will almost certainly misbehave. At least one cabinet door will need a second sanding because you spotted a flaw only after priming. This is normal. Cabinet projects are basically a long relationship between optimism and touch-up work.
But once everything is painted or finished, the result feels bigger than the actual scope of the project. The room looks calmer. More finished. More expensive. And because you preserved the original cabinets rather than replacing them, the kitchen often retains a warmth that brand-new installations can miss. It still has history. It just also has better trim, cleaner lines, and a stronger sense of style.
That is really the charm of this update. It is not about pretending your 1960s cabinets are brand new. It is about helping them become the best version of themselves. A little cleaner, a little sharper, a little more dressed for the occasion. Kind of like putting a tailored jacket on someone who already had excellent cheekbones.
So if you are staring at an older kitchen and wondering whether trim is worth the trouble, the honest answer is yes, especially if you love the idea of blending retro soul with modern polish. It is one of those projects that rewards patience, careful measuring, and a decent playlist. And when it is done, you do not just get prettier cabinets. You get the oddly glorious satisfaction of knowing you saved a piece of your home instead of throwing it away.
Final Thoughts
Adding trim to 1960s cabinets is not about covering up the past. It is about editing it beautifully. With the right molding profile, thoughtful prep, and a finish that suits your home, you can turn plain old cabinet doors into a feature that feels custom, timeless, and full of retro character. Keep the lines simple, respect the era, and let the update feel intentional. Your cabinets do not need a total identity change. They just need a better haircut.